
Grow Bags for Greenhouse Crops: Volume, Drainage, and Support
Greenhouse growing guide
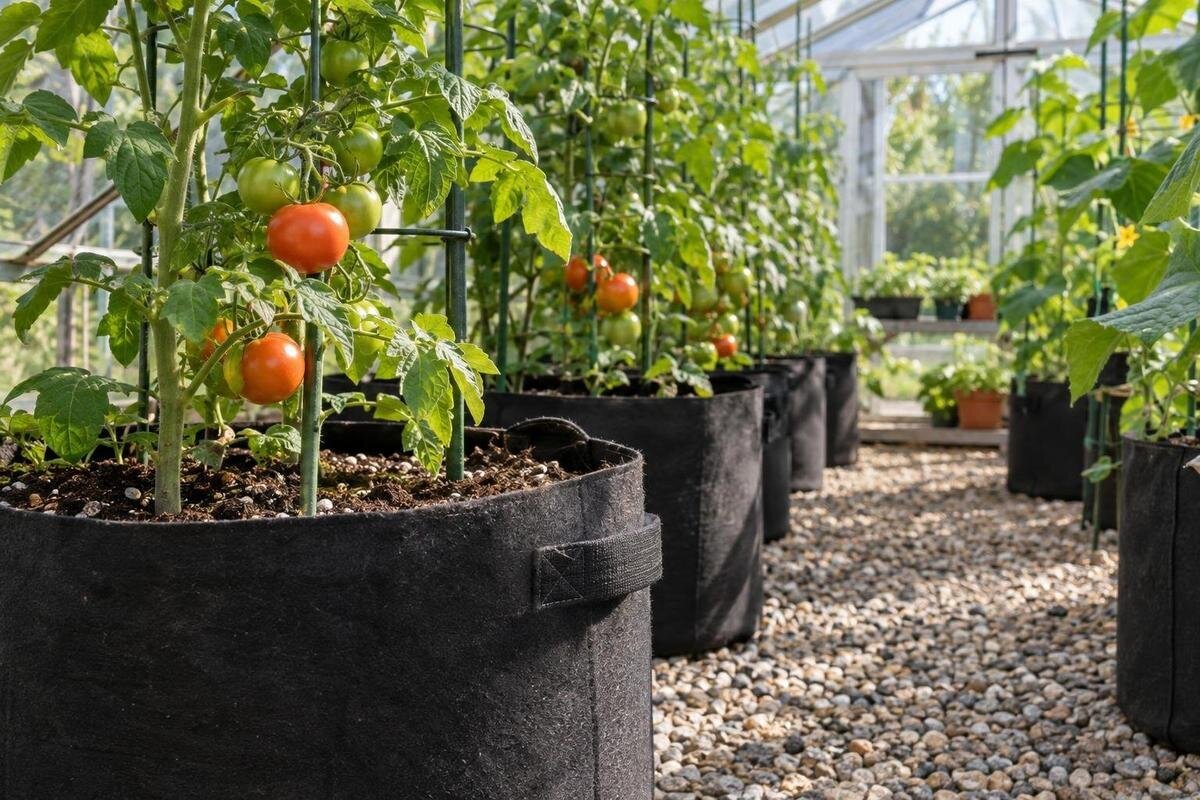
Grow bags can turn a greenhouse floor into a flexible planting area, but the number printed on a bag does not tell you how many mature plants it can support. Compare the volume actually filled, the space each bag occupies, its drainage route, and how tall crops will be supported. Then compare that plan with a permanent bed measured in the same units. The worked layout below uses hypothetical dimensions—not a universal crop prescription—so you can substitute your own bag measurements, crop guidance, and clear greenhouse dimensions.

Usable root volume is not the same as labeled capacity
Grow bags hold separate volumes of growing medium rather than forming one continuous bed. For planning, use the amount of medium that will actually be inside each bag at planting, not automatically the maximum capacity on a package or the bag’s outside dimensions. Leave room for watering and check whether the stated capacity is measured to the brim, to a fill line, or by another method. A tapered base, rounded corners, or a partly filled top can make the usable amount smaller than a simple rectangular estimate. Record the planned fill volume in cubic feet or gallons so every option can be compared on the same basis.
Volume alone does not describe root space. A deep, narrow bag and a shallow, broad bag may hold the same quantity but offer different rooting shapes and occupy different amounts of floor. Flexible sides can bulge once filled, so an empty bag’s footprint may understate how much room it uses in the greenhouse. Note the filled base dimensions and depth as well as its volume. Then consider the mature crop’s rooting pattern and spacing. Those measurements do not guarantee success, but they prevent a misleading comparison based only on a gallon figure.
Measure filled bags and beds in the same units
For a roughly rectangular bag, multiply its internal length by width by the filled depth to estimate volume. Use feet to get cubic feet; one cubic foot is about 7.48 US gallons. With measurements in inches, multiply the three dimensions and divide by 1,728 for cubic feet, or divide cubic inches by 231 for US gallons. These calculations are approximations for bags with rounded or sloping sides. The more the shape differs from a box, the more useful it is to measure the actual amount of medium the bag holds.
For example, a bag with a planned fill space of 24 by 12 by 12 inches has a box-shaped volume of 3,456 cubic inches: 2 cubic feet, or about 15 gallons. If the bag tapers, use a measured fill amount instead of treating that estimate as exact. One practical method is to fill it to the planned level using a container of known volume and count how much medium goes in. Use the same filling method for each bag, without compressing one more firmly than another. Record whether the measurement describes loose medium added or the volume after settling; these are not necessarily equal. If you later top up the bag, include that additional medium in your purchasing estimate while keeping the intended watering space above the surface. This separates the amount you need to buy from the final space available for roots.
Worked comparison: grow bags and a permanent bed
Suppose a permanent bed measures 4 by 8 feet inside and will hold growing medium to a depth of 12 inches. Its measured volume is 4 × 8 × 1, or 32 cubic feet—about 239 US gallons. Now suppose each grow bag holds 2 cubic feet at its intended fill level. Sixteen of those bags contain the same total volume of medium as the bed. This is a volume comparison, not a recommendation to plant a particular number of crops in either system.
Equal volume does not mean identical growing space. A permanent bed provides a continuous area, while bags separate the medium into individual units; crop spacing and irrigation still determine how many plants fit. If a bed is open to the ground, roots may also reach into underlying soil, depending on the conditions. The calculated 32 cubic feet describes only the filled bed, not that potential additional rooting space. Stability also differs: a bed’s fixed boundaries retain its medium, whereas each bag must keep its shape and remain upright on its own base. Neither arrangement automatically provides an anchor for tall crops. For a footprint reference, Classic aluminum greenhouse sizes range from 40.6 to 302.3 sq ft. Use the selected model’s clear interior dimensions to compare both layouts, including the access space each requires.
Lay out bag rows, aisles, and access
Here is a hypothetical layout to show how a bag count changes when access space is included. Imagine 8 by 12 feet of clear, usable floor. Reserve a 24-inch center aisle and two planting bands, each 30 inches deep. That uses 84 inches of the 96-inch width, leaving 12 inches for side clearance—6 inches on each side if the layout is centered. If a filled bag has a 24-by-18-inch base, place the 24-inch side across a planting band. Six bags along a 12-foot run, with 6-inch gaps, occupy 138 inches and leave 6 inches for the ends.
That sketch allows twelve bags in two rows, but it checks geometry only. The 24-inch aisle is an illustrative allowance, not a recommended clearance for every user or task. Actual bags may bulge, and crop spacing, support bases, and doors can reduce the count. Mark the filled bag outlines on the floor and test whether you can carry a watering can, reach the back of each bag, and turn at the row ends. Include the door’s opening space and any hose that would otherwise cross the aisle. You may need to omit an end bag rather than squeeze the whole row together. The Lean-To Greenhouse size range runs from 40 to 154 sq ft. Request the selected size’s floor plan and use its usable row length and entrance position to adapt this example.

Match bag volume to crop size and spacing
A compact planting of leafy greens or herbs does not make the same demands as a mature, fruiting or vining crop. Larger plants generally need more root room and a steadier supply of water than small greens, but an exact volume depends on the crop, variety, growing period, and medium. Use crop-specific guidance from a regional Cooperative Extension service or the seed supplier rather than relying on a universal bag-size rule. Also check the recommended spacing: adding more medium does not make close spacing suitable if mature plants need room to grow.
Write down the planned crop, variety, number of plants, and spacing before choosing bags. Divide a bag’s measured volume by the intended plant count as a screening calculation, not a precise measure of what each root system will receive. For example, two plants sharing a 2-cubic-foot bag have an arithmetic allowance of 1 cubic foot each, but no physical boundary assigns half the medium to each plant. Their roots may overlap, and crowding above the bag remains a separate issue. Compare single-plant bags with shared bags using both root-volume guidance and mature plant spacing. When evaluating the Limited Edition aluminum greenhouse options, listed from 40.6 to 302 sq ft, draw the mature planting arrangement as well as the bag bases. An empty-floor layout can otherwise overstate the practical crop capacity.
Plan drainage before filling the bags
Find out how each bag is designed to drain before adding medium. Some have openings in the base, some allow water through their sides, and some use both routes. Follow the manufacturer’s instructions rather than adding holes or a liner without checking: either change could alter the intended drainage. Keep the designed outlets clear, and place the bag where runoff will not collect around its base or spill into a walkway. Plan where excess irrigation water will go; drainage out of the bag is only useful if the surrounding surface can also handle that water.
After the first watering, observe how water leaves the bag and where it goes. The medium, its fill level, and the bag’s shape affect water movement, so drainage openings alone do not describe the whole system. If you use a tray, avoid leaving the bag standing in collected water. Make sure you can inspect and empty it without lifting a heavy planted bag or disturbing its supports. Also consider adjacent bags: runoff from one should not repeatedly collect beneath another. On your drawing, distinguish the bag footprint from any wider tray or runoff-catching area. The T-Model Greenhouse Orangery listings cover 178 to 323 sq ft. Use the selected floor plan to locate these drainage areas alongside entrances and aisles, keeping wet maintenance tasks out of the main access route.
Adjust watering to the bag’s moisture
A bag usually holds less growing medium per planting unit than a permanent bed, so its moisture reserve can change more quickly. Bag depth, medium, crop stage, greenhouse conditions, and material all affect how soon it dries; avoid assuming that two bags of different sizes need the same amount of water. Check moisture below the surface, not just at the top, and look at more than one spot if a bag is large. A dry surface does not by itself show how much moisture remains around the roots.
Use observations to set a routine rather than following a fixed calendar. Check more often when conditions or plant growth change, and notice whether water reaches the intended parts of the medium or runs straight through. Keep a brief record of which bags dry first and whether they share a crop, size, or position. That helps distinguish bags that need separate attention from those that can follow the same routine. If you use drip irrigation, inspect water delivery at individual bags instead of assuming every outlet performs alike. Leave access to the outlets for checking and adjustment. The Pyramid Greenhouse (Oasis) sizes range from 60 to 203 sq ft. Place the watering route on the selected floor plan, including where you will stand to inspect bags without reaching across neighboring plants.
Support tall crops independently of the bag
A flexible bag may not provide a firm anchor for a tall plant or its support, especially as the crop grows and carries fruit. A small stake may be appropriate when the bag and support are designed for that arrangement. For taller or vining crops, plan a support that does not rely on the bag alone unless the relevant manufacturers specify that use. Do not assume that a greenhouse frame, roof member, glazing bar, or bench can take an added load; verify before attaching a support, and consult a qualified professional where needed.
Decide where supports will stand before filling the bags. Their bases, ties, and mature plant growth can narrow an aisle even when the bags themselves fit. Draw the support footprint separately from the bag footprint, and allow access for tying stems and harvesting on the sides you need to reach. A bag that can be moved when empty may become effectively fixed once a plant is trained onto a separate support. Check that doors and other movable features can still operate throughout the growing season. The Limited Edition greenhouse with built-in storage listings range from 59.4 to 302 sq ft. For this comparison, identify the storage boundary and access door on the exact plan; neither bags nor supports should obstruct the space needed to use that compartment.

Check materials, reuse, and seasonal cleanup
Grow bags are not all made or intended for the same use. A fabric or woven appearance does not establish suitability for a particular crop, growing medium, exposure, or reuse. Read the bag maker’s information for intended use, drainage design, care instructions, and any guidance on washing or repeated wetting and drying. Check the stated dimensions and construction as well; seams and sides affect how a filled bag holds its shape. If intended use is unclear, ask the maker instead of inferring it from the material’s appearance.
Plan for the end of the growing season before the bags are in place. Decide how you will empty them, handle the used medium, inspect the seams, and clean or store the bags according to their instructions. A bag that fits through an opening when empty may be difficult to maneuver when filled, so plan to empty it in place if the maker’s handling guidance requires that. Allow space for a container to receive the medium and a clear route for removing it. Keep labels or records that distinguish bag sizes and intended uses when everything is stored. The Prestige greenhouse size options span 40.6 to 302 sq ft. Compare the selected model’s openings and working space against this cleanup process, not just the arrangement used while crops are growing.
Choose the system that fits the greenhouse and your routine
Grow bags can suit a plan that benefits from separate planting units and the ability to change an arrangement. They also divide the growing medium into smaller volumes that need individual attention for drainage and moisture. A permanent bed may suit a crop plan that needs a continuous rooting area or a fixed row layout, but it is less flexible to rearrange once established. Compare the work involved as well as the growing space: filling and checking several bags is different from managing a single bed, even when the total amount of medium is similar.
Compare the crop’s planned root-space needs, the filled volume and footprint of each bag, and the floor left for access and supports. Add drainage and watering routes to the drawing before deciding how many bags fit. Keep both versions of the plan: one for bags and one for the permanent bed. This makes trade-offs visible, such as fewer planting units in exchange for better access or a continuous bed in exchange for less rearrangement. The large backyard greenhouse range is listed from 506 to 753 sq ft. Even at that scale, compare complete working layouts rather than increasing the bag count in proportion to the advertised area.
Frequently asked questions
How many gallons does one greenhouse plant need?
There is no dependable gallon amount for every plant. Variety, mature size, growing season, spacing, and the growing medium all affect the answer. Look for crop-specific recommendations from a regional Cooperative Extension service or the seed supplier, then compare that guidance with the bag’s measured fill volume. Treat a shared bag’s volume per plant as a planning estimate, not a guarantee.
Do grow bags need drainage holes?
That depends on the bag’s design. Some have openings in the base, some drain through permeable sides, and others use more than one route. Check the manufacturer’s instructions before adding holes or a liner; either change could interfere with the intended drainage. After filling, make sure the designed outlets remain open.
Can I put a grow bag in a tray?
A tray can catch runoff, but it should not leave the bag standing in collected water. Check the bag after watering and empty the tray if water remains. Also make sure an overflowing tray will not send water into an aisle or another planting area. The bag and tray should sit securely on a surface that suits their combined footprint.
Are grow bags the same as a permanent greenhouse bed?
No. A bag creates a separate, bounded volume of growing medium, while a permanent bed provides a more continuous planting area. Bags can make it easier to change the arrangement, but each one needs suitable volume, drainage, and access. Compare measured fill volumes and crop spacing rather than assuming equal floor areas offer equal root space.
Can I move a grow bag after planting?
It is best to choose the final position before filling and planting. A filled, wet bag can be heavy, and its sides or handles may not be designed for moving it. Follow the manufacturer’s handling guidance, and do not assume the bag can be lifted safely by its handles when full. Leave room for watering and support where the bag will stay.
A reliable grow-bag plan starts with the volume that will actually be filled, not a label or an empty bag’s dimensions. Compare that amount with a measured bed, then allow for crop spacing, access, drainage, watering, and supports. When those details are included in the greenhouse floor plan, you can judge whether bags offer useful flexibility or whether a permanent bed better suits the crops and routine you have in mind.
