
Greenhouse Heater Sizing: How Much Power Do You Need?
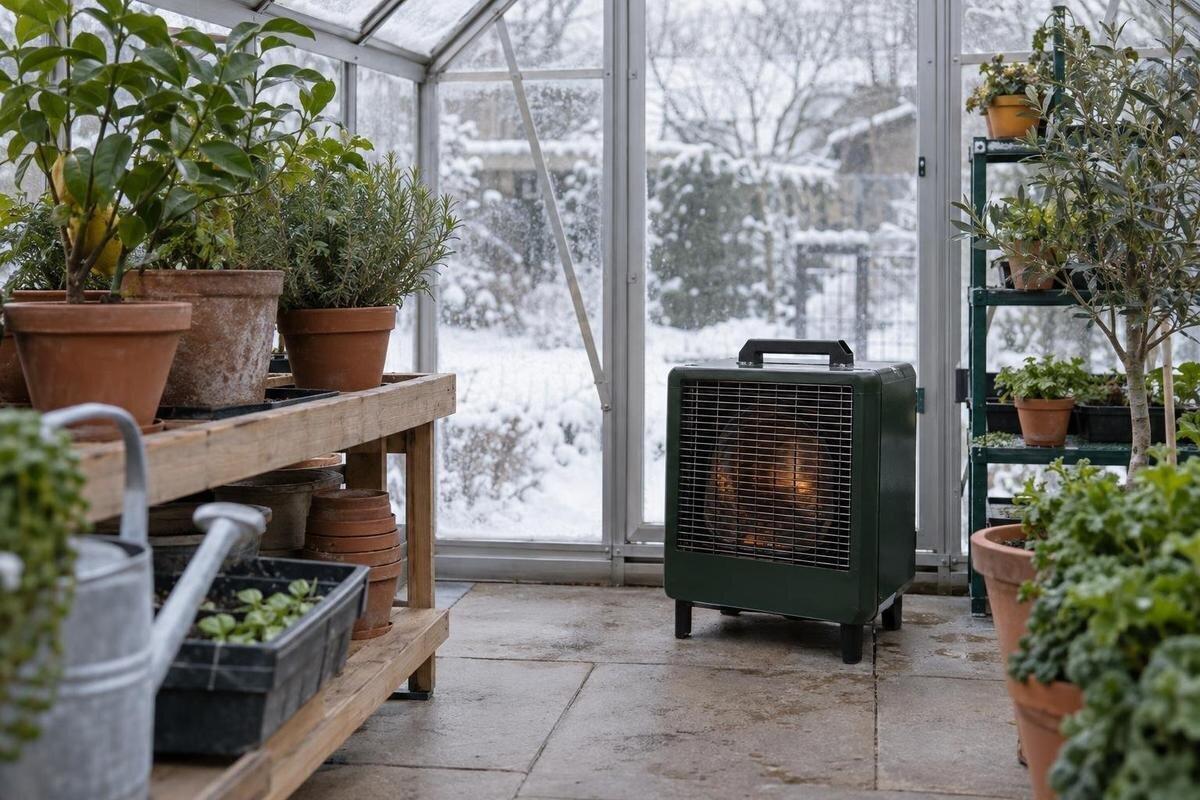
Greenhouse heating
Choosing a greenhouse heater by floor area alone can leave you with a unit that struggles on cold nights or a capacity larger than the calculated requirement. The useful question is how quickly heat escapes from this particular greenhouse under the outdoor conditions you plan for, and how warm the interior must stay. A first-pass heat-loss estimate helps compare heater capacities, but it depends on actual surfaces, documented construction values, and air exchange—not a universal watts-per-square-foot rule. Heater sizing also does not predict an energy bill: capacity is a rate of heat delivery, while cost depends on energy input and how long the system runs.
Why floor area alone cannot size a heater
Floor area is convenient for describing a greenhouse, but heater demand follows heat escaping through the roof, walls, doors, and other exposed parts. A compact, tall, or irregular structure can have a different exposed area from another with the same footprint. Panel and frame assemblies, gaps, ventilation, outdoor cold, and the desired indoor temperature matter too. Treat floor area as an identifier or rough screening input, not the calculation itself. A heater’s capacity should be stated as heat output per unit of time, commonly BTU per hour or kilowatts; a number in electrical watts may describe input instead, so verify what the rating means.
Catalog ranges help narrow your choices before you collect the dimensions needed for sizing. For example, the Classic greenhouse size range runs from 40.6 to 302.3 square feet. Select a specific option, then request its length, width, wall height, roof dimensions, and door details. Those measurements describe different parts of the enclosure; the footprint alone cannot replace them. When comparing two sizes, keep a separate measurement record for each rather than averaging the range endpoints. This also helps you distinguish usable growing space, which guides the greenhouse purchase, from exposed surface area, which informs the heating assessment.
Set the indoor temperature target first
Write down the temperature you need to maintain before comparing heaters. A greenhouse held just above a chosen frost-protection threshold has a smaller indoor-to-outdoor temperature difference than one kept warmer for active use, so its heat-loss requirement will generally be lower under the same outdoor conditions. The target is an operating decision tied to what you grow and when you need the space; it is not supplied by a heater’s maximum rating. Size for the cold period you intend to cover rather than assuming daytime solar warmth will be available on the night that sets peak demand. One thermostat reading also does not prove every area is at the same temperature.
State whether the target is an overnight minimum or a temperature to hold throughout the day, and use that definition consistently. A thermostat sensor near a heater may not represent the coldest growing area; check the equipment instructions for guidance on measurement location. For an attached greenhouse, the assessment also needs to identify which surfaces face outdoors and which adjoin the building. Do not assume the adjoining space is heated or supplies useful warmth. The Lean-To Greenhouse size range spans 40 to 154 square feet. Request the selected option’s drawings so the estimator can assess the shared boundary as well as the exposed enclosure.
Choose a realistic outdoor design temperature
Choose a cold outdoor condition that matches the location and the reliability you want, rather than using the average winter temperature. Monthly averages hide the nights when a heater must work hardest. Use a credible local weather-design value or ask a qualified heating professional which design temperature fits the project; record the source and whether it represents a routine design condition or an unusual cold snap. A mild-weather input can understate the output needed at the moment it matters. An all-time record can produce a very different estimate, so do not substitute one for a design value without understanding what the calculation is meant to cover.
Exposure adds uncertainty. Wind can increase losses through leaky construction, and an open site may not behave like a sheltered one. Record whether the proposed location is exposed, sheltered by nearby structures, or affected by openings used during winter; shelter does not guarantee a particular indoor temperature. When considering the Large backyard greenhouse listing, with sizes from 506 to 753 square feet, give the estimator a site sketch as well as the selected dimensions. The sketch can show nearby buildings and the greenhouse’s orientation. Keep the source of the outdoor temperature separate from these site observations so each assumption can be reviewed.
Estimate heat loss through the greenhouse envelope
Separate heat moving through the enclosure from heat lost when air is replaced. A preliminary transmission assessment considers each exposed part’s area, documented heat-transfer data, and the difference between the indoor target and outdoor design temperature. A suitable calculator or qualified estimator assesses the contributions and combines them; do not apply an arbitrary rate to floor area. Roofs, side walls, end walls, and doors can have different construction. Identify the floor and foundation too: heat transfer to the ground requires appropriate treatment rather than automatically using the outdoor-air temperature. This is a framework for reviewing an estimate, not a complete HVAC design.
Use data for the complete assembly where available; a panel’s center value may exclude frames, joints, and doors. Documents may report U-factor or R-value, which describe different properties and cannot be entered interchangeably. Ask the estimator to confirm the units, whether a figure covers the whole assembly, and which surfaces it applies to. For the Limited Edition greenhouse sizes, listed from 40.6 to 302 square feet, request the construction details for the exact option being considered. Keep any missing thermal values visible in the estimate. Substituting a value from an unrelated enclosure can conceal uncertainty even when the arithmetic is correct.
Include ventilation and air leakage
An envelope-only estimate misses heat carried out whenever warm interior air leaves through vents, doors, or gaps and colder air enters. Make an inventory of planned operation: manual or automatic vent openings, door use, and noticeable leakage. Include periods when ventilation is intentionally needed rather than assuming every opening stays shut during cold weather. Depending on the schedule and construction, air exchange can make a meaningful contribution to peak loss; its effect cannot be inferred from floor area. Do not confuse a ventilation requirement with a defect to seal. The greenhouse and its plants still need an appropriate air-management plan.
Separate intentional ventilation from uncontrolled leakage in the sizing record. The former follows an operating plan; the latter depends on the enclosure and its condition. Ask a qualified professional how each should be represented, including whether a temporary vent opening is part of the design requirement or a separate operating event. For the T-Model Greenhouse Orangery sizes, spanning 178 to 323 square feet, obtain the selected configuration’s opening layout and describe how you expect to use it in winter. If considering an optional vent or insulation system, confirm its availability and documented properties before including its effect in the assessment.
Compare heat loss with heater output
When surface and air-exchange losses are estimated for the same indoor and outdoor conditions, combine them to find the heat-delivery rate required for that situation. Compare the result with the heater manufacturer’s published heat output in compatible units, often BTU per hour in the United States, not simply an electrical input or fuel-consumption figure. If the documentation lists input and output separately, output answers the capacity question; input is for energy-use analysis. Confirm that the stated output applies at the intended operating conditions. A maximum nameplate number that is not available under those conditions is not a dependable sizing basis.
Discuss reserve capacity in terms of a specific need, such as recovery after planned door use, rather than adding an unexplained percentage. Also distinguish uncertainty in the heat-loss estimate from the heater’s ability to adjust its output as demand falls. Extra capacity does not correct poor distribution, and selecting the largest unit does not resolve missing inputs. For the Pyramid greenhouse options, listed from 60 to 203 square feet, compare candidate heaters only after defining the selected enclosure and target conditions. Ask the equipment supplier how each heater controls output and whether its documented operating range suits the estimated demand.
Keep capacity and running cost separate
Capacity and operating expense answer different questions. A heater’s BTU-per-hour or kilowatt output describes how much heat it can deliver per hour under stated conditions; it does not say how many hours it will run in a winter or what the energy will cost. Running cost depends on energy input, equipment efficiency where applicable, energy rates, control behavior, weather, and the operating schedule. Two heaters that can cover the same peak heat loss may have different energy use or bills. Keep the capacity estimate separate from a seasonal or monthly cost estimate.
For a cost estimate, use documented input consumption and your actual energy rate, not advertised heat output alone. Operating hours vary with weather and thermostat cycling, so keep those assumptions separate from peak capacity. A heater capable of meeting the coldest planned condition will not necessarily operate at full input continuously. When comparing the greenhouse models with built-in storage, listed from 59.4 to 302 square feet, establish which areas you intend to heat. Ask for drawings that identify the storage section and any separating enclosure. Do not assume the entire listed footprint shares one temperature target or that the storage section has particular insulating properties.
Use quick sizing rules only as a check
Watts-per-square-foot rules, BTU-per-square-foot charts, and quick web calculators can provide an early comparison, but only if their assumptions match your greenhouse. A rule developed for a particular enclosure, outdoor condition, or ventilation rate may not apply when those factors change. A calculator asking only for floor area and a desired setpoint leaves out much of the enclosure and air exchange. Treat its answer as a screening figure or a prompt for questions, not a guarantee that a heater will hold temperature. A result displayed to several decimal places is no more dependable than the assumptions behind it.
Audit a calculator before relying on it: identify its climate basis, construction assumptions, air-loss method, and output units. Check whether it includes floor or ground losses and whether it distinguishes electrical input from delivered heat. For a candidate from the Prestige greenhouse selection, with footprints from 40.6 to 302 square feet, enter only information that applies to the selected option. Save the inputs alongside the result, including any defaults you could not change. If two tools produce different answers, compare their assumptions before averaging the numbers; their disagreement may reveal an omitted heat-loss component or a unit mismatch.

Verify the heater rating and site requirements
Before buying, compare the estimated requirement with the heater’s technical sheet for delivered heat output, not only its model name or headline wattage. Check the conditions behind its rating, temperature controls, intended environment, and any stated operating limits. Confirm whether the manufacturer says the equipment is suitable for the planned greenhouse location. If considering more than one unit, their combined published output is only part of the decision; distribution and control still matter. Ask the manufacturer or seller for missing specifications rather than estimating them from a product photo or a rating that is not clearly defined.
Site constraints can determine what capacity is usable. For electrical equipment, have a qualified electrician confirm that the intended heater and supply are appropriate. For fuel-burning equipment, follow the manufacturer’s requirements and get qualified advice on ventilation, clearances, and exhaust. These are verification questions, not do-it-yourself installation directions. A qualified professional can also review whether the rating, controls, and greenhouse envelope make sense together. Check the equipment documentation for compatibility with the greenhouse’s normal moisture and watering conditions rather than assuming every heater is suitable.
Build one estimate for each greenhouse option
Make a short sizing record for each greenhouse and temperature target: the selected model and dimensions, exposed roof, wall, and door areas, documented assembly values, outdoor design temperature, indoor target, air-exchange assumption, and source for each figure. Then record the heater’s published output and the conditions attached to its rating. Mark guessed or unavailable values as unknown rather than blending them with verified data. If several important inputs are missing, ask the greenhouse supplier or a qualified heating professional how to fill the gaps. A preliminary estimate is not a certified design.
Revisit the estimate if the greenhouse changes. A different size, roof shape, panel system, door layout, or ventilation plan can change heat loss even when the floor area looks similar. If comparing models, choose the exact candidate, request available drawings and technical details, and repeat the estimate instead of carrying one heater number across a product range. Where reliable enclosure data is unavailable, the honest result is greater uncertainty, not a falsely precise wattage. Once the system is in use, observed temperatures can help identify questions to raise about controls or the original assumptions.
Frequently asked questions
Can I size a greenhouse heater by square footage?
Square footage is useful for identifying the greenhouse and making an early comparison, but it is not enough to size a heater reliably. The exposed roof and wall area, construction, temperature target, outdoor conditions, and air exchange all affect heat loss. Use the footprint as one input, not as a substitute for those details.
Which outdoor temperature should I use?
Use a credible local design temperature that matches the conditions you want the heater to handle. An average winter temperature can hide the colder nights that drive peak demand. If you are unsure which value is appropriate, ask a qualified heating professional and record the source and design basis.
Does a heater’s wattage equal its heat output?
Not necessarily. A label may give electrical input, while a separate figure states the heat output available to warm the greenhouse. Compare the estimated heat loss with documented heat output in compatible units, such as BTU per hour or kilowatts. Use input figures separately when assessing energy use.
Should I add a safety margin to the estimate?
There is no universal percentage that makes an uncertain estimate reliable. Include a margin only when it represents a specific, documented loss or operating requirement, and explain the assumption. If important inputs are unknown, ask a qualified professional to review them rather than compensating with an arbitrary oversized heater.
Does the heater capacity tell me what it will cost to run?
No. Capacity describes the rate of heat output; running cost depends on energy input, equipment efficiency where applicable, local energy rates, weather, thermostat behavior, and operating hours. Estimate those costs separately using the heater’s documented consumption and your actual rate.
Greenhouse heater sizing estimates peak heat loss under a defined cold-weather condition; it is not a square-footage lookup or an energy-bill prediction. Set a clear indoor target, use local outdoor conditions, account for the actual envelope and air exchange, and compare the result with documented heater output. If key construction or airflow values are missing, treat the estimate as provisional and get qualified help before choosing capacity. A transparent set of assumptions is more useful than an exact-looking number built on guesses.
