
Why Are Greenhouse Plants Scorching on Only One Side?
Greenhouse troubleshooting
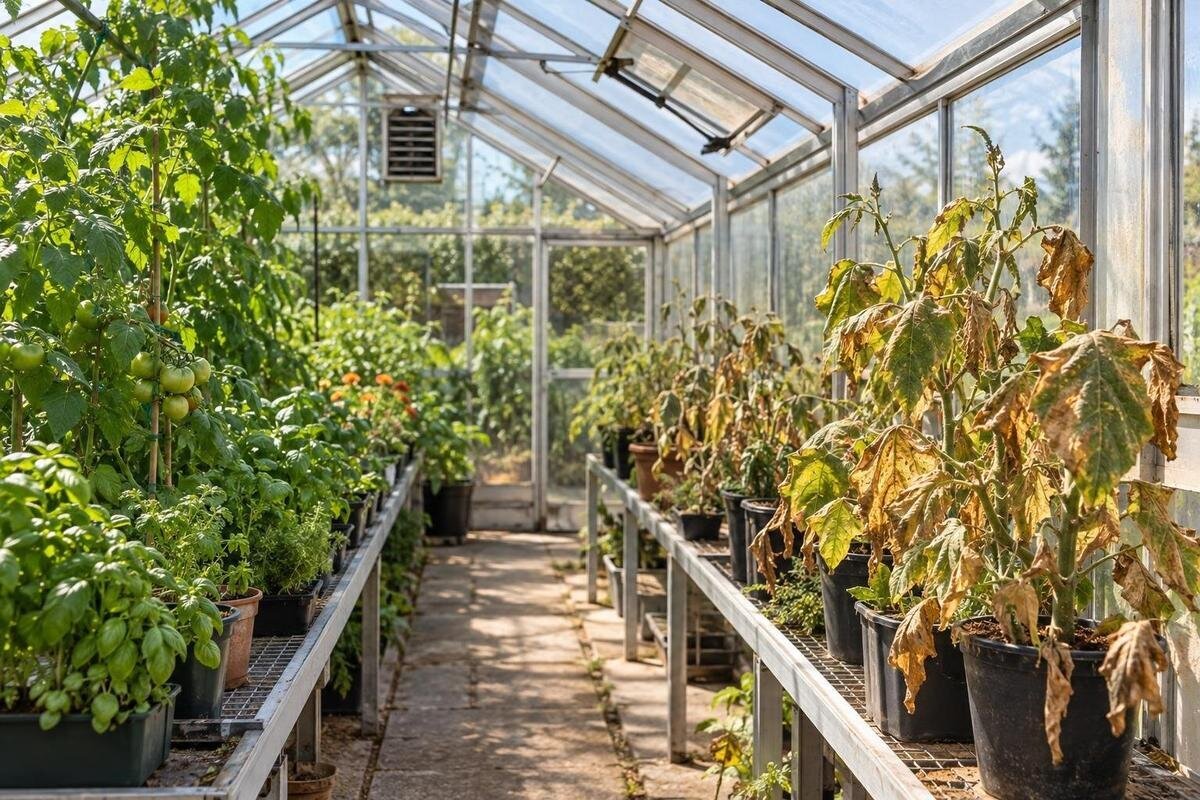
Scorching limited to one side of a plant—or repeated on the same side of several plants—is a clue that exposure changes across the greenhouse. Direct sun is one possibility, but reflected light, a warm surface, uneven airflow, inconsistent watering, pests, or spray residue can look similar. The useful evidence is where fresh damage appears and what conditions surround it at that time. Track the affected zone before changing shade, ventilation, and plant position together; changing several things at once makes the cause harder to isolate.

What the damage pattern can tell you
Use scorch as a description, not a diagnosis. Leaves damaged by strong sun or heat may look bleached, pale, papery, or brown and crisp, especially on tissue facing an exposed area. The appearance varies with plant species, leaf age, watering, and how quickly the damage developed, so color alone cannot identify the cause. Note whether the mark begins at a tip or margin, forms a broad patch, or follows contact with something. If several plants show fresh injury on sides facing the same direction, a shared exposure deserves attention; if only one crop is affected, that crop's sensitivity or care may also matter.
Compare the pattern both within a plant and across the growing area. Note whether damage repeats on outer leaves at the same height, on foliage nearest a pane, or along one bench edge. Mark a leaf that is still healthy and photograph it alongside a damaged leaf from the same angle. Repetition around a particular zone is more informative than one brown leaf, though it still does not confirm heat as the cause. Old damage can remain after conditions change, so track where new marks appear. If the affected side differs from plant to plant, look beyond a single shared sun patch.
Track when sunlight reaches the damaged leaves
Draw a simple plan and mark north, the glazing, doors, vents, beds, shelves, and nearby trees, buildings, walls, or paving. For several clear days, note when direct sun reaches an affected plant and how the bright patch moves across the canopy. Record morning, midday, and late-day conditions rather than labeling an entire wall sunny or shady. Repeat in another season if the problem returns at a different time of year: the changing sun angle and growing branches can shift a beam onto a previously shaded row. A quick sketch with times is often more useful than memory.
Plot the moving sun patch, not just a compass direction. A fence or tree can cast a shadow that reaches one corner late in the day, even when the rest of the greenhouse remains bright. Damage may become visible after the exposure that caused it, so record sunlight throughout the day rather than only when you notice symptoms. If you are comparing floor plans, the aluminum greenhouse with built-in storage is listed in sizes from 59.4 to 302 sq ft. On the exact model drawing, mark your proposed growing positions and compare them with the sun map. Include the edges of benches and shelves, where exposed leaves may extend beyond the shaded area.
Check nearby walls, paving, and reflective surfaces
During the suspected exposure period, inspect nearby surfaces from a position where you can see reflections without looking directly at the sun or into intense glare. Pale walls, shiny doors, nearby windows, metal panels, or a bright path may redirect sunlight into one zone, and the reflected patch can shift by hour. Separately note sunlit paving or masonry near the plants: a warm surface may heat nearby air and foliage without producing a sharply defined beam. Check whether leaves rest against glazing, framing, or a support as well. Rubbing or contact can create localized marks that resemble scorch, so note the exact point of contact before changing the light.
Distinguish a moving bright patch from warmth concentrated near a sunlit surface. For a wall-adjacent layout, the Lean-To Greenhouse listing gives sizes from 40 to 154 sq ft. When assessing that option, add the adjoining wall to your site sketch and record its surface, direction, distance from the proposed plants, and seasonal shadow. Compare those observations with a bed farther from the wall, preferably using the same crop and container type. A photograph taken from the same position at several times of day can show when a reflection reaches the canopy. Do not alter a neighboring surface or apply a coating to greenhouse glazing as an improvised remedy.
Measure conditions at plant height
Place a temperature and humidity logger at canopy height in the affected zone and another in a comparable, uninjured area. Keep both out of direct sun and away from glazing, metal framing, pots, and direct vent or fan streams; follow each device's instructions for placement and shielding. The aim is to compare local air, not to let sunlight heat the sensor body. If you have only one instrument, take readings at the same height and at similar times in each location, under comparable weather. Sequential readings are less exact than a paired record. Also remember that sunlit leaves can be warmer than the surrounding air, so similar air readings do not rule out unequal exposure.
Record temperature and relative humidity alongside the time, cloud cover, sunlight, vent or fan status, door position, and watering. A central reading or daily high can miss a short-lived hot spot; repeated differences during the suspected exposure period are more useful. Humidity adds context about local drying, but it is not a stand-alone diagnosis. The Bloomcabin Prestige Greenhouse listing includes sizes from 40.6 to 302 sq ft. When comparing a proposed layout with your current one, mark matched measuring points on each plan: the exposed bench edge, a sheltered comparison position, and the usual central monitoring location. Label their heights so later readings remain comparable.

Look for uneven airflow around the canopy
Trace the existing airflow path by observing vents, doors, and fans as described in their manuals. Look for a vent that appears obstructed, a fan stream aimed at one row, dense foliage that blocks a path, or a corner where leaves hardly move while foliage elsewhere stirs. A light ribbon can indicate the local direction of moving air, but it cannot measure ventilation rate or prove that the whole greenhouse is exchanging air adequately. Keep hands and loose material away from moving parts. Do not dismantle, rewire, or adjust equipment beyond the instructions provided for that model.
Compare airflow notes with temperature and humidity records. A warm, dry stream or a still pocket may intensify stress on the most exposed leaves, while stronger air movement elsewhere may help explain why damage stops at one zone. Test ventilation changes separately from shade so you can tell which change matters. The large backyard greenhouse listing shows area options from 506 to 753 sq ft. When assessing a larger growing layout, divide the plan into occupied zones and mark obstructions such as tall crops and shelving. Review the actual vent locations and equipment instructions for each zone; a clear aisle alone does not show that air reaches the neighboring canopy.
Compare plant position and water access
Keep an affected plant in place and compare it with a nearby plant of the same type, age, and growing conditions. For pots, mark which side faces the glazing before moving a single plant to a less exposed spot. If fresh injury stops on the moved plant while a similar plant in the original position develops new marks, location matters. Avoid turning, moving, and shading every plant at once. In an in-ground row, compare plants at the bed edge with those farther in, and note whether pots, foliage, or supports cast shadows that change the amount of light reaching leaves.
Uneven irrigation may not explain a clear directional pattern by itself, but water stress can make a plant less able to tolerate intense exposure. Compare growing-medium moisture at similar depths in affected and healthy positions, and check whether an emitter is blocked, aimed away, or absent at one end. Record recent watering and feeding so those factors can be compared with the timing of fresh damage. If you are redrawing benches, the Classic aluminum greenhouse listing gives sizes from 40.6 to 302.3 sq ft. On a scaled plan, allow access to check every container or irrigation outlet, including those along the glazing. A hard-to-reach end pot can receive different care even when the rest of the row looks evenly watered.
Rule out pests, sprays, and other look-alikes
Not every dry brown mark is sun scorch. Look for small spots with distinct edges, stippling, tiny insects underneath leaves, webbing, sticky residue, distorted new leaves, or damage limited to tissue that was sprayed or brushed against a surface. Recent foliar feeding, pesticide use, cleaning products, fertilizer splashes, or chemical drift can make symptoms appear on one side. Record what was applied and when, and inspect both leaf surfaces and stems. These signs can narrow the possibilities, but appearance alone does not reliably distinguish every pest, disease, or chemical injury.
Compare timing as well as appearance. If fresh marks keep appearing on a shaded side, spread across plants regardless of beam position, or show pest signs, stop treating sunlight as the only explanation. Review recent sprays, cleaning, watering, and handling before adding permanent shade; more shade can obscure the pattern without addressing its cause. Photograph the same leaves and nearby plants from the same angle over several days, and seek identification from a local Cooperative Extension office or qualified horticultural professional if symptoms progress or remain unclear. Record dates and conditions, not just the final appearance.
Test one small, reversible change
Once your notes point toward a likely cause, choose one small test: move a potted plant, shade only the affected patch, or clear a movable obstruction from an existing vent. Keep a similar plant or area unchanged as a control, and do not cover vents, doors, moving parts, or access routes. Follow the greenhouse maker's guidance for shade placement and attachment; do not improvise a fixing on glazing or a mechanism. Record the date and conditions so you can compare fresh injury rather than relying on memory. Changing one factor at a time makes the result easier to interpret.
A screen outside the glazing intercepts some direct light before it enters; an interior screen acts after the light has passed through. Results will not be identical, and compatibility depends on the particular structure. Do not expect damaged tissue to recover; judge the test by whether new leaves or newly exposed tissue develop fresh marks under comparable conditions. If a redesign is being considered, the limited-edition aluminum greenhouse range lists sizes from 40.6 to 302 sq ft. Use the successful test to describe the required shade coverage, including its location and timing. Then check the exact model's accessory and attachment guidance rather than assuming that any screen can be fitted wherever it is needed.
Plan growing zones around the exposure map
If you are adding a bench or moving crops, mark each crop's light needs using reliable, plant-specific guidance and overlay the direct exposure you observed. Put plants where the measured conditions suit their needs; do not treat one damaged plant as a universal measure for every crop. Check the light at bench height, not only at floor level, because shelves, roof bars, and taller plants can create different shadows. Mark access and existing airflow routes on the same plan so a change intended to reduce sun does not leave foliage in a still pocket or make a vent difficult to reach.
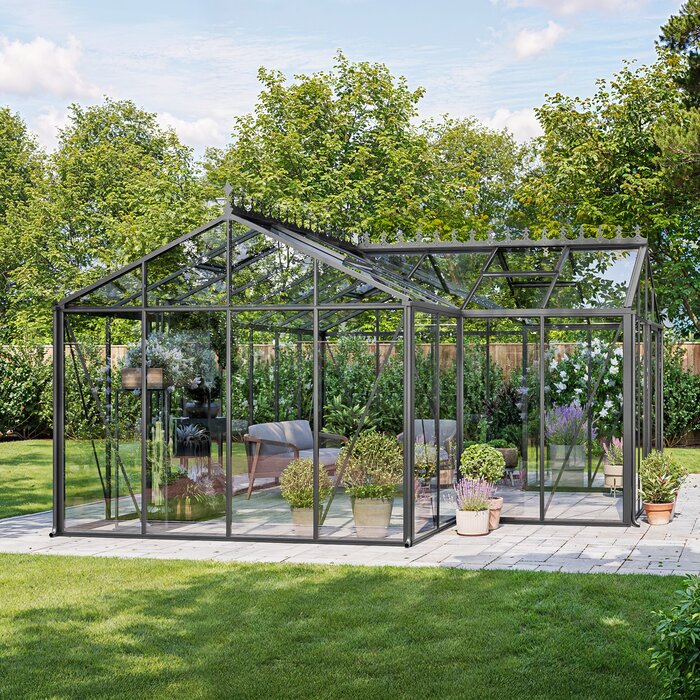
Greenhouse floor area alone does not show where a sunny edge, shaded corner, or air path will fall. The T-Model Greenhouse Orangery listing shows size options from 178 to 323 sq ft. Use a current, dimensioned plan to place each proposed bed, then mark the surrounding objects that cast shadows onto it. Check the opening locations in the model documentation and leave room to reach them after crops mature. Include the expected height and spread of tall plants: a layout that works with small seedlings may have quite different light and airflow later. Keep the exposure map with your planting notes so crop changes can be assessed against the same site observations.
What the test results mean
If a small move or shade patch stops fresh injury while an unchanged comparison plant develops new marks under similar weather, focus on the affected zone and refine that local change. If the pattern follows a fan stream or an area with repeatable temperature differences, review the equipment manual and current ventilation configuration before considering hardware changes. Similar air readings do not rule out direct or reflected sunlight heating leaves differently. If plants across the greenhouse are affected, widen the investigation to watering, crop sensitivity, treatments, or overall growing conditions. One brief comparison is suggestive, not conclusive; repeat it when conditions are similar, but do not leave a severely stressed plant exposed simply to preserve a control.
A replacement greenhouse is not the first remedy for a single hot spot; a plant move or compatible localized shade may address a local cause. Consider a new structure only if your observations also reveal a site or layout problem that practical changes cannot resolve. The Pyramid-type greenhouse listing gives sizes from 60 to 203 sq ft. None of the model names or area ranges cited here establishes ventilation capacity or shade performance. Carry your exposure map into any model comparison and assess the actual growing positions, openings, and documented equipment options. Ask a qualified greenhouse professional to assess permanent changes to mechanical ventilation when needed.
Frequently asked questions
Does one-sided scorch always mean the plant got too much sun?
No. A direct sun patch is a common possibility, but spray injury, uneven watering, pests, contact damage, and other stresses can look similar. The pattern helps you decide what to investigate; it does not confirm the cause on its own.
Why might plants near the greenhouse wall show more damage?
The area may receive a beam or reflected sunlight at a particular time, or be affected by a nearby sun-warmed surface. A wall can also change the shadows and airflow around a bed. Check what reaches the plants when fresh damage appears.
Can one thermometer rule out a local hot spot?
No. A single sensor may miss a difference between the affected canopy and another part of the greenhouse. Compare readings at plant height in both locations, out of direct sun, and record them alongside the time and sunlight.
Should shade go inside or outside the greenhouse?
The suitable position depends on the greenhouse and the shade method. Exterior shade intercepts some sunlight before it passes through the glazing; interior shade acts after it enters. Check the structure's instructions and test a small, compatible change before making it permanent.
How can I tell sun scorch from a pest or disease?
Appearance alone may not be enough. Look for signs such as stippling, insects, webbing, or marks that continue to spread independently of sun exposure. Photograph affected and healthy leaves, note recent treatments, and ask a local horticultural professional if the cause is unclear.
One-sided scorching is most useful as a map of where conditions differ, not as proof of a single cause. Match fresh damage to the sun's position, nearby surfaces, local airflow, and recorded temperature and humidity. Then test one small change while keeping a comparison plant or area unchanged. If the pattern does not follow those tests, revisit watering, pests, and recent treatments before making a permanent change to shade or ventilation.
