
Thermostat Placement for Reliable Greenhouse Heating
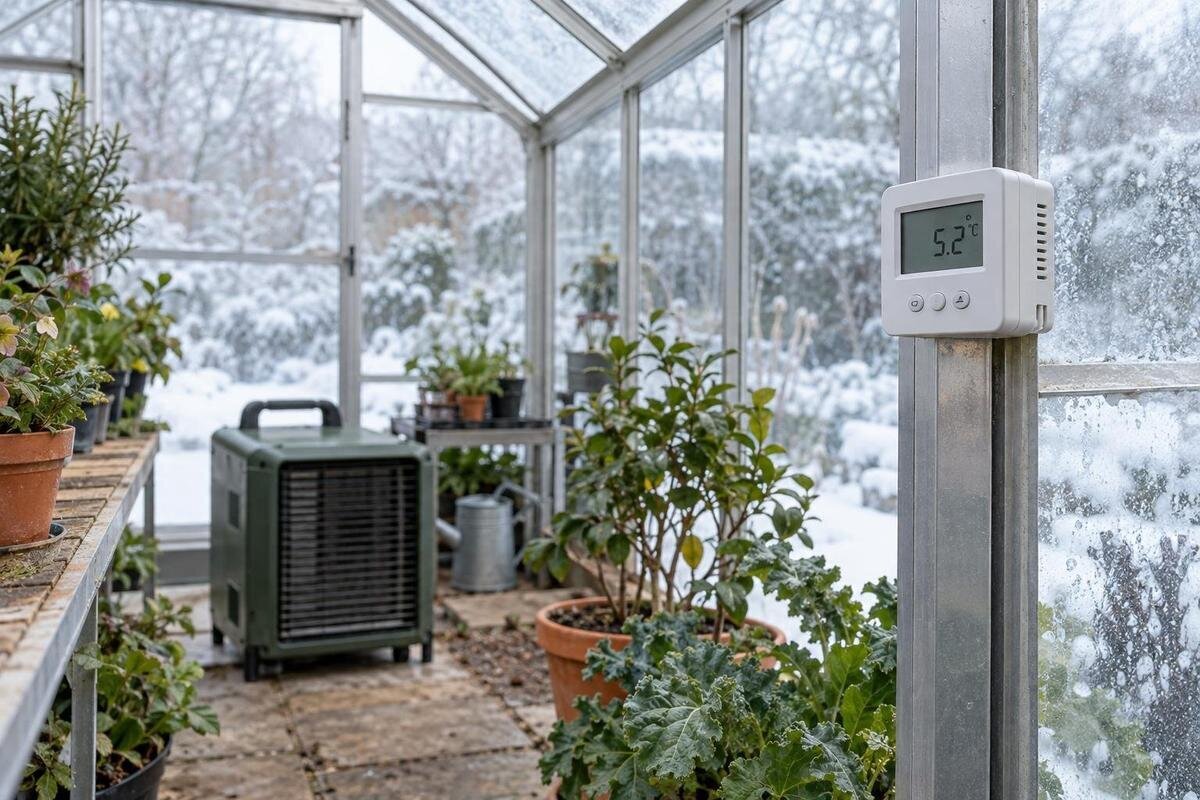
Greenhouse heating
A greenhouse thermostat responds only to the air at its sensing element. If that point sits in direct sun, a heater’s warm airflow, or a cold draft, the controller may switch heat on or off while plants elsewhere experience something different. Reliable control starts by deciding which plants and growing area the heater is meant to protect, placing the sensor in representative air, and checking that reading against temperatures at the crop canopy over real heating cycles. There is no universal mounting height or perfect geometric center for every greenhouse: crop height, shelving, doors, equipment, and footprint all shape where a representative point can be found.

How a greenhouse thermostat reads temperature
A thermostat is a local control, not a survey of the whole greenhouse. Its built-in sensor or remote probe measures air around one point, and the controller uses that reading and its settings to call for heat or stop it. It does not directly measure leaf, root-zone, potting-mix, or bench temperature, and it cannot confirm that a distant corner matches the air beside the probe. Sunlight, warm air rising, cold surfaces, openings, and equipment can all create local differences. Treat the display as a reading from one location, not a promise about every plant.
A display may show a setpoint, a current reading, or both; the target number is not the measured temperature. Identify which value you are viewing before comparing it with another thermometer. The heater may also switch on and off at different temperatures around the setpoint, depending on the controller’s documented temperature differential. That operating range is different from a measurement error: a small change in the display does not necessarily mean the heater should immediately switch. Read the equipment instructions to establish which device governs heating and which sensor the display reports. An integral thermostat may sense air at the heater, while a separate controller may use a remote probe. Repositioning a display does not necessarily change where the system senses air.
Choose the plant area the heater should protect
Decide which growing area the thermostat is meant to govern before choosing a mounting point. Consider the plants’ species and growth stage, and use their stated growing requirements to define the temperature range you want the heater to support. If benches hold groups with different requirements, name the priority zone rather than choosing an average that may suit none of them. Mark that zone on a simple layout alongside beds, pots, shelves, doors, vents, and the heater. Then you can choose a point based on the air around the intended plants, not simply the most convenient spot.
The representative point is not always the geometric center or the largest open area. On your layout, distinguish occupied growing space from paths and work areas, then mark where the most temperature-sensitive plants will stand. If you are comparing footprints, the Pyramid Greenhouse Oasis is listed in sizes from 60 to 203 sq ft. Draw the intended benches and containers within the size you are considering rather than treating all that floor area as one uniform growing zone. Decide whether the planting arrangement will stay fixed through winter or change as pots are moved indoors. A sensor selected for an empty central aisle may become unrepresentative once plants fill the perimeter. Keep a record of the priority plant group and its location so later temperature checks have a clear purpose.
Set sensor height for the crop canopy
Place the sensing element near the height of the foliage you intend to protect; a standard distance above the floor will not suit every crop or setup. A sensor near the ground can miss conditions around taller plants, while one high above the benches may read a different layer of air. Propagation shelves, low crops, and tall plants create different measurement needs. If plants occupy several levels, one reading cannot establish that conditions are alike at every level.
Keep the probe from touching leaves, pots, glass, or a bench, since those surfaces may not match the surrounding air. Allow room for foliage to grow without enclosing the sensor or pressing against it. When considering the Limited Edition greenhouse with built-in storage, sketch the growing area separately from the storage area and identify an accessible sensing point among the plants. Storage convenience should not determine the measurement location. Note the probe’s height relative to the bench and canopy, not just its distance above the floor; that makes it easier to reproduce the position after moving plants. For a mixed-height collection, compare temperatures at the lower and upper foliage levels before choosing the controlling height. Revisit that choice when a crop grows substantially or a shelf becomes occupied, following the sensor manufacturer’s mounting instructions.
Keep direct sunlight off the sensor
A sensor exposed to direct sun can warm faster than the surrounding air. Its reading may then rise even though shaded plants remain cooler, leading the thermostat to pause heating at the wrong time. The bias can change as the sun moves or clouds pass, so a location that appears reliable early in the day may not be reliable later. Check the sensor’s exposure at different times, not just when you first mount it.
Choose a shaded position that still has free airflow. If shielding is needed, follow the sensor manufacturer’s guidance for a suitable ventilated radiation shield rather than wrapping the probe or putting it in a closed box. While planning a Prestige greenhouse layout, mark where the proposed sensor will sit and consider whether seasonal sun angles could expose it through the glazing. Shade from a temporary tray or a plant that will later be moved is not a dependable arrangement. During verification, note when a patch of sun reaches the probe and compare that event with the independent air-temperature reading. A rise confined to the exposed sensor suggests a placement problem, whereas a rise at both shaded instruments may reflect actual warming. This comparison helps distinguish sunlight bias from a normal daytime temperature increase.

Avoid heater discharge, doors, and cold glazing
Keep the sensing element out of a heater’s direct warm airflow or radiant influence. If it heats rapidly whenever the unit runs, the thermostat may stop the call for heat before the rest of the plant zone warms. The opposite bias can occur near a cold door, draft, or glazed surface: the sensor may call for more heat than the main crop area needs. These are local effects, so judge a point by what the intended plants experience, not by the label of the location.
A cold-edge position may be appropriate if that edge is the zone you are specifically trying to protect, but check what happens elsewhere while heat is being supplied. The Orangerie greenhouse is listed in sizes from 506 to 753 sq ft, making a scaled planting and equipment layout useful when comparing its available sizes. Mark potential heater locations and the benches nearest and farthest from them, subject to the equipment manufacturer’s placement requirements. Then choose monitoring points that reveal whether the sensor responds before those benches warm. For a doorway location, distinguish brief changes caused by someone entering from persistent cooling while the door is closed. Both can affect the reading, but they suggest different placement questions. Do not move a sensor away from a genuinely vulnerable plant group merely to make the displayed temperature look more stable.
Allow representative air to reach the sensor
A useful reading depends on air around the probe being similar to the air in the plant zone. Avoid tucking it behind dense foliage, under a bench, inside storage, or in a corner where air barely moves. Those spots may respond slowly or reflect a small pocket rather than the wider growing area. Also avoid a direct stream from a fan or air-heating outlet, which can make the reading change sharply whenever that equipment runs.
Check the location with the greenhouse arranged as it is normally used. Shelves, pots, screens, and work areas can alter the air path, so a point that seemed open before setup may become sheltered. For a Classic aluminum greenhouse layout, leave a reachable sensing position that will not become a convenient place to stack supplies. Compare the sensor and plant-zone readings with any circulation equipment operating in its normal mode, and note that mode in your records. If readings change when a fan starts, determine whether the change appears across the plant area or only at the probe. A more consistent crop-zone temperature is different from a sensor being struck by a concentrated air stream. Recheck after substantial rearrangements; the aim is to sample ordinary growing conditions, not an unusually clear space created only for the test.
Verify the reading at plant level
Use an independent thermometer or temperature logger to check what the plants experience, rather than relying only on the controller display. First place the independent instrument beside the control sensor in shaded, freely circulating air and allow it to settle according to its instructions. This comparison can show whether the instruments differ at the same point. Then move the reference instrument to the crop canopy, keeping track of its height and position. A reading beside the thermostat and one at a bench answer different questions.
A minimum-and-maximum thermometer or logger can reveal overnight lows and daytime peaks that a quick glance misses. Before interpreting a difference, check each instrument’s stated accuracy, resolution, and response time; an extra decimal place on a display does not necessarily mean greater accuracy. Reset minimum-and-maximum values at a consistent time, or use timestamped readings to identify when extremes occurred. In a Lean-To Greenhouse planting plan, identify the particular bench or container group being checked rather than labeling every reading simply “greenhouse temperature.” Record sensor height, heater operation, weather, and door or vent openings alongside the measurements. Keep locations consistent across comparisons. If you move the reference instrument, label the new position clearly so a location change is not mistaken for an improvement in control. Repeat the comparison through both daytime conditions and overnight heating.
Use additional readings for different zones
One sensor is least informative when a greenhouse contains clearly different growing areas: for example, a bench near an opening and another farther inside, or plants at distinct heights. Take readings at more than one point to map those differences. An independent logger can help identify a warm or cool area without changing how the heater is controlled. This distinction matters: adding a monitoring point is not the same as adding a control sensor that can operate the heater.
If you are considering a remote sensor or multiple control points, confirm that the thermostat and heater are designed to work with that arrangement. Do not assume that a second display or thermometer can control equipment. When planning a Limited Edition aluminum greenhouse, label monitoring positions by plant group or bench so the resulting records remain useful as the layout develops. Simultaneous readings are best for comparing locations because outdoor conditions and heater operation may change between measurements. If you have only one reference instrument, allow it to settle at each position and record the time and operating conditions; treat that comparison as less conclusive. Look for recurring differences rather than a single isolated reading. If a controller accepts several probes, its documentation should explain whether it uses one selected probe, an average, or another control rule.

Match the sensor location to the control setup
Find out whether the thermostat senses temperature at its housing or at a separate probe. If a remote probe controls the heater, it is the probe—not necessarily the display—that needs representative air. If the sensing element is built into the control unit, follow the manufacturer’s guidance for placing that unit. Keep the display accessible enough to read, but do not choose a poor sensing location merely because it is convenient to reach.
For wireless probes, use the manufacturer’s instructions to confirm communication from the final mounting position and understand how the controller indicates a lost signal. Check battery status where applicable, and find out whether a displayed value is current or retained from an earlier transmission. For wired probes, follow the supplied guidance without improvising equipment connections or modifying cables. When evaluating a T-Model greenhouse layout, include the intended display and probe positions in your equipment plan so you can check access and communication before committing to a location. Ask the control-equipment supplier about probe compatibility, permitted operating conditions, and what happens if a sensor fails. Also identify any separate ventilation sensor: a heating display cannot tell you what temperature another controller is using. These checks establish how the system responds, not merely whether its screen is easy to read.
Troubleshoot the pattern before changing settings
When readings seem wrong, record the controller display, the independent plant-zone reading, whether the heater is running, and the conditions around the sensor. A display that rises quickly during heating may point to warm air or radiant influence at the probe; a low reading limited to one edge may reflect a local draft or cold surface. If the plant-zone reading differs while the sensor’s immediate surroundings appear stable, compare locations and heights before concluding that the thermostat itself is faulty.
Change one placement factor at a time so you can tell whether the reading becomes more representative. Compare results under reasonably similar conditions and retain the earlier record; a milder night can otherwise make a relocation appear more effective than it was. Do not compensate for a sun-warmed or heater-warmed sensor simply by changing the target setting, since that can conceal the bias. If both the controller and an independent plant-zone instrument remain below target while the heater runs continuously, sensor placement alone may not explain the problem. Heater output, equipment operation, and greenhouse heat loss may need assessment using documented specifications and the actual layout. Seek qualified service if the equipment does not operate as intended. A representative sensor improves control, but it cannot establish that the heating system has enough capacity for every weather condition.
Frequently asked questions
Should a greenhouse thermostat be at plant height?
Usually, place the sensing element near the height of the plants it is meant to protect. The right spot depends on the crop, its growth stage, and the layout; there is no universal mounting height. If plants grow taller or occupy several levels, recheck whether the sensor still represents the intended zone.
Can I put the sensor in direct sunlight?
Avoid direct sun on the sensing element. Solar radiation can warm the sensor and produce a reading that is higher than the surrounding air, so the heater may respond as if the plant zone were warmer than it is. If a shield is needed, use one that the controller’s instructions allow and that does not block airflow.
Is it a good idea to mount the thermostat next to the heater?
Not if the sensor is warmed by the heater or its discharge before the plants are. That can stop heating while the crop area remains cool. Follow the heater and thermostat instructions for the controlling sensor’s location, and use an independent thermometer to check conditions where the plants sit.
How can I tell whether one sensor is enough?
Compare readings in the different plant areas, especially if the greenhouse has separate benches, levels, or distinct warm and cool spots. One sensor may be adequate for a consistent zone, but a single control point cannot confirm that every area matches. Additional monitoring can reveal variation without necessarily requiring another thermostat.
Why does a separate thermometer show a different temperature?
The instruments may be sampling different air because of height, sunlight, a draft, or proximity to the heater. They may also have different response or accuracy characteristics. Place them together in shaded, freely circulating air to compare them, then measure at the plant canopy to see how the crop zone differs from the control point.
Reliable greenhouse heating depends on a sensor that samples the right air and on checks that show how that point relates to the plants. Define the area the heater should protect, place the sensor near its canopy, and keep it away from misleading sunlight, heater influence, and drafts. Then compare its reading with temperatures at the plants through changing conditions. A mismatch is useful information: it can show that the sensor location needs attention or that the control setup deserves a closer look.
