
Hardening Off Greenhouse Seedlings Before Planting Outside
Greenhouse growing guide
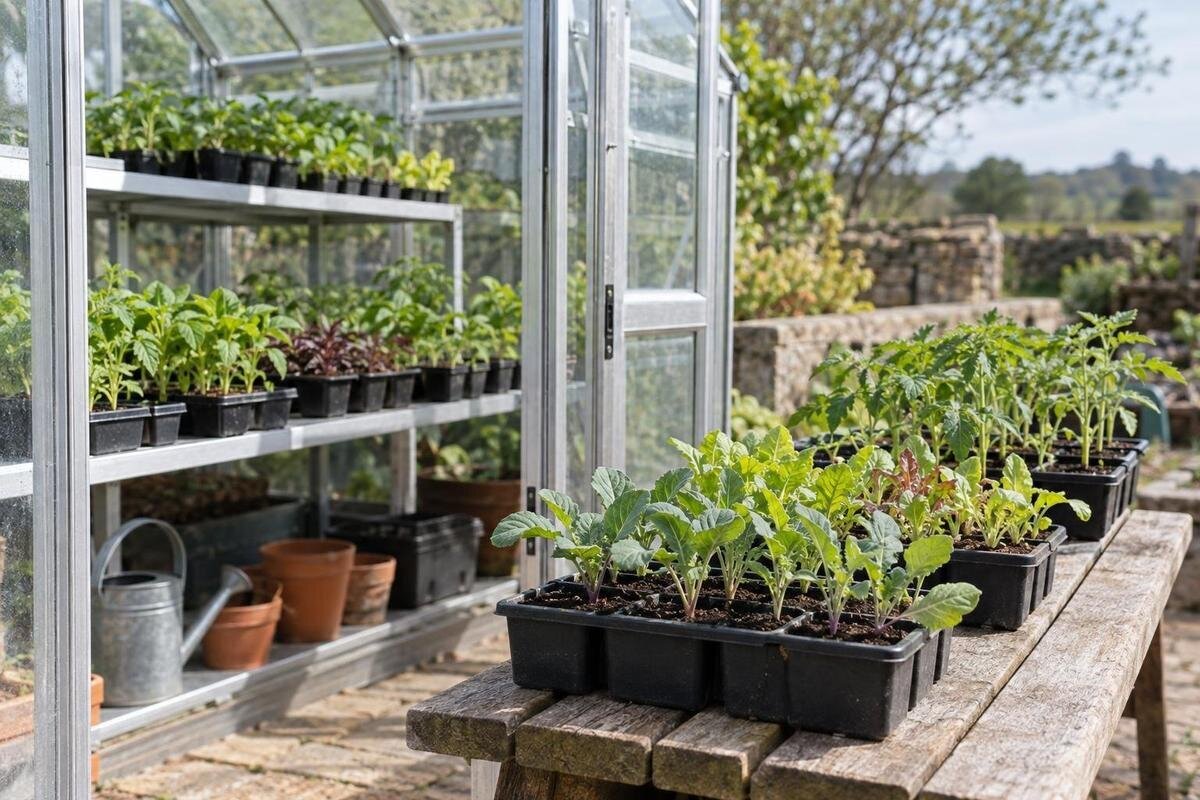
Greenhouse-grown seedlings can look ready to plant while still being unprepared for outdoor sun, wind, and wider temperature swings. Hardening off is the gradual transition between those conditions, not a fixed number of days to cross off. The pace depends on the crop, how protected the seedlings were, and the weather at your actual planting site. Use each outing as a check: increase exposure when plants stay healthy, and pause or step back when weather or plant response calls for it.
What hardening off changes
Hardening off helps seedlings adjust from a comparatively sheltered growing space to the light, moving air, and temperature changes outside. A greenhouse does not create one uniform starting point: glazing, shade, ventilation, bench location, and watering all affect conditions around the leaves. A tray raised in a bright, airy position may already receive more sun and airflow than one kept in a shaded corner. Even across one bench, leaf-level conditions can differ, and a greenhouse may be much warmer than the garden during the day. Observe the plants where they are growing, rather than relying on the structure’s name or a single temperature reading. Compare that environment with the bed, patio, or container where they will live before choosing the first outing.
Outside, leaves may receive stronger direct sunlight, stems move in wind, and small pots can lose moisture quickly. Outdoor nights may also be cooler or less predictable. Gradual exposure gives plants time to adjust before transplanting adds root disturbance and a change in soil; making both changes at once can compound stress. The aim is continued growth with minimal damage, not forcing seedlings to wilt or toughening them through stress. Hardening off improves readiness only for conditions the crop can naturally tolerate. It does not make frost-sensitive plants frost-hardy or protect them from extreme heat, waterlogging, or damaging wind. Keep that distinction in mind when deciding whether a plant can stay outdoors overnight.
Check crop tolerance and seedling readiness
Begin with the crop’s tolerance, not only seedling size. Cool-season crops and frost-tender warm-season crops do not share the same safe night conditions, and varieties can differ. Check the seed packet or crop-specific local extension guidance for an appropriate transplant window and temperature limits; neither a calendar date nor a broad hardiness-zone label tells you whether this week’s weather is suitable. Consider the exposure of the intended planting site, too: an open bed can be less sheltered than a protected patio. Group different crops by cold tolerance and planting window so one batch is not left outside simply because another is ready. Hardening off cannot replace waiting until a crop can actually live outdoors.
Look for actively growing plants with firm leaves and enough roots to hold the growing mix together during transplanting. Newly emerged seedlings, recently pricked-out or repotted plants, and plants recovering from stress may need more time to establish. Check for pests, and correct persistently dry or waterlogged mix before adding outdoor exposure. Root development is one readiness check, not a reason to leave plants until their roots become crowded. For future batches, measure your trays before choosing greenhouse space. The Pyramid Greenhouse size options span 60 to 203 sq ft. Sketch the benches and carrying aisle within the selected plan, including space for leaves that extend beyond tray edges. That gives you a more useful capacity estimate than dividing the total floor area by the size of a flat.
Let the forecast set the pace
Check the forecast for several days, not just the afternoon you plan to set trays out. Review highs and lows, frost alerts, wind and gusts, rain, and abrupt shifts; bright sun paired with wind can dry a tray faster than a mild, overcast day. Compare the forecast with the actual planting site, which may be windier or sunnier than the greenhouse. A low spot, paved patio, south-facing wall, and open bed can each experience the same forecast differently. Recheck conditions before each outing, especially before considering an overnight stay outdoors. Seasonal averages are useful context, but the current forecast and the plants’ actual surroundings determine whether a particular exposure is manageable.
Choose a manageable stretch of weather rather than forcing a start because a date has arrived. If a cold front, heat spike, strong wind, or storm is due, leave seedlings protected and resume when a suitable opportunity returns. A day spent indoors does not count as outdoor exposure, and a long outing in harsh weather is not useful progress. Keep crop-specific night limits in mind: daytime tolerance does not prove the same seedlings can safely remain outside overnight. If the forecast changes after trays go out, bring them back or move them to shelter rather than waiting for a scheduled end time. A short delay is easier to manage than trying to undo weather damage after planting.
Choose a sheltered first-outing spot
Start in bright shade or filtered light with shelter from strong gusts. Choose a stable, level spot where you can see the plants and retrieve every tray without delay. A lightly shaded patio edge or protected garden area can work; avoid a location that gets intense reflected afternoon sun, channels wind, or leaves trays standing in runoff. Do not leave seedlings in deep shade throughout hardening: the first exposure should be gentler, but later stages need to resemble the light and airflow at their planting site. If no naturally shaded place exists, use temporary light shade that still allows air movement. Leave enough room to handle each tray without brushing or crushing neighboring leaves.
Think through the carrying route, too: flats should not have to be stacked or balanced while you move them from their growing area. Keep labels visible and group crops with similar exposure needs so the right tray can be moved promptly. If planning a propagation area, compare greenhouses with built-in storage with the equipment you need to keep nearby. Confirm the storage arrangement and usable dimensions for the selected model rather than assuming how the space is divided. Give tray carriers, labels, and watering supplies accessible places that do not obstruct the exit. Keep the outdoor staging area close enough that moving plants back under cover remains practical when conditions change.
Increase exposure one step at a time
On the first suitable day, give seedlings a short, supervised outing in bright shade; bring them back before light, wind, or temperature becomes harsher than they have experienced. If leaves remain firm and unmarked, extend the next outing. Add direct sun gradually, moving from filtered light to the gentler sun the garden receives, then to stronger exposure only as plants tolerate it. Increase one main stress at a time. Adding full sun, gusty wind, and a much longer outing together makes it difficult to see which change caused a problem. A shaded porch outing, for example, is not the same exposure as a full day in an open bed.
Repeat or hold a stage as long as needed; the same number of hours or days cannot suit every crop or forecast. Cloudy weather may give little practice with direct sun, while a windy afternoon may call for bringing plants in early. Separate batches by exposure stage so newly started seedlings do not accidentally follow plants already tolerating longer outings. When comparing Prestige greenhouse sizes, which span 40.6 to 302 sq ft, consider how you would organize those groups. Allow each tray to be removed independently, without moving another batch into an unsuitable location. A clearly labeled bench arrangement helps you track progress while keeping the growing conditions appropriate for plants still indoors.
Adjust for sun, wind, rain, and temperature
Sun, wind, and temperature are separate variables. Direct sun can scorch leaves that have not experienced it; wind raises water loss and can buffet tender stems; a cool night may exceed a warm-season crop’s tolerance even after it handles sunny afternoons. Rain can soak small containers or tip light trays, while a hot spell can make a supposedly sheltered site harsh. Check plants during the exposure and again when you bring them back. Notice which side of a tray or plant received the most sun or wind; that pattern can help you adjust the location instead of abandoning the whole transition. Conditions can change quickly when a partly cloudy day clears.
In strong sunlight, return seedlings to shade if they show stress rather than pushing through; on gusty days, use a more protected spot. Keep seedlings under cover during weather beyond their crop limits, but check the greenhouse’s actual temperature instead of assuming it stays cool. Larger batches also need a backup location that can accommodate every tray you have put outside. The large backyard greenhouse range lists footprints from 506 to 753 sq ft. If comparing that scale of growing space, calculate how much of your planned bench area would remain available when outdoor trays return. Reserve room before an outing rather than relying on empty-looking floor space where light, drainage, or access may be unsuitable.
Check root-zone moisture before watering
Outdoor air often dries pots more quickly, so use the root ball as your guide instead of watering by a fixed routine. Check the mix in several cells or containers; if it is drying, water evenly and let excess drain before setting trays out. Do not send seedlings out bone-dry, but avoid carrying saturated trays into wind or leaving them in standing water after rain. Small cells and shallow plugs hold less moisture than larger pots, so inspect them more often in sun or moving air. Check both center and edge cells because exposure can vary across a flat. A damp-looking surface does not always tell you whether the root zone is still moist.
If one tray wilts, check the medium before deciding why: water loss, intense exposure, and root problems can look similar at a glance. Group plants by crop and container size so you can check comparable pots together without assuming every tray needs water. For a planned growing area, the Classic aluminum greenhouse size range runs from 40.6 to 302.3 sq ft. Use your layout to identify where you could inspect and water flats without reaching across delicate foliage. Confirm bench drainage separately, and leave access to pots at the back as well as the front. Convenient inspection matters more than squeezing in an extra tray that you cannot readily check.
Pause or step back when seedlings struggle
Look for a pattern rather than waiting for one dramatic sign. Repeated wilting, leaves that stay limp after the tray is shaded, bleached or brown patches on the sun-facing side, or stems pushed around by wind suggest that exposure may be too much. Check whether the mix is dry or waterlogged before blaming sunlight; a leaf symptom alone rarely tells you the full cause. A brief response that resolves when conditions ease is different from damage that persists or spreads. Inspect several plants in a tray, not just the most exposed specimen, and do not increase exposure while new stress symptoms are appearing.
Move stressed seedlings to bright shade or a protected growing area; water only if the medium needs it, and keep plants out of conditions their crop cannot tolerate. Once they recover and resume normal growth, restart at an easier level rather than trying to make up missed time. Set recovering trays apart from batches ready for longer outings, with labels showing why they were brought back. If considering a Lean-To Greenhouse for your growing area, check the selected layout for an accessible observation space. Its listed range is 40 to 154 sq ft, but the recovery location needs suitable light and temperature, not just room for a tray. Persistent trouble calls for checking roots, pests, or other growing conditions.
Transplant when the crop and site are ready
Transplant when seedlings have handled the light and airflow they will meet in the garden and the forecast suits the crop—not merely after a preset number of sessions. Check crop-specific guidance for night temperatures and soil conditions, and postpone if frost, strong wind, or a heat wave is likely. Hardened plants can still be set back by unsuitable soil or abrupt severe weather. If conditions change at the last minute, leave seedlings in their protected growing place and continue the transition later instead of planting just to keep a date. A calm, overcast day avoids the immediate challenge of strong sun and wind, provided temperatures and soil conditions are suitable for the crop.
Before moving seedlings, moisten a dry root ball so it comes out of its cell intact. Handle plants by the leaves or root ball rather than squeezing the stem, and plant at the crop-appropriate depth and spacing. Water after transplanting to settle soil around the roots, then watch for wilting and shelter plants from unusually harsh sun or wind if needed. Keep labels with each group as trays are emptied. If planning protected space for staggered planting dates, compare the limited-edition aluminum greenhouse sizes with the largest number of trays likely to overlap. Early crops may still be waiting when the next batch needs room; a simple sowing-and-planting schedule helps reveal that overlap before you choose a footprint.
Keep notes for the next batch
Keep a simple record by crop and batch: where trays sat, whether exposure was shade or direct sun, approximate time outdoors, wind and night conditions, watering, and plant response. A note such as “firm in morning sun, drooped in gusts” is more useful next time than a date alone. Record setbacks, too; noting when you brought flats in helps identify useful limits and repeat a successful stage. Label tray groups clearly, especially when varieties have different cold tolerances or planting dates. Include the greenhouse position if you grow seedlings in more than one area, since starting conditions can affect the transition.
Use those observations to adjust later batches, not to create a rigid formula. A different sowing date, greenhouse position, container size, or spring weather can change the pace. Record the greatest number of trays you managed at once and any difficulties moving or checking them. Those details can inform a future space purchase: the T-Model greenhouse footprint options range from 178 to 323 sq ft. Compare a selected plan with your measured trays and the working arrangement that proved useful, then verify the model’s configuration before choosing benches. Your records should help you distinguish a genuine need for more space from a handling problem that a better layout could solve.
Frequently asked questions
How many days should I harden off seedlings?
There is no single number that suits every crop or forecast. Use a sequence of outdoor exposures, advancing when seedlings stay healthy and holding or stepping back when weather or plant response calls for it. Time spent indoors during bad weather does not count as outdoor acclimation.
Can I harden off seedlings on cloudy days?
Yes. A mild, cloudy day can be a gentle time to begin, but it gives seedlings less practice with direct sun. Continue adding sunlight gradually when conditions allow, and account for wind and temperature as well as cloud cover.
Do seedlings need to come inside at night?
That depends on the crop and the expected low temperature. Keep frost-sensitive plants protected until outdoor nights are within their crop-specific limits. A greenhouse can also get cold, so check its actual conditions rather than assuming it will protect every plant.
Is opening the greenhouse enough to harden seedlings off?
Ventilation can expose plants to more moving air, but it does not necessarily reproduce direct outdoor sun, wind, rain, or night temperatures. Use it as one part of the transition, then give seedlings gradual, supervised outdoor exposure when the weather is suitable.
What should I do if seedlings wilt outside?
Move them to bright shade or a protected spot and check the growing mix. Water if it is dry, but do not add more water to a saturated root ball. Wait for plants to recover, then resume at a gentler level. Persistent or spreading damage needs closer inspection.
Treat hardening off as a response-based transition: begin with shade and shelter, build light and airflow gradually, and let crop tolerance and current weather govern the pace. Healthy growth after realistic daytime exposure is a better signal than a date on the calendar. Keep seedlings protected from conditions beyond their limits, then transplant when both the plants and the site are ready.
