
How Large Should a Greenhouse Rainwater Tank Be?
Greenhouse rainwater planning
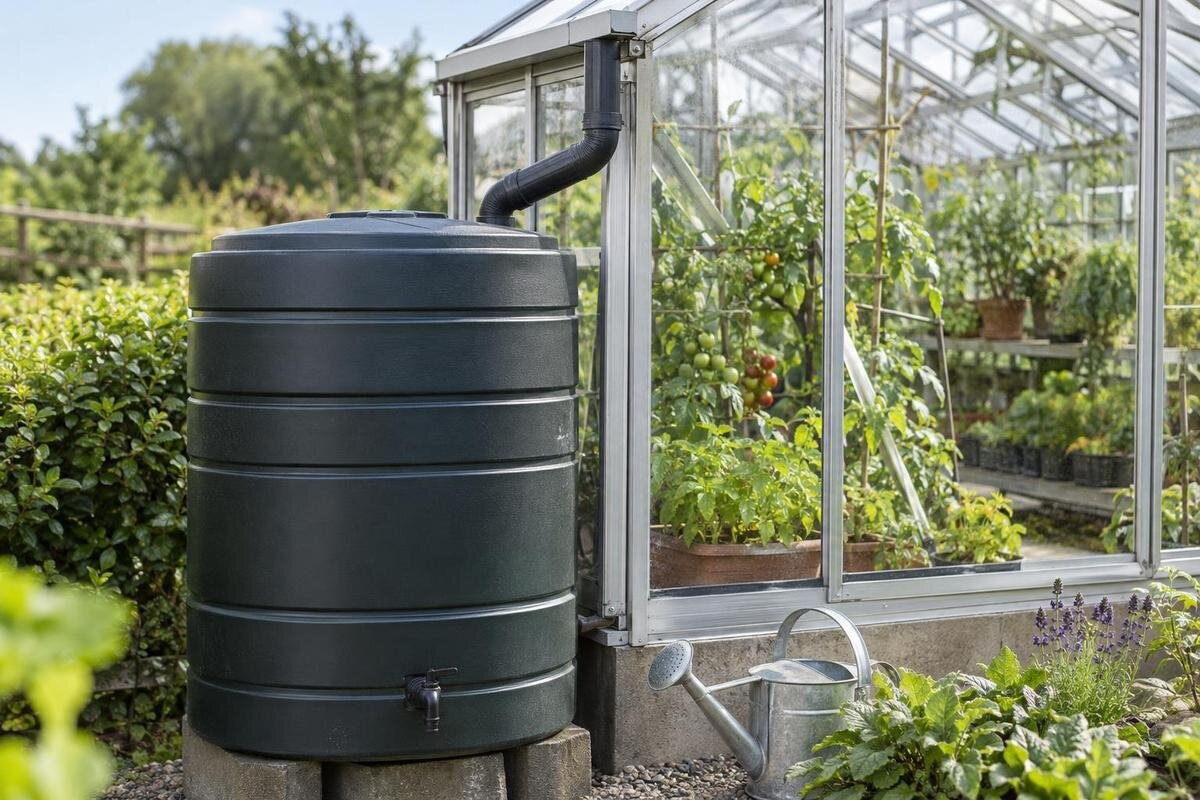
To size a greenhouse rainwater tank, balance the water a connected roof can collect with the amount your plants draw during the dry interval you want to cover. Roof area and rainfall estimate inflow; measured watering demand sets storage needs. A practical plan also accounts for overflow, because storms can deliver more water than an almost-full tank can hold.
Before choosing a tank 1
Seasonal supply and dry-spell coverage
A tank has to pass two separate tests: the roof must collect enough over the season, and stored water must last between useful refills. Annual rainfall alone does not answer either question. Water may arrive when the tank is already full, be diverted or lost on the way, or fall outside the months when greenhouse crops need irrigation. A large tank cannot solve a shortage if too little water reaches it; a high annual total does not prevent a small tank from emptying in a dry stretch. Think of seasonal yield as a limit on supply and tank capacity as a buffer against timing.
Set your service goal first. Do you want rainwater to supply all routine watering, cover a chosen number of rain-free days, or serve as a backup while another source remains available? Greenhouse plants are usually sheltered from direct rain, so outdoor showers do not ordinarily reach their roots; the tank is a separate supply. Decide what shortfall you can accept and whether the tank should start the dry interval full. Those choices determine a realistic reserve and coverage target. A full-supply goal also needs a backup plan if the tank has not refilled while watering demand continues.
Measure the roof area that drains to the tank
Measure only the roof area whose runoff can actually reach the proposed tank. For ordinary vertical rainfall, use horizontal projected area—the roof’s outline when viewed from above—not the larger area of sloped panels. On a plan, add the projected portions that drain to the connected gutter or downspout. If two roof slopes feed separate edges, do not count the whole footprint twice; if you collect from only one side, count only that side’s projected catchment. Leave out sections that drain elsewhere. Include overhangs only when their runoff is captured. A plan drawing is usually more useful for this estimate than measuring along a sloped panel.
Greenhouse listings can help compare scale, but an area figure is not a gutter diagram. The Limited Edition aluminum greenhouse range is listed from 40.6 to 302 sq ft; use the selected model’s dimensioned plan to confirm its roof projection, eaves and drainage route before using an area in the formula. Ask which gutter and outlet arrangement applies to that exact configuration rather than assuming accessories are included or compatible. Record which roof sections are connected, since roof size alone does not show how much runoff reaches the tank.
Before choosing a tank 2
Convert rainfall into gallons collected
Estimate gross yield for each rainfall event with this formula: projected catchment area in square feet × rain depth in inches × 0.623 = approximate U.S. gallons before losses. The 0.623 factor converts one inch of rain over one square foot to U.S. gallons. Multiply by a collection factor between zero and one to allow for water that does not reach storage. Roof wetting, gutter splash, leaks, debris screens and any first-flush diversion can reduce the amount. The factor is site-specific, so treat it as an estimate to calibrate, not a guaranteed performance figure. Use rainfall measured at your site where possible; a nearby weather station may record different totals.
For example, a hypothetical 200 sq ft connected roof under 1 inch of rain has a gross yield of about 124.6 gallons. If you use an illustrative 0.80 collection factor, the estimate is about 100 gallons; 0.80 is an example, not a universal value. The T-Model Greenhouse Orangery is listed in sizes from 178 to 323 sq ft, but that range cannot replace the selected model’s projected catchment area. After storms, compare estimated yield with a tank-level change if you know the starting level and withdrawals. The calculation estimates incoming water, not the amount ultimately used by plants.
Measure actual greenhouse watering demand
Estimate what the greenhouse actually uses rather than assigning the same average rate to every square foot. During active growing months, record tank withdrawals or irrigation supply over several representative weeks, including warm, dry periods when watering is frequent. A meter is convenient; otherwise, measure a known container volume and count refills. Log gallons per day or week and note watering events, not just timer run time: minutes do not reveal delivered volume unless the flow has been measured under the actual setup. If the tank will serve several beds or groups of containers, record their use separately where practical so a high-demand area is not hidden by an overall average.
Demand changes with crop type and stage, plant density, pot size and growing medium, greenhouse ventilation and weather. A sparse spring bench and a full summer crop are not equivalent, and plants under cover may need water while it is raining outdoors. Use a high but realistic active-season demand for the storage test, then make a separate seasonal estimate if you want to compare annual supply and use. The Pyramid greenhouse range is listed from 60 to 203 sq ft; that size range does not establish watering volume. Actual demand comes from the planting plan and measured withdrawals, not the greenhouse label.
Before choosing a tank 3
Calculate usable storage for a dry spell
Translate demand into a storage target. If you draw D gallons on a typical high-use day and want to cover N days with no useful rain, a first estimate is D × N gallons of usable water. For example, 12 gallons per day for six rain-free days requires 72 usable gallons before any reserve. This illustration assumes the tank begins full and receives no helpful rain during the interval. Set N from the dry spells you want to withstand, and choose a reserve according to how important uninterrupted watering is; there is no universally correct extra-day allowance. If use varies sharply from day to day, add the measured withdrawals across the interval instead of multiplying one average.
Compare that target with usable volume, not just the capacity printed on a tank. Some water may sit below the outlet, be kept back as an operating reserve or be inaccessible because of the tank’s shape. Confirm how much can actually be drawn before the level is too low for your setup. Include the expected starting level: a partly filled tank provides less usable water, and the amount available depends on how much remains above the minimum operating level. Product names can also be confusing: greenhouses with built-in storage are listed in sizes from 59.4 to 302 sq ft, but that description does not specify rainwater-tank capacity. Base a water-tank target on measured demand and usable gallons.
Test candidate sizes with a water-balance worksheet
A water-balance worksheet catches problems that a multiplication shortcut misses. Track usable water above the minimum operating level, using the candidate tank’s usable capacity as the upper limit. Record beginning volume, rainfall captured, irrigation withdrawals, overflow and ending volume. Process rainfall and watering in the order they occur: add captured rain, record any amount above usable capacity as overflow, then subtract each withdrawal when it happens. If demand exceeds available water, record the shortfall and set usable volume to zero. Carry the ending volume into the next row. Split a day into separate rows when the order of rainfall and watering could affect overflow or shortages. Calculate rainfall inputs with the collection factor already applied; do not subtract the same collection losses or diverted water again.
Run the same rainfall and demand sequence against several candidate capacities, using daily or storm-sized intervals and more than one historical season. Start with a plausible tank level for the date when watering begins; a test that starts full may overstate reliability if the tank has not filled by then. The Prestige greenhouse options are listed from 40.6 to 302 sq ft, so a broad size range is no substitute for the exact roof plan and planting layout in the calculation. A worksheet shows whether added capacity prevents shortages, whether water routinely spills, or whether the tank holds water you are unlikely to use.
Before choosing a tank 4
Use rainfall patterns from the watering season
Choose rainfall records for the months when plants need stored water, not just a calendar-year average. A nearby weather station or local climate record can show daily rainfall and the length of historical gaps; an on-site rain gauge helps account for differences at your garden. A month that gets its usual total in two storms behaves differently from one with weekly showers. For sizing, note both rain depth and the number of days between useful events. Do not count a trace shower as a dependable refill unless it produces measurable runoff at your site.
Test several past seasons or a demanding active-season dry spell rather than relying on one convenient year. You might size for a common gap and keep a backup source for unusual drought, or model a longer interval; make that choice explicit so the capacity has a clear purpose. The large backyard greenhouse sizes are listed from 506 to 753 sq ft, a reminder that roof scale can vary widely. Use the selected roof drawing, not the broad listing range, in the yield estimate. If the nearest station is far away or conditions differ at your site, build a record with a rain gauge over time.
Plan where excess rainwater will go
Overflow is part of the system, not an afterthought. A tank may be sized for a long dry spell yet fill early in a wet period; once full, it cannot store the next storm’s yield. Rainfall depth estimates total volume, but short, intense rain also challenges the gutter, inlet and overflow route. Check the manufacturer’s information and the actual roof-to-tank layout for inlet and overflow provisions. The route must handle flow as well as the tank’s total volume. If capacity or discharge is uncertain, ask a qualified installer to evaluate the setup instead of choosing a pipe or outlet by guesswork.
Plan the outlet so overflow does not soak the greenhouse base, pond beside a path or send water toward a neighbor’s property. Site and drainage conditions vary, so choose a suitable discharge location and check applicable local guidance where needed. Keep gutters and screens accessible for removing leaves; blockages can change both collection and overflow behavior. The Classic aluminum greenhouse is listed in sizes from 40.6 to 302.3 sq ft, but a model name does not specify the connected roof area or local storm conditions. Use those details when reviewing the overflow plan.
Before choosing a tank 5
Choose a practical and stable tank location
Locate the tank where the actual collection outlet can reach it and where you can inspect, clean and monitor it without blocking greenhouse access. Leave room for the lid, inlet screen, outlet and any maintenance access described by the tank maker. Check the support requirements for a full tank: water is heavy, and a large or elevated installation may need a qualified professional to verify support and placement. Do not assume the greenhouse structure or a nearby shelf is designed to carry a tank. The chosen position should also leave a clear route for planned overflow. Where freezing weather applies, follow the tank manufacturer’s guidance for seasonal care rather than assuming every tank can stay full outdoors.
Consider water quality as well as volume. Roof debris and roofing materials affect what reaches a tank, so keep it covered and maintain the recommended screening and cleaning arrangements. Stored rainwater is not automatically drinking water; if you plan to use it on edible crops, check whether the roof, collection setup and intended use are suitable under local public-health or extension guidance. A Lean-To Greenhouse is listed from 40 to 154 sq ft, but its listed area does not tell you where a particular outlet will sit. Confirm the selected layout’s drainage and leave room to reach the tank and its filter.
Adjust the estimate after real use
After the first few storms, check whether the tank level changes roughly as the estimate predicts. Record rainfall, starting and ending tank level, irrigation withdrawals and overflow; otherwise, water spilling from a full tank can make the apparent collection total misleading. Compare actual withdrawals with your demand log, and adjust the collection factor or daily-use estimate only after several observations. A measured drop in tank level may reflect plant use, a leak or other losses, so check the system before changing capacity. Recheck the calculation when the planting, season or collection route changes.
Interpret the pattern before buying a larger tank. Frequent overflow may simply mean storms exceed the empty space available; extra capacity helps only if you need to retain water for later and can collect enough before the dry period. If the tank empties early, look at withdrawals, leaks, missed rain and the level at the start of the gap. More storage cannot create rainfall that the roof never captures. If the tank stays nearly full while watering needs remain modest, a larger one is unlikely to improve the plan. Where overflow is routine but there is no later shortage, accepting some overflow may make more sense than storing water you will not use.
Frequently asked questions
Should I size a rainwater tank using annual rainfall?
No. Annual totals hide how rain is distributed and whether the tank is already full when storms arrive. Use rainfall records for the months you water, then test the capacity against the rain-free intervals you want to cover.
How many gallons can one inch of rain produce?
One inch over one square foot produces about 0.623 U.S. gallons before collection losses. Multiply the connected roof’s horizontal projected area by rainfall depth and 0.623, then apply a realistic collection factor.
Do I measure the sloped roof surface?
For ordinary vertical rainfall, use the roof’s horizontal projected catchment area—the area seen from above—not the larger surface area of the sloped panels. Count only roof sections whose runoff reaches the tank.
Should tank capacity equal the amount from one storm?
Not necessarily. Storm yield estimates incoming water, while tank capacity must cover demand between useful refills. A storm may produce more water than an almost-full tank can hold, so include overflow in the plan.
What should I do if the tank often overflows or runs dry?
Record rainfall, tank levels, overflow and withdrawals before changing capacity. More storage can help retain water for a later dry spell, but it cannot make up for too little rainfall, an unconnected roof or demand that exceeds available supply.
A sensible tank size comes from three site-specific figures: the connected roof’s projected area, peak-season withdrawals and the rain-free interval you want to cover. Use rainfall records to estimate inflow, test storage with a water-balance worksheet and plan for overflow. That approach ties capacity to the water your greenhouse can actually collect and the water your plants actually need.
