
No-Dig Beds Inside a Greenhouse: A Practical Setup
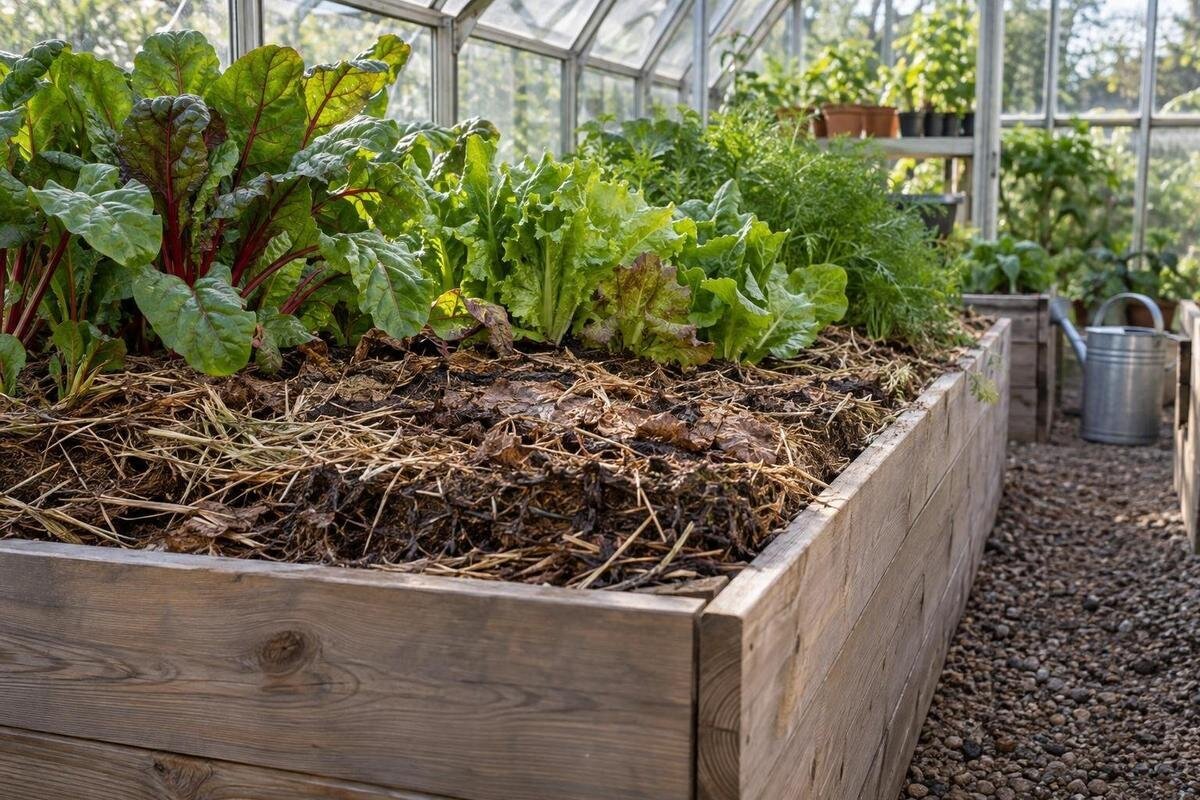
Greenhouse growing
A no-dig greenhouse bed is a permanent in-ground or framed growing area whose soil is not routinely turned. Instead of digging organic matter into the bed at each reset, you place appropriate additions on the surface and let roots, water, and soil organisms incorporate some of them over time. A greenhouse changes the routine: rain is largely excluded, soil can dry unevenly, and every bed competes with paths and access. A practical setup therefore begins with the existing soil and the floor plan, then uses measured, crop-aware surface care rather than a yearly blanket layer.

01
What no-dig means under a greenhouse roof
No-dig describes how a bed is maintained, not a special soil product or a ban on all hand tools. Once you have a workable growing area, avoid routine tilling, turning, or double-digging. Keep the soil profile largely in place and put suitable organic additions on the surface instead of mixing them through. Roots, water, and soil organisms gradually incorporate some material, although the pace depends on conditions and material. Weeds still need removing, crops still need planting and watering, and a compacted or diseased area may need targeted attention. The defining habit is to stop rebuilding the whole bed each season and keep regular foot traffic on designated paths. A hand fork for planting or a small targeted repair does not turn the whole bed into a tilled system.
Inside a permanently covered greenhouse, no-dig has to account for what the roof changes. With an intact roof, a bed gets little or no direct rainfall, and sun, heat, ventilation, and shade can leave different sections drying at different rates. A surface cover may slow moisture loss, but it cannot correct poor drainage, unsuitable soil, or an inadequate root zone. The method works in native ground or in a framed bed with an appropriate fill; it does not require a tall stack of mixed ingredients. Pick stable bed boundaries first, then match surface additions and watering to the soil and crops. Different crops under one roof may still have different water needs, so shared cover does not justify a single watering schedule.
Map beds and paths before filling the greenhouse
Measure the clear interior at bed height, then sketch the greenhouse to scale before bringing in soil, frames, or mulch. Mark the entry and any door clearance, structural posts, shelving, the route for a hose or harvest basket, and places that need access for cleaning or ventilation. Draw beds and walkways around those fixed points. Choose a bed width by testing how far you can comfortably reach from its aisle; a bed reached from two sides can be wider than one against a wall. Keep a continuous route to each bed so routine work does not depend on stepping into growing soil. Mark a trial layout with tape or stakes and walk it with the watering can or cart you use; a path that looks wide on paper may feel tight in practice.
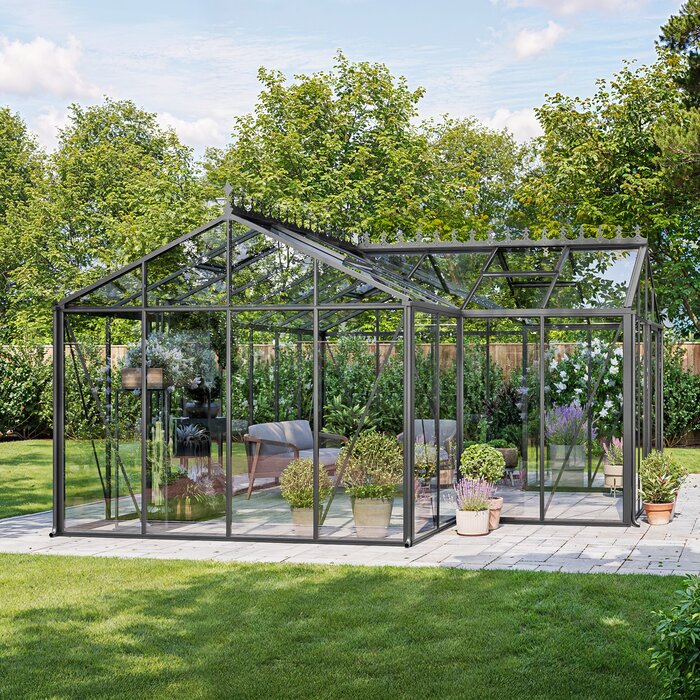
The Classic aluminum greenhouse is listed in sizes from 40.6 to 302.3 sq ft, a range of overall footprints rather than a measurement of free planting area. For any option, confirm the selected model’s clear interior dimensions and use a dimensioned plan to mark beds, entry clearance, aisles, and non-growing zones. Subtract those areas before estimating how much soil or surface material you need. A sketch based only on the outside footprint can leave a bottleneck by the door or make the far bed awkward to reach, even when the total square footage sounds generous. Adjust the drawing while the floor is still empty.
02
Choose in-ground beds or framed beds
In-ground beds can be the simplest arrangement when existing greenhouse soil is suitable: define the edge and keep that soil as the growing zone. A frame can separate beds from paths or contain a distinct layer of growing soil, but a box does not make poor soil, contamination, or standing water disappear. Over native ground, roots may extend below an added layer if conditions allow. Over a continuous slab or a root-blocking bottom, the usable root zone is limited to the fill. Pavers are not necessarily a sealed base; joints and the layers beneath them affect drainage and possible root growth. Before choosing a frame, check the depth your crops need and where excess water can drain. Choose any liner or bottom according to the actual base and bed design.
Count storage and potting space before treating the rest of the greenhouse as available for beds. The aluminum greenhouse with built-in storage is listed in sizes from 59.4 to 302 sq ft; storage belongs on the plan alongside paths and planting surfaces. For any selected option, verify what remains as clear growing space rather than dividing the headline floor area into theoretical bed rectangles. Keeping tools, hoses, and unopened amendments out of the bed also helps limit accidental compaction and prevents materials from being spread simply because they are close at hand. If equipment will be stored inside, mark its access route as well as its parking spot.
Test existing soil and resolve problems first
Before covering a bed, record its crop history, past additions, and any sections where water tends to stand. A representative soil test is more useful than guessing at pH or nutrient needs from leaf color or last year’s harvest. Sample separate beds or zones when they have different histories, and ask the testing lab how to collect a sample for the information you need. If the ground has an unknown or concerning previous use, arrange appropriate testing before growing food. Keep the results with the bed map; they help you avoid adding lime, fertilizer, or compost just because a generic greenhouse recipe says to. Take a baseline sample before adding new material so the result reflects the existing soil.
Look at the soil after watering as well as when it is dry: persistent puddling, a hard layer, or a sharp change in texture may need attention before the bed is mulched. Do not work saturated soil, which can smear and compact. If a localized compacted layer truly needs loosening, deal with it before adopting a no-dig routine and disturb only the affected area; a surface dressing is not a drainage repair. If pooling keeps returning, investigate its cause rather than covering it with more organic matter. When considering the T-Model Greenhouse Orangery, compare the proposed bed locations with the site’s soil conditions and the required base layout. Confirm which areas will remain open to native ground before planning in-ground beds or collecting baseline samples.

03
Clear weeds before laying a surface cover
Remove living weeds and old crop debris before adding a surface cover. Dig or pull persistent perennial weeds and their roots as thoroughly as practical; mulch may hide them without stopping them, and chopping some spreading roots can make control harder. Cut or pull annual weeds while small, and remove diseased plants rather than burying them. Keep bed edges visible so you can tell where a planted area ends and a path begins. Check corners and the edges of frames, where weeds can be easy to miss. If the same weed returns in the same place, identify its source before adding more cover; a permanent greenhouse makes repeated inspection easier than a problem hidden under a thick layer.
When forming a bed over turf, remove or suppress living sod across the full footprint instead of putting a thin sprinkle of soil over grass and expecting it to disappear. Inspect the edges for persistent weeds too; growth from an adjacent strip can reach a newly cleared bed. If using a temporary sheet to suppress vegetation, choose one suitable for garden use and inspect for regrowth before planting. For a Lean-To Greenhouse, use the selected model’s plan to locate beds and leave access along boundaries where weeds will need inspection. Plan how you will reach the back edge without stepping into the bed. Keep doorway clearance and access to walls or services separate from the growing area.
Use suitable surface additions, not a fixed recipe
Choose each surface addition for its purpose; the word organic alone does not establish quality or suitability. Finished compost is one common nutrient-bearing topdressing, but no-dig is not permission to add unlimited compost or fresh manure. Compost used near growing roots should be mature and stable. Coarse plant material used as mulch serves a different purpose and should not be treated as ready-to-use compost or mixed into the root zone by default. Be cautious with material of unknown origin if weed seeds, residues, or excess salts are possible. Follow crop-specific guidance and any soil-test recommendation. For bulk material, ask about its source and intended use, and keep the label or supplier information with your bed notes. If a test indicates no amendment is needed, another layer may create a new problem.
Plan a place to handle material before it reaches the beds. The Large backyard greenhouse is listed in sizes from 506 to 753 sq ft; when comparing an option, reserve a working area and a clear route for carrying material to each bed. Larger overall area does not eliminate the need to protect soil from foot traffic during spreading. Keep bags or bulk material in a designated staging area rather than on planted soil, and identify which input belongs in each bed before opening it. If one bed needs compost and another only needs surface protection, handle them separately so a convenient delivery does not become a blanket treatment. Leave the working area clear again once the additions are complete.
04
Measure the bed before calculating material volume
For a rectangular bed, multiply length by width to get area, then multiply the area by the intended layer depth to estimate volume. Keep the units consistent: a 4-by-8-foot bed covers 32 sq ft, and a hypothetical one-inch layer gives 32 sq ft × (1/12 ft), or about 2.7 cubic feet. That example demonstrates the calculation, not a recommended topdressing depth; the appropriate amount depends on soil condition, crop, material, and test advice. For an irregular bed, divide the outline into rectangles and add their areas, or measure the sections separately. Convert inches to feet before multiplying if you want the answer in cubic feet. Do not calculate from the entire greenhouse floor.
Use the calculation for each bed and record both the intended depth and actual volume. The Bloomcabin Prestige Greenhouse is listed in sizes from 40.6 to 302 sq ft, but the overall footprint range cannot determine a compost or mulch order; only the measured bed area can. Spread the selected material evenly rather than piling it at one end, and leave room around plant stems and crowns. Note how much the bed level changes after watering and settling. A short record gives you a comparison for the next season and helps prevent repeated additions from gradually burying bed edges or narrowing paths.
Adjust watering and mulch for covered conditions
Because a greenhouse roof blocks most direct rain, irrigation is the main water input to covered beds. Do not transfer an outdoor watering schedule without checking the soil: sun, ventilation, crop size, season, and airflow all affect how quickly the root zone dries. A dry top surface may sit over moist soil, while damp-looking mulch can conceal a dry layer underneath. Check below the surface in a consistent spot, and compare areas that receive different sun or airflow. Water needs vary by crop and growing medium, so observation at root depth is more useful than a universal day-of-week schedule. Recheck after adding mulch, since a new surface layer can change how quickly the bed appears to dry.
Mulch can slow surface evaporation, but it can also hide wetness or cover newly sown rows. Keep it clear of tender stems and leave seed rows accessible until seedlings are established, using crop-specific instructions for timing. Mark hose or drip-line routes before spreading material so water reaches each bed without requiring you to step on the soil to move equipment. When comparing a Pyramid-type greenhouse, use the selected floor plan to check access to watering points and the ends of each bed. Once irrigation is operating, inspect moisture beneath the surface in several places, including between outlets if using drip irrigation. A wet patch beside an outlet does not establish that the whole root zone has been watered.
05
Maintain beds between crops without resetting them
At a crop change, remove diseased or pest-infested plants rather than leaving them in the bed. For healthy crops, some gardeners cut stems at soil level and leave fine roots to break down; remove roots that obstruct planting or may carry a known problem. Clear fallen fruit and spilled material promptly. Keep crop groups in mind when planning what follows, but do not turn all the soil merely to change crops. In a small permanent greenhouse, rotation options may be limited, so record which bed each crop used instead of treating every season as a completely separate start. The surface can stay undisturbed while the planting plan changes.
Add material when the measured bed condition, test result, or crop plan calls for it, not because every greenhouse needs the same layer on a fixed date. When planning beds for a limited-edition aluminum greenhouse, allow for maintenance access after crops have grown, not just while the beds are empty. Leaves, supports, and irrigation lines can make a previously reachable edge difficult to inspect or topdress. Keep an aisle route available for removing crop debris and carrying measured additions without crossing the bed. Record crops, added material and volume, and soil-test results so changes have context. If a bed remains productive and testing gives no reason to amend, leave it undisturbed rather than replacing soil by habit. Treat beds with different histories separately.
Investigate symptoms before adding more material
More organic matter is not an automatic remedy for pale leaves, weak growth, standing water, algae, or a crusted surface. Similar symptoms can come from irrigation patterns, temperature, root damage, pH, nutrient balance, or salts in soil or water. A thick new layer can make the cause harder to inspect. Check which crop and area are affected, when the change began, and whether watering differs across the greenhouse; use a soil or water test when the evidence points that way. Avoid adding several amendments at once, because then you cannot tell which change helped or caused trouble.
Before changing the soil, check for a practical difference between affected and unaffected areas. Inspect irrigation outlets for uneven delivery, look for water collecting beside a bed, and note whether shade or a nearby crop changes local conditions. Record when the symptom appeared and compare that date with recent watering or input changes. Photograph the affected area and keep test results together if you need advice from a horticultural specialist. If the evidence supports a correction, apply it to the affected bed as directed and review the outcome before changing other beds. Do not repeat an unsuccessful treatment simply because it fits a no-dig routine. Preserving the soil profile is useful, but it should not prevent investigation or a targeted repair.
Frequently asked questions
Can a no-dig bed sit over a paved greenhouse floor?
Yes, provided the bed has suitable growing depth and a workable drainage arrangement. Over a continuous slab or root-blocking bottom, roots are limited to the fill. Paving joints and the underlying base can behave differently, so inspect the actual construction rather than assuming all paved floors are sealed or freely draining. A frame alone does not provide drainage.
Do no-dig greenhouse beds need raised frames?
No. You can maintain a permanent bed directly in suitable greenhouse soil. A frame can define the edge or hold a separate layer of growing material, but it does not correct poor soil or drainage by itself.
How much compost should I add to a no-dig bed?
There is no universal amount or calendar. Measure the bed, review its condition and crop needs, and use soil-test results where available. If you do add a layer, calculate its volume from the bed area and intended depth rather than the greenhouse’s total floor area.
Should I mix mulch into the soil?
Routine mixing is not part of a no-dig approach. Leave suitable surface additions on top so the soil profile remains largely undisturbed. Choose a material that fits the crop and bed condition, and keep it away from stems and newly sown rows when needed.
How should I water a mulched greenhouse bed?
Check moisture below the mulch rather than judging by the surface alone. Greenhouse conditions and crop needs vary, and the roof excludes most direct rainfall. Adjust watering based on the root zone and the condition of each bed, not a fixed schedule.
Treat a no-dig greenhouse as a permanent soil system, not a one-time layered project. Measure the real bed area, protect the paths, address soil or drainage problems before covering the surface, and keep additions small enough to evaluate. Because a roof changes rainfall and moisture patterns, check below the mulch and make decisions from crop needs, soil tests, and bed records. The result is a steadier routine: less seasonal disturbance, clearer inputs, and a growing area that remains easy to inspect.
