
Planning Greenhouse Bench Space for Spring Seed Trays
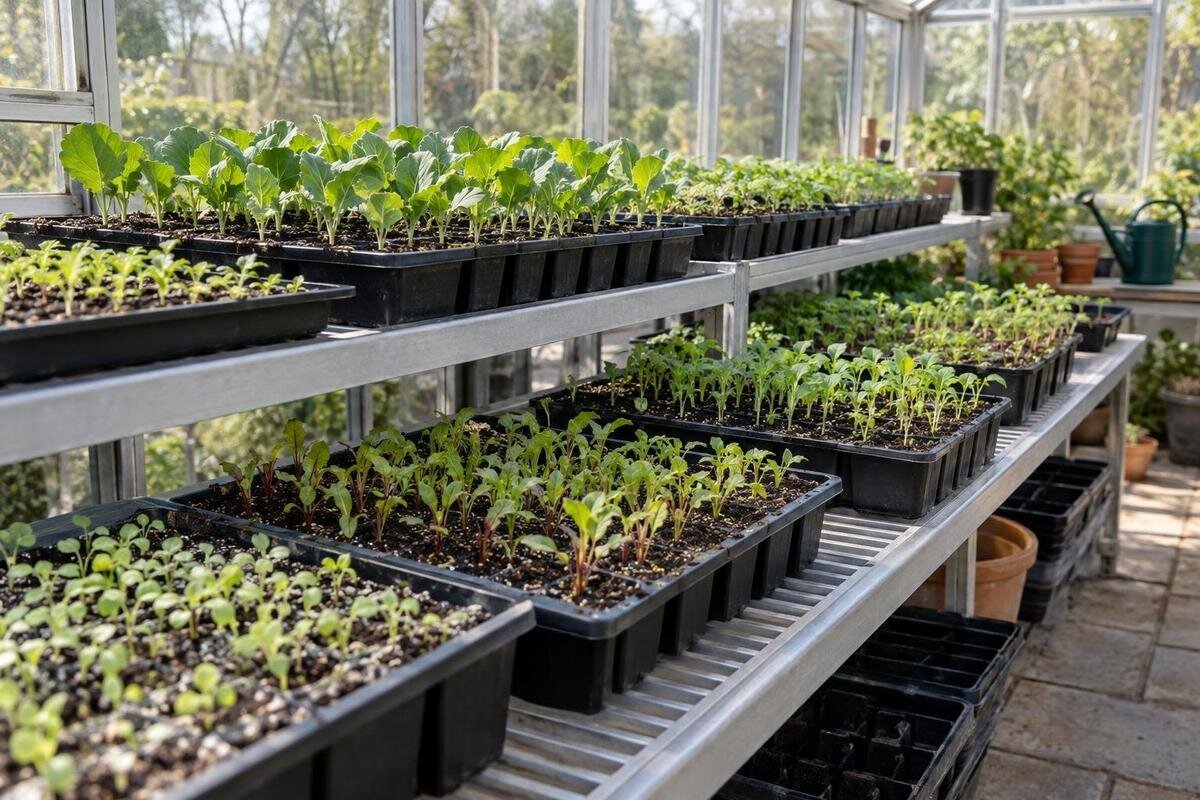
Greenhouse planning
Spring seed-starting plans often run out of bench space when a new sowing is due while earlier trays still occupy the surface. To estimate the space you actually need, track each batch from its arrival on the bench to the day it moves elsewhere, then map the simultaneous trays onto clear, reachable bench dimensions. That peak-week picture is more useful than the season’s total tray count when laying out benches or comparing greenhouse plans.

Peak bench demand from overlapping batches
A seasonal sowing total is a poor measure of bench demand. A tray can occupy space from sowing through germination and further early growth, or until you move it to another growing area; the endpoint depends on the crop and your routine. If one batch uses several trays, count the trays rather than the seed packets or eventual number of plants. The practical question is how many trays need a place at once during the busiest part of your spring schedule. That overlap, rather than the season’s grand total, is what your bench layout has to handle.
List each batch and mark the weeks when it is expected to occupy a bench. For every week, add the footprints of the batches still there; the highest total is a first estimate of peak demand. Keep differently sized trays separate instead of turning them into one misleading count. Also distinguish cell count from tray count: two trays with different numbers of cells may have the same outside dimensions and occupy the same bench space. Conversely, two trays described by the same cell count may have different footprints. Record the actual containers you intend to use rather than estimating from their names. When comparing the Classic aluminum greenhouse, use this peak-demand estimate to develop a proposed bench layout for the configuration you are considering. The model is listed in sizes from 40.6 to 302.3 square feet, giving you several overall sizes to investigate without establishing how many trays any particular arrangement will hold.
Build a calendar for each batch
Give each crop, variety, or separate sowing its own calendar entry. Record the planned sowing date, the number and type of trays, when the batch is expected to occupy the bench, and what will happen to it next. A destination might be another growing area or a larger container stage; the important detail for space planning is whether the original bench is actually freed. Use crop-specific guidance and your usual process to estimate the interval, rather than assuming every batch follows the same timetable.
A weekly grid makes overlaps easier to see than a list of dates. Mark each week a batch is likely to remain on the bench, then total the tray footprints in each column. Add actual sowing and move dates as the season progresses, so a delayed transfer does not disappear from the plan simply because its original date has passed. Use daily entries around a tight changeover: a batch leaving Friday cannot free space for trays arriving Monday of that same week. If two batches share a weekly column but never occupy the bench together, a daily check can also prevent you from overstating the peak. Record arrival and departure days whenever this distinction affects your choice of greenhouse size. The Lean-To greenhouse is listed from 40 to 154 square feet. Once your calendar identifies the busiest overlap, draw the required benches into the specific configuration under consideration, including the entrance and any access needed alongside the adjoining building.
Measure the bench area seedlings can use
Measure the clear top of each bench rather than estimating from the greenhouse floor area. Note its usable length and depth, and exclude portions occupied by supports, fixed equipment, containers, or anything that prevents a tray from sitting flat. If a bench narrows, has a cutout, or is divided into separate sections, record those parts separately instead of treating the top as one large rectangle. A tape measure and a simple sketch are usually enough to capture the dimensions you need for an initial layout.
Include only surfaces you can reach and intend to use for trays. A narrow strip behind another bench, for example, is not useful capacity if you cannot place or retrieve trays there in your normal workflow. Keep separate benches separate on the sketch, including the gaps between them. Record bench height as well as length and depth, and check how the proposed tray position relates to nearby glazing, framing, and equipment. A clear floor plan alone will not reveal an obstruction above the bench. For the Limited Edition aluminum greenhouse, request the dimensions needed to check your proposed bench positions rather than assuming they follow from the model name. Separately, confirm with the bench supplier that the chosen benches can support the intended trays when watered, together with any other equipment they will carry. A layout that fits geometrically still needs appropriate bench support; tray capacity and load capacity are different checks.
Calculate how many trays fit on each bench
Measure trays at their outside edges, including rims or handles if those parts take up space. Use the same units for the tray and bench measurements. For a rectangular tray and bench, estimate a row count by dividing the bench’s usable length by the tray’s outside length and rounding down; repeat with bench depth and tray width. Multiply the two whole-number results for a rough grid. This is a screening calculation, not a promise that the full count will be convenient to use.
Try the tray in both orientations if it can be rotated, and check whether the resulting rows leave room for the access you marked. For example, a clear surface measuring 72 by 36 inches can fit seven 10-by-20-inch trays with their 10-inch sides along the bench length: seven along the length and one across the depth. Rotate the trays and the grid becomes three along the length by three across the depth, or nine trays. Both counts assume no gaps and a completely clear surface, so reduce them wherever your working layout requires space. Mixed tray sizes may fit better in separate blocks; draw their outlines rather than assuming their combined area guarantees a fit. When comparing the T-Model greenhouse, check each proposed bench separately and then add the verified capacities. Do not combine disconnected strips of surface into a single imaginary rectangle. A leftover strip can count toward capacity only if an actual tray fits there and you can use it comfortably.

Reserve space for access and daily work
A bench that is filled edge to edge on a sketch may be difficult to use. Leave the areas you need to reach trays, check labels, water, and lift containers out of the layout. Also mark the route you use to carry trays and the places occupied by tools or equipment during propagation. The right allowance depends on your actual benches and tasks, so avoid relying on a universal clearance number. The test is whether you can do routine work without shifting several other trays every time you need one.
Draw these no-tray areas before calculating final capacity, not after the first sowing crowds them out. If a hose, work surface, or storage area shares the greenhouse, show it in its intended location as well. Include a place to set down a tray while opening a door or preparing its destination; otherwise, a usable route may still leave you with nowhere to put what you are carrying. Test access with the tray dimensions, not just with a person walking empty-handed. For the Pyramid Greenhouse Bloomcabin Oasis, compare the proposed bench positions with the interior dimensions at bench height and with the entrance arrangement. Ask for the relevant drawing if those details are not available. Keep the temporary handling space marked on your plan so it does not quietly become permanent tray storage during the busiest week.
Use a worked example to find the peak
For illustration only, suppose Batch A occupies six identical trays in weeks one through three, Batch B occupies four in weeks two through four, and Batch C occupies five in weeks three through five. The weekly counts are six, ten, fifteen, nine, and five. Week three is the peak because all three batches overlap. These dates are not a growing schedule; replace them with estimates for your crops and then update them with actual occupancy. If batches use different tray sizes, run the same weekly check with footprints rather than relying only on the total number of trays.
Now suppose, also just for illustration, that each tray measures 10 by 20 inches outside. Fifteen trays have a combined bare footprint of 3,000 square inches, or about 20.8 square feet. A 3-by-6-foot bench has 18 square feet of surface, so it cannot hold that peak even before allowing for gaps or access. This area comparison rules out an undersized surface quickly, but a larger surface still needs a tray-by-tray layout. For this example, accommodating nine trays on one bench would leave six needing another suitable surface during week three. Mark where those six would go rather than averaging demand across the five weeks. If you are considering the aluminum greenhouse with built-in storage, request the configuration's storage and growing-area dimensions separately. Allocate empty trays, supplies, and other stored items to their intended places, and count only the proposed growing benches when checking whether all fifteen occupied trays have a position.
Include the space seedlings need as they grow
Do not assume a tray leaves the propagation bench as soon as seedlings emerge. Some batches may remain there for a later stage, while others move to a different growing area or into larger containers. If the next stage stays in the same greenhouse, its trays or containers may have a different footprint and need their own place in the plan. Record the expected changeover point for each batch, and distinguish the sowing tray from the containers that replace it.
Compare space at each stage, not just at sowing. A group of small trays may clear a bench while a later group of larger containers takes up more of it, even if the plant count is falling. Give the later stage a separate calendar entry with its own container count and outside dimensions. If pots sit in a carrying tray, measure that tray rather than adding up pot bases; if they need wider spacing as plants develop, draw the intended spacing too. During a transfer, both the original tray and the replacement containers may briefly occupy surfaces, so reserve working room for that changeover. When developing a bench plan for the Prestige greenhouse, show where each stage will go and which surface becomes available afterward. This makes it possible to distinguish a genuine departure from the greenhouse from an internal move that merely shifts demand to another bench. Count both stages during any period when they actually overlap.
Compare greenhouse area with actual bench capacity
Once you have a peak-week sketch, compare greenhouse options using the same measurements each time. Look for dimensions for the specific configuration and note where benches could go, what parts of the interior would remain available, and whether your planned work route is still clear. Do not convert a greenhouse’s total square footage directly into tray numbers: floor area and bench surface are different measures, and the layout between them matters. A drawing with bench lengths, depths, and access areas marked makes those differences easier to spot.
For a larger-scale comparison, the Bloomcabin Orangerie is listed from 506 to 753 square feet. Apply the same peak-week plan to this option as to smaller models, with each proposed bench drawn to scale. Keep a comparison sheet showing the configuration, proposed bench dimensions, fitted tray count, and space assigned to other uses. Identify which measurements are confirmed and which still depend on a drawing or a bench selection. This prevents an attractive preliminary layout from being mistaken for a verified fit. The supplied product information does not establish included benches or their capacities, so confirm those details separately before treating a proposed arrangement as part of a purchase. If one option requires extra benches or a different tray format, record that difference explicitly. Compare the complete arrangements that would meet your spring workload, rather than ranking greenhouses by overall square footage alone.

Test the layout against your real workflow
Before committing to a full sowing plan, test the arrangement on an existing bench or with a scaled drawing. Mark the outside dimensions of the trays, the bench edges, and the access areas. If it is practical, place empty trays in the proposed positions and check whether you can reach, label, and lift them as expected. This simple rehearsal can reveal that a theoretical grid leaves an awkward corner or blocks the route you use to carry trays.
Walk through an ordinary task in the order you do it: bring in a tray, find the batch label, tend it, and move it when the time comes. Check the back and middle rows as carefully as the front edge, especially where benches are close together. If routine handling requires temporarily moving another batch, include that disruption in your capacity decision; the bench may technically hold the trays but still be difficult to manage. Revise the sketch until the peak-week arrangement works for both the count and the way you use the space.
Update the plan with what happens in spring
Leave a deliberate response for schedule changes rather than assuming every transfer happens on its planned date. A late move can extend a batch’s occupancy into the next sowing, while a re-sow can add trays at short notice. Decide what you would do in those cases: use a marked spare part of a bench, move a batch to a specific alternate area, or postpone a sowing. A buffer only helps if it is real space or a defined change to the schedule, not an unmarked assumption that the greenhouse will somehow fit more.
Keep a brief record of planned and actual sowing dates, tray counts, and the dates batches left each bench during the season. Note when the busiest overlap occurred and whether access remained workable. After spring, compare the record with your original calendar and change the estimates that proved inaccurate. This turns next year's plan into a better fit for your crops, trays, and routines. The useful result is not a maximum tray count on paper; it is a bench layout that can hold the actual peak without making everyday work cumbersome.
Frequently asked questions
How do I calculate the busiest week for seed trays?
List each batch’s expected weeks on the bench, then add the trays or tray footprints present in each week. The week with the greatest simultaneous demand is your starting point. Update the dates when actual growth or transfers differ from the plan.
Does a greenhouse’s listed square footage equal bench space?
No. Listed area describes the greenhouse size, not how much clear, reachable bench surface it has. Check the dimensions and layout for the specific configuration, then subtract space used for access, equipment, storage, and other work.
Should I plan by tray count or by area?
Use both. Tray count helps track batches, but it can mislead when tray sizes differ. Record the outside footprint of each tray type and map those footprints onto the usable bench surfaces.
How much extra room should I leave around the trays?
There is no single clearance figure that suits every bench and workflow. Mark the space you need to reach, water, inspect, and move trays, then check that those areas remain usable in the proposed layout.
What if my sowing or transplant dates change?
Treat calendar dates as estimates, not fixed clearance promises. Record when batches actually occupy and leave the bench, and recalculate the overlap if a sowing, transfer, or re-sow shifts into a busier week.
Good spring bench planning combines three things: the weeks each batch occupies a surface, the outside footprint of its trays, and the bench area you can actually reach. Find the week with the greatest overlap, test that tray arrangement against your usable dimensions, and include access and later-stage space. Keep a record of what happens during the season; those real dates and tray counts will make the next plan more accurate.
