
Self-Watering Containers in a Greenhouse: What to Check
Greenhouse watering
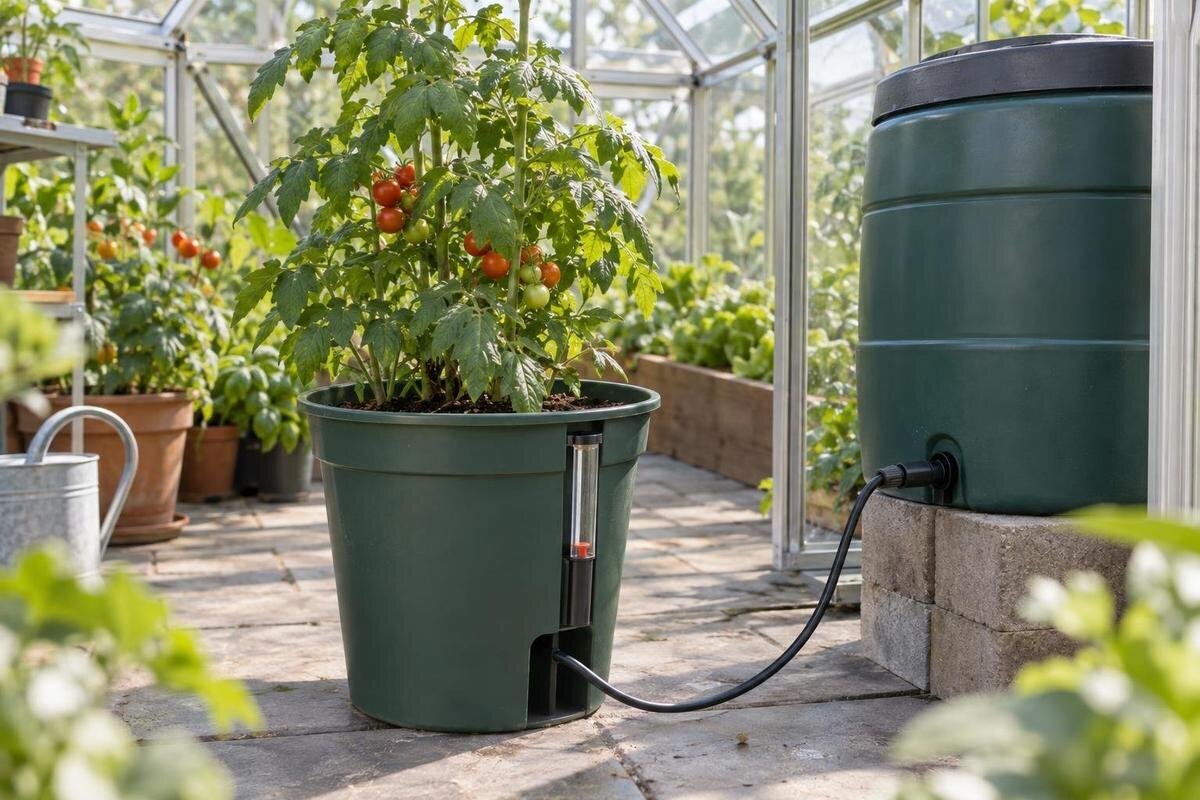
Self-watering containers can reduce repeated top-watering, but they do not remove the need to check moisture or manage runoff. In a greenhouse, heat can change water use, and overflow may pool on a paved floor rather than drain away. Before choosing a planter, trace how water enters and leaves it, keep the fill point reachable, and confirm that the crop can use moisture supplied from below. A small trial is more informative than assuming a large reservoir means longer, safer intervals between checks.

What to check before buying 1
How self-watering containers move water
Most self-watering containers hold a reservoir beneath or beside the growing medium. A wick, wicking column, or contact between a water tray and the mix draws moisture upward as the medium dries. In the intended setup, the bulk of the root zone is not meant to sit permanently under standing water; roots need both moisture and air in the growing mix. Designs differ: a fill tube may lead into the reservoir, a level indicator may show stored water, and an overflow port may limit the maximum level. Treat these as separate functions. A tube is not automatically an overflow, and a full reservoir does not prove that moisture has reached every root. Read the maker's diagram before filling.
Trace the full path from the fill opening to the reservoir, wicking surface, growing medium, and overflow. Check whether the instructions specify a particular potting mix, a wick assembly step, or an initial top watering to wet dry mix. Unsuitable mix may not make reliable contact with the wick; dense, constantly wet mix can leave too little air around roots. Do not block drainage openings to hold more water or add a liner that changes the design. If the product information does not show how excess water is controlled, ask the maker for instructions before placing the planter above a paved floor. Keep those instructions handy if the container later needs cleaning or troubleshooting.
Usable floor space and refill access
Begin with the interior measurements of the exact greenhouse, not its listed area alone. Mark doors and their swing, vents, benches, hose connections, drains, and the aisle used to carry supplies. The Large backyard greenhouse listing spans 506 to 753 sq ft, but a size range does not tell you how much clear floor remains after fixtures and access routes. Check the dimensions of the specific option, then draw containers at their outside measurements, including handles, fill caps, and any catch tray. A row that fits on paper can still be awkward if you cannot reach the refill opening without leaning over other plants or stepping into the aisle. Leave room to set down a watering can while filling.
Test the refill route with each pot in its intended position. Can you remove a cap, read an indicator, and add water without lifting a heavy planter or spilling onto foliage? A fill opening at the back of a deep row may force you to move containers repeatedly; an opening that faces the aisle is easier to inspect. If you use a hose, check that it reaches without crossing a doorway or making a trip hazard, and keep its shutoff easy to reach. Leave space to see the base and clean around it. Mark final positions before planting, because a wet, planted container is harder to move.
What to check before buying 2
Overflow on a paved greenhouse floor
On a slab or paved surface, overflow may pool, follow joints, or drain through gaps; do not assume it will disappear safely. Follow the outlet from every container and identify where water will land. Check whether the surface carries it toward a doorway, a low spot, shelving, or another pot. If the route is unclear, observe a small, controlled pour on an open part of the floor and dry it promptly. The Classic aluminum greenhouse listing ranges from 40.6 to 302.3 sq ft. When planning a container layout for a specific size, mark any drains and thresholds separately: the listed area does not describe the installed floor or its drainage. Keep outlets visible rather than tucked behind a wall or bench.
Allow for a blocked outlet, accidental overfill, spill, or hand watering, not just the normal fill cycle. A catch tray is useful only if it can hold the volume that may escape and is easy to inspect and empty; a shallow saucer can fill quickly and leave the pot standing in water. If runoff must be collected, put the receiving container where you can reach it without crossing the walking route. Empty collected water promptly rather than letting it sit. Mop up spills and inspect for persistent dampness or algae, which can make a smooth floor slippery. Do not direct water into the greenhouse frame or under stored materials. If you need to alter paving or drainage, ask a qualified professional rather than improvising.
Crop needs and root-zone moisture
Choose the reservoir method for the crop, not simply for the greenhouse. Some plants tolerate consistently available moisture; others need the medium to dry somewhat between waterings, so constant bottom moisture may not suit them. Seedlings and recent transplants may also have roots too shallow to reach a wick or moist lower layer. Follow both crop guidance and the container maker's start-up instructions; some setups call for top watering until roots establish. When planning containers for a lean-to greenhouse, group crops by watering needs and allow room to check each group separately. Label pots with the crop and planting date so that young transplants do not automatically receive the same care as established plants.
Check moisture where active roots are, not only at the surface or on a reservoir gauge. A dry-looking top can coexist with moist soil below, while a wet reservoir can sit beneath a root ball that remains dry if wick contact or the mix is poor. Use a finger or clean, narrow tool near the edge of the root zone, taking care not to damage roots, and compare more than one point when growth is uneven. Check at similar times between refills so you can compare conditions. If the lower layer stays soggy or the center dries out, review the mix and assembly instructions rather than repeatedly topping up the tank.

What to check before buying 3
Access as plants grow
As plants grow, their leaves and supports can occupy space beyond the container footprint. Check that the mature canopy will leave a clear route to doors, vents, windows, and equipment you operate. If you are considering the limited-edition aluminum greenhouse, use the exact configuration's layout to mark these access points before placing pots. Allow space to harvest, prune, and remove a plant without pushing foliage into a neighboring row. A container that is easy to reach when empty may become difficult to service once a tall plant is trained above it. Keep removable reservoir covers clear of stakes and ties so maintenance does not require dismantling the plant's support.
Think through how each mature plant and its container will be supported. Install stakes or other supports according to the planter's instructions, without puncturing the reservoir or obstructing its internal parts. Keep ties and trailing growth away from indicators and overflow openings. If you plan to grow on a bench or shelf, check its published capacity for the complete wet setup, including the container, growing medium, stored water, plant, and support. Do not judge capacity by how sturdy the bench looks. Seek qualified advice if the support is uncertain. Floor-level containers also need stable footing and enough clearance to inspect the base without dragging a mature plant across the paving.
Reservoir capacity and refill intervals
Treat reservoir capacity as a buffer, not as a watering schedule. Check whether the advertised capacity means usable water at the normal fill level or the compartment's total volume; those figures are not necessarily interchangeable. When laying out containers in a T-Model Greenhouse Orangery, compare each planter's footprint and usable reservoir capacity rather than choosing the largest tank alone. Neither greenhouse area nor tank volume predicts how many days a plant can go between refills. Demand depends on plant size, growth stage, leaf area, mix, light, temperature, and ventilation. After planting, note the fill level and date, then track consumption through brighter, warmer periods and cooler or cloudier ones. Repeat as plants grow.
Use those observations to set a check routine with a reasonable margin, especially before a trip or a stretch of busy days. If the reservoir is empty well before the next check, the plant may run short; if you keep refilling without checking the outlet and floor, a leak may go unnoticed. An indicator helps only if you know what its marks mean, so compare it with the actual reservoir level at first. Check several containers rather than assuming a row uses water uniformly: pot size, shade, and crop development can change demand. For time away, arrange a check or rely only on a setup you have tested under comparable conditions. Self-watering does not mean unattended or fail-safe.
What to check before buying 4
Fertilizer residue and reservoir cleaning
Bottom watering can leave dissolved minerals or fertilizer residues behind as water evaporates. Depending on the water, fertilizer, and container design, salts may build up near the surface or along the edges of the growing medium. A crust or change in wetting is a reason to inspect, not proof of one specific problem. Cleaning the reservoir alone will not remove salts already accumulated in the mix; consult the planter and crop guidance for an appropriate response. For a pyramid greenhouse layout, include a place to set down removable reservoir parts and a clear route for carrying out collected water. Add fertilizer through the reservoir only when both the planter instructions and fertilizer label permit it.
Clean the fill tube and reservoir on the schedule and by the method in the planter manual, removing loose debris without damaging a wick, seal, or level indicator. A covered reservoir can limit debris, but it still needs inspection; exposed standing water can collect plant fragments and attract insects. If you notice algae or an odor, empty and clean the parts as directed. Avoid improvising with bleach, acids, or other treatments that could damage the container or affect growing media. Inspect overflow openings as well: roots or deposits can obstruct a route that worked during the first test. Keep cleaning water out of neighboring reservoirs, and handle it so it does not leave a slick patch on the paved floor.
Testing one container before planting a row
Test one container before planting a full row. First, check the dry fit: place the planter and any catch tray on the intended surface, confirm stable footing, and try opening the fill cap and removing serviceable parts. Then assemble and fill it as directed, checking joints for leaks and observing where overflow goes. Include storage and supply access in this trial. If you are considering a greenhouse with built-in storage, use the exact layout to check the route from stored supplies to the planters. The presence of storage does not establish drainage, wet-area suitability, or a convenient refill location. Keep water collection separate from items that must stay dry.
Next, test with the actual growing medium, because a water-only check cannot show whether that mix wicks evenly. Wet and pack the mix as instructed, then check moisture at several points and depths before relying on the reservoir for a planted container. Confirm that the fill level remains within the maker's limit. Do not tilt the planter, seal an opening, or add a spacer unless the instructions permit it. During the first days after planting, inspect after refills and any top watering. If a saucer needs frequent emptying or a cap is awkward to reach, fix the layout before adding more containers. Repeat the trial for different planter designs or crop groups; success with one combination does not establish that another will behave the same way.

What to check before buying 5
Greenhouse heat and changing water use
Greenhouse conditions can change quickly: sunlight, shade, ventilation, season, and plant canopy all affect the area around a container. Warmer, brighter periods may increase plant water use, while a reservoir exposed to direct sun may warm the water and lower root zone. When planning container positions in a Prestige greenhouse, identify sunny and shaded areas in the actual installation rather than assuming conditions will be uniform. Observe temperature and exposure at planter height before changing refill expectations. A reading near the door or an outdoor forecast may not represent conditions within a crowded planting row. Follow any planter guidance about reservoir exposure, and leave access for checking pots in both sunny and shaded positions.
Condensation, roof drips, leaks, or water from hand watering can add moisture from above, so reservoir level alone does not describe every source reaching the roots. Ventilation and airflow also affect how quickly leaves and exposed mix dry, while crowded foliage can hide a spill. Recheck containers after a major change in shade, ventilation, or plant size, and adjust one factor at a time so you can tell whether the mix responds. Do not assume roof runoff is directed into a planter's reservoir; check the actual water path. In a greenhouse with distinct sunny and shaded areas, record each pot's position alongside fill dates to distinguish a location effect from a clogged wick or a different crop's demand.
A routine for checking each container
Make a short routine for every container: check the reservoir level, confirm the overflow opening is clear, feel the medium at root depth, inspect for leaks, and look at the paving around the base. Recheck whether fill caps remain reachable as plants spread, and confirm nothing has shifted against a door or drain. A simple log of refill dates, unusual spills, and crop changes can reveal which pot behaves differently without guesswork. Follow the maker's cleaning and storage instructions, and replace a wick, plug, or seal only with a part specified for that design. Avoid improvised repairs that change how water enters or leaves.
When a plant wilts or a reservoir stays full much longer than expected, check the indicator against the actual level, inspect the mix at root depth, and look for a blocked wick or overflow. A full tank does not prove that roots can reach the water, and a dry surface alone does not establish that the whole root zone is dry. Compare a neighboring pot with the same crop and similar exposure, then change one likely factor, such as water contact, fill level, or placement, before changing several things at once. If a fitting leaks or safe operation is unclear, stop using that container until you identify an approved repair or replacement; do not seal the outlet or block drainage.
Frequently asked questions
Can I set a self-watering container directly on greenhouse paving?
Often, provided the planter sits stably and you have a plan for overflow. A slab may hold puddles, while pavers may drain through joints or channel water elsewhere; neither guarantees a dry walkway. Check low spots and keep doors and walking routes clear. Use a catch tray only if it can hold likely runoff and is easy to inspect and empty. Follow any instructions about the container's base or stand.
How can I tell whether the overflow is working?
Check the manual to identify the overflow opening; the fill tube or water-level indicator may have a different purpose. During the initial test, add water slowly to the specified level and watch where excess water leaves the container. Confirm that the outlet is clear and that runoff reaches the planned collection point or floor area. Repeat after moving the planter.
Are self-watering containers suitable for seedlings?
Not automatically. Small or newly transplanted plants may not have roots that reach a lower wick or reservoir-fed zone, and some crops need the growing medium to dry between waterings. Check the crop's needs and the planter instructions, then monitor moisture at root depth during a trial. Top-water during establishment only if the instructions or your growing plan call for it.
How often should I refill the reservoir?
Use observed water use, not a universal calendar. Fill to the maker's stated level, note the date, and check how quickly several planters use water in your actual greenhouse conditions. Repeat as plants grow or weather and ventilation change. An indicator can help, but verify what it shows and keep checking the growing medium.
Can I put fertilizer in the reservoir?
Only if the planter instructions and fertilizer label both allow it. Follow their directions for the product, concentration, and application method; do not use a stronger mixture to compensate for weak growth. Residue can accumulate in both the reservoir and growing medium. Inspect both, and follow the appropriate cleaning or growing-medium maintenance guidance rather than assuming that washing the tank will resolve every buildup.
When each container can be refilled without shifting a row, its root-zone moisture can be checked, and overflow has a known destination, the setup is manageable. Start with a small group, observe how it behaves through the conditions your greenhouse actually experiences, and expand only if the checks and cleanup fit your routine.
