
Separate Watering Zones for Pots and Greenhouse Beds
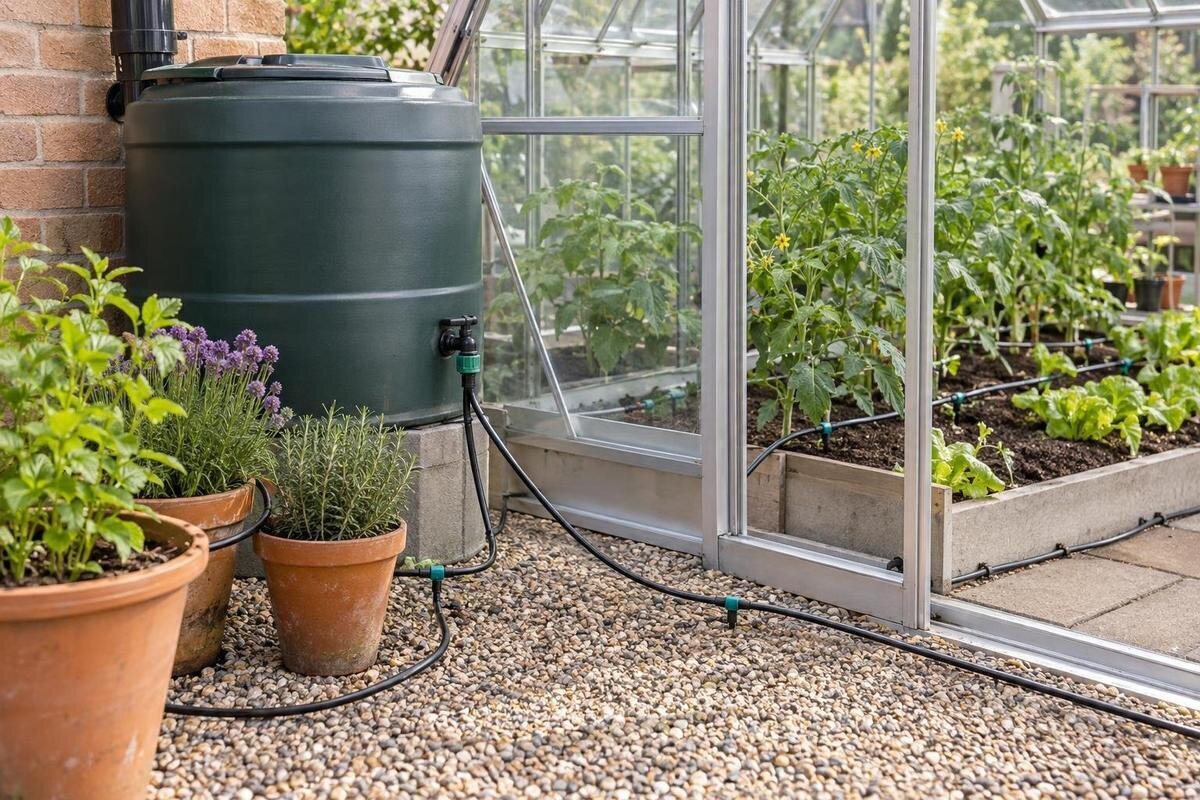
Greenhouse irrigation
Greenhouse pots and beds can look similar at the surface while their root zones dry at different speeds. A small container holds limited growing medium; a deep bed may buffer moisture, while a shallow or exposed bed may not. One timer can force a compromise between them. Separate watering zones let containers and beds follow independently adjusted schedules, based on observed moisture and actual water delivery rather than one setting for the whole greenhouse.

Why pots and beds often need different schedules
Containers and beds differ in the amount of growing medium around the roots. A pot has limited volume and exposed sides, so its root zone may heat and dry faster, especially when the container is small, the mix drains quickly, or air moves around it. A deep bed can buffer short changes, but that is not guaranteed: a shallow bed, coarse soil, dense roots, or a warm edge can dry quickly too. Even two pots may behave differently if their sizes, crops, or exposure differ. These are tendencies, not rules; the word “pot” or “bed” alone does not tell you how often to water.
When unlike groups dry at different rates, one greenhouse watering schedule forces a compromise: frequent watering for exposed pots may keep a slower-drying bed wet, while a schedule suited to the bed may leave containers short. As an early scale reference, the Pyramid-type greenhouse collection is listed in sizes from 60 to 203 sq ft. Within the chosen footprint, distinguish the space occupied by crops from the walkways and working areas. Observe each planted group through ordinary watering cycles before deciding that they can share one setting. Two groups that need different amounts of water may still share an interval, but groups that need water on different days require independent timing.
Group plants by root-zone needs
Before laying out lines, inventory each bed and container group: crop, growing medium, pot size or bed depth, sun exposure, airflow, and the locations that dry first. Combine plants only when their root-zone needs can fit a shared interval without one group staying wet while another needs water. Different crops can share a zone if their conditions and target moisture are similar; the same crop may need separate timing in a small pot and a deeper bed. Also note newly transplanted and established plants, since root spread changes over time. Aim for a few coherent groups, not a control for every plant.
Sketch planted areas and fixed features—walkways, benches, shelves and storage—and mark which containers sit in more exposed positions. When considering the Limited Edition greenhouse with built-in storage, locate the storage area on the selected model’s plan before assigning growing space. Keep access to stored tools clear, and avoid routing a movable pot line through a doorway or across a frequently used path. On the sketch, give each proposed group a descriptive name and note why it needs a separate schedule: smaller containers, a different medium, or a consistently faster-drying position. These notes make it easier to decide whether a new plant belongs in an existing group. If the inventory creates many small groups, identify which can genuinely share a schedule and which would be simpler to water separately by hand.
Map the routes before choosing controls
On a simple plan, mark the water source, planned control points, each pot bench or bed row, and the route to the last outlet. Note doors, walkways, and spots where tubing could be pinched or obstruct access. Keep pot and bed branches identifiable from the start, even if they share an upstream supply; written labels are enough. Record where each junction can be reached for inspection without moving crops. If the greenhouse has not been set up yet, confirm the route against the final interior plan before selecting tubing lengths or controller locations.
Use the selected greenhouse’s interior dimensions to turn that sketch into a measured route. When comparing versions of the Prestige Greenhouse, account for the bed lengths and bench positions you intend to use rather than treating the listed floor area as planted space. Measure from the proposed control point to each branch and its last outlet, including turns around fixed features. Also note changes in height, such as a line rising to a bench, for comparison with the irrigation equipment’s requirements. Leave control points and connections accessible for inspection. A route that looks short on a floor plan may be harder to service if its junctions sit behind a full bed or beneath an immovable bench. Mark representative near and far outlets for later testing.
Choose controls that can run zones independently
An independent zone is one whose watering interval and runtime can be changed without changing the other group’s program. It does not necessarily need a separate water source; some systems control several branches from one supply. Splitting a line after a single-output timer does not create separate schedules if both branches still open together. Check the controller and valve documentation for independently programmable watering days, start times and durations. A controller with multiple outlets may offer fewer scheduling options than you expect, so check its actual functions rather than counting connections. Also confirm whether zones operate sequentially or can overlap. Sequential operation can keep their watering windows separate, but the equipment still has to meet each active zone’s pressure and flow requirements.
Choose the number of zones by the number of genuinely different watering patterns, not by greenhouse size. The Large backyard greenhouse listing covers versions from 506 to 753 sq ft. A planting plan at that scale may include several beds and benches, but each physical area does not automatically need its own program. Several beds with similar moisture needs could share one schedule, while a small propagation bench might need separate control. Before buying, write down the required functions for each group and check whether the controller can provide them. Include the ability to disable one zone while leaving another active, especially if beds are seasonally empty. Confirm compatibility among the controller, valves and supply; if the instructions leave that uncertain, ask a qualified irrigation professional to review the proposed arrangement.

Put water where roots can use it
Place outlets so water reaches growing medium around active roots. For a container, keep the outlet over the potting mix rather than beyond the rim or on the walkway; a large container may need a different distribution pattern from a small one. Do not assume one outlet per pot, or a fixed runtime, without checking emitter specifications and how the medium wets through. After watering, check for runoff or pooling and look for dry pockets. In a bed, align delivery with the planted row or root area and consider plant spacing. A line passing the bed edge should not automatically water unused soil or paths.
Draw each run and mark its outlets on the plan for your chosen Classic aluminum greenhouse. Distinguish fixed bed lines from branches serving containers that may move during the season. For the pot group, identify how each outlet will stay in position during routine handling, using supports or fittings specified for the irrigation components. Keep connections accessible rather than hidden beneath containers. For the bed group, mark the planted rows and the points where you will check moisture after watering; outlet spacing alone does not prove that the whole root area is wetted. If a pot is removed, do not leave its outlet discharging onto the floor. Follow the component instructions for closing or removing that outlet, and update the map.
Test the actual output from each zone
Test each zone separately with its normal water source and the full intended line in place before relying on timer settings. Follow the equipment maker’s setup guidance. Run the system for the same measured period and collect water at representative near and far outlets; compare the volumes with the emitter’s stated output under the specified operating conditions. This shows whether actual delivery differs along the run. A suitable pressure or flow check can add useful evidence, but use only a method and gauge appropriate for the equipment, or have a qualified irrigation professional take the readings.
Include the actual branch layout in your test record, whether you are planning a Lean-To Greenhouse or another greenhouse form. Record the test duration, collected volume and outlet location so later results are comparable. If the equipment specifies output as a rate, compare your collection over a matching time period rather than comparing a collected volume directly with that rate. Test under the conditions you intend to use: a zone tested alone has not demonstrated its performance while another zone runs simultaneously. If outlets deliver less than expected, investigate using manufacturer guidance before lengthening watering time. Extra time may overwater plants at stronger outlets without correcting uneven delivery. Keep the initial results as a baseline, and retest affected branches after changing a route, connection or emitter.
Set schedules from moisture checks
Set a starting schedule by checking moisture in the root zone at several representative points, not just by looking at the surface. A dry top layer can sit above moist medium, and a damp surface can hide a drier lower root area. Check pots of different sizes and more than one place along each bed, including a known warm or exposed spot. Use crop-appropriate guidance for the moisture level to maintain; there is no universal greenhouse runtime for every crop, medium and container. A meter or probe is useful only when it is suited to that growing medium and used consistently.
After a normal irrigation, observe how each group changes before its next scheduled watering. Note the day and time, root-zone condition, runtime, and unusual heat, sunlight or ventilation. Distinguish the amount delivered in one event from the time between events. If the intended root area wets adequately but dries too soon, the interval may need attention. If it remains dry immediately after watering, first check outlet placement and delivery; a shorter interval will not necessarily correct poor distribution. If it stays wet longer than intended, review the amount delivered and the interval before choosing which setting to change. Adjust one zone and preferably one setting at a time so you can interpret the result. A representative pot can also be lifted before and after watering to learn its relative weight, provided it can be handled safely; use that comparison alongside root-zone checks, not as a universal threshold.
Revisit schedules when conditions change
Greenhouse conditions shift over a season. Longer, brighter days, changed ventilation or shading, new shelving, and a move from small to larger pots can alter how quickly roots use available moisture. Crop growth and harvest can also change which areas are planted and how much root space they occupy. A basic timer repeats settings; it does not sense these changes. Recheck each zone after a major change and during periods when the greenhouse warms or cools noticeably. Check moisture and delivery before changing a program, so you can distinguish higher demand from a line or emitter problem.
Revisit the layout as well as the clock whenever beds or benches move. If you are planning a Limited Edition aluminum greenhouse, keep the irrigation sketch with the interior planting plan so later rearrangements are easy to track. A container moved from a shaded bench to a brighter position may no longer belong in its original watering group, even though its pot and crop are unchanged. During crop turnover, distinguish an empty bed from a newly planted one: they should not automatically inherit the mature crop’s program. Disable unused zones where the controls allow it, and follow component instructions for unused outlets. If a new planting cannot share the existing interval, give it independent timing or clearly identify it for separate watering until a suitable group is available.

Troubleshoot each zone on its own
Read symptoms by zone. If pots are dry while the bed is still moist, first confirm that both schedules are active and that water reaches the pot line; do not increase the bed’s runtime to correct a problem elsewhere. If a bed is wet but plants look stressed, check moisture at root depth and confirm outlets reach the planted row before assuming plants need more water. Plant appearance can have several causes, so assess it alongside medium moisture and actual water output. Also check whether the controller shows the intended program for each group.
Then distinguish timing from delivery. If every pot is evenly dry, its interval may be too long; if one pot alone is dry, inspect its outlet position and output. If only the far end of a line is dry, compare measured delivery with the initial test rather than changing every schedule. Check for a shifted emitter or loose connection before lengthening watering time. Make one adjustment or correct one visible problem at a time, then recheck under similar conditions. This keeps a fix for one spot from leaving another group unnecessarily wet.
Keep the watering plan easy to maintain
Keep a simple map that names each zone by what it serves, such as “pots—sunny bench” and “bed—east row,” rather than by a number alone. For a layout in the T-Model Greenhouse Orangery, label each planted area clearly enough that someone can match it to the correct control without guessing. Record the controller’s zone number beside the descriptive name, then note its watering days, start time and duration. Add the date and reason for each significant change. This prevents an old adjustment for a hot spell from becoming an unexplained permanent setting. Keep emitter details and the initial output measurements with the map, too. When replacing a component, those records help you check its specifications rather than choosing solely by appearance or assuming every outlet in the system is identical.
During routine checks, look for a shifted outlet, kinked line, loose connection, visible leak or blocked emitter, and confirm the controller still shows the intended program. Follow component instructions for cleaning and maintenance; do not use an unapproved treatment or alter pressure to compensate for a problem. If one branch needs service, use its separate control to pause watering where possible while keeping the other group’s schedule intact. After the repair, check that branch’s delivery before returning it to normal operation. Keep the revised settings and layout together so the record describes the system you are actually using.
Frequently asked questions
Can pots and greenhouse beds share one watering timer?
They can if checks show that both groups can use the same schedule without one staying too wet or drying out. If pots and beds need different intervals or runtimes, give them separate controls. Simply splitting a line after a single-output timer does not provide independent scheduling if both branches still turn on together.
How many watering zones does a greenhouse need?
There is no fixed number based on greenhouse size or plant count. Create a separate zone for each group with a meaningfully different watering pattern, then combine groups whose root-zone needs are similar. Check that the timer or controller can operate that many schedules independently.
Should pots always be watered more often than beds?
No. Small, exposed containers often dry sooner, but pot size, growing medium, crop and location all matter. Shallow or fast-drying beds may need attention sooner than larger containers. Check moisture in the root zone of both groups instead of assuming that pots always need more frequent watering.
How can I check whether each zone delivers water evenly?
Run each zone separately for the same measured period and collect water from representative outlets, including points near the start and end of a line. Compare the results with the emitter specifications under their stated operating conditions. If pressure or flow is uncertain, use an appropriate measurement method or ask an irrigation professional to check it.
Can one water source supply both watering zones?
Often, separate controls can operate branches supplied from one source, but compatibility depends on the controller, valves and water supply. Check the equipment requirements for operating pressure and flow, and verify that each zone can be controlled independently. If the instructions do not confirm that your setup will work, ask a qualified irrigation professional.
A useful greenhouse watering plan does not make every pot and bed follow the same clock. It gives groups with different drying patterns independent controls, checks that water reaches their root zones as intended, and revisits settings when plants or conditions change. With clear labels and a simple record, an adjustment for the containers can stay limited to the containers, while the beds keep the schedule that suits them.
