
Do Soil-Moisture Sensors Improve Greenhouse Watering?
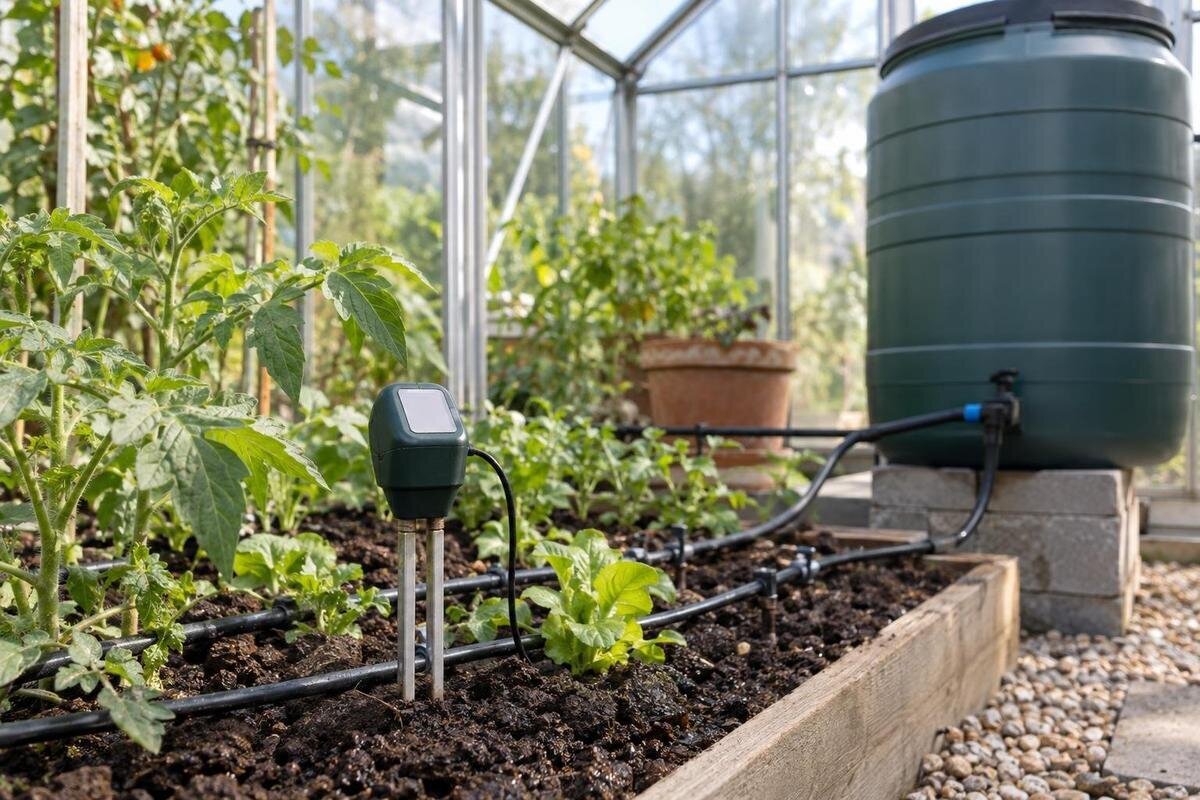
Greenhouse watering
Greenhouse watering can look regular on a calendar while pots and beds dry at different rates. A soil-moisture sensor offers a local reading that can expose that difference, but it is not a verdict on every plant. The result depends on probe type, growing medium, contact, and location. Before letting a controller act on it, calibrate the sensor in the setup you actually use and compare its readings with a simple manual check.

01
What a soil-moisture sensor actually measures
A soil-moisture sensor samples conditions in a small volume around its sensing element; it does not measure an entire bed, pot, or greenhouse. Depending on the device, its display may show a relative scale, a percentage, an electrical signal, or a tension value. Those figures are not automatically interchangeable between brands or probe types. Read the manufacturer’s description so you know what the units represent and whether a higher number means wetter or drier. A trend from the same probe, in the same medium and position, is usually more useful than comparing its number with a reading taken elsewhere. Treat one reading as a local observation, not a greenhouse-wide average.
Moisture is only one part of plant conditions. A probe cannot tell you on its own whether roots are healthy, whether the mix drains well, or whether plants need nutrients. Readings can shift with poor contact, air gaps, compaction, substrate texture, and, depending on sensor design, salts or temperature. A probe beside a drip emitter may register a quick rise while nearby roots remain drier. Use the display as evidence about that particular spot, then look at the crop, growing medium, and delivery pattern before deciding what it means. A precise-looking number can still mislead if the sensing point is unrepresentative or the output is not understood.
How many sensors does each watering zone need?
Before deciding how many probes to buy, draw the watering plan. Mark beds, benches, containers, crop groups, growing media, and which plants share a valve or watering schedule. Areas watered together but drying at different rates are difficult to manage from one reading: the sensor may satisfy one group while leaving another too wet or too dry. Differences can come from unlike pot sizes, growing mixes, light, or water delivery. A useful zone is a group for which one irrigation decision makes sense. If the controller cannot water two areas separately, a second probe alone cannot correct the mismatch; keep one area under manual observation or plan a separate control arrangement.
Do not count sensors from greenhouse floor area alone. Identify groups of plants that can reasonably share one watering decision, then choose representative monitoring points within them. When comparing sizes in the Classic greenhouse range, listed from 40.6 to 302.3 sq ft, sketch the proposed beds and benches rather than estimating sensor count from square footage. Mark which groups share a valve and where you could reach a probe for inspection. A larger planting area does not necessarily need more sensors if its conditions are consistent; a small area with several growing systems may need separate monitoring. Focus first on zones where timing is hard to judge.
02
Match the sensor to your growing medium
Check the probe’s stated use before buying it. Devices may use different sensing principles and report volumetric water content, relative moisture, or tension; that output has meaning only within the maker’s method and intended material. A sensor designed for mineral garden soil may not give dependable readings in a light potting mix, a coarse bark blend, a peat-based substrate, or another soilless medium unless the manufacturer says it is suitable. For hydroponic systems, a soil probe is not automatically appropriate. Confirm the operating range, insertion method, and any medium-specific setup instructions rather than assuming that a product called a soil sensor fits every greenhouse.
Even compatible sensors need to be checked in your own mix. Two potting mixes with different proportions of bark, coir, peat, perlite, or compost can hold and distribute water differently, and settling changes contact around the probe. Use the same model and installation method within a zone if you want readings to be comparable; do not assume that two devices’ raw numbers match. When planning the interior of a Lean-To Greenhouse, list the growing media you intend to use in beds and containers before selecting probes. Keep that inventory with the watering plan so each sensor is assigned to an appropriate material. Changing the mix means checking its response again, even if the plants and greenhouse stay the same.
Place probes in representative root zones
Place the probe where the crop’s active roots are drawing water, at a depth representative of that plant and container or bed. A surface reading can be misleading because the top may dry first; a probe too deep can stay wet after the upper root zone needs attention. Root depth varies with crop and growing setup, so follow the sensor instructions and select a depth that matches the area you intend to manage. If a sensor cannot be inserted at that depth without damaging roots, use a representative container or an appropriate probe arrangement rather than forcing it into a planted root ball.
Choose a typical location, not the wettest point immediately under an emitter or the driest edge beside a wall, door, or exposed container. Those spots can still be monitored as known problem areas, but they should not stand in for the whole zone without comparison. In a pot, keep the sensing element within the growing medium, away from the sidewall, drainage layer, and stem; follow the maker’s directions for contact and insertion. If you are planning beds for a limited-edition aluminum greenhouse, include accessible monitoring positions in the layout. Leave room to inspect the probe without stepping into a bed or moving neighboring plants, and record its depth and distance from the emitter.

03
Calibrate with the medium and watering method you use
Calibration establishes a relationship between a sensor’s output and a reference measurement or condition. Follow the manufacturer’s procedure: some sensors support medium-specific calibration, while others use factory settings that you should not alter. Recording wet and dry observations can help you interpret either type, but it does not necessarily calibrate the device or validate a displayed percentage. Use the actual potting mix or soil, probe depth, and installation method you plan to keep. If you move the probe or change the substrate, recheck that relationship. Never assume that a display reading of zero, 50, or 100 has the same meaning across devices.
Establish useful reference points without deliberately pushing a crop into distress. Note the reading after normal irrigation and drainage, then observe how it changes as the representative area dries. Pair those values with a manual check at probe depth and the condition at which you ordinarily plan to water; do not wait for wilt as a calibration target. If the controller allows a delay or separate start and stop thresholds, test those settings according to its instructions while you can observe the zone. For a layout planned around the T-Model Greenhouse Orangery, keep a separate reference record for each independently watered growing area. Record the probe location, medium, watering method, and observed response so settings remain traceable when the planting plan changes.
Verify readings with a manual moisture check
A manual check helps you judge whether the sensor’s local signal agrees with the medium. Feel a small sample near the sensing element at the same depth, where you can reach it without injuring roots or disturbing probe contact. An unplanted pot can help demonstrate how a mix responds, but it will not necessarily dry like a planted pot because it lacks root water uptake. For containers, lifting the same planted pot at repeat intervals provides another comparison, especially when the mix is hard to inspect. Judge its weight consistently rather than relying on one impression. The surface alone is a poor reference: it may be dry above moist mix or damp after watering that never reached deeper roots.
Write down the sensor reading, manual observation, location, and time relative to watering. Compare them at similar points in the watering and drying cycle, and repeat the check instead of changing a setting after one odd reading. If the results disagree, confirm that the probe has good contact and that your sample came from a comparable depth and position relative to the emitter. When laying out containers in a Pyramid-type greenhouse, give each monitored group a clear name or number and use it on the probe and in your notes. Include pot size and growing mix in the record; similar-looking plants are not necessarily a valid comparison if their containers or media differ.
04
Set controller rules only after the readings make sense
A controller makes a sensor useful only if the measured zone matches the water it can control. Before enabling automatic watering, confirm that the sensor, controller, valve, and delivery equipment are designed to work together according to their manufacturers. A probe on one bench should not trigger water for a separate bed with different needs. If one zone contains mixed containers, a reading from the driest pot may overwater the rest, while a wet location may keep a thirsty section off. Split control when practical; otherwise keep the arrangement manual or use the sensor as an alert.
Begin with observable operation rather than leaving new automation unattended. Confirm that the intended zone receives water, check delivery at representative emitters, and watch how long moisture takes to reach the sensing point. Repeated short cycles, no response, or a wet reading beside dry containers may indicate a settings, placement, or delivery problem. Use the operating limits and fault procedures described by the manufacturer, including its guidance for a lost sensor signal. If you are considering the aluminum greenhouse with built-in storage, budget for irrigation equipment separately: the supplied listing does not establish sensor or controller compatibility. Before buying those components, verify their exact model requirements and decide how you will water manually if automatic control becomes unavailable.
Account for greenhouse microclimates and changing conditions
Even inside one greenhouse, light, temperature, ventilation, and air movement can create different drying patterns. A bed near a sunlit glazing area may not behave like a shaded bench, and containers can dry at different rates because of their size, crop, position, or airflow. Avoid treating left-to-right or front-to-back as a guaranteed moisture gradient; observe where the actual mix changes. A probe placed in a mild, central location may offer a neat reading while missing a consistently drier or wetter part of the growing area.
Compare representative locations manually before deciding that one probe can represent a whole zone. If moisture differences persist through watering and drying, determine whether the plants need separate irrigation groups or whether the monitoring point poorly represents the existing group. While planning an interior for the Prestige greenhouse range, mark likely shaded and sun-exposed planting positions on the layout, then verify their behavior once the greenhouse is in use. A drawing can identify places to investigate, but it cannot predict their drying rates. Repeat those comparisons after rearranging benches, changing crops, adding shade, or altering ventilation. Keep observations tied to the actual growing positions rather than assuming that the same part of the greenhouse is always driest.

05
Keep sensors reliable and investigate mismatches
Read the sensor’s maintenance instructions and keep the probe, housing, connectors, and cable in the conditions the manufacturer permits. Clean it only by the specified method; a probe that must stay dry above its sensing element should not be immersed, and not every model is designed for outdoor exposure, constant wetness, or a particular cleaning agent. Handle it by its intended grip rather than pulling the cable, and avoid scraping or bending the sensing part. Recheck placement after moving a pot, tilling a bed, replacing medium, or disturbing a cable.
If a reading suddenly jumps, stays unchanged, or conflicts with a check at the same depth, investigate before resetting the watering threshold. Inspect probe contact, position, visible damage, power status if applicable, and any recent change to the medium. Then repeat the comparison. If the medium is wet while a plant looks stressed, do not automatically add water; moisture readings alone cannot identify the cause of plant stress. For a larger layout, such as one planned around the large backyard greenhouse, keep a simple sensor register with each device’s zone, depth, installation date, and maintenance history. This helps distinguish a recurring fault in one device from a change affecting several growing areas and makes a replacement easier to install consistently.
Decide whether automation adds enough value
These sensors earn their place when routine watering is hard to judge by appearance alone, when several similar containers need consistent timing, or when you want a record of how quickly a particular mix dries. They can reveal that a calendar interval is too short or too long, prompt you to inspect a zone, and make repeated observations easier to compare. They are most useful when the same sensor stays in a well-defined zone and a person verifies the result. A sensor may improve decisions; it does not guarantee lower water use, bigger harvests, or healthier plants.
For a few pots with visibly different needs, a manual check or pot-weight comparison may be quicker than installing, calibrating, and maintaining equipment. A sensor adds little if its reading cannot represent the plants being watered, if its medium is outside the specified range, or if no one checks whether water reaches the roots. Choose automation only when you can define its zone, validate the readings, and respond to faults. The practical test is whether it helps you make a better repeatable decision than your existing checks—not whether the display looks precise.
Frequently asked questions
Will a soil-moisture sensor work in potting mix?
Only if the sensor is intended for that kind of mix or its manufacturer provides suitable setup guidance. Potting mixes differ in texture and water distribution, so compare the reading with a manual check in the same mix and at the same depth before relying on it.
Should a greenhouse have one sensor or several?
Let the watering zones guide the decision. A sensor may represent one consistent bed or group of containers, but it may not represent plants that receive water together yet dry at different rates. Separate their control where practical; otherwise check the less-representative area manually.
Can a sensor trigger an irrigation controller?
Yes, if the sensor and controller are designed to work together and the reading represents the plants served by the controlled zone. Calibrate and observe the setup first, confirm that water reaches the intended area, and keep a manual fallback for unexpected readings or faults.
How can I tell whether a reading is useful?
Compare it with the medium at the probe’s depth in the same bed or a representative container. Record the location and reading, then repeat the comparison through more than one watering and drying cycle. A consistent relationship is more useful than one number that looks precise.
How often should I recalibrate a sensor?
Follow the device instructions; there is no single interval that suits every sensor and growing medium. Recheck the setup when you change the mix, move the probe, alter its depth, or see repeated disagreement with manual checks. Routine comparisons also help reveal when a reading has drifted.
A soil-moisture sensor can improve greenhouse watering when it represents the right root zone, is calibrated for the growing medium, and agrees with practical checks. Keep distinct watering zones separate when their needs differ, and revisit placement and calibration after changes to the crop or setup. Used this way, a sensor supports your judgment; it does not replace it.
