
Using a Greenhouse to Start Plants for Outdoor Raised Beds
Greenhouse propagation guide
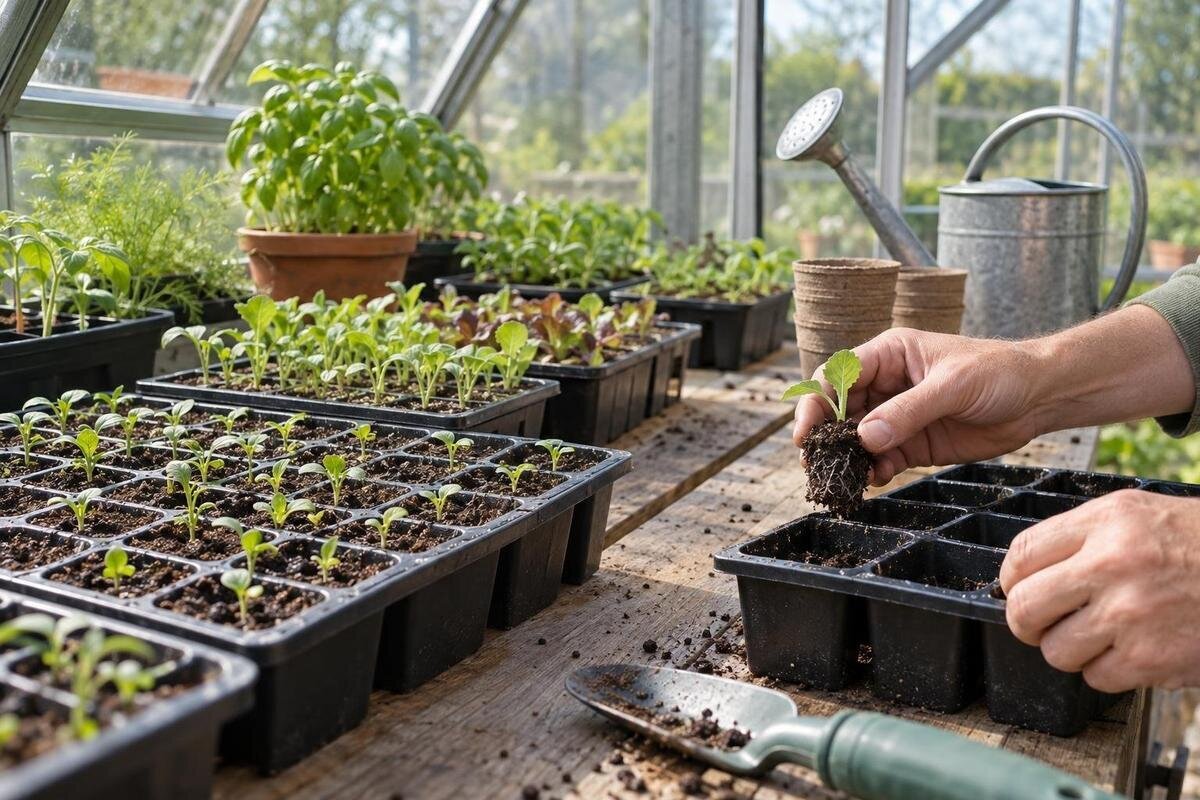
Starting seedlings in a greenhouse only helps if their move into outdoor raised beds is planned from the start. Treat the greenhouse as a temporary nursery: the bed plan determines how many plants you need, local conditions determine when they can go outside, and bench space limits how many you can raise at once. Coordinating sowing, growing on, hardening off, and transplanting reduces crowded trays and surplus seedlings without treating the greenhouse as a permanent growing site.

01
Use the greenhouse as a temporary nursery
Use the greenhouse for sowing, emergence, and early growth until seedlings are ready for an outdoor bed. Plan for trays and growing plants to occupy the space temporarily, then release it for later batches or other uses. Set the intended number of plants per bed before buying seed or filling trays; greenhouse capacity alone is not a reason to start more. Count crops that will remain in the greenhouse through harvest separately, since their long-term container, support, and maintenance needs differ from those of a nursery batch.
Raised beds still depend on outdoor light, weather, soil condition, and the crop's cold tolerance. An unheated greenhouse does not guarantee frost-free conditions or make every seedling ready early. Beds can differ in sun, wind, and drainage, so one planting date may not suit them all. Use local crop guidance and check outdoor soil conditions rather than relying on greenhouse air readings. Group trays by destination and planting window so you can move one batch outside while another stays protected.
Begin with the raised-bed planting plan
Draw each bed and list the crop, variety, spacing, and intended number of plants. Mark succession plantings separately: a bed may hold an early crop followed by a warm-season one, or repeated sowings of a fast crop. This gives each batch a target count and prevents starting a full packet for a few available spaces. Include any areas you intentionally leave open. Note when earlier crops are expected to finish, since their space may not be available on your preferred transplant date. Keep the map with your sowing records so labels, quantities, and destinations stay connected.
Translate the bed map into a preliminary greenhouse layout before comparing structures. The Pyramid-type greenhouse listing covers models from 60 to 203 sq ft. Use the selected model's dimensions to sketch where you would sow, tend trays, and carry plants through the door; total floor area does not reveal whether those tasks will be convenient. Include the benches you intend to use rather than assuming they are supplied. Check access to the back of each bench and leave a place to set down a tray while opening or closing the door. Outside, consider the route to the raised beds: gates, steps, and narrow paths can make moving a full tray awkward. A workable nursery layout should connect with the garden, not just fit inside the greenhouse.
02
Count back from the outdoor transplant window
Choose an outdoor transplant window for each crop using local growing guidance and the seed packet, not a date copied from another climate. Average last-frost dates help organize a plan but do not guarantee suitable weather or soil conditions. Check the crop's requirements and each bed's readiness; sunny and shaded beds may become suitable at different times. Plan around the recommended transplant stage and allow for weather delays. A target window is more useful than a fixed day because a delay may affect some crops without changing the schedule for all of them.
Count backward from that window: allow for seed emergence, any potting-up period, and the crop's hardening-off interval. Seed packets often provide indoor-sowing and transplanting clues, while local extension guidance can refine them for your area. Stagger batches when their outdoor dates or growth rates differ; sowing everything on one weekend can create a bench-space peak and seedlings that are ready before their beds. Assign each batch an expected departure window so you can see when space should become available for another sowing. When reviewing the aluminum greenhouse with built-in storage, check the selected configuration's storage arrangement and how it would separate supplies from active trays. Keeping unused containers and equipment out of the growing area makes overlapping batches easier to manage. Record actual emergence dates too, since real conditions can differ from ideal growing notes.
Choose crops and sow only what the beds can use
Prioritize crops that tolerate transplanting and benefit from a head start in your climate. Tomatoes, peppers, and many brassicas are commonly raised as transplants for outdoor beds, but their sowing dates and preferred transplant stages are not interchangeable. Read instructions for the variety you have, since days to maturity, regional recommendations, and temperature needs can differ. Some crops are usually more straightforward to sow directly where they will grow; carrots are a familiar example because moving a young root can distort it. A greenhouse nursery should support the bed plan, not turn every crop into a transplant project. Give scarce bench space to plants that actually gain time from a head start in your growing conditions.
Plan sowing quantities around the number of bed positions, with a modest allowance for failed germination or unusable seedlings. Identify which extras are replacements rather than filling every cell by default. For repeated plantings, divide the total into separate batches instead of raising the season's supply at once. If you are comparing the Prestige greenhouse, use this batch list to identify your nursery space requirements. Label every tray with the crop, variety, intended bed, and sowing date, especially when batches of the same crop are at different stages. Keep replacement plants clearly identified so they do not become unplanned additions to a full bed.

03
Calculate peak bench space, not just greenhouse area
Work out how much bench area seedlings need when they are largest in the greenhouse, not just on sowing day. Count each tray or pot footprint, leave enough separation for handling and watering, and include a surface for filling containers if that work will happen inside. Seedlings may be pricked out or moved into larger pots, so a small tray count can become a larger collection of individual containers. Keep a route clear to reach every batch; shelves and benches do not add useful capacity if trays become inaccessible or block routine care. You can mark tray and pot sizes on a scale sketch before choosing benches, then check that you can reach and tend the plants without shifting other batches.
Compare the peak layout with the exact drawing for each greenhouse size under consideration. The large backyard greenhouse page lists model areas from 506 to 753 sq ft. A nursery supplying a few raised beds may not need that scale, while a larger planting program may require several overlapping batches. Check usable bench lengths, aisles, and space to set trays aside during cleaning. If the greenhouse will also hold crops through harvest, include their containers and supports in the drawing. Their longer stay may overlap with later sowings, reducing the space available for new seedlings.
Separate germination from later seedling growth
Think of each batch moving through stages instead of expecting one spot to serve every purpose. Some seeds need particular warmth or light conditions to germinate; after emergence, seedlings need adequate light and room to develop. Follow crop or seed-supplier guidance for germination rather than applying one setting to every tray. Label where each batch is in the process and move it when its needs change. Keeping newly sown cells separate from larger plants also makes it easier to find them, water them appropriately, and avoid letting foliage from one crowded tray shade another. If you move a tray, keep its label or batch record with it so you do not lose track of its variety or sowing date.
Potting up should follow the crop's development and expected time in the nursery, not a fixed date for every tray. Check crop guidance, root development, and how quickly the growing mix dries before deciding whether a larger container is needed. If a batch will leave for its bed soon, avoid an unnecessary move; if planting is delayed, reassess whether the current container can support continued growth. When considering the aluminum Classic greenhouse, check whether your intended layout provides a convenient surface for this work as well as room for the finished pots. Keep fresh growing mix, clean containers, and labels together so each plant retains its identity during the move. Return the batch to appropriate light and monitor watering afterward, since a larger container may dry differently from the original cell.
04
Monitor light, temperature, moisture, and airflow
Greenhouse conditions can change quickly, particularly when bright sun heats an enclosed space while outdoor temperatures remain cool. Check actual conditions and inspect seedlings rather than assuming the structure is warm, bright, or ventilated enough because it is a greenhouse. Crops differ in light and temperature needs; a site shaded by trees or nearby buildings can also affect available light. Observe seedlings for stretching, wilting, scorching, or persistently wet growing mix, and adjust watering, spacing, shading, or ventilation in line with crop guidance. Measure where the trays sit and check at different times, since daytime peaks and overnight lows can differ.
Assess the proposed site at the time of year you expect to raise seedlings. For the lean-to greenhouse, check how the adjoining building and nearby obstacles would affect sunlight reaching your intended tray positions. A location that appears bright in summer may receive different exposure during an early spring sowing period. Review the selected model's openings and access, then consider whether you can reach them without moving benches or trays. Plan where you would take temperature readings and inspect plants, including trays farther from the door. If you expect to use an unheated structure, base the first sowings on observed conditions rather than assuming it behaves like a heated indoor room. Keep a record of daytime highs and overnight lows so you can identify which batches need a different sowing date or propagation location.
Harden seedlings off before moving them outside
Hardening off is the gradual acclimation of greenhouse-grown seedlings to outdoor sun, wind, and temperature changes before planting. Begin with short periods in a sheltered outdoor spot, then increase time outside and exposure to direct sun as the crop and weather allow. Avoid moving plants straight from protected growth into a full day in an exposed bed. Check both foliage and growing mix during the transition: outdoor wind can change watering needs, while rain can leave trays wetter than expected. If leaves wilt or show damage, reassess exposure and moisture rather than continuing to increase outdoor time automatically. Pause or protect tender starts when conditions turn harsh, and use crop-specific local advice for frost-sensitive plants. Hardening off helps seedlings adjust; it does not make a tender crop frost-tolerant.
Reserve an accessible outdoor area for this stage and include the daily movement of trays in your plan. When comparing the limited-edition aluminum greenhouse, review the selected model's doorway and your proposed bench arrangement with a loaded tray in mind. You should be able to retrieve a batch and carry it outside without shifting other seedlings. Choose a hardening-off spot where trays can stand securely, drain freely, and receive the protection required at the start of the transition. Keep batches with different exposure needs separate, and note which ones must return under cover if the forecast changes. Labels and brief exposure notes help another person care for the plants without guessing how long they have been outside. This temporary outdoor space serves a different purpose from the bed where the plants will eventually grow.

05
Transplant when the plants and beds are ready
On transplant day, check both plant and bed. A seedling should be at the stage recommended for that crop, not merely the oldest one left on a bench; a tightly crowded or badly stressed plant is not automatically ready because the calendar says so. Confirm that the bed is workable and that near-term weather suits the crop. Cold, saturated soil or a sharp change in the forecast can justify waiting, while keeping a plant too long in a small container can create its own problems. Use mature spacing from the seed packet or reliable local guidance rather than judging fit by how small starter plants look in their pots. If timing shifts, reassess pot space, watering, and hardening instead of ignoring the delay.
Follow the bed map for spacing and labels, handle plants by the root ball where practical, and avoid rough root disturbance, especially for crops that dislike it. Water transplants according to crop and soil needs, then watch them as they establish; early wilting, wind exposure, or gaps may signal that conditions need attention. If a crop needs support or a particular planting depth, prepare that as part of the bed setup before carrying the tray out. Keep varieties clearly marked so you can compare outcomes later. Do not put every spare greenhouse plant into a bed simply because it is available; unplanned crowding can reduce airflow, shade neighboring crops, and undo the spacing plan.
Record each handoff to improve next year's plan
Record each batch's handover while details are fresh: sowing date, hardening period, transplant date, destination bed, and number planted. Note delays and whether they came from slow seedling development, unsuitable weather, or an occupied bed. After establishment, record losses and unused plants. These few details connect nursery output with actual bed demand without requiring an extensive growing diary. Include any differences in bed exposure that affected planting, so you do not mistake a sheltered bed's earlier readiness for a sowing schedule that will work everywhere.
Use those results to adjust the next planting cycle. Reduce batches that repeatedly leave surplus plants, or stagger sowings when potting up creates a space shortage. A larger greenhouse will not solve delays caused by beds that are still occupied. If you are considering the T-model greenhouse, turn your batch records into a layout for the selected configuration: identify which plants would occupy each bench and when they would leave. This gives the purchase a specific purpose, such as accommodating overlapping batches or improving access during transplanting, rather than simply adding more nursery space.
Frequently asked questions
How early should I sow for a raised bed?
There is no universal lead time. Use the crop and variety guidance to estimate sowing-to-transplant time, then count back from a local outdoor window and allow for potting up and hardening off. Leave room for weather or bed delays.
Does a greenhouse need heat for seedlings?
Not always; it depends on the crop, sowing date, and actual conditions. A greenhouse can warm in sun and cool overnight, so monitor near the trays and follow crop-specific germination guidance. Do not assume daytime warmth means nights are suitable.
Can I keep seedlings in the greenhouse if the bed is delayed?
A short delay may be manageable if the crop remains in suitable conditions and its containers have room. Recheck watering, spacing, and pot size; crowded or overgrown seedlings are not improved by waiting indefinitely. Adjust the bed plan or next sowing.
What does hardening off mean?
It is a gradual transition from greenhouse protection to outdoor exposure. Increase seedlings' time in a sheltered outdoor spot and their exposure to sun and wind as conditions permit, watching for stress. The right pace depends on the crop and weather.
Which crops are worth starting in a greenhouse?
Start crops that transplant well and gain useful growing time in your location; tomatoes and peppers are common examples. Many root crops, including carrots, are usually direct-sown. Follow variety-specific guidance and let the bed plan determine quantity.
Keep the greenhouse and bed plan connected from the first seed to the final transplant. The bed map sets your target count, the local planting window guides when to sow, and the busiest stage determines how much nursery space you need. Allow for potting up and an outdoor hardening-off area, then adjust the schedule when plants or beds are not ready. A successful handoff leaves the raised beds planted at appropriate spacing and the greenhouse available for the next batch, rather than filled with surplus seedlings waiting for somewhere to go.
