
Pricking Out Seedlings: When to Move Them into Larger Pots
Seed starting and transplanting
Pricking out is the move from a shared seed tray into individual cells or pots, and not every seedling needs it. The best timing depends on the crop and the plants in front of you: true leaves are developing, roots are ready to separate, and seedlings can still be lifted without tearing a crowded root mat. This guide covers those signs, careful handling, potting depth, and the first days afterward.
01
What pricking out means
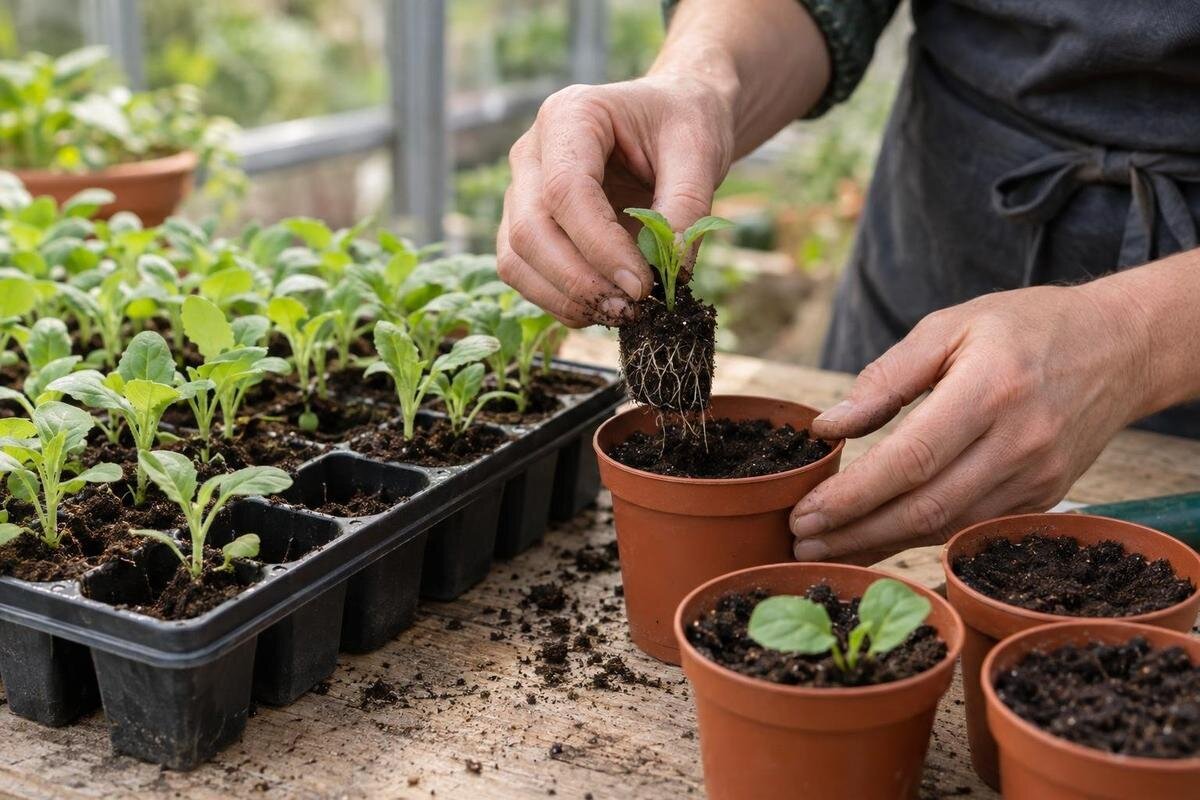
Pricking out is the first transplant of seedlings sown close together in a shared tray: each plant is lifted and placed in its own cell or small pot. The aim is to give roots and leaves room before crowding makes growth uneven, while the seedlings are still small enough to handle. It differs from sowing, which places a seed in growing medium, and usually from potting on, which moves an established plant into a larger container after it has outgrown the first one. Here, a larger pot means a suitable next container, not the biggest pot available.
Not every seedling needs this step. Plants sown one to a cell can remain there until they need potting on; closely spaced seedlings in a flat are the usual candidates. If several seeds share a cell, snipping extras at the surface of the mix can be gentler on the chosen plant than pulling out neighbors. Crops grown for a straight taproot, such as carrots, are generally direct-sown because moving them can distort the root. Check crop-specific instructions before separating plants that are known to dislike root disturbance.
Use a growth stage, not a calendar date
Look at the seedlings rather than counting a fixed number of days after sowing. A common window is when the first true leaves are opening and each seedling is large enough to lift safely, yet still young and flexible. Cotyledons—the first seed leaves—appear before true leaves; their presence alone does not mean a plant is ready. The precise stage differs by crop, and some plants are better moved earlier or later. Use seed-packet directions or reliable crop-specific guidance when available, then check the seedlings themselves.
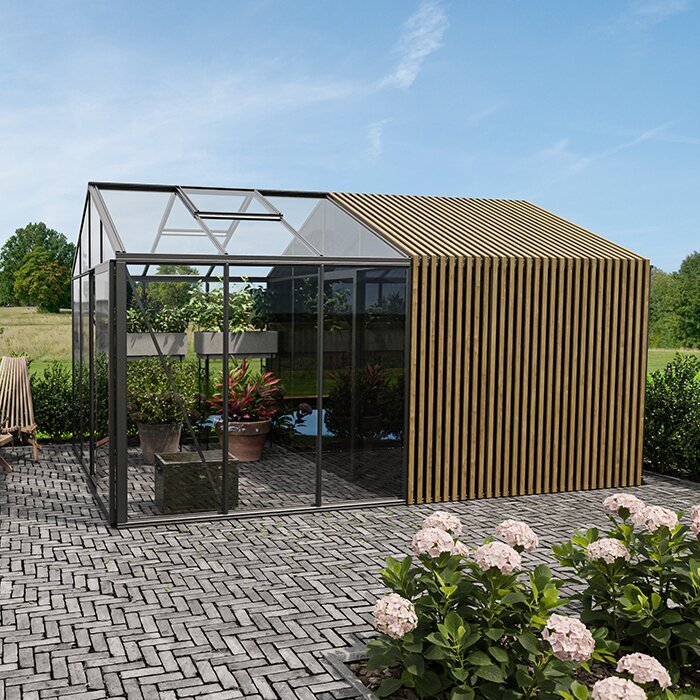
Moving at the cotyledon-only stage can mean handling tiny stems and roots that are difficult to separate; waiting until roots form a dense mat makes the job harder too. If a tray is uneven, move the plants that are ready and leave the rest until they reach a workable stage. Keep the remaining seedlings labeled, and avoid disturbing their roots as you remove their neighbors. Conditions under cover can change the rate of growth, so a sowing date is only a rough reference. For growers comparing larger spaces for successive batches, the Large backyard greenhouse listing gives an area range of 506–753 sq ft. Match the chosen size to a proposed layout that includes both growing benches and a place to work on trays.
02
Read the leaves, roots, and spacing together
True leaves appear after the cotyledons and often begin to show the shape or texture of the mature plant. They may not look like miniature adult leaves, so do not judge readiness by appearance alone. Notice whether the seedling has enough growth to handle without pinching the tender stem, and whether neighboring plants are beginning to crowd one another. Leaf overlap by itself is not an emergency, but dense growth can make it harder to see individual stems and separate plants cleanly.
Roots provide another clue. A seedling that lifts with a little mix around its roots and can be teased away from its neighbors is usually easier to move than one held in a tangled root web. Roots visible at drainage holes show that roots have reached the bottom, but a few protruding tips do not necessarily mean the container is full. If you want to test a shared tray, gently lift one seedling from an edge rather than repeatedly disturbing several plants. For an individual cell, inspect a representative plug only if it releases easily; do not pull it out by the stem. When choosing a greenhouse, allow access for these close inspections. The Classic aluminum greenhouse listing covers 40.6–302.3 sq ft, providing several sizes to compare against your bench layout.
Which seedlings to separate—and which to leave alone
Seedlings in a shared flat are the clearest candidates for pricking out when they have enough growth to handle and are starting to compete for room. Work by small groups rather than trying to separate the entire tray in one sitting. A row of seedlings that are still well spaced may be left for now, while a crowded patch is ready sooner. For seedlings already growing in separate cells, wait for the roots and plant size to call for potting on instead of separating them just because true leaves have appeared.
Some crops are better started individually so their roots are disturbed as little as possible. Larger-seeded crops such as peas, beans, and cucurbits are often easier to handle in separate cells, so the plug can be moved with its roots intact; check guidance for the particular crop. Also check whether multiple seedlings are intentional: some crops are grown as small clumps rather than separated into single plants. A cell containing several seedlings is therefore not automatically a mistake to correct. Keep trays with different handling requirements clearly identified so you do not separate a clump intended to stay together. If you are considering a greenhouse beside an existing building, the Lean-To Greenhouse page lists sizes from 40–154 sq ft. Compare its dimensions with the site and the space needed to reach and handle your trays.
03
Prepare pots and a clean work area
Choose cells or small pots with drainage holes and enough room for the roots to grow until the next move. The roots should fit without being folded into a cramped hole, but a tiny seedling does not need a large final container. Excess mix beyond the developing roots can remain wet longer, making moisture harder to judge. Consider how long the plant will stay in this pot: a seedling going to its final location soon has different space needs from one that must remain under cover for several more weeks. Use clean growing medium intended for container seedlings, moisten it evenly, and fill the containers without packing it hard. Make a planting hole in each one with a dibber, pencil, or similar tool before lifting the seedlings.
Set out labels, a small tool for lifting, the original tray, and a tray for the newly potted seedlings. Label each variety before beginning, especially if several look alike at this stage. Include the sowing date or batch identifier if you need to distinguish successive sowings of the same variety. Prepare only as many seedlings as you can transfer promptly; a small completed batch is better than a pile of exposed roots waiting for pots. Keep the work surface clear enough to set down a lifted clump without mixing varieties. If you are comparing greenhouse options for this work, the Limited Edition aluminum greenhouse listing gives sizes from 40.6–302 sq ft. Include a potting surface in your layout rather than allocating every available position to growing trays.
Lift and separate seedlings gently
If the tray mix is dry, water it ahead of time and allow excess water to drain; evenly damp mix is easier to lift than dust-dry or saturated mix. Loosen the medium beneath a seedling with a dibber, narrow plant label, or small spoon, bringing up the roots with as much of their surrounding mix as practical. Insert the tool far enough beneath the roots to lift from below rather than levering against the stem. Hold the seedling lightly by a leaf, preferably a cotyledon when it is large enough to grasp, rather than squeezing its stem. Support the roots with the tool so the leaf does not carry the weight of a heavy clump. A crushed stem may not recover. Keep the lifted plant out of direct sun and transfer it promptly.
Separate roots slowly with your fingers or the tip of a tool, working a small clump apart from its edges. Do not yank one seedling free from a tight knot or shake all the mix off to expose the roots; small roots can tear or dry out. If preserving one good seedling requires sacrificing a crowded neighbor, snip the unwanted plant rather than pulling hard on intertwined roots. Do not routinely trim roots to make them fit a pot; prepare a deeper hole or choose an appropriate container instead. Have the new pots close to the source tray so each lifted seedling can go directly into place. The T-Model Greenhouse Orangery listing gives an area range of 178–323 sq ft. When considering its layout, look for a practical arrangement that lets you work with both trays within easy reach.
04
Set each seedling at the right depth
Place the seedling in the prepared hole with its roots pointing down, not folded back or compressed into a shallow space. Set it at the depth appropriate for that crop. For many seedlings, keeping the root system covered and the plant near its previous depth is a sensible starting point; some crops tolerate being planted deeper, so use species-specific guidance when relevant. Keep the growing point above the mix, and avoid burying leaves or the crown just to make a weak stem stand upright.
Bring the mix gently around the roots so the plant is supported without pressing the surface into a hard crust. If the seedling has long roots, make the hole deeper rather than pushing the roots into a bent bundle. Place one seedling in each container unless the crop is deliberately grown as a clump. Leave enough space below the pot rim to water without washing mix over the edge. Water gently after planting to settle the mix, then let excess drain. If settling exposes roots or leaves a noticeable hollow beside the plant, add a little mix without burying the growing point. Keep finished pots upright in a stable tray. For a greenhouse comparison, the Pyramid greenhouse listing offers sizes from 60–203 sq ft; use the chosen model’s dimensions to plan where these trays will sit without obstructing access.
Care for seedlings after transplanting
After watering, check that mix has settled around the roots and that the pot drains freely. Keep it evenly moist while the seedlings re-establish, but do not leave pots standing in water or keep adding water by the clock. Check the mix itself and adjust to the crop and conditions. Fresh potting mix may already contain nutrients, so do not assume every transplant needs fertilizer immediately; follow the mix label and crop-specific instructions.
Give the seedlings bright, crop-appropriate light and avoid an abrupt move into harsh sun or a drying draft while they are recovering. Temporary protection from strong sun should not become prolonged placement in a dim corner. In a greenhouse, monitor conditions where the trays actually sit, since sun and airflow can vary across the space. Keep recently moved seedlings together initially so you can compare their response and water them according to their current needs, rather than treating them exactly like established plants nearby. If they will soon move outdoors, acclimate them gradually to that change. For keeping spare pots and supplies separate from growing trays, the aluminum greenhouse with built-in storage is an option to investigate. Check the storage dimensions and arrangement against the items you intend to keep there.

05
Keep newly potted batches organized
Keep each completed batch together with a readable label and enough space to inspect individual plants. Include the variety and transplant date, especially when one sowing is moved in several stages. Arrange pots so leaves are not trapped under neighboring containers and labels remain visible after watering. If some seedlings were much smaller than others, group them separately rather than assuming they will need identical care. Place trays where they can drain without sending runoff across a work surface. As the leaves expand, spread pots farther apart when necessary; the arrangement that worked on transplant day may become crowded before the plants need larger pots.
Decide where each batch will remain after pricking out so completed trays do not accumulate on the potting surface. A reachable holding area makes it easier to inspect moisture, notice new growth, and remove a struggling plant without disturbing its neighbors. Keep a simple record of where each variety is placed if several batches look alike. When comparing greenhouse sizes, the Prestige Greenhouse listing covers 40.6–302 sq ft. Its listed area is not usable bench area: map the chosen dimensions, bench positions, and access space before estimating tray capacity. The useful layout is one that accommodates the plants after transplanting as well as the short period when you are working on them.
Common problems after pricking out
A little drooping after roots have been disturbed does not by itself show that a seedling has failed. Check whether the mix is dry or waterlogged, whether the roots were covered, and whether the plant has been moved into much harsher light or airflow. Moisture at the surface may not represent the whole pot, so assess the mix below the surface without digging beside the fragile roots. Keep conditions steady and watch for recovery rather than repeatedly lifting the seedling to inspect it. Upright leaves and subsequent new growth are more useful observations than an immediate increase in height. A plant that continues to decline, especially with discoloration or damage at the stem base, may have another problem; do not assume every symptom is caused by transplanting.
The most avoidable setbacks are pinching the stem, letting roots dry while pots are being prepared, pulling apart a tight root tangle, or planting too deeply. For the next batch, record the crop, the stage of its true leaves, how crowded the tray was, and how easily the roots separated. Those observations help you adjust the timing for that crop in your own growing conditions, instead of repeating the same date-based routine when seedlings develop at different rates.
Frequently asked questions
Should seedlings have two true leaves before I prick them out?
Not always. Many seedlings can be moved when their first true leaves are opening and they are large enough to handle. Check the roots and how easily the plants can be separated, and follow crop-specific guidance if it gives a different stage.
Can I move seedlings at the cotyledon stage?
Usually it is easier to wait until true leaves appear. At the cotyledon-only stage, seedlings may be very small and difficult to lift without damaging the stem or roots. Follow specific guidance for crops that need earlier handling.
Do seedlings already growing in individual cells need pricking out?
Usually not. Leave a seedling in its own cell until its roots and growth indicate that it needs a larger container. The appearance of true leaves alone does not mean it must be moved.
Should I water seedlings before pricking them out?
Aim for mix that is evenly damp and holds together, not saturated. If the tray is dry, water it ahead of time and let excess drain. After transplanting, water gently to settle the mix around the roots.
What should I do if seedlings wilt after moving?
Check that the mix is moist but not waterlogged, and that roots were placed in contact with it. Keep light and growing conditions steady, and avoid repeatedly lifting the plants to inspect them. If decline continues, look for another cause rather than assuming it is transplant shock.
The most useful cue is a seedling you can lift and separate before neighboring roots form a dense mat—not a date on the calendar. Match that cue to the crop, prepare the pots first, and return the seedlings to steady growing conditions. A brief note about leaf stage, crowding, and how the plants responded will make the next batch easier to time.
