
When Should You Replace Soil in a Greenhouse?
Greenhouse soil guide
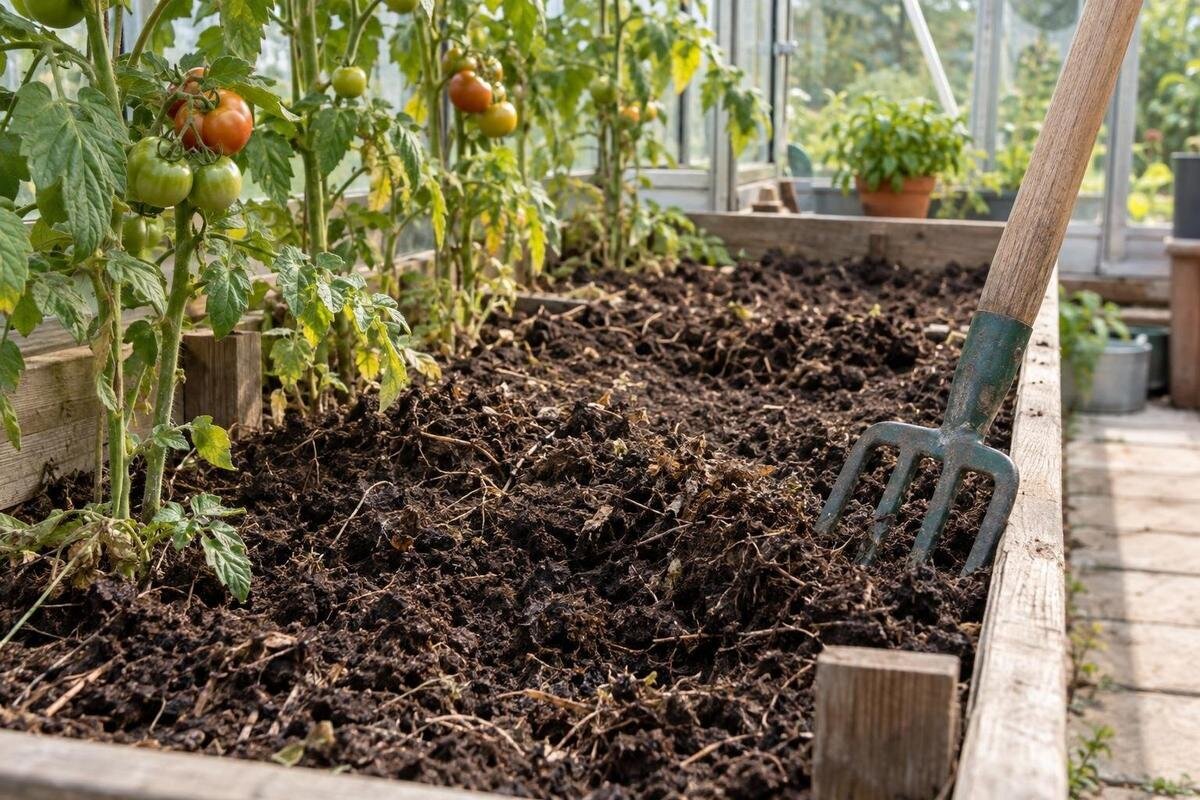
Greenhouse soil does not automatically need replacing because it has supported crops for a year or because growth has slowed. Nutrient imbalance, physical decline, and disease concerns call for different checks and remedies. Replacing soil without identifying the cause can discard a usable growing medium while leaving the real problem untouched. Compare crop history, soil condition, and test results first; then renew only the area that cannot be managed in place.

Before replacing soil 1
Greenhouse soil does not need annual replacement
A greenhouse bed has no universal replacement interval. Soil that supports healthy roots, drains appropriately, and tests within a range suited to its crops can remain productive for many seasons; age alone does not make it exhausted. Nutrients, pH, organic matter, and structure change for different reasons and on different timelines, so a calendar rule cannot describe every bed. A roof usually reduces direct rainfall leaching, leaving irrigation and drainage to play a larger role in how salts move. Crops also differ in what they use and need. Monitoring is worthwhile, but it does not make annual removal necessary; a targeted correction may preserve soil that still serves the crop.
Track which crops grew in each bed, what amendments were applied, whether irrigation changed, and where weak growth appeared. A problem limited to one row after one crop is different from a repeated decline across several crops and beds, though neither pattern proves a cause. Compare current performance with prior seasons and keep test results in the same record. Recording when a change began can help connect symptoms with a crop or input. If you are comparing greenhouse sizes while planning permanent beds, the Pyramid-type greenhouse listing spans 60 to 203 sq ft; estimate renewal from the selected configuration's planted beds, not the whole floor, which may include paths or containers.
Symptoms alone rarely identify the cause
Yellowing, stunting, poor flowering or fruiting, and weak roots are clues, not proof that soil is depleted. Water stress from too little or too much irrigation, unsuitable pH, salt buildup, root injury, pests, disease, and temperature swings can overlap in appearance. Compare plants of the same crop and age, then note whether symptoms begin on new or older leaves, affect one side of a bed, or follow a planting row. A symptom soon after transplanting may point to root disturbance rather than bed age. These observations can narrow questions for a soil test or diagnostic service, but they cannot prescribe fertilizer or soil removal.
Map where the trouble occurs before changing anything. If one end of a bed or one irrigation line is affected, investigate that boundary; if several unrelated crops decline, look for shared conditions. Examine soil below the surface at several points and take dated photos to track changes. Keep labels, sampling supplies, and clean tools separate from soil-covered equipment so observations remain traceable to the right bed. If you are considering the greenhouse with built-in storage, check the storage layout for that separation rather than assuming all gardening supplies should share one space.
Before replacing soil 2
Use a soil test before making changes
Ask a soil-testing lab to analyze a representative greenhouse sample, and follow its collection directions exactly. For a uniform bed, this often means taking several small samples from the same area and depth, then combining them; do not mix path soil, container media, unlike beds, or a visibly affected patch into one sample. Keep affected and unaffected zones separate when you want to compare them. Sample before adding a new amendment when possible, and tell the lab about recent inputs. Ask which tests it offers: pH, available nutrients, and soluble salts or electrical conductivity can answer different questions, but no single soil test diagnoses every root or disease problem.
Record the crop, sampling area, recent fertilizer or compost, and irrigation source with each sample. If a result does not fit the symptoms, ask whether the test method suits that medium and crop. Irrigation-water testing may also help explain salt or alkalinity problems. Interpret results against crop-specific guidance, and use comparable sampling locations when checking a correction. When reviewing the Prestige greenhouse, consider where you could label and package samples without setting them on another bed. Confirm the usable layout; the advertised floor area alone does not establish space for a work surface.
Handle nutrient problems with targeted corrections
If a test shows low available nutrients, replacing soil is not automatically necessary. A measured amendment suited to the crop may restore the supply while preserving workable soil. pH matters because it affects how readily plants can access nutrients already present, so adding more fertilizer may not correct a problem caused by pH. The opposite can happen too: repeated inputs can leave excessive nutrients or soluble salts. Plant appearance cannot reliably distinguish these conditions, especially when water stress or root problems are also present. Read the test and crop requirements before applying a broad fertilizer or more organic material; do not treat a suspected deficiency as proof that the bed is spent.
Make one correction at a time when practical, record the material and amount, and retest when the lab or crop guidance recommends. If salts are high, extra watering is not automatically the answer: drainage and irrigation-water quality affect whether salts can leave the root zone. For a larger project, such as a configuration from the large backyard greenhouse range of 506 to 753 sq ft, plan amendment quantities bed by bed. Apply recommendations to the measured growing area, excluding paths and storage, and check whether the reported rate refers to the product itself or its nutrient content.

Before replacing soil 3
Assess poor structure and drainage separately
Physical problems call for a different assessment from nutrient issues. Soil that forms a hard crust, stays dense after watering, sheds water, or remains saturated around roots may have poor structure or drainage. Foot traffic on beds, working soil while wet, or gradual loss of organic matter can contribute, but a slow-draining bed may also reflect the site or irrigation setup. Check below the surface at the main root zone and compare more than one area instead of judging only the top layer. If water stands in one spot, note whether the problem follows the bed or a particular watering zone; the cause affects the remedy.
If the soil is otherwise suitable, keep traffic on paths, avoid working it when wet, and choose amendments for the existing texture, crop, and test results. A small trial area can show whether a proposed change improves water movement before you use it across the bed. Replacing soil is more defensible when a confirmed physical limitation cannot be corrected in place or the existing material remains unsuitable after appropriate adjustments. The aluminum classic greenhouse listing covers 40.6 to 302.3 sq ft; use the selected footprint to map planted beds and walking paths separately when planning a growing area.
Investigate suspected soilborne disease before removing soil
Recurring wilt, root decline, or sudden plant collapse can raise concern about soilborne disease, but water stress, root injury, and other pests can look similar. Record the affected crop, when symptoms began, and whether the same problem returns in the same bed. Photograph the pattern and ask a plant diagnostic lab or local extension service about submitting affected roots or plants. Request identification before choosing a remedy: pathogens differ, some diseases are crop-specific, and some apparent soil problems are not soilborne at all. A diagnosis is more useful than replacing soil based on a single failed crop.
If a soilborne problem is confirmed, follow crop- and pathogen-specific guidance on whether to remove material, how much to remove, and how to handle it. A shallow layer may miss a deeper problem, while whole-bed removal may be unnecessary. Keep suspect soil from being tracked into clean beds, and clean tools according to diagnostic guidance. When assessing a lean-to greenhouse layout, check the route from an affected bed to the exit and identify a place to contain removed material temporarily. Verify access dimensions rather than assuming a wheelbarrow or loaded container will fit.
Before replacing soil 4
Choose the replacement area from the evidence
Renewal can be limited to one zone, but only if the problem is localized and that zone can be separated safely. If test results or a diagnosis point to one bed, there may be no reason to discard sound soil elsewhere. If a problem is widespread or its boundary is unclear, a small patch could leave the cause in place. Set the treatment area from the root zone, bed history, and test findings, not from convenience or a standard top-layer depth. The appropriate scope depends on the bed system and the issue being corrected, so decide it before disturbing the soil.
Before removal, mark the affected area, measure the bed, and plan access for moving material without spreading it through clean growing areas. Estimate only the amount required for the planned replacement depth; the greenhouse's full floor area includes aisles and may include containers or storage. The limited-edition aluminum greenhouse listing spans 40.6 to 302 sq ft, so compare the specific configuration with the bed map before estimating soil quantities. If disease is involved, decide on handling and disposal with diagnostic guidance before digging.
Match replacement material to the growing system
Replacement material should suit the growing system, not simply look dark or smell earthy. Material intended for containers can behave differently in a permanent bed; in-ground soil, raised beds, and potting mixes have different requirements for drainage, aeration, and water retention. Ask the supplier what the material is intended for and request available information on composition, pH, and nutrient or salinity status. Confirm that its source is consistent and that it suits the bed type and crops. Avoid unknown fill or a product selected only because it is labeled as garden soil.
Before combining new and existing material, check that their texture and water behavior are compatible; a sharp change between layers can leave roots in uneven moisture conditions. If disease prompted removal, do not reuse suspect material or mix it into clean compost unless diagnostic advice permits it. Plan where replacement bags or bulk material will wait, following the supplier's storage directions and keeping them separate from outgoing soil. When comparing the T-Model greenhouse, review access and usable working space for bringing material to the beds. Its listed floor area does not establish door clearance or handling access.

Before replacing soil 5
Time soil work between crops
Schedule soil work when a crop has finished and the bed can be assessed without damaging roots. Greenhouse calendars vary: some beds are replanted quickly, while others have a break between crops, so use the diagnosis and crop plan rather than a fixed season. Collect test samples before applying amendments, and tell the lab about recent inputs. If the lab or treatment guidance specifies when to sample again or replant, follow that timing so results remain interpretable and young plants are not put into a bed that is still being adjusted.
During renewal, keep soil from an affected bed separate from clean replacement material and other beds. Use clean tools with the new material, and remove roots and debris as directed for the diagnosed issue. Avoid carrying wet soil through other beds; it can smear and compact underfoot and may transfer material between zones. Record what changed, the area treated, and the date. Keep the supplier's material information and any laboratory recommendations with that record, so later results can be assessed against the actual treatment rather than an incomplete recollection of what was added or removed.
Evaluate the next crop after soil renewal
Evaluate the next crop against the specific problem the treatment was intended to solve. After a nutrient correction, compare follow-up results using the lab's recommended timing and method. After drainage work, observe whether the root zone still remains wet under comparable irrigation. For a diagnosed disease, follow the recommended monitoring plan rather than relying on the disappearance of visible symptoms alone. Healthy new growth is encouraging, but it does not prove every underlying problem has been eliminated. Distinguish a measurable improvement from a change caused by planting a different crop, adjusting watering, or growing in a different season.
If the same problem returns, revisit the original explanation before replacing more soil. An unchanged water source, drainage restriction, or source of infection may still be affecting the bed; repeating removal without addressing it can repeat the failure. Compare the location and timing of the new symptoms with the earlier pattern, and seek further testing or diagnosis where needed. If performance and test results remain suitable for the crop, keep the bed in use. Future replacement should respond to a persistent, demonstrated limitation or a specific removal recommendation, not simply to the number of seasons since the last renewal.
Frequently asked questions
Should I replace greenhouse soil every year?
No. A bed does not expire on a yearly schedule. Keep it while it remains suitable for the crops, and use crop history, soil condition, and test results to decide whether to correct a specific problem or replace material. Weak growth in one season alone is not enough reason to remove a whole bed.
Can I fix nutrient-poor greenhouse soil without replacing it?
Often, if testing identifies a correctable nutrient shortfall. Choose an amendment for the crop and the test result, and consider whether pH or excess salts may be affecting plant growth. Avoid adding fertilizer just because leaves look pale; the cause may be unrelated to nutrient supply.
How can I tell whether poor growth is caused by soilborne disease?
Plant symptoms alone cannot confirm a soilborne disease. Note which crops are affected, where symptoms recur, and how they develop, then ask a plant diagnostic lab or local extension service about identification. That diagnosis helps determine whether soil removal is appropriate and what other sources may need attention.
Can I replace only part of a greenhouse bed?
Possibly, when the problem is localized and the affected area can be separated from healthy soil. The right area depends on the crop, root zone, test results, and any diagnosis. A small patch may not help if the problem is widespread or its boundary is unclear.
Can I use potting mix to replace greenhouse bed soil?
Not automatically. Potting mixes and materials intended for permanent beds can differ in drainage, water retention, and nutrient content. Check the product's intended use and available information, then match it to the bed type and crops. A dark color or loose texture alone does not show that it is suitable.
Treat greenhouse soil as a growing system to monitor, not a consumable that expires on a calendar. When growth changes, compare plant symptoms with bed structure and a representative test, and investigate recurring disease separately. If the evidence points to a correctable imbalance, address its cause and keep the existing soil. Reserve removal for a diagnosed problem or a medium that cannot be restored for the intended crops, and renew only the area the evidence supports.
