
Why a Greenhouse Base Must Be Square as Well as Level
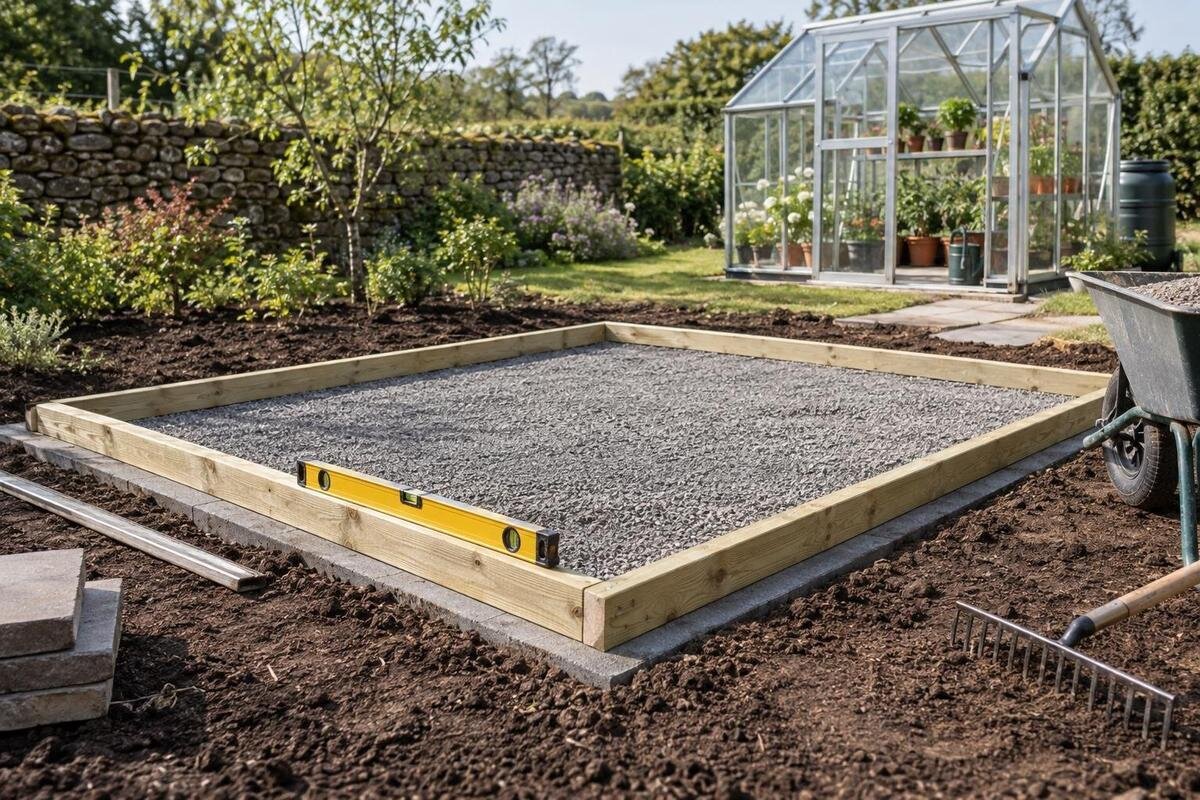
Greenhouse groundwork
Before a greenhouse is assembled, its base needs to pass two separate checks: it must be square in plan and level where the frame bears. A level surface can still be skewed, and a correctly squared outline can still have a high or low support point. Measuring both conditions against the exact model drawing helps catch layout problems before the structure itself makes them obvious.

Level and square are different checks
Here, “square” means having right-angle corners, not four equal sides. A long, narrow rectangular footprint is square when it follows the planned side lengths, with straight edges, parallel opposite sides and right-angle corners. “Level” describes elevation, not outline shape: it concerns whether the specified bearing surface meets the installation drawing’s level requirement. A diagonal check looks across the footprint in plan view; a spirit level, laser or other appropriate survey method checks height. Those measurements answer different questions, so neither can replace the other. One reading along an edge says nothing about the angle between that edge and its neighbor. When discussing the layout with the contractor, distinguish the corner angles from the footprint’s length and width.
A level but skewed footprint can have consistent heights while one end is shifted sideways. Conversely, a correctly laid-out outline can have a high or low support point, or a slope the installation plan does not permit. A clean-looking slab or perimeter does not reveal either reliably. If you are comparing the Bloomcabin Prestige Greenhouse, identify the exact model and size before asking for a matching base drawing. Ask the installer to mark layout points and elevation checkpoints separately on the inspection sketch. This keeps a corner’s position distinct from its height and makes clear which measurements belong to each part of the inspection.
How a skewed base can affect assembly
An out-of-square base can change the frame’s geometry as it is fastened down. Parts intended to meet at matching corners may sit proud or fall short, and small differences can accumulate as rails, uprights and roof members are added. Depending on the design, glazing channels or panels may not line up cleanly; a door or vent opening may also sit out of square or move less freely. These are possible symptoms, not a guaranteed result: the installation drawing and approved tolerances control. A greenhouse that looks close from above can still be difficult to assemble correctly. Forcing a joint can hide, rather than fix, the layout error.
If assembly begins before the outline is checked, the crew may spend time trying to decide whether a mismatch comes from the frame, the base or an incorrect reference point. The greenhouse itself should not be used as a jig to pull corners into position, and fasteners should not be treated as a way to make the base square. When considering the Large backyard greenhouse, include the base inspection in your installation planning rather than waiting for a joint to resist assembly. Record the prepared base’s measurements before the frame is attached. Those readings give the installer a clear starting point if a later fit problem needs investigation.
Use the drawing for the exact greenhouse
Ask for the manufacturer’s current base or foundation drawing for the exact model, selected size and configuration. Confirm which line represents the greenhouse support: the outside of a base rail, an inside face, anchor positions, or another stated reference. A displayed greenhouse dimension may refer to the frame rather than the base work, so do not assume the visible product size is the dimension a foundation contractor should set out. Read the drawing together with the installation instructions, and look for notes about the required support surface or attachment points. If two documents appear to give different references, ask which one applies rather than combining them.
Before site preparation starts, write down the drawing revision and reference line the installer and contractor will use. Confirm how corners will be marked on the finished surface and whether measurements are taken to edges or centers; use that convention for all sides and both diagonals. A Classic aluminum greenhouse product listing can identify a candidate, but it cannot replace the selected size’s installation drawing. Avoid scaling a screen image or copying dimensions from a similar model. If the right plan is missing or ambiguous, request clarification before a contractor has to guess and the outline becomes harder to change.
Measure both diagonals from matching corners
For a rectangular footprint, label the four drawing-defined corners A, B, C and D on a simple sketch. Measure A to C and B to D, the two diagonals crossing the outline, from the same type of reference point at every corner. If the drawing calls for the outside face of a rail, do not start one measurement at its center and another at its edge. Use actual set-out points, not convenient spots chosen after construction. Both readings are plan distances. If the support points sit at different heights, ask the installer how to establish the plan reference instead of draping a tape along a sloping route.
Use a measuring method suitable for the span, keep the line straight and tension consistent, and check that sag or an obstruction is not changing its path. Note each measurement with units and endpoints; a sketch makes it easier to see which diagonal is which. Repeat a result that looks unexpected. When planning the layout for a Lean-To Greenhouse, identify any corners that will be difficult to reach before measuring begins. Agree on an alternate reference with the installer if necessary, rather than quietly shifting an endpoint between readings. Keep that reference on the sketch so another person can repeat the measurement. A stepped or irregular outline needs its own checking method.

Equal diagonals are only one part of the check
For the intended rectangular outline, the two diagonal distances match in the ideal plan. A repeatable difference can point to a skewed layout, the wrong corners, or a measurement method that changed between readings; check those possibilities before deciding what the base needs. Matching diagonals are not a complete proof of squareness, though. Some nonrectangular four-sided shapes can also have equal diagonals, and a diagonal pair does not show whether the sides have the lengths on the drawing. It also cannot tell you whether the bearing surface is level. Treat the diagonal check as one part of an inspection, not a stand-alone pass mark.
Compare all four side lengths with the drawing and check the corners and opposite edges using a suitable framing square, reference lines or the installer’s approved layout method. If the outline has a bay, step or other nonrectangular shape, identify every drawing-defined corner and check each segment as specified; do not apply the two-diagonal shortcut to the entire perimeter. For a Limited Edition aluminum greenhouse, keep the selected version’s plan alongside the measurement record so the installer can compare each reading with its intended reference. Record the side lengths as well as the diagonals, rather than relying on a visual impression or treating one matching pair of measurements as approval.
Check level and support across the base
Once the plan geometry is checked, inspect height independently. The installer can use an appropriate level or survey instrument along the specified perimeter and across the support surface; one reading on one rail only tells you about that short section. Check both directions and the relative heights at the corners, along with any other points called out in the drawing. Do not assume a fall is acceptable because it seems helpful for drainage, or impose a generic slope rule. The manufacturer’s instructions and a qualified site review determine how the selected support is meant to sit. Record readings from the actual bearing surface, not just nearby soil or paving.
Check the bearing path between corners too. A surface may have level corner points but a hump, dip or unsupported joint between them, so inspect the lines where the greenhouse base will actually rest and any intermediate support points shown in the drawing. This checks the prepared surface, not just the shape of its outer edge. When preparing for a T-Model Greenhouse Orangery, have the installer identify the support locations and level reference on the selected model’s plan. Keep readings for intermediate points separate from the corner readings, with each location labeled on the sketch. This makes it clear which parts of the bearing surface were inspected before approval.
Agree on a base inspection with the installer
Have the installer approve the inspection method before the foundation work is handed off. For a rectangular base, an example inspection record can label the four drawing-defined corners, name the reference edge, list all four side lengths, record both diagonals and note level readings at each point specified in the drawing. The installer compares these observations with the current manufacturer base drawing and the project’s acceptance criteria. If the drawing specifies an anchor line rather than the outside perimeter, use that same line throughout. The sequence makes the check repeatable; it does not establish a universal tolerance. If no acceptance criteria are stated, ask for them before work proceeds.
Add an overhead site photograph and close-ups showing the corner marks and measuring points, along with the units, date, drawing revision and who took each reading. Suppose the two diagonals still differ after remeasurement: the installer checks the endpoints and layout, then arranges a review by a qualified foundation professional if needed. Do not mark the base approved using a guessed allowance, and do not let the frame be forced square during installation. Have the installer confirm the method and acceptance criteria in advance, then keep records of any correction and subsequent measurements with the inspection photos.
Use the right reference for each foundation type
The same checks apply across different foundation interfaces, but the correct measuring edge may change. On a concrete slab, the visible slab perimeter may not be the greenhouse’s bearing line; on pavers, a tidy joint pattern does not establish the footprint; on a wall, the top surface and corner layout both need to match the plan. A separate perimeter frame can be square while its supporting surface does not meet the level requirement. These examples do not mean that every foundation type suits every greenhouse. Use the model’s instructions to identify which surface carries the base and which corners or edges are the measuring references.
Ask the installer or qualified foundation contractor how the drawing will be transferred to the finished surface and which edges will remain visible for inspection. Do not substitute generic foundation dimensions or assume that a neat finish proves support alignment. For a Pyramid Greenhouse, establish from the exact base plan whether a rectangular diagonal check applies and which support perimeter to measure. Mark that perimeter clearly on the inspection sketch, distinguishing it from surrounding paving or other finished edges. If later paving or trim will cover the reference points, photograph and record them before they disappear so the inspection record preserves the locations actually measured.
What to do when measurements disagree
If the two readings disagree, repeat them from the same marked endpoints and confirm that the tape has not sagged, the corners were not confused and the drawing uses the reference you measured. Check the four side lengths as well. A different result can come from a measuring error, an incorrect layout, a misunderstood drawing or a genuine geometry problem; the reading alone does not tell you which. Also confirm that the units and drawing revision match the work on site. If the mismatch is repeatable, pause the installation rather than deciding that the base is close enough.
Send the marked sketch, measurement notes and site photographs to the installer, and ask for review against the manufacturer’s drawing. If adjustment is needed, have a qualified foundation professional determine the correction; do not pull the greenhouse frame into shape, move anchor holes, cut rails or add unapproved packing to disguise the discrepancy. Recheck side lengths, diagonals, elevations and support after approved work, then document the result before assembly resumes. If the drawing does not state an acceptance tolerance, request clarification rather than choosing one yourself. The correction depends on the actual base and is not a universal do-it-yourself fix.
Schedule the inspection before assembly
Put the base inspection on the installation schedule, before delivery and before finishing work makes reference edges hard to reach. Confirm the exact model and size, obtain the current drawing, and identify who will lay out the base, who will measure it and who will accept the work. If you are choosing an aluminum greenhouse with built-in storage, include its selected configuration in that planning record so everyone uses the same drawing. Ask what measurement method and installation criteria the installer will use; do not invent a tolerance if the documentation is silent. Allow time to resolve a discrepancy before the assembly date.
Complete the check after the base is prepared and before the frame is assembled; repeat it after later work that could disturb the outline or bearing surface. Keep the drawing, labeled measurements, photographs and installer approval together. If the model, selected size or drawing revision changes after layout, ask whether the reference points or support requirements changed; a previous check may no longer match. Assembly should begin only after the installer has reviewed both the plan geometry and level readings, and confirmed that any noted discrepancy is resolved. This makes the handoff clear for everyone working on the installation.
Frequently asked questions
Does a level greenhouse base automatically count as square?
No. Level checks elevation; it does not check the footprint’s angles or corner positions. A base can be level but skewed. Compare its side lengths and diagonals with the drawing, then check the support surface’s level separately.
How should I measure greenhouse base diagonals?
Use the same drawing-defined reference point at each corner. Measure between opposite corners for both diagonals, using a consistent measuring plane. Record the results and side lengths. If corners sit at different heights, ask the installer how to establish that plane before measuring.
Should the two diagonal measurements match exactly?
The diagonals of an ideal rectangle are equal. Whether a difference in field measurements is acceptable depends on the selected greenhouse and its installation criteria. Repeat unexpected measurements, then ask the installer to compare them with the correct drawing; there is no universal allowance to apply.
Are equal diagonals enough to prove a base is square?
No. Some nonrectangular four-sided outlines can also have equal diagonals. Check the side lengths and corner positions against the drawing, and confirm the intended footprint shape. Diagonal measurements also say nothing about whether the bearing surface is level.
What should I do if the diagonals do not match?
Repeat the measurements from the same marked points and check the drawing reference. If the mismatch remains, pause assembly and share the measurements and site photos with the installer. Have a qualified foundation professional review any needed correction; do not force the frame into position.
Squareness and levelness protect different parts of the installation: one puts the corners where the drawing expects them, and the other checks the support surface’s height. Diagonals are a useful field check for a rectangular footprint, but they work best alongside side measurements, level readings and installer approval. Resolve uncertain results before the frame is assembled, when the base can still be reviewed on its own.
