
Why Is My Greenhouse Hotter Than the Outdoor Forecast?
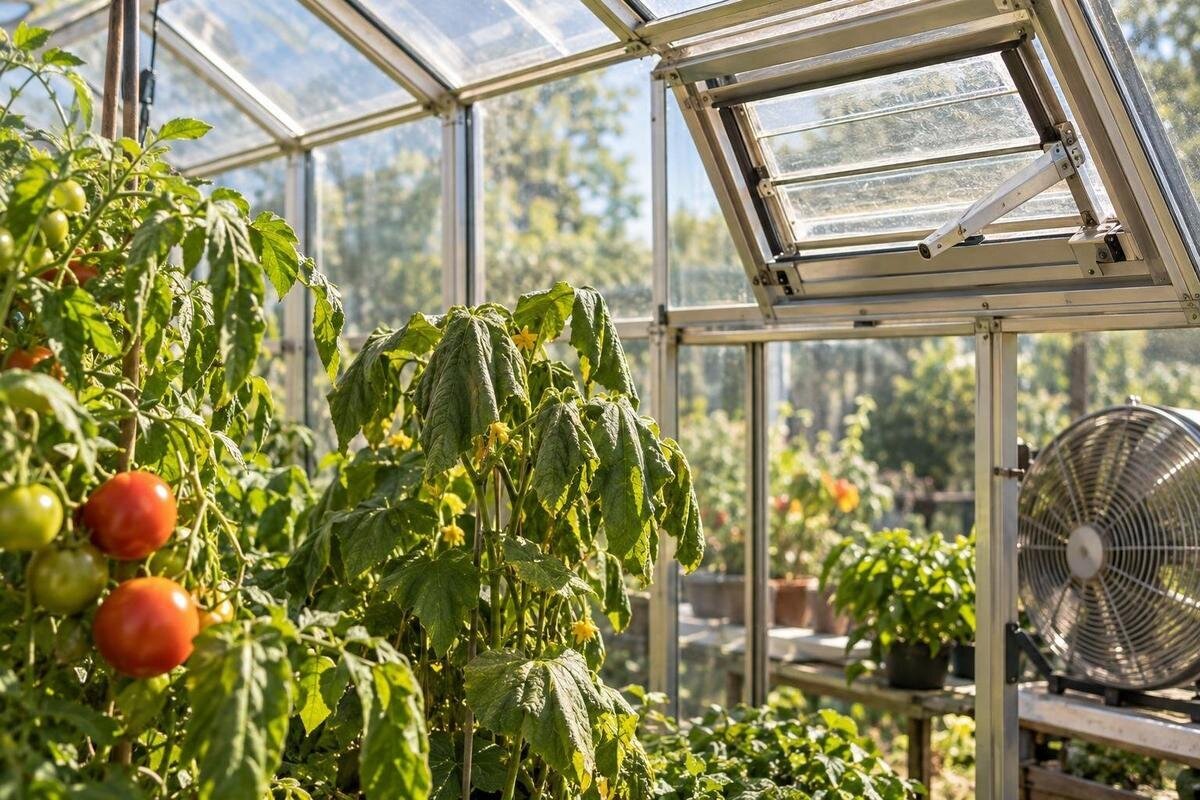
Greenhouse climate troubleshooting
An outdoor forecast and a greenhouse thermometer describe different environments. Sunlight can warm surfaces inside the enclosure, while restricted air exchange lets heat build; a sensor sitting in direct sun can also report a falsely high air temperature. To find out which is happening, compare a shaded, correctly placed indoor sensor with an outdoor observation at the same time, and log humidity, sunlight, and vent positions. A short, consistent record is more useful than changing several openings or adding shade based on one midday reading.

Why the greenhouse reading differs from the forecast
An outdoor forecast is an estimate for outdoor air in a broad location and a defined time window, not a reading at your greenhouse wall. The forecast high might occur later than the moment you check inside. Compare indoor and outdoor values at the same time; better yet, compare with a nearby station's actual observation instead of the app's predicted daily maximum. Trees, wind shelter, elevation, clouds, and hard surfaces can make a backyard differ from the forecast location. If you use an outdoor thermometer, keep it in ventilated shade and away from the greenhouse, a sunny wall, roof, or pavement so it measures air rather than a heated surface.
Sunlight that passes through a transparent greenhouse cover can warm the floor, benches, pots, and other surfaces. Those surfaces then transfer heat to the surrounding air. The enclosure limits direct exchange with outdoor air, so openings or fans have to move enough air to remove the heat being gained. This can create a real indoor temperature rise even when the outdoor reading is moderate. On a bright, calm day, or when openings are closed, heat may build faster than it escapes. The size of the difference changes with sun, wind, shade, and the way the greenhouse is ventilated; the forecast alone cannot show which factor is responsible.
Check that the sensor is measuring air
A thermometer exposed to direct sun can warm up and report higher than the surrounding air, even if the display is working correctly. Put the sensor in a ventilated radiation shield, following its manual so the shield blocks direct sun without restricting airflow. Place it at a consistent, representative height, such as around the active crop canopy. Avoid resting it against glazing, a frame, a bench, soil, or a wall, since those surfaces can be warmer or cooler than the air. A reading near a door, vent, fan outlet, lamp, or heater may describe that local spot rather than the greenhouse as a whole.
If you suspect a faulty instrument, compare it with a second thermometer side by side in the same shaded, ventilated spot. Give both devices the time their manuals specify to settle, and check their units, batteries, clocks, and logging intervals. Compare any disagreement with the devices' stated accuracy and follow the maker's instructions for a further check; don't apply an assumed correction. An infrared spot thermometer reads surface temperature, not air temperature, so it is not a direct substitute for an air sensor. If temperatures differ from one part of the greenhouse to another, keep the first sensor in place and add a second one to map the difference.
Build a temperature log you can compare
Use one indoor sensor in shade and a separate, well-ventilated outdoor reference. At each reading, record the date and time, indoor and outdoor temperatures, relative humidity, sensor location, cloud cover, and whether direct sun is reaching the greenhouse. Note which vents and doors are open, how far they are open, whether fans are running, and whether shade is in place. Record watering or other activities that could change conditions. If you include a forecast in the log, keep it separate from actual outdoor observations and use the same forecast source consistently.
Choose a repeatable schedule that covers the period before sun reaches the greenhouse, the temperature rise, the outdoor peak, and the later cooling period. A data logger can capture changes between checks; with manual readings, use intervals you can maintain and note the time of each vent or fan adjustment. Identify the exact greenhouse and its footprint at the top of the record. For example, the Pyramid-type greenhouse listing spans 60 to 203 sq ft, so the model name alone would not identify the size being monitored. Record your installed version, not the whole catalog range. Keep sensor placement fixed during your first comparisons so a change in location does not obscure the effect of operating the vents.
Map direct sun and nearby heat sources
Note when direct sunlight reaches the roof and each side of the greenhouse, and when nearby shade arrives. The pattern changes over the day and through the season, so one observation may not describe the full exposure. A quick sketch or a series of photos from the same viewpoint can help you connect the temperature curve with the sun's path. Include cloud cover and wind in your notes. Nearby walls, paved areas, and other solid surfaces may absorb or reflect heat or affect airflow, so record whether they are sunlit when the indoor temperature begins to rise.
If the greenhouse is close to a building, check whether that wall is shaded, sun-warmed, or blocking an air path; do not assume the wall alone explains the temperature. When reviewing a lean-to greenhouse, ask for a drawing showing the openings in relation to the adjoining wall. Compare that drawing with your site sketch, including nearby fences, overhangs, and vegetation. This helps you identify questions about sun exposure and access to outdoor air without guessing how the finished structure will perform. Photograph the wall and surrounding surfaces during the warming period, not just when you first arrive in the morning. Those observations can help explain why the temperature rise begins at a particular time.

Check the full ventilation path
List the doors, windows, roof vents, and other openings intended to operate, then check whether each moves as its instructions describe. Look for plants, pots, hanging baskets, stored items, or shade material blocking an opening or the route between openings. Dirty or restrictive screens can also affect airflow; clean or adjust components only as the manufacturer directs. In a natural-ventilation design, upper outlets and lower inlets may work together, but the path and local conditions matter. A high vent by itself does not tell you how much air is moving through the greenhouse.
For a fan or automatic opener, note whether it operates when expected and whether the inlet and outlet are clear. Observe operation only as the manual permits. Record both the controller's setting and the vent's actual position: a command to open is not evidence that the opening has moved. A stuck vent or blocked intake deserves attention before you conclude that the structure needs replacing. When reviewing the Prestige greenhouse, use the selected version's drawings to locate each opening and identify how it is operated. Ask which ventilation components are included and which, if any, are optional. That gives you a concrete equipment checklist rather than an assumption based on the product name.
Interpret the temperature pattern
Look for patterns across sensors and over time, rather than focusing on one high reading. If only a sensor in direct sun spikes while a shaded sensor nearby does not, placement or the instrument is a likely place to investigate. If several well-placed sensors rise together as sunlight reaches the greenhouse, the increase is more likely to be real. A consistently warmer corner may point to a local sun patch, a blocked path, or a nearby heat source. Mark the times when vents or fans change state so you can compare the readings with what the equipment was doing.
If indoor temperatures remain elevated after outdoor air cools, consider several possibilities: surfaces may still be releasing heat, openings may be closed or restricted, or the air may not be moving as intended. That lag is a clue, not proof of a particular fault. Check whether the cooling pattern appears throughout the greenhouse or only in one area. The large backyard greenhouse listing includes footprints from 506 to 753 sq ft; when assessing a structure of that scale, mark each sensor's location on a floor plan so a single reading is not mistaken for a complete picture. Compare the timing of the rise and fall at each location, as well as the maximum temperature.
Use humidity as supporting evidence
Log relative humidity alongside temperature, but do not treat one number as a diagnosis. Relative humidity describes how close the air is to saturation with water vapor at its current temperature. As air warms, the relative humidity reading may fall even if the amount of water vapor has not changed. For that reason, a lower humidity reading during a temperature spike does not necessarily mean moisture has left the greenhouse. Compare readings taken at the same location and consider the temperature change at the same time. If your logger also displays dew point, it can provide supporting information about moisture changes, but first confirm how the device measures or calculates it.
Record when you water, whether floors or containers are wet, and whether dense plants or stored items block air movement. These observations can help explain changes in moisture and ventilation, but humidity alone cannot show whether the greenhouse is exchanging enough air. For the aluminum greenhouse with built-in storage, request the layout drawing and establish whether the storage and growing areas share an air path. Use that information to decide whether separate sensor locations would be useful. In an existing structure, note where watering and wet surfaces are concentrated so you can distinguish a local moisture change from a change across the growing area. Use crop-specific guidance rather than treating one humidity value as a universal target.
Test shading only after checking the basics
If a correctly placed sensor shows a repeatable rise that follows strong sun, shading may reduce incoming solar energy, but it also changes the light available to plants. Consider the crop's light needs and, where useful, measure light rather than selecting a shade level by guesswork. First make sure the temperature reading is credible and the existing ventilation path is clear. Shade should not cover or obstruct vents, doors, or controls, and any attachment must suit the greenhouse and its instructions.
A controlled comparison is more informative than adding shade and changing several other settings at once. On comparable sunny days, record the vent and fan positions before and after a compatible shade trial, along with any change in cloud cover or wind. Compare the rate of warming and the daily peak, not just a reading immediately after the shade is placed. If you are considering a Classic aluminum greenhouse, ask which shading arrangements are compatible with the selected version and how they affect access to openings and controls. No shading option is established by the supplied listing. A successful trial can show that solar gain contributed to the problem; it cannot establish that ventilation will be adequate in every weather condition.

Separate an operating problem from a design limitation
A sensor that disagrees with another device, a vent that will not open, or a fan that does not run points to a specific check or repair. If the sensors are reliable and the openings work as intended, but repeated sunny-day logs still show heat building faster than it leaves, the current configuration may not be meeting the conditions at your site. Sun, wind, screens, the arrangement of plants, and the way openings are operated all affect the result. A persistent pattern is a reason to review the system, not proof that one particular accessory or replacement will solve it.
Before buying a different structure or ventilation equipment, turn the log into a clear description of the unresolved problem: when the temperature rises, where it is highest, and what happens with the existing openings fully available for use. For a comparison involving the limited-edition aluminum greenhouse, request the selected version's opening locations and sizes, operating methods, and any fan specifications. Ask a greenhouse professional to explain how the proposed configuration addresses the pattern you recorded at your site. A useful assessment should consider exposure, screens, planting layout, and the space you need, rather than floor area alone. This separates a documented reason for changing the design from a purchase based only on one unusually hot afternoon.
Bring useful records to an installer or equipment professional
If a fan, controller, or moving vent appears to fail, start with checks allowed by its manual and contact the manufacturer or a qualified service professional when more is needed. Do not remove guards, work on wiring, or force a jammed component. For a broader assessment, bring the temperature and humidity log, sensor make and model, greenhouse sketch, dates and weather observations, and notes on vent positions and fan operation. Include photos of the sensor location and any opening or obstruction you observed. This gives the professional a clearer picture than a single peak temperature.
Make photographs easy to interpret: label the date, viewing direction, sensor position, and whether each pictured vent was open during the logged period. Include a wider view of the surroundings as well as close-ups of any obstruction or malfunction. For a purchase inquiry about the T-model greenhouse, identify the intended footprint within its listed 178 to 323 sq ft range and attach your site sketch. Ask the professional to distinguish findings supported by your records from questions that require an on-site inspection. Keep a written record of any proposed equipment changes and the conditions under which their results will be checked. That gives you a practical way to evaluate the work afterward.
Frequently asked questions
Can direct sunlight make a greenhouse thermometer read too high?
Yes. Sunlight can warm the sensor itself, so it may show more than the surrounding air temperature. Place it in a ventilated radiation shield, follow the device instructions, and compare it with a second thermometer in the same shaded location.
Should the temperature inside my greenhouse match the forecast high?
No. A forecast describes outdoor conditions for a particular area and time, not the air inside an enclosed greenhouse. Compare indoor readings with actual outdoor observations from the same time rather than with a forecasted daily high.
How often should I record greenhouse temperature and humidity?
Use a repeatable schedule that covers the warming period, the day's outdoor peak, and the time when the greenhouse cools. Add a note whenever you change a vent or fan setting. A data logger can help show the curve, but consistent manual readings are useful too.
Does high humidity cause a greenhouse to get hotter?
A humidity reading alone cannot identify the cause of a high temperature. Relative humidity changes with air temperature, even if the amount of water vapor stays the same. Track both readings together and note watering, wet surfaces, and ventilation.
Will opening the vents always solve greenhouse overheating?
Not necessarily. The result depends on the greenhouse's openings, airflow path, wind, sun, and whether vents or screens are obstructed. Check the equipment instructions and record what changes when vents are operated as intended. Ask a qualified professional to assess ventilation sizing if the issue persists.
Once the sensor and comparison are sound, the temperature pattern can narrow the cause: a sun-linked rise, a ventilation response that is not cooling the space, or a reading isolated to one spot. Keep the record through comparable days and change one factor at a time. You can then distinguish a placement adjustment or operating issue from a need for a documented ventilation or shading assessment.
