
Why Do Tomatoes Split in a Greenhouse? Causes and Next Steps
Greenhouse tomato care
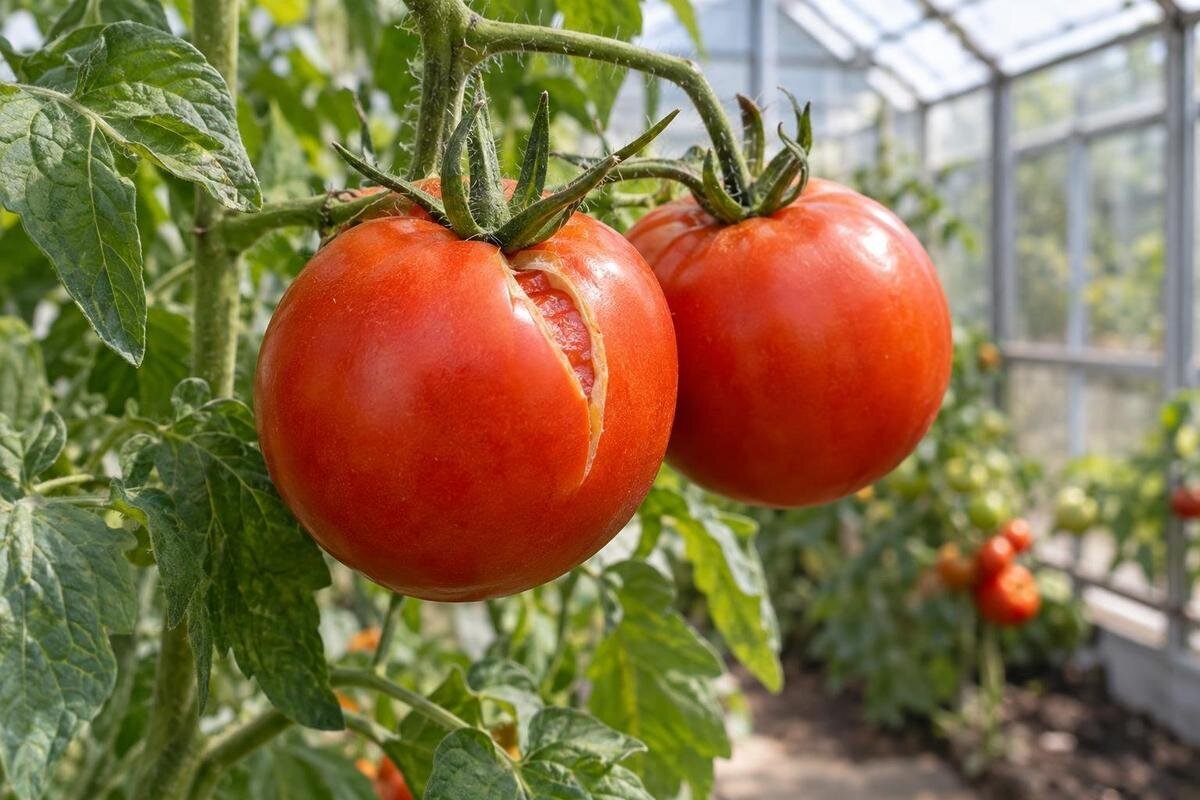
Tomato splitting in a greenhouse is commonly linked to fluctuating soil moisture, sometimes alongside changes in temperature. One crack alone cannot establish the cause. Start by checking whether the roots experienced a dry interval followed by a much wetter period, and compare affected tomatoes with sound fruit nearby. Record ripeness, variety, recent weather, and irrigation differences rather than assuming every split has the same explanation. These observations can help you narrow down the likely trigger, decide which fruit needs prompt attention, and adjust watering without leaving the soil constantly wet. The goal is to prevent new damage, not to restore fruit that has already split.

What tomato splitting looks like
Tomato cracks generally appear in two patterns. Radial cracks start near the stem scar and run lengthwise down the sides; concentric cracks form rings around the stem end or shoulders. They may be fine lines that stay dry, or open fissures that expose the flesh. The shape describes the damage, but it does not identify its cause. Note whether the fruit is green, changing color, or fully ripe, and whether the crack is shallow, branched, wet, or widening. Compare fruit on the same plant and across different parts of the greenhouse rather than treating one striking example as the whole story.
Before cutting a specimen, photograph the whole tomato and a close-up that includes the stem end. Record the date, cultivar, bed or row, and recent watering so you can compare it with other fruit. A cluster of cracks after a dry spell and a large watering is a useful clue, while one isolated cracked tomato may have a different history. Photos cannot show root-zone moisture or prove what caused a split. Note any soft or discolored tissue beyond the crack, too; an open split can later develop secondary decay.
How uneven moisture contributes to splitting
The Royal Horticultural Society identifies fluctuations in soil moisture as a cause of tomato splitting and cracking. Its guidance also notes that variable temperatures can contribute to fruit disorders. This makes the history of growing conditions more useful than the appearance of a single crack. A dry interval followed by a substantial watering is one pattern to investigate, but you need evidence that the root zone actually dried. Check your observations against irrigation records and nearby plants. The day you notice a split may not be the day the conditions that contributed to it began.
Uneven moisture is a common trigger, not a diagnosis that fits every damaged tomato. A greenhouse blocks much of the direct rain that reaches outdoor beds, but it does not make moisture stable. Pots, raised beds, and different sections of a long bed can dry at different rates. Record the variety, fruit size, and stage of ripeness so you can compare like with like rather than assigning every difference to irrigation. Cracking alone is not a reason to add calcium or increase fertilizer. Extra feeding will not close split skin; first establish whether the water supply has been consistent.
Watering fluctuations to look for
Look for a dry-to-wet swing rather than simply too much water. Clues include a missed irrigation followed by a long catch-up session; a container that dried hard and was then soaked; hand watering that varies from plant to plant; an uneven line or blocked emitter; or a hot, sunny spell that raised water use before the usual watering. In one greenhouse, a bed can stay damp while a pot near the edge dries quickly. A large application may contribute when it follows dry root conditions, but the amount alone cannot prove the cause. Constantly waterlogged soil is a separate problem, not the goal.
Review the week or two before the first crack: watering dates and duration, missed days, unusually warm or cloudy weather, and which plants were affected. Distinguish a change in the watering schedule from a change in how much water actually reached each plant. A timer running normally does not rule out a blocked emitter or runoff. Note whether splits cluster in one row, one pot, or fruit at the same stage. If you are also comparing new growing spaces, the Limited Edition greenhouse listing gives an area range of 40.6 to 302 sq ft. On a proposed floor plan, identify which beds would share a watering line and which containers would need separate attention. That helps expose management differences before you apply one watering routine to the entire space.
Check moisture at the roots
Check below the surface, not just by looking at the top layer. Sun and air movement can dry the upper soil while deeper soil stays wet; a container surface can look damp even when the root ball has dried unevenly. At several plants, feel the growing medium below the surface where roots are active, or use the same probe method at comparable points. Compare the center and edge of a bed, and check a plant with cracked fruit alongside one that looks normal. For pots, check the medium within the root zone, not just the drainage tray. Repeat checks at a consistent time so you can make meaningful comparisons.
Then check whether irrigation reaches those same spots. Look for dry patches between emitters, runoff that escapes the bed, standing water, or different output near and far along a line. Mark wet and dry areas on a sketch and repeat the check after the next normal watering. If you compare emitter output, collect water for the same length of time at each point; unequal collection amounts identify a delivery difference, though not its cause. For a future layout, the T-Model greenhouse listing provides a starting footprint of 178 to 323 sq ft. Sketch the irrigation route and inspection points within your chosen configuration. Leave access to the ends of lines and bed edges so checking delivery does not require reaching through dense tomato foliage.
How greenhouse conditions affect water demand
Sun and temperature change how quickly tomato plants use water. On bright, hot days, foliage loses more water and root zones can dry faster; cool, overcast stretches reduce demand. A fixed amount on a rigid calendar may therefore be too little in one spell and too much in another. Greenhouse air can heat quickly, while a roof usually means rainfall does not evenly water the beds. High humidity by itself is not a reliable explanation for cracked fruit, and opening vents without checking the soil will not correct an uneven irrigation pattern. Treat heat as a factor that changes the rate of drying, not proof of the cause.
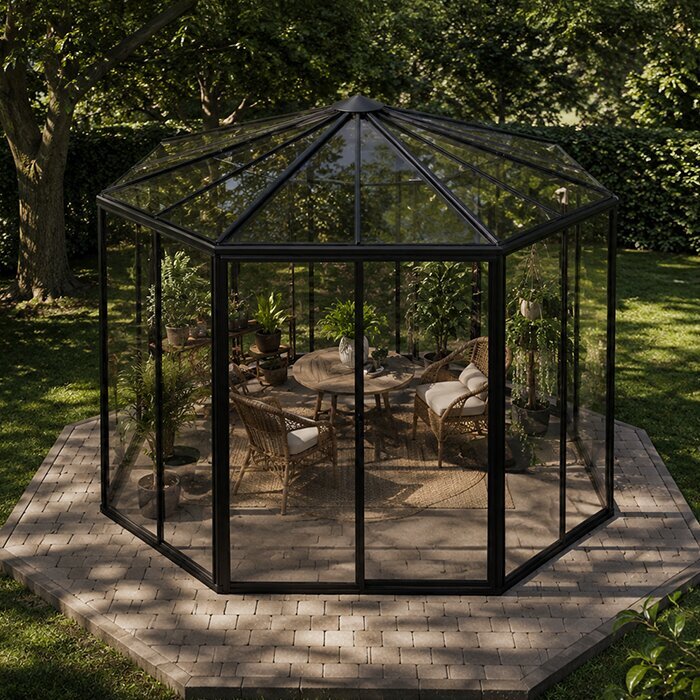
Use a max–min thermometer near the crop and note the day’s conditions alongside root moisture and watering. Record major shifts in sunlight, outside temperature, and vent operation. Keep the thermometer in a consistent position so relocating it does not create an apparent temperature change in your log. Ventilation can help manage heat, but soil checks are still needed to understand how the crop responds. When considering the Pyramid greenhouse options, ask for the ventilation details of the configuration you are comparing; the supplied listing identifies the greenhouse and its area range, not its vent arrangement. Check how vents would be operated once plants are tall and where you could monitor conditions near the crop. These are questions about daily management, not evidence that a greenhouse shape prevents cracking.
Compare fruit stage and variety
Record whether each affected tomato is green, beginning to color, or fully ripe. Fruit stage helps you interpret a pattern, but it does not establish the cause of a crack. For example, finding damage only at harvest does not tell you when the split first appeared. Inspect developing clusters as well as tomatoes ready to pick, and label observations by variety. If one cultivar repeatedly shows more cracking, check whether its plants also occupy a drier part of the bed or receive different irrigation before attributing the difference to the cultivar itself.
The RHS advises prompt harvesting to help reduce losses from splitting. Check harvest-ready fruit regularly while investigating a moisture swing, and remove damaged tomatoes rather than leaving them until the next large picking session. For a useful comparison, record the color stage at harvest and distinguish newly noticed splits from older, dry scars. If the greenhouse with built-in storage is among your layout options, establish how much room remains for growing beds in the configuration you are considering. Plan labeled cultivar positions and access for harvesting each row. Keep baskets and other equipment where they will not hide low clusters or block the route between beds. That makes it easier to inspect each variety consistently instead of overlooking the least accessible plants.
Distinguish splits from other damage
Check that the main feature is a break in the skin rather than a discolored patch, puncture, or area of collapsed tissue. Describe what you can see before assigning a diagnosis: where the damage begins, whether the skin has opened, and whether the surrounding flesh looks firm or deteriorated. A dark patch at the blossom end and a split near the stem are different observations and should not automatically receive the same explanation. Damage can also overlap. The RHS notes that splits allow fungi to enter fruit, so decay may obscure the original crack by the time you inspect it.
Inspect fruit on several plants and compare affected and unaffected areas. Photograph an early example as well as older damage, and record whether leaves are wilting or spotted and whether nearby soil is wet or dry. If lesions spread or the whole plant declines, ask a local Cooperative Extension office or plant diagnostic service for help. A location map makes those observations easier to interpret. If you are planning beds in a Prestige greenhouse, use the proposed layout to assign row and pot labels before planting. In an existing greenhouse, a simple hand-drawn sketch serves the same purpose. Put those labels in photographs and crop notes so a recurring problem can be traced to a particular location rather than remembered only as affecting a few plants.
What to do with cracked tomatoes
Pick a cracked tomato promptly, particularly if it is ripe or the split is open. The break in the skin exposes tissue to dirt and organisms that can cause decay, and fruit left on the vine may deteriorate before your next inspection. Separate cracked fruit from sound harvest rather than treating all tomatoes as equally storable. A dry, fine surface line differs from a deep, wet fissure, but even a shallow crack deserves a close look. Do not use a tomato with visible spoilage as a test of whether the plant problem is only cosmetic.
Advice about preventing cracks is not a food-safety assessment of an individual tomato. Do not assume that a small split makes fruit safe to eat, or taste questionable fruit to judge its condition. Discard fruit showing mold or decay; if you are uncertain about damaged fruit, seek current food-safety guidance from your local Cooperative Extension office. Keep questionable tomatoes separate while sorting so they are not mistaken for intact fruit intended for storage. If you are considering the large backyard greenhouse listing, which covers 506 to 753 sq ft, plan a collection route around the beds you actually intend to install. Leave a convenient place to inspect the harvest and separate damaged fruit before moving sound tomatoes into storage.
Keep water steady without waterlogging the roots
Once you have checked root-zone conditions, aim for a repeatable supply that keeps active roots from swinging between very dry and saturated. Base watering decisions on what the soil or potting mix is doing and on current weather, not on a calendar alone. Apply water in a way that reaches the root zone across the bed instead of soaking one corner, then adjust gradually as you learn how quickly each area dries. Containers, raised beds, and in-ground beds can need different attention, so one number of minutes or gallons is not a reliable rule for every greenhouse.
Do not respond to cracking by sharply withholding water; that can create the dry interval that makes the next application a bigger swing. At the same time, do not keep roots constantly wet. Check drainage where water collects, and confirm that containers can drain rather than remaining in standing water. With a timer or drip line, adjust the routine only after checking both delivery and root-zone moisture, then reassess when plants grow or weather changes. If you are comparing the Classic aluminum greenhouse listing, plan irrigation around your proposed beds and containers rather than choosing a schedule from the greenhouse’s total area. Group locations only when their moisture checks support the same routine. Keep a separate note for a pot or bed that repeatedly dries sooner so it does not dictate watering for every plant.
Track patterns and make the layout easier to manage
Keep a short log for the next few clusters: variety, row or pot, date, fruit stage, watering duration, root-zone feel, and greenhouse temperature or weather. When a fresh crack appears, look back at the conditions recorded before you noticed it rather than assuming that day’s watering caused it. Change one part of the routine at a time and observe fruit that was previously intact. An existing crack may dry and scar, but the tomato will not return to its undamaged condition, so it is a poor measure of whether an adjustment prevented new damage. Compare fruit at similar stages of ripeness across several harvests; a repeated pattern is more useful than one dramatic tomato.
Access makes observation easier. Arrange beds and containers so you can inspect fruit near the back, reach irrigation fittings, and check soil without stepping into the growing area. Keep row labels visible as foliage fills out, and avoid placing frequently moved equipment where it blocks the inspection route. For an existing greenhouse, moving a container or clearing a path may be enough to improve access; replacing the structure is not a treatment for splitting. If you are considering the Lean-To greenhouse listing, its supplied area range is 40 to 154 sq ft. Draw the proposed beds and paths within the configuration you are evaluating, including the reach to plants along the wall. Use that plan to assess whether your routine checks would remain practical when the tomato plants are mature.
Frequently asked questions
Will a split tomato keep ripening?
It may continue to color, but ripening does not restore intact skin or rule out decay. Pick cracked fruit promptly rather than leaving it on the plant to see whether the split closes. Keep it separate from sound tomatoes and discard fruit showing mold or decay.
Can you eat a cracked tomato?
A crack alone cannot tell you whether a tomato is safe to eat. Its depth, contamination, and the fruit’s condition matter, and appearance cannot provide a guarantee. Discard spoiled or questionable fruit rather than tasting it to decide. For advice about using damaged tomatoes, consult current food-safety guidance from your local Cooperative Extension office.
Should I stop watering when tomatoes split?
No. Withholding water sharply can create another dry-to-wet swing. Check moisture where the roots are growing, then aim for a steadier supply without leaving the soil saturated.
Why are only some tomatoes splitting?
Check whether the affected tomatoes share a variety, stage of ripeness, or location. Plants in different parts of the greenhouse may receive different amounts of water, and damage may be noticed at different times. Compare affected fruit with nearby sound fruit and check the soil around both plants before drawing a conclusion.
Does high humidity cause greenhouse tomatoes to split?
Humidity alone is not a reliable explanation. Uneven root-zone moisture is a common pattern to investigate, while temperature and sunlight can change how quickly the soil dries. Check both conditions rather than relying on humidity as a diagnosis.
Most greenhouse tomato splitting is best approached as a water-pattern problem to investigate, not a single visual diagnosis. Check root moisture in more than one place, compare affected fruit’s ripeness and variety, and review the conditions before the crack appeared. Keep soil evenly moist without leaving it saturated, pick damaged fruit promptly, and watch new fruit after making a measured adjustment. If the pattern continues despite steadier moisture—or other lesions or plant decline appear—seek a local diagnosis rather than adding water or fertilizer blindly.
