
Assessing Newly Landscaped Ground for a Greenhouse
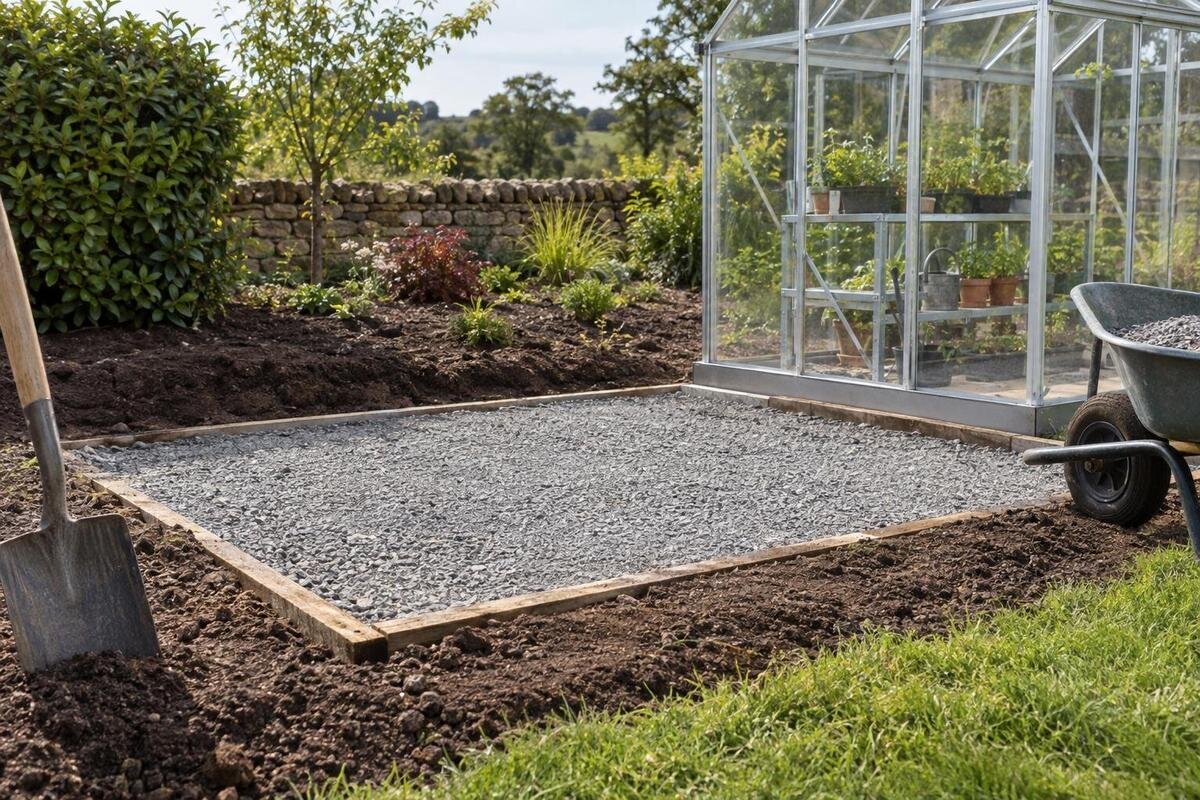
Greenhouse site planning
A recently landscaped garden can look level, complete and ready for planting while the ground below still has an uncertain history. New fill, cut areas, backfilled trenches and changed drainage paths may all be hidden by turf, paving or fresh topsoil. Before planning a greenhouse foundation, find out what work was done, look for signs of movement, map the intended finished levels and understand where water will go. This guide focuses on those post-landscaping checks. It does not give a standard foundation size or replace site-specific advice for a particular ground condition.

01
A finished garden does not prove the ground is settled
Assess the ground beneath the entire proposed greenhouse, rather than judging readiness from the garden’s finished appearance. A greenhouse base relies on consistent support across its designed footprint. If one part continues to settle more than another, the base can lose its intended level or alignment. The distinction matters where landscaping has left different ground conditions beneath an apparently uniform surface: original ground at one end, for example, and recent fill or a backfilled trench at the other. Establishing where those changes occur helps you identify what needs assessment before deciding on the base position or covering the area with further finishes.
Treat readiness as three separate questions: what lies beneath the full proposed footprint, whether the ground suits the selected base, and where water will travel after landscaping is complete. Records and site observations help answer them; a newly landscaped site is not automatically unsuitable. If the Spacious Greenhouse is on your shortlist, note the exact model and configuration before requesting its matching base drawing. A product title or photograph cannot show the buried ground or set out the foundation. Keep that drawing distinct from the landscaper’s surface plan, which may show finished turf and paving without recording the layers below.
Find out what changed below the surface
Ask the person who carried out the work what was removed, what was brought in, where it was placed and when. Request plans or dated photographs showing excavations, fill boundaries, trenches and retaining work. Ask which materials were used in each layer and for what purpose, and whether records of placement or compaction are available. Find out which areas were disturbed for irrigation, drainage, lighting or other services, and how those trenches were reinstated. These details matter because a buried trench or patch of recent fill may cross only part of the proposed footprint, while the finished surface makes the area look uniform.
Mark known cut and fill zones, original ground, backfilled trenches, raised areas and retaining edges on one sketch rather than relying on memory. If the map is incomplete, label the gaps and ask the landscaper or builder to help reconstruct it; do not treat a continuous lawn as evidence of consistent ground below. A Classic aluminium greenhouse can be plotted against that sketch once you have the correct footprint from its drawing. The useful question is whether the proposed support area crosses new fill or a transition, not whether the model looks compact or familiar in a catalogue.
02
Look for movement over time
Walk the full proposed footprint and nearby ground, looking for fresh depressions, uneven patches, gaps beside edging, shifted paving or cracks and movement at retaining edges. Note where water sits after rain, where it runs and whether a path or garden bed appears to have changed level. These are screening clues, not a diagnosis: a crack may have more than one cause, and a smooth finish can hide movement underneath. Photograph each location from a consistent viewpoint, add the date and weather, and compare the images with earlier photographs from the landscaping work.
A single inspection records one moment, not a history. If the work is recent, ask a suitably qualified professional what further assessment or monitoring is appropriate; there is no universal waiting period that proves every fill area has stopped moving. Time elapsed on its own does not establish how the ground was prepared. Whether you are considering a Lean-to greenhouse or another configuration, assess the whole intended base area: a stable-looking corner cannot stand in for evidence about the rest of the site. Record any unresolved movement before covering it with more paving or planting.
Coordinate the footprint with finished levels
Separate the levels visible today from those planned after the final paving, turf, garden edging or path is installed. The landscaper’s finished level may not match the level required by the greenhouse base drawing, so show both on the same site plan and identify a fixed reference point. Mark the proposed perimeter, entrance and adjoining surfaces, then ask the supplier or installer which parts of the current model drawing apply. This is coordination, not a recommendation for a standard height or a foundation calculation: the actual drawing and site conditions control. If the finished levels are still changing, keep the foundation decision provisional.
Check whether the proposed footprint lies entirely within one prepared area or crosses a boundary between areas with different ground histories. Also mark changes in surface level between paving, turf and raised beds. A level-looking surface can conceal different layers beneath it, while a sloping site cannot be assessed from a single level at the entrance. If you are considering a Limited Edition aluminium greenhouse, use the drawing for the exact version on your shortlist and have the planned finished levels reviewed against it. Do not assume another model’s drawing, an adjacent path or a garden wall establishes the right base level. Record open questions before work starts.

03
Trace runoff around the proposed greenhouse
Landscaping can change drainage routes as well as levels. New paving, compacted paths, raised beds and edging may send water towards a low spot that was not obvious before, while soil may behave differently once planted or covered. Inspect during or soon after rain, noting where water arrives from, where it pools, how long it remains and where it leaves the area. Look beyond the greenhouse outline, including ground upslope and the route around its sides. A dry-day inspection cannot show the full pattern, and one puddle is not enough to identify its cause.
Sketch the intended water route from the surrounding garden and the greenhouse roof, and confirm where the water will be managed. Do not assume that topping up a low area, adding a gravel strip or directing water towards an existing drain will solve the problem; the receiving point needs site-specific review. A proposed T-Model Orangery Greenhouse belongs on the same levels-and-drainage plan, so its chosen footprint is considered alongside the finished surfaces. If runoff still has no clear route or collects near the proposed support area, ask a suitably qualified drainage or site professional to assess it before finalising the base.
Review fill boundaries and retaining edges
Look closely at boundaries between raised and lower parts of the garden, especially where the landscaper has cut into a slope, added fill, built a retaining edge or laid paving against a garden bed. A greenhouse placed across one of these transitions may sit over ground with different histories on either side, even if the finished surface looks continuous. The visible wall, edging or paving does not show whether the material behind or below it is suitable for the proposed base. Mark these features and have their relationship to the footprint reviewed rather than treating a tidy retaining edge as a foundation.
Do not rely on a garden wall, retaining structure or decorative edging as part of the greenhouse support unless the design and a suitably qualified professional confirm that role. This matters where fill was placed behind a wall or levels were changed close to the footprint; a surface-only inspection cannot reveal every buried condition. If the Pyramid Greenhouse is under consideration, mark its proposed base area against wall corners and level transitions on the site plan. The product identity does not establish what lies under that area, so the site history and review still determine whether it can be prepared as proposed.
04
Locate services and preserve access
New landscaping can conceal irrigation lines, stormwater pipes, electrical supplies for garden lighting and other services. Ask the landscaper, builder and relevant service providers for current records, including routes that cross the proposed base and locations that need future access. A plan drawn before excavation may not show changes made during the work, so request updated as-built information or a clear account of what was altered. Before anyone excavates for a base or adjusts levels, have unknown services identified through the appropriate provider. This is a coordination check, not a reason to locate or disturb services yourself.
Include service routes, access points, taps, drains and paths on the same plan as the proposed greenhouse, so the footprint does not simply cover a maintenance issue. If a Limited Edition greenhouse with built-in storage is on your list, use the exact configuration drawing to plot the complete intended footprint; do not infer it from the product label. The site plan should also show practical access for installation and later maintenance, without treating a path or paved strip as proof of support below. If a service route conflicts with the base, resolve that issue with the relevant professional before foundation work begins.
Use the drawing for the exact greenhouse model
Once the site history and likely footprint are clear, obtain the current manufacturer base or foundation drawing for the exact model, size and configuration being considered. Use the drawing and any accompanying notes to identify the support footprint and the requirements specified for that model; do not scale a product image or copy a drawing for another version. Ask the supplier or installer to clarify any detail that affects the relationship between the base and finished ground, including levels or interfaces, rather than guessing. If you change the selected model or configuration, check the documentation again.
Send the drawing with the earthworks sketch, dated site photographs, proposed finished levels and drainage notes to the person reviewing the groundwork. A Prestige greenhouse product page identifies a candidate; it cannot establish the condition of newly landscaped ground. Ask the reviewer what evidence they considered, what remains unknown and whether further investigation is needed before the base is designed or the ground is covered. A model-specific drawing and a site review answer different questions: one concerns the intended greenhouse arrangement, while the other assesses the conditions where it will sit.

05
Know when to pause for further assessment
Pause and obtain further advice if fill boundaries are unknown, the proposed base crosses new fill and original ground, the surface is still changing, or water repeatedly collects near the footprint. Movement at a retaining edge, a buried trench without a clear reinstatement record, or levels that continue to be adjusted are also reasons not to judge readiness by appearance alone. These signs do not automatically mean a greenhouse cannot be installed. They indicate that the available evidence may not be enough to plan its foundation responsibly. A site professional can review the history and advise whether a more specialised assessment is warranted.
Be precise about the question you need answered. Ask whether the available evidence supports the proposed base position, whether further ground investigation is appropriate, and which finished levels and drainage arrangements need to be confirmed before work proceeds. If the main concern is heavy clay rather than recent fill, assess that ground condition separately instead of assuming both have the same cause or solution. Where there is complex fill, retaining work or uncertain services, a geotechnical, structural or service professional may need to contribute. A drainage problem is not automatically proof of settlement, so establish what is causing it before choosing a response.
Assemble a site record before foundation work
Before installation, assemble a readiness pack with the exact model drawing and a site plan showing the intended footprint, original and finished levels, known fill or cut areas, trenches, retaining edges and drainage routes. Add dated photographs from the landscaping work and later inspections, available descriptions of fill and placement, any compaction records, and notes on water pooling, movement and service locations. Mark unknowns as unknown rather than filling gaps with assumptions. A clear record helps a qualified reviewer compare the proposed support area with the site’s actual history instead of relying on the finished surface as the only evidence.
Consider the site ready for foundation planning when its ground history has been documented or assessed, relevant signs of movement have been addressed, the final levels have been coordinated with the exact model drawing, and the water route is understood. Give the relevant professionals a chance to resolve questions about fill, retaining edges and services before work proceeds. This is not a demand for a perfect garden or a fixed waiting period; it separates known conditions from unanswered ones. If a key detail remains uncertain, keep the plan provisional until it has been reviewed.
Frequently asked questions
Can I install a greenhouse on recently landscaped ground?
Possibly, but the landscaping date alone does not confirm that the ground is ready. Find out what was placed, where it lies under the proposed base and what records are available about the work. If the history or signs of movement are unclear, have the site reviewed before setting final levels.
How long should I wait after new fill is placed?
There is no single waiting period that proves all fill is stable. Time may reveal movement, but the material, placement, site history and later observations matter too. Ask a suitably qualified professional what evidence or monitoring is appropriate for your site rather than relying on a calendar date.
Does a flat paved area prove the base is ready?
No. Turf and paving can conceal layers or disturbed ground beneath them. Finished levels describe the surface; they do not establish how the supporting ground was prepared. Use earthworks records and a site-specific review as well.
What if the footprint crosses original ground and new fill?
Do not assume the transition is harmless because the surface looks level. Have the proposed base reviewed against the exact greenhouse drawing and available fill records. A qualified professional can advise whether more information or investigation is needed.
What should I give the installer or site assessor?
Provide the current model drawing, a plan of proposed finished levels, site photographs, records of fill and trenches, any placement or compaction records, drainage observations, retaining-edge details and known service routes. Mark gaps in the information clearly instead of guessing.
A newly landscaped site does not need to be ruled out simply because work was recent, but a finished surface is not enough to establish readiness. The decision rests on understanding the ground beneath the proposed footprint and coordinating the base with final levels and drainage. Keep unresolved details visible in the plan so they can be assessed before further finishes conceal them or foundation work begins.
