
Greenhouses in Frost Pockets: Assessing a Low-Lying Garden
Greenhouse site planning
Before committing to a greenhouse in a low-lying garden, find out whether cold air repeatedly settles there and how its overnight minimum compares with nearby ground. A short, matched temperature survey, supported by a sketch of levels, barriers and possible footprints, can reveal patterns that a forecast or one frosty morning cannot. The aim is not to declare every hollow unusable. It is to identify a position that suits the plants, establish what an unheated structure can and cannot be expected to do, and decide whether heating needs a separate assessment.

How frost pockets form in low-lying gardens
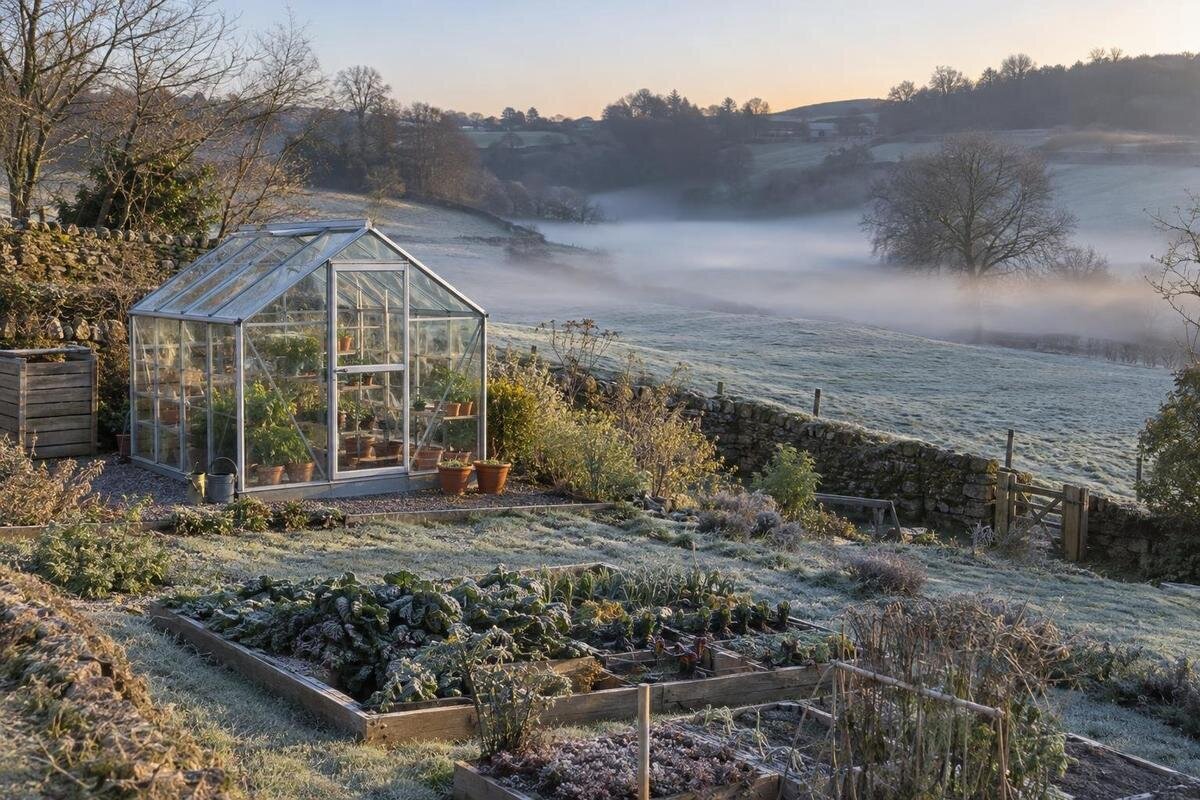
On a clear, calm night, the ground loses heat and cools the air just above it. That denser air can drain downhill, following the fall of the land until a hollow, bank, hedge, fence or building slows or redirects it. A frost pocket is an area where this cooled air repeatedly gathers, producing lower minimum temperatures than nearby higher ground. Low elevation alone is not proof: wind can mix the air, cloud cover changes overnight cooling, and barriers can alter the route. The practical question is whether one proposed greenhouse position stays colder than other realistic positions in comparable weather.
Clues include frost lingering in one hollow after it has cleared elsewhere, or repeated damage to frost-sensitive plants in the same part of the garden. Treat these as reasons to investigate, not measurements: leaf temperature can differ from an air reading, and plant damage has other causes. A dip may be colder on calm nights but show little difference when wind mixes the air. Compare the bottom, middle and higher parts of the block rather than relying on a single frost event. This will show whether the whole site is low or only one pocket is affected.
Map ground levels and possible cold-air routes
Draw a scaled plan and, where the ground falls, a simple side profile. Mark higher points, hollows and slope direction, then add retaining edges, raised beds, fences, dense hedges, sheds, tree lines, gates and open gaps. These features may guide or interrupt near-ground air movement, so show where they sit rather than drawing one assumed flow arrow across the block. Mark realistic greenhouse positions and access routes. Add a seasonal shadow diagram and dated photographs from repeatable viewpoints; dawn images can record where frost lingers. Mark wet patches and drains separately: surface-water paths and cold-air routes may overlap, but one does not prove the other. Keep the plan clear enough to show whether a footprint lies in a hollow, across its edge or on higher ground.
Use arrows to sketch likely downhill routes and places where air might be diverted, but treat them as hypotheses to test with readings. Note approximate level changes; a garden sketch is not a construction survey and does not establish a universal rule for siting a structure. The Aluminium Greenhouses range lists sizes from 3.77 to 28.08 m², which can help you screen possible footprints. Area does not show exact length and width, so once you have a model in mind, compare its dimensions with the mapped cold zones, access and usable ground.
Place minimum thermometers consistently
Use either a minimum/maximum thermometer that retains overnight extremes or a temperature logger that records readings over time. A minimum/maximum instrument shows how low the air fell; a logger also shows when it cooled and how long the site stayed near its minimum. Use matching instruments where possible, set them to the same units and check that logger clocks agree. If you use minimum/maximum thermometers, read and reset them at the same time each morning so the measurement periods match. Before placing them, set them side by side and compare readings. Note battery changes, resets or unexplained outliers, and follow the maker’s operating notes.
Exposure matters as much as the instrument. Put each sensor in a shaded, ventilated radiation shield, away from walls, paving, roofs or windows that could affect its reading differently. Mount it at a representative height for the plants you plan to grow; if frost close to the ground matters, a second sensor can measure that separate level. Do not rest the thermometer on soil or press it against a fence. Record the exact position and height on your sketch, and keep them consistent between sites and nights. A thermometer measures the air at its sensor, not the temperature of every leaf or surface nearby.
Log more than one type of night
There is no fixed number of nights that proves a garden is frost-free. Log through the part of the year when your intended crops will be in the greenhouse, including repeated clear, calm nights and other conditions common on the site. A brief run can screen locations, but a warm spell or one isolated cold night is a poor basis for a long-term decision. If you intend to grow beyond one season, continue the survey across the relevant seasons instead of extrapolating from a small sample. Mark gaps, sensor faults and any period when equipment was moved so you can judge how much confidence to place in the record.
Each morning, note the minimum and maximum, the time of the minimum if available, cloud cover, wind direction and estimated strength, rain or wet ground, and whether frost appeared on grass, leaves or hard surfaces. Repeatable photos can show where it formed. A nearby weather station or forecast adds context but is not a substitute for a garden reading. If a wall-side position is a genuine option, measure it as a separate micro-site rather than assuming it will be warmer. The Wall Greenhouse range is listed from 3.69 to 14.34 m²; use a specific model’s footprint to decide which wall-side position your sensor should represent.

Compare candidate positions under the same conditions
To compare candidates fairly, place sensors simultaneously at the lowest point and at one or more alternatives, such as a gentle rise, open mid-slope or wall-side area. Match their height, screens and measuring period, and leave them in place on the same nights. Compare instruments side by side before and after the run if possible. If you have only one, moving it between sites on successive nights is useful for reconnaissance but weak evidence for ranking: different weather can explain the difference. A fixed reference sensor helps, but record conditions carefully and avoid treating non-matching nights as a controlled comparison.
Measure across the proposed outline, not just at a convenient corner. A larger footprint may span a hollow’s edge, so put a sensor near the coldest relevant part and, if practical, another where the main growing area would be. Note any likely drainage route crossing the outline. The Limited Edition Aluminium Greenhouses are listed in sizes from 3.77 to 28.08 m²; use the actual dimensions of a shortlisted model to see which terrain it would cover. A single reading from the garden’s warmest patch cannot represent a whole greenhouse site.
Interpret minimum readings in context
Do not judge a site from its single lowest reading or its seasonal average alone. The lowest reading shows a possible extreme, while the average can hide a short but severe dip; neither tells you how often cold spells occur. A logger shows their timing and duration, whereas a minimum/maximum thermometer records only the temperature extremes. Compare sites during the same clear, calm nights, then note whether their ranking changes in windier or cloudier conditions. Keep each night’s readings rather than removing a low value because it looks unusual; first check whether a reset, battery or placement problem explains it.
Summarise each position with its lowest reliable result, a range of repeated minima and the conditions associated with them. Note how often it is colder than the reference site, not just by how much on the coldest morning. This helps distinguish a persistent pocket from a one-off event. The T-Model Orangery Greenhouse is listed in sizes from 16.52 to 30 m²; if one of those options is on your shortlist, place its full footprint on the cold-air map. The size listing does not identify a warmer location or predict the temperature inside.
Balance frost exposure with light and access
Choose among positions using temperature evidence alongside light, drainage and access. If a higher candidate is repeatedly less cold on calm nights, check whether it also gets suitable seasonal sun, avoids unwanted shade and leaves room for ordinary garden work. A rise may be more exposed to wind; a sheltered spot can be shaded by buildings or trees. Those trade-offs depend on the block, so use the shadow diagram, photographs and observations rather than assuming the highest or most sheltered point is best. A modest shift up a slope may be enough to avoid the deepest pocket, but only if the resulting site still works for growing.
If the only practical area is low, record whether the proposed structure sits in the deepest hollow, on its edge or across a suspected cold-air route. Do not assume a wall, barrier or raised platform will eliminate the problem; physical changes can redirect drainage and need their own assessment. A smaller footprint could avoid the coldest corner but reduce growing area or affect access. The Pyramid Greenhouse range lists areas from 5.53 to 18.9 m²; check a specific model’s plan against the measured zone rather than treating its floor area as proof of fit.
Overnight temperatures inside an unheated greenhouse
A greenhouse changes the immediate environment, but that does not make an unheated structure reliably frost-safe. Solar gain during the day, air exchange and heat loss overnight all influence indoor conditions, and temperatures can vary between parts of the structure. A warm afternoon reading does not establish the predawn minimum. If you already have a greenhouse at a comparable position, measure inside and outside at the same time, with sensors at recorded heights. Note whether doors or vents were open; the result describes those conditions, not every future setup. Without a comparable internal log, outdoor readings are evidence about the site, not a direct forecast for the greenhouse.
Match your intended crops and season to reliable crop-specific minimum guidance before deciding whether an unheated setup is enough. If storage changes the layout you need, check the model’s full dimensions as well as its area. The Limited Edition Aluminium Greenhouses with Storage are listed from 5.52 to 28.08 m²; that range can inform footprint screening, but storage format and floor area do not indicate overnight temperature protection. Keep the questions separate: temperature records describe the outdoor site, crop requirements set the target, and product details establish which footprint you are considering.

Use the log to plan a heating assessment
Use the log to prepare a heating brief, not to guess heater size. List the crops, intended season, minimum temperatures those crops need according to suitable growing guidance, the lowest repeated outdoor readings, how long low temperatures lasted if logged, and how sites differed. This makes clear whether a less cold position could meet your plan or whether controlled heating needs assessment. The required growing temperature is crop-dependent; it is not simply the lowest outdoor reading. Heater capacity also depends on the chosen enclosure, glazing, air leakage, exposure and ventilation, so area or one thermometer result is not enough for a reliable calculation.
If you may heat the greenhouse, ask an appropriately qualified heating or electrical professional, or a relevant supplier, to assess equipment and installation for the chosen model and intended use. Do not select a unit from a generic wattage rule or make an electrical plan from temperature logs alone. Heating will not fix poor light, drainage or access, and ventilation remains part of the growing plan. The Bloomcabin Prestige Greenhouse range is listed from 3.77 to 28.08 m²; use exact model dimensions and relevant technical information in a heating assessment rather than relying on its name or area.
Final greenhouse site plan and records
Before deciding, overlay the proposed footprint on your plan and mark its relationship to the lowest ground, likely cold-air routes, barriers, drainage, nearby trees and buildings, access and sensor positions. Keep the dated readings and photographs with it, including the weather conditions that produced the lowest minima. Check seasonal shade and wind exposure too: a warmer overnight result may not be the best growing position if it is too shaded or awkward to use. If measurements cover only a mild spell, label the ranking provisional and continue logging before making a firm decision about heating.
A large footprint can cross more than one microclimate. The Spacious Greenhouse is listed from 47 to 70 m²; if that scale is under consideration, assess the whole outlined area rather than relying on one sensor point. Share the plan and temperature record when checking dimensions with the supplier or discussing heating with a qualified professional. The sketch shows where the structure fits, the log describes local cold exposure, and crop requirements establish the minimum you are aiming to maintain. Keeping those questions separate prevents a low garden, a model name or a single cold night from deciding the whole plan.
Frequently asked questions
How long should I log minimum temperatures?
Keep logging until you have repeated readings in the weather that matters to your growing season; there is no universal number of nights. A short survey can screen positions, but it will not establish a full-season pattern. If you plan to grow year-round, record across the relevant seasons and note unusual conditions.
Where should a minimum thermometer sit?
Place it in a shaded, ventilated radiation shield at a height that represents the plants you intend to grow. Keep it away from walls, paving and other surfaces that may affect its reading. Record its height and position, and use the same arrangement when comparing sites.
Should the greenhouse go at the highest point?
Not necessarily. A higher spot may be less affected by pooling cold air, but it could also be windier, more exposed or shaded differently. Compare readings at realistic locations, then weigh light, drainage and access. The best position is a measured compromise, not simply the top of the block.
Will an unheated greenhouse prevent frost damage?
Not automatically. Daytime warmth does not guarantee the greenhouse will stay above a crop’s required minimum before dawn, and conditions can vary inside. If you already have a comparable structure, measure inside and outside together. Otherwise, treat outdoor readings as site evidence and check crop requirements.
Can temperature logs tell me which heater to buy?
No. Logs describe local outdoor temperatures and, with a logger, how they change over time. Heating needs also depend on the chosen structure, its dimensions and construction, exposure, ventilation and intended crops. Use the record as a brief for a qualified professional or relevant supplier rather than estimating capacity from area alone.
In a frost pocket, the difference between a workable greenhouse site and a frustrating one may be a small change in level or airflow, but it should be demonstrated rather than guessed. Log matched minima at the low point and alternatives, connect readings to the weather and map them against the full footprint. That evidence supports a more realistic decision about crops, position and whether heating warrants professional assessment.
