
Bubble Insulation for Glass Greenhouses: The Trade-Offs
GREENHOUSE INSULATION
Bubble insulation can reduce heat escaping through the glazed parts of a greenhouse, but the saving depends on how much glass is covered, how well the sheet fits and what else lets heat out. It also reduces daylight and can change where condensation forms. The useful question is not whether bubble wrap works in general, but whether a suitable, well-fixed layer lowers your metered heating use without creating a bigger problem for plants, ventilation or maintenance.

How bubble insulation affects a glass greenhouse
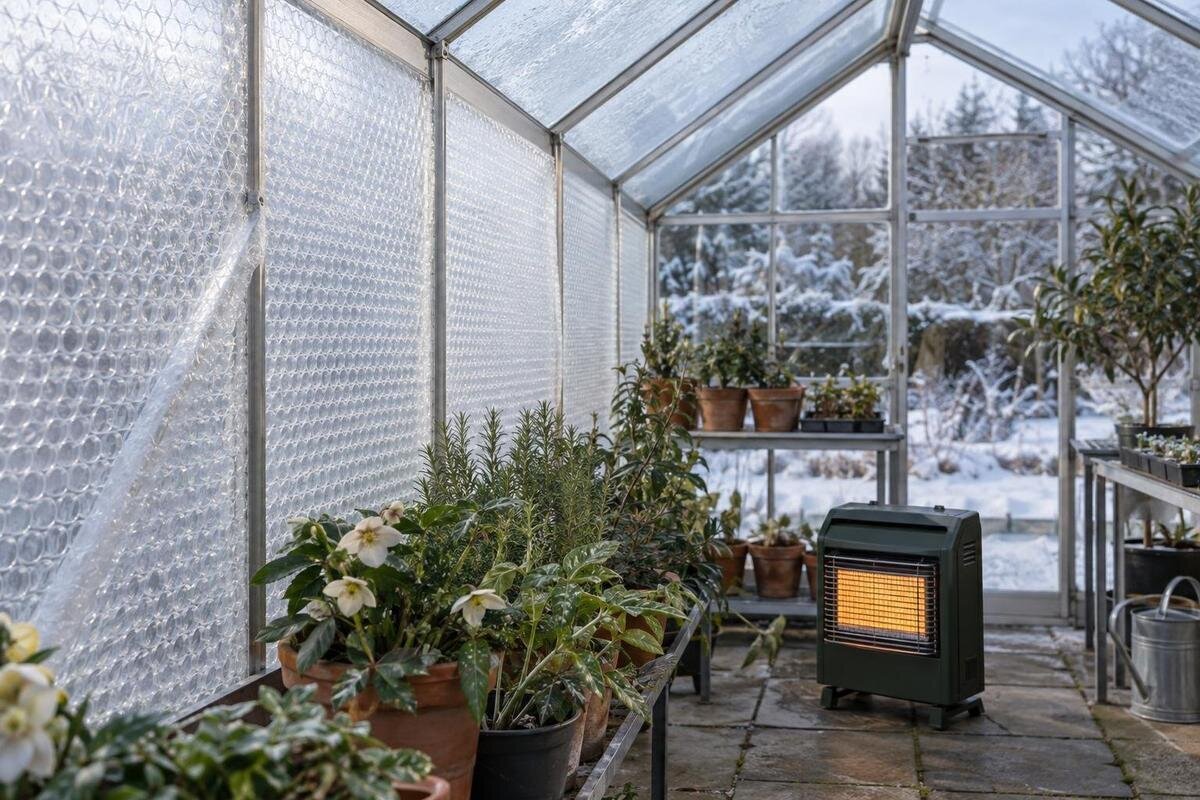
Horticultural bubble insulation is an extra sheet fitted over glazing, commonly on the greenhouse side where the film and greenhouse makers allow that arrangement. Air held in the bubbles slows heat transfer through covered panes; it does not create warmth, replace a heater or make the whole structure airtight. Its effect is limited to the surfaces it covers and the quality of the fit. Uncovered doors, vents, gaps, frame sections and the floor still exchange heat with outside. A thermal claim is useful only if it describes the actual film-and-glass arrangement and the conditions used for the test; a figure for the film alone is not automatically a whole-greenhouse result. Do not assume that every transparent layer suits every pane, seal or frame.
Greenhouse size is not the same as glazed surface area: roof slopes, gables, opening panes, doors and solid sections affect both the amount of film needed and the places where it can be retained. The Aluminium Greenhouses listing shows sizes from 3.77 to 28.08 m², but those figures do not show the pane layout or total glass area for a chosen configuration. If you are selecting a greenhouse as well as insulation, ask for its glazing plan and frame details. Measure the usable panel surfaces, rather than estimating from the floor area, and follow the film maker’s guidance on overlaps and fixings before ordering.
Which heat losses bubble insulation can affect
Most potential benefit comes from slowing heat transfer through covered glass. The film cannot seal a door that does not close, repair a failed glazing seal or stop heat leaving when a vent is open. Nor is glazing the only route: the frame, floor, air leakage and the way the greenhouse meets a wall or shelter all affect heating demand. Covering one part can change conditions at that pane yet barely move total heater use if other losses dominate. If the greenhouse is unheated, there is no heater-energy saving to record, even if overnight temperatures change. Treat a film rating as a component result unless it covers the complete assembly.
Your conditions matter as much as the material. Outside temperature, wind, cloud, shade, ventilation, soil moisture and the amount of equipment or plants in the space can all change heater runtime. Bubble insulation is not a heat source and cannot promise a minimum indoor temperature or protect every plant during every cold spell. To isolate its contribution, keep the heater target and usual routine steady and measure the same greenhouse before and after. Avoid combining the trial with other changes, such as repairing gaps, changing the heater or altering the plant load, if you want to attribute any difference to the film. The share of heat loss that passes through the covered glass also affects the size of any whole-greenhouse change.
How to measure the heating effect
Start with an energy baseline while the greenhouse is being used normally. For an electric heater, log measured electricity use in kilowatt-hours for each heating period; for another heat source, record its corresponding fuel use. Note indoor and outdoor readings, the target setting, vent or door openings, and unusual weather or changes in use. An existing consumption monitor or an appropriately rated meter is more dependable than estimating from a heater’s nameplate and hours switched on: thermostats cycle, and some equipment does not draw a constant load. Keep a written log with dates, and note whether fans or other equipment share the meter. For any new monitoring arrangement in a damp greenhouse, have a qualified professional confirm it is suitable.
Fit the film as instructed, then repeat the log with the same heater, control setting and routine across several comparable heating periods. A before-and-after pair is weak evidence if one period is mild and calm and the other is cold and windy. Keep raw energy readings beside temperature and ventilation notes; do not report a percentage without saying which periods were compared. If you are comparing a wall-style option such as the catalogue’s Wall Greenhouse, measure that particular structure rather than transferring a result from a different layout or site. Even two bays in one greenhouse can differ in shade or airflow, so a side-by-side comparison is useful only when their exposure and heating can be assessed fairly.
Turn heater readings into a cost comparison
Once you have a measured change in heater use, calculate the change in energy costs. Apply the variable electricity rate that matches the test hours, using your current retailer bill or tariff schedule; with time-of-use rates, the cost per kilowatt-hour depends on when the electricity is used. A lower heater reading does not reduce a fixed daily supply charge, so leave unchanged charges out of the saving. If fans, lights or other appliances share the meter, separate their consumption or label the result as the whole greenhouse load rather than heater-only use. For a fuel heater, use its measured fuel consumption and the corresponding fuel price instead of an electricity assumption.
If an energy meter is unavailable, the heater’s documented electrical input and observed operating time may support a rough estimate, but they are not a substitute for measured consumption. Check the specification for the exact heater: rated heat output and electrical input are different details, and thermostat cycling makes a simple runtime estimate uncertain. For a new-build comparison, the T-Model Orangery Greenhouse listing shows sizes from 16.52 to 30 m². Use the exact configuration, documented heater specification and local tariff rather than assuming listed area predicts a bill. A payback period is not reliable until film, fixings and any installation costs are compared with a saving measured over a representative period.

Check winter light where the plants grow
Every added layer changes the light reaching the crop, and the amount depends on film material, bubble structure, condition, dust or condensation and the pane beneath it. A sheet that looks clear may still reduce or scatter light. Ask for a light-transmission figure for the specific greenhouse film and whether it describes the film alone or a tested film-and-glass combination; check the stated test method if one is provided. If the supplier gives only a visible-light figure, do not assume it measures the same wavelengths used by plants. Avoid applying a percentage from another product or assuming bubble diameter predicts transmission. In periods when daylight is already limited, the effect can matter differently for different crops.
Assess light at the leaves or bench where plants actually grow, not just by looking up at the roof. A photosynthetically active radiation meter can compare the same points before and after a small test area is covered; take readings at similar times and record cloud and season. Light shifts through the day, so one midday reading can miss a dim morning or afternoon. Sample more than one spot to capture shade from frames or nearby objects. A lux meter records human-visible brightness rather than directly measuring light useful for photosynthesis. If considering the Pyramid Greenhouse, confirm its exact panel layout and orientation; its model name or listed size cannot predict winter light at your site.
How bubble insulation changes condensation
Condensation depends on humidity and surface temperature. When moist air meets a surface below its dew point, water can form; an extra layer changes the temperatures of both the greenhouse-facing film and the glass behind it. Moisture may appear on the film, or between film and pane if humid air reaches that space. The outcome varies with fit, airflow and conditions, so insulation should not be treated as a condensation cure. Plants, damp soil and watering add moisture to the air, while the lining itself does not remove it. A sheet can also conceal droplets on the glass until water runs elsewhere, making a wet area less obvious without resolving it.
After cool nights and watering, inspect both accessible sides of the liner and note where droplets collect or drain. Keep the greenhouse’s intended ventilation openings and air paths usable; do not use a sheet edge to seal a vent or trap standing water against a frame. A fixing method that can be opened for inspection is more useful than one that hides the glazing and stays difficult to reach. If moisture persists or the liner makes routine checks impractical, follow the greenhouse and film makers’ maintenance guidance or ask them about that exact arrangement. The aim is to understand where water is going while preserving normal ventilation, not to keep every surface permanently dry.
Choose film intended for greenhouse conditions
Choose film for greenhouse conditions rather than by bubble diameter alone. Confirm it is intended for the sunlight and moisture exposure at the proposed location, and ask for information on light transmission, thermal performance and the conditions behind any claim. Check whether a rating applies to the film itself or a complete glazed assembly, and whether the recommended fixing method suits the greenhouse frame. Ask how to clean, store or remove the product, too, and whether its instructions allow use with your glazing. Ordinary parcel wrap is not automatically equivalent: it may lack performance data or guidance for prolonged greenhouse exposure. If durability is stated, check the conditions and handling that statement assumes rather than treating it as universal.
Measure each pane you plan to cover, following the manufacturer’s allowance for joins, overlaps and retainers. Mark doors, opening panes and any areas you will leave bare rather than assuming every glass surface should be lined. For a model with storage, such as those in the Limited Edition Aluminium Greenhouses with Storage range, confirm which parts of the exact configuration are glazed and which form the storage section before estimating film quantity. A simple sketch of the covered panels and clear access points makes ordering easier, helps avoid blocking openings and gives you a record when you inspect or replace the liner later.
Match the fixing to the greenhouse frame
Film should be retained without loading the glass or interfering with glazing seals, frame joints or moving parts. A clip designed for one glazing-bar profile may not fit another, and adhesive tape, magnets, ties or improvised hooks are not universal alternatives. Aluminium and timber frames can have different permitted fixing points; even two sizes in one range may use different details. Check the greenhouse maker’s instructions and the film maker’s compatible clips or retainers for the exact frame. If guidance is unclear, ask the supplier or a qualified greenhouse installer before altering the structure. Avoid drilling or clamping a pane, or making an unapproved change that could damage the glazing or weaken a frame.
Wind can make a loose sheet flap, while pulling it too tight can strain a retainer. Aim for a neat, removable fit that can be inspected and stays clear of door tracks, vents and glass edges; tension is not a substitute for compatibility. When comparing models in the Limited Edition Aluminium Greenhouses range, obtain the exact frame profile, glazing information and approved fixing details before ordering insulation. A catalogue name does not confirm that a particular clip will fit. The chosen arrangement should also leave the frame visible enough for routine checks, rather than hiding joints where water or movement could go unnoticed.

Keep vents, doors and inspection access clear
Plan around components that need to open or be reached. Film should not bridge a vent hinge, block a door, obstruct a drainage route or hide access to seals and fasteners. If the greenhouse has fixed and opening panes, mark them separately on your coverage plan and follow the maker’s directions for anything near a moving sash. The arrangement should preserve normal ventilation, including automatic opening hardware if fitted. Leave a practical way to inspect glass condition, check for condensation and take the liner down for cleaning or seasonal storage. Opening and closing should remain straightforward; a covering that is awkward to move back can discourage ventilation when it is needed.
Check openings for the exact size and configuration instead of assuming every option in a range is identical. The Bloomcabin Prestige Greenhouse listing identifies that greenhouse family; use the supplied drawings or ask the seller to confirm the actual door, vent and frame arrangement before mapping a liner. After fitting, inspect periodically for sagging, tears, trapped moisture and loose retainers, and make sure ordinary access still works. If the film makes ventilation or inspection awkward, revise the coverage rather than accepting reduced access as an unavoidable cost. Record how to release or remove it according to the maker’s instructions so maintenance does not depend on guesswork.
Trial one area before lining the whole greenhouse
A small reversible trial can expose practical problems before the whole greenhouse is covered. Choose a representative section, record light at the plants and heater use under comparable conditions, and inspect for condensation and loose fixings. If the greenhouse has different orientations or shade, a single sheltered pane may not represent every surface; note where the trial sits and what it can show. Keep the rest of your routine steady and mark which panels remain uncovered. A partial test cannot predict an exact whole-structure saving: uninsulated glazing and leaks remain, and one panel may respond differently from another. Treat the trial as a check on fit, light and moisture as well as an initial energy indication. If readings vary widely, repeat the comparison before drawing a conclusion.
Scale the decision to the glazing you can actually insulate and the way the greenhouse is used. The Spacious Greenhouse listing shows sizes from 47 to 70 m², but that figure alone does not specify glazed area, heater demand or film quantity; obtain details for the chosen configuration. Fix obvious maintenance issues, such as a cracked pane or a door that will not close, rather than expecting an extra layer to compensate. Then weigh three observations together: metered heater energy under comparable use, light where plants grow, and how condensation and access change after fitting. Include film, fixings and any installation cost when assessing the financial benefit, rather than looking only at a lower energy bill.
Frequently asked questions
Can bubble insulation keep a glass greenhouse frost-free?
It can slow heat escaping through the covered glazing, but it does not make heat and cannot guarantee an indoor temperature. Whether frost occurs also depends on outside conditions, air leaks and the heating system. Treat bubble film as one part of a setup, not as frost protection by itself.
Does greenhouse bubble film reduce daylight?
It can. The amount of light absorbed or scattered varies with the film, its condition and the glazing beneath it. Ask for information on the actual film-and-glass arrangement and compare light readings where your plants grow before covering every pane.
Is ordinary packing bubble wrap suitable?
Not automatically. It may lack data or guidance for prolonged sunlight, moisture and greenhouse use. Choose a film whose supplier identifies its intended use, provides relevant performance information and confirms a suitable fixing method for your frame.
Will bubble insulation stop condensation?
No. It changes surface temperatures, so condensation may form on the greenhouse-facing film or between the film and glass, depending on moisture and fit. Keep normal ventilation available, inspect the liner and follow the film and greenhouse makers’ guidance.
How should I estimate the energy saving?
Compare metered heater use before and after fitting under similar conditions, keeping the target setting and routine steady. Apply the variable tariff that matches the hours measured. A single mild night or a heater’s nameplate does not prove a saving, and there is no universal percentage.
Bubble insulation is most useful when it produces a measurable reduction in heater use under comparable conditions, while still providing enough light and leaving ventilation and inspection practical. Because those results depend on the specific film and greenhouse, a limited, reversible trial is more informative than relying on a universal saving or a material rating alone. Keep the covering only where the energy result justifies its effects on light, moisture and day-to-day access.
