
Setting Up No-Dig Beds in a Greenhouse
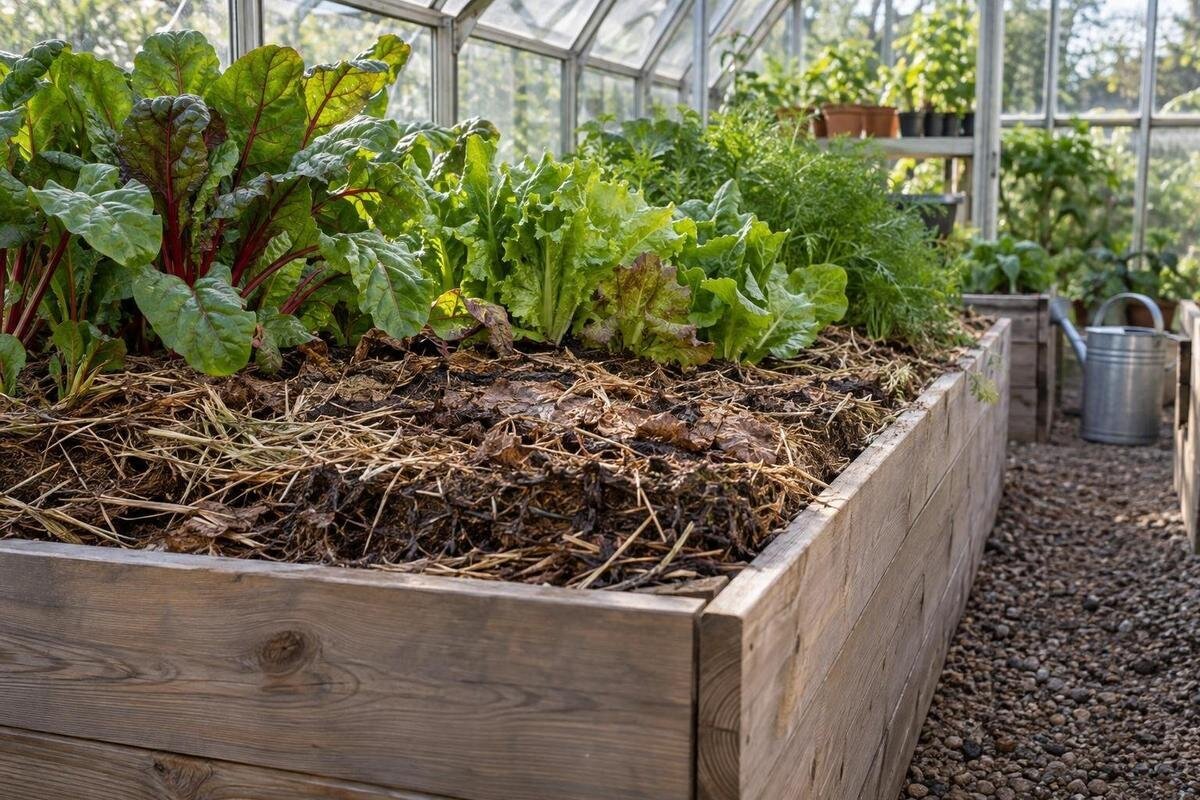
Greenhouse growing guide
No-dig greenhouse beds are built by leaving the soil largely in place and adding suitable organic matter at the surface. A roof changes the routine: rain may not reach the bed, paths need to stay usable, and a permanent layout becomes awkward to alter once planted. Good preparation starts with the ground you already have and the crops you intend to grow, not a standard stack of materials. This guide covers bed and path planning, soil checks, low-disturbance preparation, the first surface layer, and ongoing watering and renewal.

01
What a no-dig greenhouse bed involves
A no-dig bed is a defined growing area where soil is left largely in place and not routinely turned. Organic matter is added at the surface, while planting, harvesting, weeding and occasional soil sampling cause only local disturbance. The aim is not to make the soil untouchable; it is to avoid repeatedly cultivating the whole bed. Over time, plant roots and soil organisms help incorporate surface additions. A permanent position is useful under cover because moving the bed later can mean shifting soil, reworking paths and rerouting water access. Choose an area that can serve the crops you intend to grow over several growing cycles, rather than simply filling the available floor.
Sketch the bed, path, entrance and fixed items before fitting edging or ordering material. Mark doors, vents, shelves, taps and any work or storage zone you need; not every square metre is planting space. Give the bed a purpose, such as growing fruiting crops, leafy crops or propagation, and leave room for harvesting and carrying in trays. If considering Limited Edition Aluminium Greenhouses with Storage, include the storage area on the same drawing and verify the chosen configuration’s dimensions before setting bed boundaries. Planning these zones together helps prevent a useful path becoming an unusable leftover strip.
Set bed widths and paths around access
Test your reach from the path before fixing bed width. Stand where you will work and check that you can plant, weed, harvest and spread surface material across the whole bed without stepping onto it. A bed reached from both sides can be wider than one served from only one side, but there is no universal width: your reach, crop height and tools all matter. Plan for mature plants, not just an empty bed or seedlings. Repeated foot traffic can compact the growing surface, so do not rely on walking across it to reach the centre. Mark the edges temporarily and test the layout before building.
Draw paths to scale using measurements for the exact Bloomcabin Prestige Greenhouse configuration under consideration. A model name or outside footprint does not tell you how much clear room remains between a bed, frame and door, so confirm the internal dimensions first. Allow space for the tools, trays or watering can you will carry, and account for the door opening and ventilation points. Keep a continuous route from the entrance to the beds; a narrow dead end behind a planted row can be awkward for harvesting or top-ups. Check the layout while the floor is still empty.
02
Measure usable bed area and material volume
Measure the interior area that can actually become beds rather than estimating from the greenhouse’s outside dimensions. Record clear lengths, supports, door position, shelving, work zones and any ground that must remain open. If the floor plan is irregular, measure each possible bed area separately instead of treating the full footprint as one rectangle. The Spacious Greenhouse listing states a range from 47 to 70 m²; whichever configuration you assess, use its exact plan to distinguish bed area from paths and working space. Keep the overall area and bed footprint as separate figures, including the space needed to reach the ends of beds.
Estimate surface material only after settling the bed dimensions. Multiply bed length by width and by the planned layer depth, keeping all measurements in the same unit; measurements in metres produce a volume in cubic metres. For a non-rectangular bed, divide it into simple measured parts and add the results. If topping up an established bed, measure only the new layer, not the full bed depth. This is a quantity estimate, not a recommendation for how deep to apply anything: choose a suitable layer for the soil, crop and material. Check volume units before ordering, and allow for settling rather than assuming loose material will keep its original depth.
Choose an in-ground bed or a raised frame
An in-ground bed is a straightforward no-dig option when the existing ground is suitable for growing and drains adequately. A frame is optional: it marks a boundary and can contain brought-in growing material, but it does not automatically improve the soil below it or solve a drainage problem. Frames also use floor area and add an edge that affects how far you can reach from the path. If the ground is paved or otherwise unsuitable for direct planting, a framed bed may be more practical, but it needs suitable growing material and its own watering plan. Check site conditions before deciding that a frame is the answer.
Choose between these arrangements after inspecting the site, rather than assuming no-dig means raised beds. For Aluminium Greenhouses, compare the selected greenhouse dimensions with a scaled outline of any proposed frame and path; a product range alone does not show whether the planned bed will fit. Check that bed edges will not interfere with doors, vents or access to the growing area. If buying soil or other materials for a new frame, verify that they are suitable for the crops and setting. A general-purpose product should not be assumed suitable for every growing use.

03
Check the existing soil before covering it
Inspect the soil before adding compost or mulch. Look for signs that need investigation, such as water that ponds for a long time, a surface that stays hard after wetting, strong unexplained odours, rubble or a history of repeated crop failure. These clues are not a diagnosis, and surface appearance alone cannot establish nutrient levels or contamination. Ask what has grown in the bed and whether unusual materials or chemicals may have been introduced. If the history is uncertain or the ground may be unsuitable for food crops, arrange an appropriate soil test or seek qualified advice before planting.
Check how water enters and moves through a small area, and note where the soil is compacted, bare or already improved; a new layer should not hide a problem that needs attention first. A soil test can help assess pH and nutrients when crop history or plant performance raises a question. Follow the test provider’s sampling instructions and interpret the results for the intended crops. When considering a Wall Greenhouse, include the actual wall line, available access and bed position in your site sketch rather than borrowing a free-standing layout. A bed must be reachable as well as suitable for the soil.
Clear weeds without turning the whole bed
Clear rubbish, dead crop remains and established weeds before laying the surface layer. Cut annual weeds close to the ground; remove persistent perennial weeds with as much of their roots or rhizomes as practical, because a covering layer will not reliably prevent vigorous regrowth. Do not bury visibly diseased crop material in the bed as a shortcut. If grass or weeds cover the planned footprint, decide whether they need removal or a suitable barrier before adding compost. Check that any barrier is intended for growing use and will not prevent water reaching the soil.
Keep disturbance local. If only one patch is compacted, address that area rather than turning the entire bed. Avoid working soil when it is saturated or powder dry, and do not cover a dense, poorly draining base with a thick layer in the hope that the problem will disappear. Mark the final bed edges on the ground and recheck the path. If a Limited Edition aluminium greenhouse is on your shortlist, confirm where the selected footprint will sit before clearing and marking the beds; shifting an established bed creates extra work. Remove loose debris without unnecessarily disturbing the soil structure.
04
Add a suitable first surface layer
Use organic matter with a known source and a form suited to the intended crops and soil. Mature, finished compost is often used as a surface dressing; other amendments vary, so check their ingredients and suitability rather than treating all materials as interchangeable. Avoid covering beds with fresh or unknown waste, or burying large quantities of raw material where it cannot be inspected. Spread the chosen material evenly over the prepared bed without routinely mixing it through. Keep it away from existing plant crowns and stems, and avoid damaging plants that are already growing there.
Plan how you will sow or transplant before spreading the surface layer. When planning beds for a T-Model Orangery Greenhouse, consider whether you will sow directly into the beds, plant seedlings raised elsewhere or use both methods. For fine seeds, coarse mulch can make sowing difficult and leave seed without close contact with the soil. Move it aside and sow into a fine, even surface. For transplants, open a planting hole through the surface layer and follow crop-specific guidance for planting depth. Replace mulch between plants if it suits the crop, without burying stems.
Manage watering under cover
A greenhouse roof intercepts most direct rainfall over the bed, so include watering in the layout rather than treating it as an afterthought. Note the water source and decide how a hose or watering can will reach each bed without damaging plants or blocking the path. The right frequency varies with crop, growth stage, weather, ventilation, soil and mulch, so a calendar alone is unreliable. Check moisture below the surface near the root zone: the top can look dry while the soil beneath remains damp, or look dark after watering while deeper roots are still dry.
Water evenly and gently enough to soak the root zone rather than running straight off the surface. Recheck the soil after watering, especially in a newly prepared bed where the surface layer may absorb water differently from the ground below. If water consistently pools or runs away, investigate the soil and drainage instead of adding more compost or following a fixed schedule. Keep paths clear so watering does not create an obstacle for routine work. When planning a Pyramid Greenhouse, mark the bed and water access on the same verified layout before fixing their positions.

05
When to top up organic matter
Top up the surface when the bed’s condition and crop needs justify it, not automatically with a thick layer every year. Organic matter breaks down at different rates, and excessive additions can change nutrient balance or contribute to soluble-salt problems, particularly where the bed receives limited natural flushing. If growth is poor, avoid treating more compost as a universal remedy. Review crop history, watering, soil structure and any test results first; add a measured, suitable material only when it answers a specific need. Keep a note of what you added, approximately how much and when, so future top-ups are based on actual inputs rather than memory.
Between crops, look at how water enters the bed, whether the surface is sealing or staying open, and whether roots occupied the expected depth. These observations help distinguish a need for organic matter from problems that call for another response. If you use fertiliser as well as compost, consider the inputs together and follow crop-specific instructions; compost is not automatically a balanced fertiliser. Where results are uncertain, use a suitable soil test rather than applying amendments by guesswork. A measured maintenance routine is easier to adjust than a large correction after several unrecorded seasons.
Manage crop changes and investigate problems
After harvest, remove stakes, ties, diseased foliage and crop residues that could harbour problems; do not bury material simply because the bed is no-dig. What to do with healthy roots depends on the crop and any disease concerns, so avoid a blanket rule to remove every root or leave everything in place. Clean soil from tools before moving between beds, and note which crops occupied each area. Where more than one bed is available, moving related crops between them can reduce repeated use of the same patch. In a single-bed greenhouse, keep good records and choose crops and growing methods suited to the site.
No-dig does not prevent pests, disease, compaction or nutrient imbalance. If a crop performs poorly, compare affected plants with healthy ones, review moisture and input history, and investigate the soil before replacing it wholesale. A targeted test or small local correction may be enough; persistent or unexplained problems warrant advice from a knowledgeable horticultural service or testing laboratory. Digging a small area to inspect a suspected issue does not cancel the low-disturbance approach. The aim is to avoid unnecessary disturbance while still responding carefully to evidence from the bed.
Frequently asked questions
Can I start a no-dig bed directly on existing greenhouse soil?
Yes, if the ground is suitable for growing, drains adequately and has no unresolved contamination or persistent weed problem. Inspect it first, deal with established weeds and test uncertain soil before covering it. No-dig methods do not make unsuitable ground safe.
Do no-dig beds need to be raised?
No. A suitable in-ground bed can be managed without routinely turning the soil. A frame is optional and may help define the bed, but it takes up floor space and needs suitable growing material. Choose based on the site and how you will reach the crops.
How much compost should I use?
There is no single amount for every bed. Measure its length, width and intended layer depth to estimate volume, then choose a suitable material and depth for the soil and crops. Keep a record of top-ups, and avoid assuming that more compost is always better.
How often should I water a greenhouse bed?
Check moisture near the root zone and adjust to the crop, weather, soil and mulch rather than following a fixed calendar. A roof limits direct rainfall, but the surface can still give a misleading impression of moisture below it.
Can I sow seeds through the mulch?
Coarse mulch can make it hard for small seeds to reach a fine, even surface. Pull it aside, sow into suitable soil or fine growing material according to the crop instructions, and return mulch between rows if it suits the crop.
A workable no-dig greenhouse bed begins with a measured footprint, accessible paths and an honest assessment of the soil already there. Clear persistent weeds and address site problems before adding a suitable surface layer. After planting, check moisture below the surface, record additions and adjust only when the bed or crop gives you a reason. That steady, low-disturbance routine—not a one-off pile of compost—keeps a permanent bed practical from one crop cycle to the next.
