
Buying a Freestanding Greenhouse: Choose Its Position Before Ordering
Greenhouse buying guide
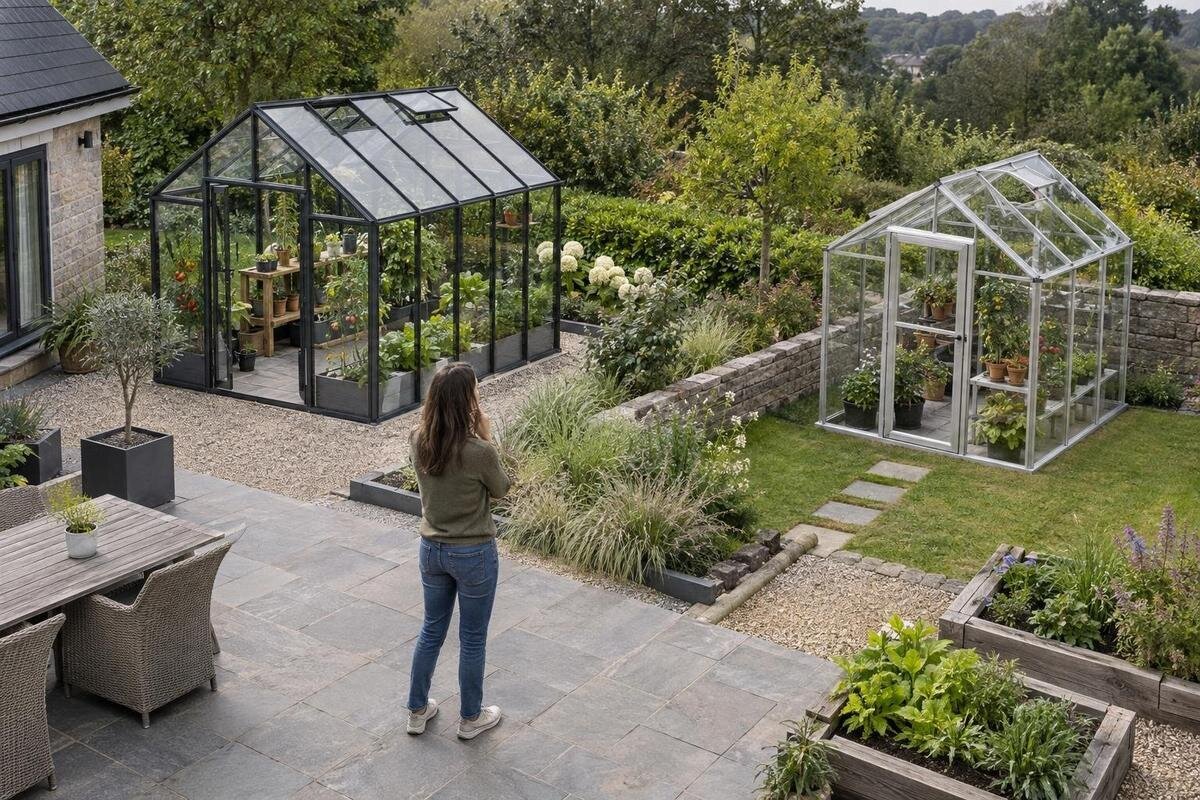
Buying a freestanding greenhouse is easier when you choose its position before choosing the model. A garden patch that looks empty on a plan may be shaded for much of the day, collect water after rain or leave no clear route for delivery and daily use. Compare a few possible locations, then test the preferred one against the greenhouse’s verified dimensions, installation instructions and base requirements. This site-first approach helps you avoid ordering a structure that forces awkward compromises in light, access or ground preparation.
Site-selection checklist 1
Shortlist possible positions around the garden
Begin with two or three possible positions rather than buying the largest greenhouse that appears to fit an empty patch. Walk the garden and note where you already grow plants, sit, store tools and move between doors, sheds and gates. A greenhouse needs a place in the garden’s everyday circulation as well as a footprint on a plan. Consider whether you want it near existing beds or a water source, and which areas should stay open for play, entertaining or future planting. Decide which conditions are essential, such as useful light and workable access, and which are preferences, such as a particular view. This first pass is a shortlist, not a final decision: you will test each option against the site and the exact model.
Sketch those options against fixed features: house walls, fences, paths, trees, drains, garden taps and any known buried services. Include slopes, retaining edges and places where the ground has been filled or disturbed; these can affect how a base is prepared even when the surface looks usable. Mark what could be moved and what should remain undisturbed, so a temporary gap does not look like permanent space. Avoid treating a narrow strip as viable simply because the frame might fit: maintenance access and a clear route matter too. If you are unsure where services run, or a site may need excavation or drainage work, seek suitable professional advice before treating it as an option.
Observe sunlight at the proposed position
Sunlight is best assessed at the proposed position, not guessed from the garden’s overall aspect. On several clear days, note where direct sun and shadows fall in the morning, around midday and later in the afternoon. A quick note or photograph taken from the same point at each time makes the pattern easier to compare. The time of year matters: the sun’s path and the height of surrounding shade change over the seasons, so a sunny patch in summer may receive different light in cooler months. In much of Australia, an open northern aspect is a useful clue to stronger sun exposure, but a house, fence, tree canopy or neighbouring structure can change the result. Let the plants you intend to grow guide your light target.
Draw the actual footprint over your sun notes, rather than recording only whether one point gets sun. For a candidate such as the Prestige greenhouse with metal base, use its verified dimensions to see which parts of the greenhouse would sit in sun or shade; neither the product name nor an image can establish that pattern. A footprint may cross more than one light zone, which could matter for the plants you intend to grow. Note the time and conditions beside each observation, then revisit the spot in another season if possible. One bright afternoon is not a reliable basis for committing to a position or an order.
Site-selection checklist 2
Account for shade from trees and buildings
Look beyond the view on the day you inspect the site. A fence or shed can cast a long shadow when the sun is low, while tall hedges and neighbouring buildings may shade a position that looks open at midday. Trees add seasonal variation: a deciduous canopy can let through more light when bare than when fully leafed. Branches may also drop leaves or other debris over the greenhouse. Consider how nearby trees may grow and whether their roots could complicate ground preparation; do not assume a small sapling will stay small. If planned planting or building work could change the light, include that uncertainty in your comparison instead of treating today’s conditions as permanent.
Walk around each candidate patch and look upwards as well as across it. Note overhead branches, roof eaves, downpipes and fences that could affect light, access or later maintenance. Photographs from the ends and sides of the proposed footprint can help you compare those obstructions with your shadow notes. When reviewing a named option such as the Bloomcabin Orangerie, use confirmed plan dimensions to judge the area it would occupy; do not infer its size or siting needs from its name or image. If an obstacle could force the greenhouse into shade or prevent access, reconsider the location before moving on to the order.
Measure the footprint and working clearance
Once a position looks promising, get the selected model’s external dimensions from its current product information and mark them on the ground with string, pegs or a temporary outline. Check how the manufacturer defines those dimensions: the frame, base, eaves or other projections may be described differently. Add the clearances called for in the installation guidance, plus room to reach the sides for cleaning and maintenance. This is about fitting a real object into the garden, not just comparing nominal floor area. Keep a written record so you use the same measuring method when comparing another model or location, and note anything the published drawing does not explain.
Mark the entry side and test the space needed to approach and open the door, including where you will stand while carrying a tray or tool. Leave the route clear of a fence, raised bed, tap or path junction, and consider whether doors or panels can be handled as the instructions require. If a product name includes a number, such as Classic Plus 385, do not treat that number as a measurement. Use the stated drawing or specification instead. Ask the seller to clarify any dimension that is missing or ambiguous before you make a purchase.

Site-selection checklist 3
Confirm that the model is genuinely freestanding
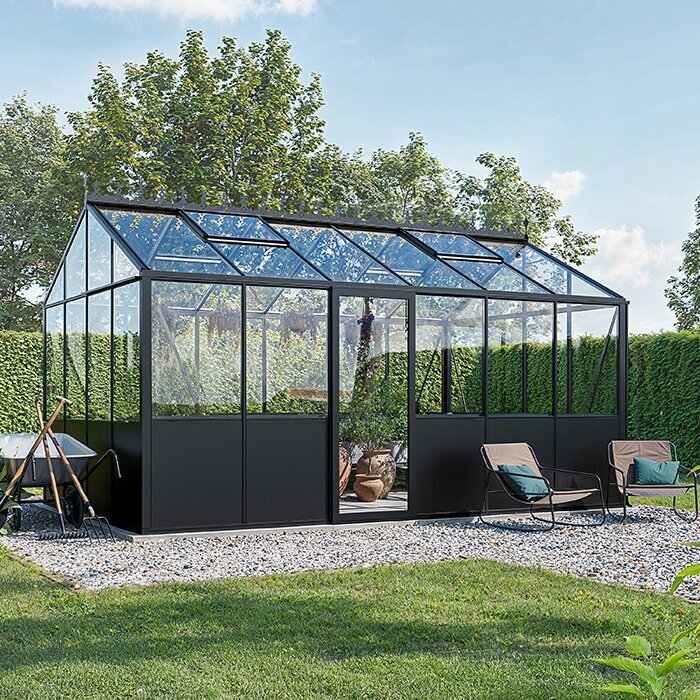
Assess a freestanding greenhouse as a structure with its own position and perimeter, not as something that can automatically borrow support from a nearby wall. Check the selected model’s installation guidance for its intended configuration, base and required clearances. The title of a listing can help identify the product, but it is not a substitute for its installation information: for example, the T Model Orangery listing is titled for a wall base. Do not assume a product described for a wall or base arrangement can be placed as an independent freestanding unit. Confirm the installation type before choosing dimensions or planning groundwork.
Even with a freestanding model, a boundary can limit access. Leave room to inspect and maintain the outside, and avoid positioning the greenhouse so tightly against a fence or shed that assembly, cleaning or repairs become awkward. A nearby wall may also change the light and wind conditions; do not treat it as structural support or a guaranteed windbreak unless the manufacturer’s instructions explicitly allow that use. If the only apparent site depends on attaching the greenhouse to a building, check whether the product’s specified installation type matches that plan before ordering.
Check drainage and ground conditions
Observe the ground after rain and during watering. A shallow hollow may hold water even when the rest of the garden drains well, while runoff from an upper slope or hard surface may pass through a proposed position. Avoid choosing a spot where water regularly pools, and consider where water from the greenhouse could go without causing problems for paths or garden beds. Do not assume gravel or paving will correct poor drainage. If the site needs regrading, a drain or other ground work, have the proposed solution assessed by a suitably qualified local professional before ordering a base or arranging installation.
The surface alone cannot confirm that the ground suits the chosen base. Check whether the product guidance calls for a particular base arrangement and whether the existing surface is appropriate for it. A title such as Pyramid Greenhouse for Masonry Base signals a base-related detail in the product name, but does not establish what construction is included or whether your site is suitable. Ask the seller or installer to confirm the requirements for the exact model and whether extra preparation is needed. If earthworks or masonry are involved, agree the sequence with the installer so the site is ready without obstructing delivery or assembly.
Site-selection checklist 4
Plan a practical route to the greenhouse
Choose a location you can reach comfortably during ordinary garden jobs. Imagine carrying seed trays, watering cans, tools and harvested plants along the route, then check for steps, gates, soft ground, tight turns and obstacles. A greenhouse at the far end of a yard may be usable, but the extra trip can be frustrating if the path is awkward or gets muddy. Keep existing paths and entrances clear, and consider where a barrow could turn around rather than ending at a dead end. There is no need to guess a standard path width: test the route with the equipment you actually use.
Map the route from the house, garden gate or shed, and identify a practical connection to a hose or other water supply if your routine needs one. Avoid planning a hose across a main walkway, and keep movement around the greenhouse clear. Check the intended entry position and handing against the product information before finalising the layout. For a candidate such as the Aluminium Classic Greenhouse, the name alone does not establish door orientation or approach clearance. Confirm those details and make sure the entry still works with nearby beds, paving and gates.
Assess wind exposure and nearby boundaries
Wind exposure can vary across a garden, even when the whole area feels sheltered. Open corners, gaps between buildings and slopes can make one position more exposed than another; fences or hedges may provide shelter from one direction but redirect gusts elsewhere. Do not assess a site on a calm day alone. Note overhanging branches and nearby objects that could strike the greenhouse, and consider whether the proposed position leaves room to carry out maintenance. Do not count on a fence, wall or tree as a substitute for the model’s specified fixing or base. If the position is exposed or may need anchoring work, follow the manufacturer’s guidance and seek advice from a qualified installer rather than guessing.
A wall-side position may seem sheltered, yet a nearby building can also change shade and restrict access. Keep the greenhouse type in view while comparing locations: a listing titled Aluminium Lean-To Greenhouse is labelled as a lean-to, so do not transfer its siting assumptions to a freestanding model. For the greenhouse you intend to buy, confirm that its stated installation method matches the actual garden position. A boundary should be treated as a feature to assess, not as support or protection unless the product’s instructions say it can serve that role.

Site-selection checklist 5
Confirm delivery, assembly and local requirements
Check how the greenhouse will reach its final position before you place an order. Walk the delivery route from the property entrance to the proposed site: gates, side passages, steps, sharp turns, uneven paths and overhead branches can be more restrictive than the garden plot itself. Ask the retailer how the selected product is packed, what access is needed for delivery and where unloading takes place; do not infer package size or handling needs from the assembled footprint. Allow somewhere for parts or materials to be kept during assembly without blocking a shared path or driveway. A site can fit on paper and still be difficult to supply.
Confirm who will prepare the base and assemble the greenhouse, and which product instructions that work depends on. If you plan to use an installer, ask what information they need before the site is finalised. For a specific page such as the Aluminium Limited Edition Greenhouse listing, use the current product details rather than the title to confirm dimensions, delivery arrangements and installation information; an edition label does not establish those facts. Rules for structures and ground work can vary by location and site. If approval may be relevant, check with the local council or a qualified professional before ordering or starting work.
Compare the site with the exact product listing
Before deciding where to place a freestanding greenhouse, compare your strongest location options in one record. For each, note sunlight observations, water pooling, the measured footprint, entry and maintenance space, the access route, wind exposure and any base or local-rule questions. Mark each point as acceptable, unresolved or a reason to rule out the site. This helps separate fixed constraints from preferences: a slightly longer walk may be manageable, while persistent pooling or an obstructed delivery route may require work you have not planned. Keep photographs and a sketch with measurements so you can revisit the decision without relying on memory.
Then test one shortlisted model against the preferred position using its published dimensions and installation guidance, not just a product image or title. Confirm that the footprint, entry, base arrangement and delivery route match what you measured. If a crucial dimension, installation condition or delivery detail is unavailable, ask before paying; choosing another model or site is easier before work begins. Site selection is not about finding a universally perfect corner. It is about avoiding a purchase that forces preventable compromises in light, access or ground preparation.
Frequently asked questions
How do I decide where to place a freestanding greenhouse?
Choose a position that suits the light needs of your planned plants and remains practical to reach. Observe the whole proposed footprint at different times, then assess drainage, access and base requirements. There is no universally right spot: the layout and conditions of your garden matter as much as compass direction.
Is a north-facing position always best in Australia?
No. An open northern aspect can be a useful clue to stronger sun exposure in much of Australia, but it is not a guarantee. Buildings, trees, fences and seasonal changes can alter the light. Observe the proposed site and compare its conditions with the needs of the plants you intend to grow.
Can I put a greenhouse on lawn or paving?
That depends on the selected model’s installation and base requirements, as well as the condition of the ground. An existing surface may still need preparation, and a lawn does not automatically provide a suitable base. Check the manufacturer’s guidance and ask the supplier or installer about the exact site before ordering.
How much clearance should I leave around the greenhouse?
There is no single clearance that suits every model and site. Use the product’s verified dimensions and installation guidance, then allow for the entry, everyday access and maintenance around the outside. Check nearby fences, beds and paths so they do not obstruct assembly or make the greenhouse awkward to reach.
What should I confirm before placing the order?
Confirm the exact model’s dimensions, installation type and base requirements, then compare them with your chosen position. Check sunlight, drainage, entry and maintenance space, the delivery route and who will prepare the site. If local approvals may apply, ask the council or a qualified professional before ordering or starting work.
A good greenhouse position is one that works for the plants you intend to grow and for the way you use your garden. Observe its light, ground and access before settling on a model, then compare the exact product information with what you measured. That order of decisions makes it easier to choose a greenhouse and location that genuinely fit together.
