
Buying a Greenhouse with Storage: How Much Growing Space Remains?
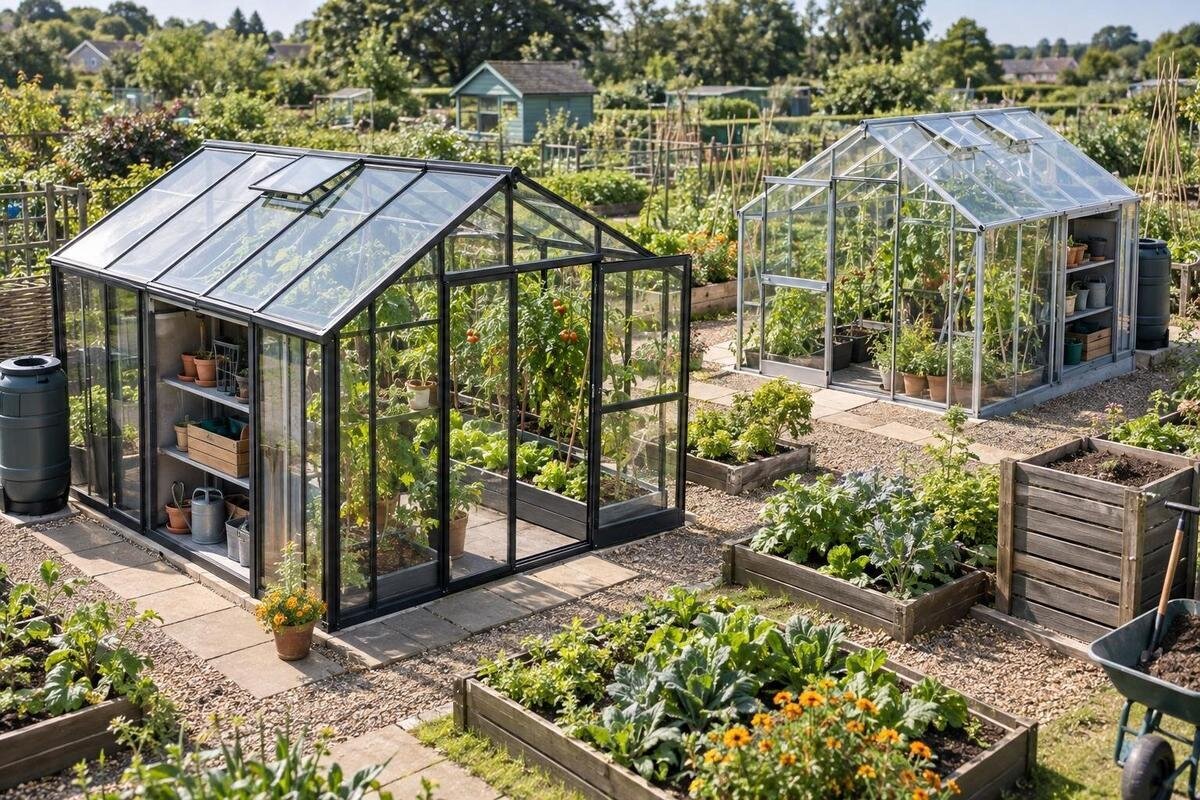
Greenhouse buying guide
Buying a greenhouse with storage means balancing two needs within one garden footprint: a place for supplies and enough clear, well-planned room for plants. A dedicated bay, shelves, benches, the door area and working aisle all affect how much of the interior can actually support growing. The headline footprint alone will not show that. Before choosing a size, list what you want to store, sketch where beds, pots or plant benches will sit, and separate plantable surfaces from space reserved for access. This guide explains how to compare those figures and what to confirm in the product details before ordering.

Buying checklist 1
List what the storage area must hold
Start with the items, not an assumed cupboard size. List the hand tools, pots, seed trays, labels and watering accessories you use regularly, then separate them from seasonal extras and bulk supplies. For each group, note whether it needs to be easy to reach while tending plants, whether it can sit on a shelf or hang, and whether its care instructions allow greenhouse storage. Count or measure the largest boxes and long-handled tools as well: a few awkward items can dictate the store’s shape more than a long list of small ones. Think in terms of floor and shelf area, not just item numbers. If you store some things only at certain times of year, plan for peak inventory rather than the tidiest week.
Assign each group a position on a rough plan and include room to reach and remove it; a bin wedged between a partition and doorway may fit on paper but still be awkward to use. Clarify what “storage” means in the listing: a partitioned bay, supplied shelving or open space you organise yourself will use the interior differently. When considering the Bloomcabin Prestige greenhouse with metal base, treat product details, not the model name, as confirmation of whether a dedicated storage area is supplied and where it sits. A roomy greenhouse is not automatically one with a separate store.
Measure internal clear space
First distinguish the outside footprint from the internal clear floor dimensions. Outside length and width help show how much ground the structure may occupy; they do not tell you how much room remains between the frame, supports, partitions and other internal features. Record what each stated measurement describes before comparing models. Multiplying internal length by internal width gives a useful gross floor estimate for a simple rectangle, but not the net planting area: storage, paths, door clearance and fittings not used for growing still need their own space. If the outline narrows or includes a bay, split it into simple shapes rather than treating the whole plan as one rectangle. A wall-side projection can also affect where a bed or bench fits, even if it takes up little area.
Use a comparison sheet with separate entries for external dimensions, internal clear dimensions, storage footprint and usable planting surfaces. A name such as Bloomcabin Orangerie cannot tell you its internal floor area, so rely on stated dimensions or plan details where available and ask for clarification if the difference is unclear. A product photograph is not a measuring scale. If only an outside measurement is given, keep your usable-area estimate provisional instead of counting every square metre within the outline as clear growing floor. Note any projections or partitions shown on a drawing, and make sure the figures you compare apply to the exact option you are considering.
Buying checklist 2
Calculate the storage footprint
Once you know the internal outline, draw any dedicated storage area on the same plan using its actual floor dimensions. For a simple rectangular compartment, multiply its internal width by its length, then deduct that footprint from the greenhouse’s gross internal floor area. For illustration only, an interior measuring 3 m by 2.4 m has 7.2 square metres of floor; a 0.9 m by 2.4 m store uses 2.16 square metres, leaving 5.04 square metres before you reserve an aisle, door clearance or other non-growing floor area. These are example figures only, not a recommended size or a product specification. Use measurements from one consistent plan; mixing external and internal figures will distort the comparison.
Keep that result as clear floor, not a complete measure of growing capacity. A bench or shelf intended for pots may add a usable planting surface above the floor, while a route to reach those plants remains non-planting space. On irregular plans, split storage into rectangles and add them, or trace its outline to estimate the footprint. A figure in a model label such as Classic Plus 385 is not a substitute for actual dimensions. Record storage, circulation, floor-level planting and bench or shelf growing surfaces separately so a large total does not hide a cramped layout. If a partition runs only partway across, map the remaining passage as well as the area it occupies.
Allow for access inside the greenhouse
Not every part of the remaining floor can sensibly hold plants. You need a route from the entrance to the storage and to each bed, pot group or plant bench, plus room to tend plants without shifting them. Draw the route before allocating leftover floor to crops. If you can reach a bed from one side only, plan for that; if both sides need access, do not count the same strip as both an aisle and a planting edge. Test the proposed width by imagining carrying the tray, watering can or box you use, rather than relying on a line on paper. Leave enough room to turn or set something down without blocking the door.
Include the entrance area and any door swing shown in the product plan; a layout that works with the door closed may be awkward when bringing supplies through. For a candidate such as the T-model orangery greenhouse for wall base, use the measurements and any plan supplied for that exact model to locate openings and internal divisions rather than reading them from its title. Keep any specified vents or maintenance access reachable as well. The point is not to maximise planted square metres at all costs: a route that works makes both storage and growing areas practical to use. If you need to move a large tray, check the route at its tightest turn.

Buying checklist 3
Use vertical storage without losing access
Vertical storage can preserve floor area, but it does not make the storage requirement disappear. Shelves need a reachable position, may shade plants beneath or behind them, and can limit the height available for crops. Hooks, a narrow rack or stacking containers can keep small items out of the aisle, but each arrangement still needs room to remove items and tend nearby plants. Draw the depth and height of the storage units you expect to use, and check that doors and any specified openings remain clear. Do not assume the greenhouse frame can support shelving or hanging loads; follow the model instructions and any stated limits for fittings.
Separate everyday tools from seasonal reserves so you can see whether one shelf or cabinet is enough and where it can go. A title such as the pyramid greenhouse for masonry base does not confirm that shelves, rails or mounting points are included. Check the listing and instructions before counting on a supplied storage system or planning attachments. If shelves will hold pots, count their usable surface as planting space only where plants will receive suitable light and you can reach them. Otherwise, treat that area as storage, not extra capacity on paper. Keep the floor below clear only if it will genuinely remain accessible.
Keep storage clear of light and openings
Storage also changes the light and airflow pattern inside a greenhouse. A tall cupboard, stacked trays or hanging tools can shade a planting zone, block a vent or window, or create a tight corner that is hard to tend. Mark the location and height of every storage unit on the same sketch as beds and shelves, then check it against openings and paths shown in the product information. Put any likely shadowed area on your plan before assigning plants to it. A broad floor area can still offer fewer useful planting positions if storage occupies the best-lit wall or obstructs an opening. The effect depends on position and height, so a floor-only calculation cannot show it.
The name Aluminium Classic greenhouse does not tell you where openings sit or how the interior is arranged. Use any model-specific plan or instructions, if provided, to check that storage will not obstruct doors, vents or routine access; if the information is unclear, ask before ordering. Leave the positions needed for operating openings unobstructed rather than assuming a cabinet can go anywhere. Check the depth of overhead shelves too, since their floor footprint may be small while their effect on plants below is not. Aim for a layout where supplies stay convenient and planting areas retain the light and airflow the design allows.
Buying checklist 4
Match the remaining area to your planting plan
Choose crops and growing methods before deciding whether the remaining area is enough. Draw beds, benches and individual containers to scale, using the width plants will need as they mature rather than the space occupied by seedlings. Include temporary trays or potting work if they will regularly sit in the greenhouse, and distinguish those short-term areas from permanent planting. Tall crops, hanging baskets and multi-level benches use vertical space differently; they cannot all occupy the same airspace comfortably. A plan for a few large plants may need wider access gaps than one for small pots, even when both use the same floor area. Consider how many pots you want to keep at peak season, not only immediately after setup.
Compare the plan with the net area and inspect its shape, not only the total. A narrow strip can add square metres but may not fit a bed or make a useful growing zone. For the Aluminium lean-to greenhouse, as for any candidate, base that comparison on stated internal measurements if available, not on the model label or a photograph. Mark pot depth, bench height and the room needed to reach each plant. If your usual routine requires space to set down harvested produce or a tray, include that temporary landing area so you do not count one patch for both growing and working.
Compare storage inside and outside
An internal storage bay keeps frequently used supplies close, but every floor-level metre assigned to it is unavailable for a bed or floor pot. A separate outdoor cabinet can preserve the greenhouse’s plantable floor, yet it uses garden space of its own and adds a route between the two. Compare the total area each option occupies, not just the interior measurements; also consider whether you can reach external storage easily during ordinary gardening. The best arrangement depends on which items you want close at hand and whether your garden has room for both the greenhouse and separate storage. Rarely used supplies may not justify taking permanent growing space.
Do not treat an integrated compartment, supplied shelf and ordinary spare corner as the same feature. Check what the product details explicitly include, what is optional or separate, and whether any partition forms part of the offered layout. A photograph of a tidy interior does not confirm the storage components or how much floor they occupy. If storage is outdoors, consider door orientation and exposure, and follow each item’s care instructions. Then add the chosen option’s footprint and access route to your site plan so you do not solve a space problem inside by creating one outside.

Buying checklist 5
Check measurements and inclusions before ordering
Make a like-for-like comparison using separate figures for overall footprint, internal clear dimensions, storage footprint, floor reserved for movement, and any bench or shelf surfaces you will use for plants. Mark each item as confirmed, estimated or unknown. This prevents a nominal total area from being mistaken for planting space and shows where a product detail is missing. Check whether an advertised dimension covers the greenhouse alone or includes a store, whether it is external or internal, and whether any diagram applies to the exact configuration you plan to order. Use the same units and measurement basis for every candidate. If a page lists several options, note the exact one you selected.
The label Aluminium Limited Edition greenhouse is a model identifier, not a specification sheet; the same rule applies to every option. Read the product details and any supplied dimensions or drawings, and do not count storage as included unless it is expressly described. Confirm which shelves, partitions or fittings are part of the order and which would need to be sourced separately. If a storage arrangement or measurement is unclear, ask the seller or manufacturer before treating it as fixed in your plan. Record the answer against that model so comparisons stay accurate.
Test the layout at the intended site
Test the outside footprint in the intended position before committing. Mark the measured outline with string, chalk or a temporary plan, then add the door approach, route around the greenhouse and footprint of any separate storage. Check it against paths, fences, garden beds and the space you need to maintain the surrounding area. Include enough room to bring in a tray or long tool; an item may fit inside but still be difficult to move through the entrance. Use the manufacturer’s siting instructions for required clearances rather than guessing; an area calculation cannot answer questions about the base, surface or structure. If those raise installation or drainage concerns, get advice from an appropriately qualified professional before ordering.
Then run a busy-day test of the interior: bring supplies in, set down a tray, reach each bed and remove stored tools while imagining mature plants in place. If an essential movement depends on shifting pots or blocking an opening, revise the drawing. Choose a larger greenhouse only if its overall footprint and setup suit the site; otherwise reduce the stored stock, use vertical storage that the instructions permit, or keep suitable items elsewhere. The right size leaves enough planting surface and a workable route while giving every stored item a clear, realistic place.
Frequently asked questions
What counts as growing space in a greenhouse?
Count the internal floor left for beds or pots after marking dedicated storage and fittings that are not used for growing. Keep aisles and door clearance separate: they are useful working space, but not planting space. If you plan to grow on benches or shelves, count their usable surfaces separately rather than treating the greenhouse’s overall footprint as the amount of room available for plants.
How do I calculate the floor area left after storage?
Use internal measurements from the same plan. Calculate the floor area of a dedicated storage bay and subtract it from the gross internal floor area; then mark the aisle, door clearance and other non-growing areas. For an irregular layout, split it into simple shapes. Treat the result as a floor estimate, not a complete account of any bench-level growing surfaces.
Can vertical storage save growing space?
It can reduce the floor occupied by supplies, but shelves still need access and may shade plants or block an opening. Check the product instructions before planning fittings or attachments; do not assume the greenhouse frame can support them. Count a shelf as growing space only if it is suitable and practical for the plants you intend to put there.
Is inside or outside storage better?
Inside storage keeps frequently used supplies close, but a floor-level bay reduces the room available for planting or movement. Separate outdoor storage may preserve floor space in the greenhouse, but it needs its own footprint and an accessible route. Compare the total garden space involved and check that the location suits the items you plan to keep there.
What should I confirm before ordering?
Check whether storage is explicitly included, where it sits and how much floor it occupies. Confirm whether measurements are internal or external, what shelves or partitions are supplied, and whether any plan matches the exact option you intend to order. Note anything unclear and ask the seller or manufacturer before basing your layout on it. Test the overall footprint and access route at the intended site.
Work out the storage footprint, plantable area and access space as separate figures, then test them against a realistic planting plan. That prevents a broad floor-area figure or an appealing photograph from making the decision for you. If the space left cannot support your must-have crops and a workable route, reconsider the storage arrangement or compare another size before ordering. A greenhouse with storage is a good fit when its convenience is real and the area remaining still suits the way you intend to grow.
