
Choosing Greenhouse Shade Cloth Percentage and Placement
Greenhouse growing guide
Shade cloth is often sold with a number such as 30% or 50%, but that rating alone cannot tell you whether a greenhouse crop will receive enough light. It describes a cloth under the supplier’s rating method; it does not guarantee the same reduction at the leaves or a particular drop in air temperature. Choose by setting a crop-specific light target, measuring the light plants actually receive, then deciding whether cloth should cover the whole greenhouse or only particular growing zones.

What a shade percentage actually means
On most shade-cloth labels, the percentage is intended to indicate how much light the fabric blocks under a stated test or rating method. Some labels describe a shade factor; others may report light transmission or use another test basis. Read the product information to find out whether the number means light blocked or light transmitted, and what kind of light the rating concerns. Ask the supplier if the wording is unclear. A label such as 40% is a comparison point, not a crop prescription. It does not mean every spot inside the greenhouse will become exactly 40% dimmer, or that every plant-relevant wavelength is reduced by that amount.
A shade rating is not a temperature setting. A cloth labelled 50% shade does not mean the air will be 50% cooler or predict a particular number of degrees of cooling. Light at leaf level also depends on the greenhouse covering, its condition, sun angle, framing, cloud and shade from nearby trees or buildings. These influences combine, so treat a cloth rating as a starting estimate. If heat is part of the concern, log air temperature and relative humidity at a consistent position and time as well as light. Note whether the shade or ventilation changed between readings; the percentage alone cannot tell you which factor needs attention.
Match the light target to the crop and growth stage
Different crops, and different stages of one crop, can have different light requirements. Use reputable horticultural guidance for the species and, where available, the cultivar. Check whether it gives a daily light integral (DLI), an instantaneous photosynthetic photon flux density (PPFD), or a broad description such as full sun. These measures are not interchangeable: DLI totals light over a day, while PPFD describes the rate at one moment. A target for seedlings may not suit mature, flowering or fruiting plants. Also note whether the guidance describes minimum light, a productive range or a maximum exposure; each answers a different question. Record the units and growth stage alongside the target so they remain clear when you compare readings later. If the guidance gives only a broad sun preference, do not turn that description into a precise shade percentage without a suitable light target.
Make a simple crop map before shopping: mark each crop, its growth stage and the area it occupies. If reliable guidance shows one zone needs less light than another, shade that zone rather than automatically dimming the entire greenhouse. Where needs overlap, plan around the more light-sensitive crop only in the area it occupies, not across every bed. If you are comparing a greenhouse and cloth at the same time, include the Limited Edition Aluminium Greenhouses with Storage as a model under consideration, then confirm its exact layout and approved accessories from model-specific documentation.
Measure light where the leaves are
For measurements at leaf level, a PAR meter that reports PPFD is more useful than judging brightness by eye. PPFD is commonly expressed in micromoles per square metre per second (µmol/m²/s). Take readings at the height of the top leaves, with the sensor level and positioned the same way each time. Sample several points: the centre, both ends, bed edges and any crop zone with a different sun pattern. Record the time, cloud conditions, cloth position and crop location. Give each measuring point a label on your crop map so later readings can be matched to the same position rather than a nearby, differently lit spot. Keep your body from casting a shadow over the sensor, and avoid taking every reading beside the brightest panel.
If you need a daily total, use a meter or logger that records through daylight and reports, or lets you calculate, DLI in mol/m²/day. One midday PPFD value cannot provide that total. A lux meter or phone app can compare relative brightness at the same points under the same light source, but lux is weighted for human vision and is not a universal substitute for plant-light data. Repeat measurements on representative bright days and, when conditions vary, on a more typical day. Even when comparing a model such as the Bloomcabin Prestige Greenhouse, use on-site canopy readings: a product listing cannot predict light at your particular location.
Estimate the reduction from measured light
Once you have a crop target and a measurement in the same units and over the same period, estimate the reduction needed. Subtract the target from the current reading, divide that difference by the current reading, then multiply by 100. For example, if the current PPFD is 500 µmol/m²/s and the chosen target for that moment is 400 µmol/m²/s, the difference is 100 µmol/m²/s. Dividing 100 by 500 and multiplying by 100 gives a required reduction of 20%. This is an arithmetic example, not a recommendation for any crop. If the current reading is already within the chosen target range, this comparison does not indicate a need for further light reduction at that point. For daily-light decisions, compare DLI with DLI rather than comparing a peak PPFD reading with a daily target. Keep the original reading, target and calculation together in your notes so you can revisit the estimate when either the crop target or measured conditions change.
Treat the calculated gap as a performance aim, not an instruction to buy cloth with the identical label. The cloth rating and the reduction measured inside your greenhouse may not match exactly, so check the supplier’s definition and allow for a trial. Map bright and shaded pockets separately: an average can hide one bed receiving too much light and another already falling short. For the Spacious Greenhouse, whose listed sizes range from 47 to 70 m², measurements across the growing area are more informative than a single reading near the entrance.

Plan around crops with different light needs
Mixed plantings create a coverage problem as much as a percentage problem. A rating chosen for a light-sensitive crop may leave a light-demanding crop short, while a rating that suits the latter may not help the former. Put crops with similar requirements in the same zone when practical, or use a smaller independently managed shade area over the crop that benefits. Keep the boundaries in mind as plants spread: a strip that was over one bench at planting may shade neighbouring leaves later. Mark both the intended shaded area and the adjacent crop positions on your plan. This makes it easier to check whether a proposed cover serves the whole crop that needs it without extending unnecessarily over another. If pots move or plants grow taller, revisit the crop map.
Do not assume every plant beneath the cloth receives the same amount of light. The sun moves, greenhouse framing casts narrow shadows and canopy height changes. Note what each bed receives at the times its crop is exposed, then select coverage that reduces excess without suppressing plants already near their target. If you are planning a layout around a candidate in the Aluminium Greenhouses range, compare the intended beds with that exact model’s dimensions before buying cloth for a fixed area; the category name alone does not establish fit.
Place shade over the area that needs it
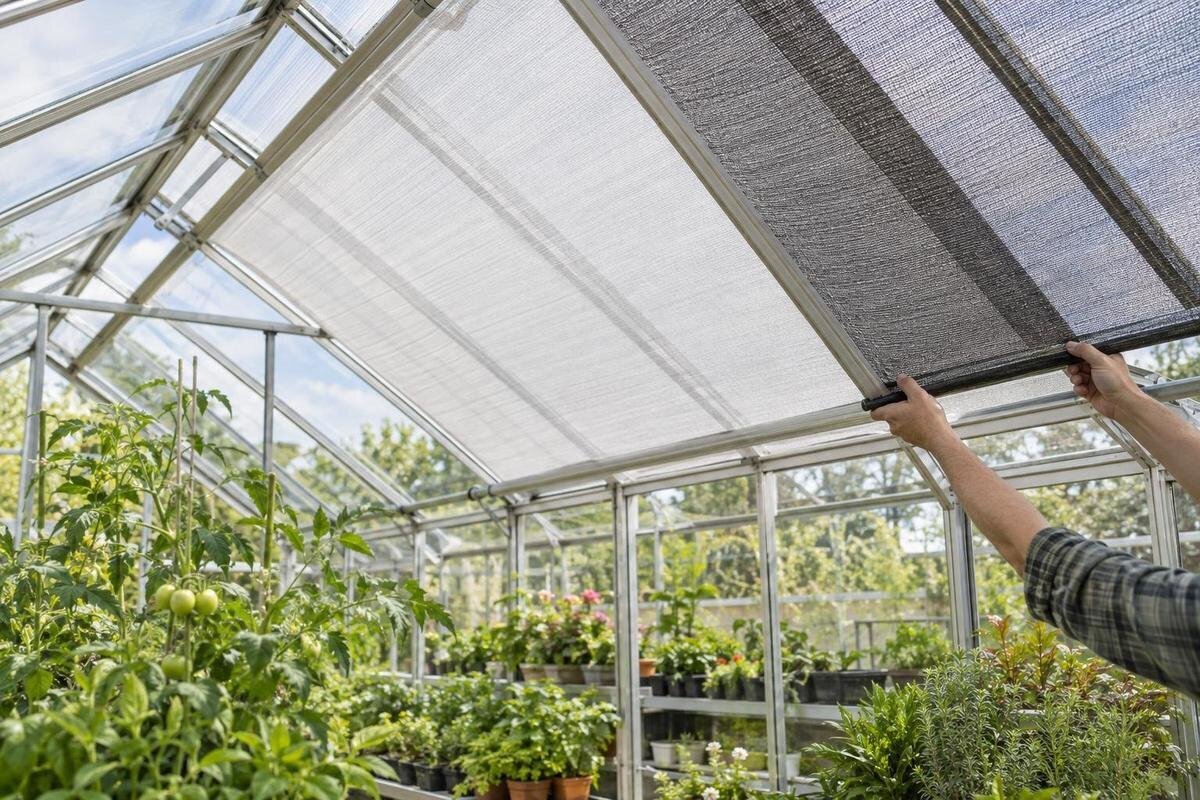
Place shade according to where excessive light reaches the plants, not simply where it is easiest to spread. Observe the greenhouse at several times of day and mark moving bright patches on a sketch of the beds. A roof-wide cover gives broad coverage; a smaller area over one bed can preserve more light elsewhere, provided the shade remains over the intended zone as the sun moves. If a bright patch shifts away in the afternoon, a permanently shaded strip may no longer match the problem. Dated photographs from the same viewpoint can help you compare the pattern.
Map existing shade from trees, fences and neighbouring buildings as well, and note areas that already receive less light. A location near a wall may have a different pattern from the centre, so check the real site rather than infer conditions from a product category. For a site being assessed for the Wall Greenhouse, include nearby buildings, eaves and fences in the light map. Existing shade can reduce light before any cloth is added, and one end of the growing area may receive a different amount from the other.
Reassess coverage as the season changes
Light conditions change through the year as sun angle and day length change, while the crop beneath the cloth may move from establishment to flowering or harvest. A percentage that seems suitable during a bright spell can become excessive when days are shorter, cloudier or the plants are at a different stage. Keep the decision linked to current measurements and crop stage rather than choosing one figure for the whole year. Use the same labelled measuring points when reviewing seasonal coverage, while adjusting sensor height to match the current canopy. That keeps the comparison tied to the plants rather than an empty bench or a former leaf height. Record any change in position so an apparent seasonal difference is not confused with a change in where you measured.
Keep a seasonal record with the date, crop and growth stage, readings, weather and cloth position. Note when coverage changes and what prompted the decision, so you can compare one planting with the next rather than rely on memory. If the cover is intended to be movable, check the cloth and greenhouse makers’ instructions and consider how it will be adjusted. If a model from the Limited Edition Aluminium Greenhouses range is under consideration, confirm from its model-specific documentation that the proposed shading arrangement suits the seasonal changes you intend to make.
Check cloth and greenhouse compatibility
Before buying, read the cloth maker’s intended-use and rating information, including how the percentage is defined and where the material may be used. Check the available dimensions and how the cloth is meant to be supported; a product photo is not a reliable way to judge light transmission or fit. Confirm that the proposed position, whether inside or outside, is permitted for the cloth and the greenhouse model. If the instructions do not identify compatible mounting points, or the arrangement could affect the frame, ask the supplier or a suitably qualified installer rather than improvising a roof attachment.
Check clearances before finalising the layout. Shade must not obstruct vents, windows, doorways, paths, irrigation controls or sensors, and openings must still move through their intended range. Keep access to crop beds and equipment usable. Consider the cover in each position you intend to use, rather than checking only its fully extended position. A layout that works while the cloth is spread out still needs a practical place for the material when it is moved aside. Include access to your regular measuring points so you can continue checking light without changing the shade arrangement just to reach the sensor. For a T-Model Orangery Greenhouse or any other candidate, consult the specific model instructions to confirm the actual openings and approved shade arrangements; do not assume clearance or compatibility from the product name.

Test coverage before extending it
Test a small, representative section before committing to full coverage, provided the trial follows the cloth and greenhouse instructions. Record light at the same canopy points before and after, in comparable bright conditions and with the same sensor. If the sky changes between readings, repeat the test rather than attributing the difference to the cloth. For a daily-light target, record over the daylight period; for a brief high-light concern, include readings at the relevant times. Keep the unshaded and shaded results beside each other for each measuring point, with the date, time and conditions attached. Compare the measured reduction with your calculated aim, not just with the percentage printed on the cloth. If the result differs, review the individual readings and trial conditions before deciding whether to change the rating or the coverage. Where possible, change one thing at a time so the effect of shade is not confused with a simultaneous adjustment elsewhere.
Judge the trial against both the target and the spread of readings across the beds. A result that looks right at one bench might push a neighbouring zone below its crop target. Keep notes on plant growth, but treat appearance as supporting evidence: water, nutrition, pests and other conditions can also affect it. If you are planning a Pyramid Greenhouse, test in the actual installed location; readings from another site cannot describe its light pattern. Extend coverage only when the measurements and crop map support it.
Avoid common shade-cloth mistakes
Common errors include buying a familiar percentage because another grower uses it, treating the label as a guaranteed indoor reduction, measuring only at noon, and shading uniformly when only one area is affected. Another is trying to solve every heat problem with cloth. Shade changes the light reaching plants; it does not by itself establish why a greenhouse is warm or prove that a crop’s light exposure is excessive. Separate observations of canopy light, air temperature, crop position and ventilation status make it easier to tell which decision is being tested.
Before settling on a cloth, be able to state the crop-specific light target, the readings from the growing zone, the approximate reduction needed and the exact area to shade. Add the supplier’s definition of the percentage and the greenhouse compatibility checks. If those details point to different needs in different beds, use zoned coverage or keep measuring rather than choosing a single compromise number. This gives you a reasoned starting point that can be reviewed when crops, seasons or measured conditions change.
Frequently asked questions
What does a 30% shade-cloth rating mean?
It is a supplier-defined rating intended to describe how much light the cloth blocks, but the precise basis can vary. It does not guarantee that light at the crop will fall by exactly 30%. Check what the rating measures, then compare readings in your greenhouse before and after shading.
How should I measure light in a greenhouse?
A PAR meter that reports PPFD is useful for readings at canopy height. Take measurements at several points and times, using the same sensor position each time. To assess total light over the day, use a logger that records DLI; a single midday reading cannot provide a daily total.
Should I choose shade cloth based on temperature?
Not by itself. A shade percentage does not predict how many degrees cooler the greenhouse will be. Measure light at the plants if you are concerned about their light exposure. If heat is also a concern, keep separate, consistent temperature and humidity records so you can assess both issues.
Should I shade the whole greenhouse or just one bed?
Base coverage on where the crops need less light. If plant requirements and measurements differ between beds, targeted coverage may avoid dimming areas that do not need it. Map the sun’s movement first, as a shaded patch can shift away from a bed during the day.
Can shade cloth stay in place all year?
That depends on the crop, season and measured light. Day length, sun angle and plant growth stage change, so cover that suits one period may reduce light too much later. Review your records as conditions change, and follow the cloth and greenhouse manufacturers’ instructions for the intended position.
Choose the percentage last, not first. A crop’s light target and well-timed canopy measurements show how much light needs to be reduced; the cloth rating helps you compare options, while placement determines which plants receive the change. Begin with the area that needs shade, check the measured result in comparable conditions and keep a record as crops and seasons change.
