
Peat-Free Media for Greenhouse Crops: Key Checks
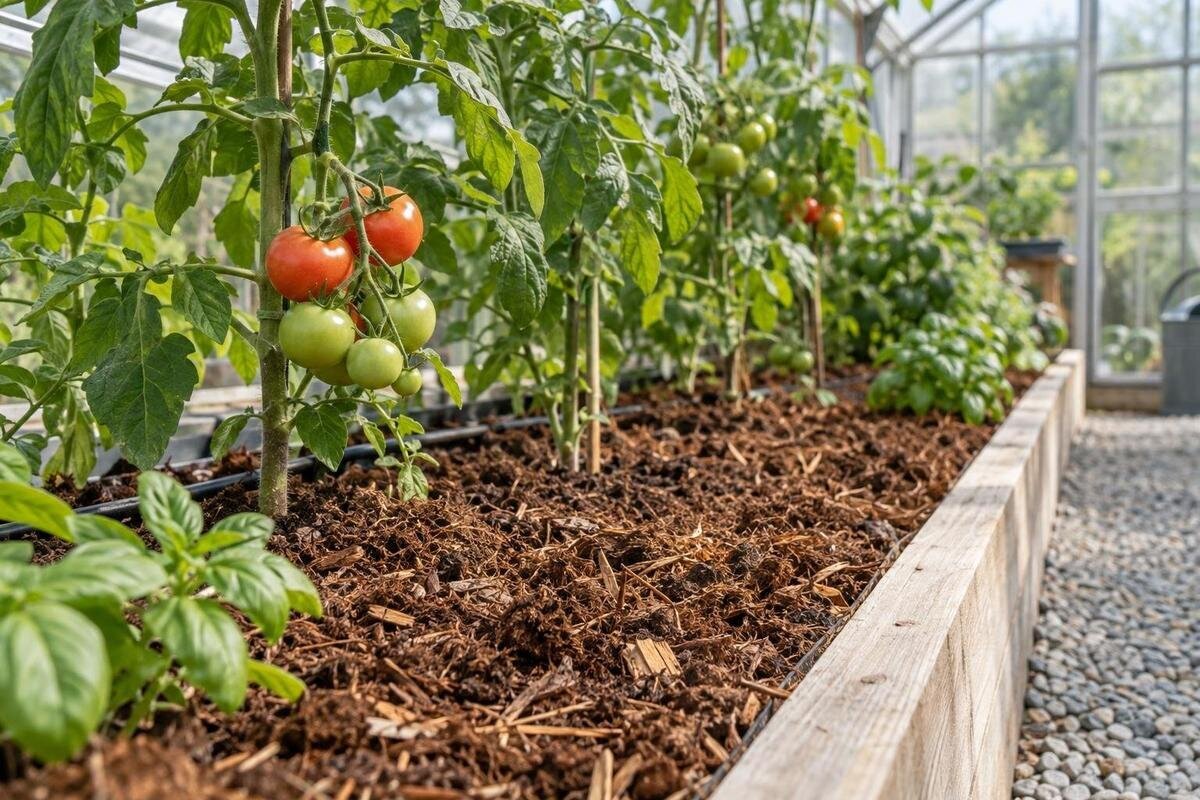
Greenhouse growing media
Switching to peat-free media in a greenhouse is not a simple one-for-one substitution. Peat-free tells you what has been left out; it does not say how a mix wets, drains, holds air or supplies nutrients. Coir-rich, bark-based, wood-fibre and compost-containing products can behave differently, even when their labels sound similar. Those differences affect watering, feeding and root-zone conditions, so choosing a blend by its front label alone can lead to avoidable trial and error. Compare the full product information with your crop and growing method, test a small amount in the intended containers, and scale up only when its behaviour is clear.

What a peat-free label tells you
Peat-free means the growing medium is made without peat, but it does not identify one standard recipe. Depending on the product, ingredients may include coir, composted bark, wood fibre, composted plant material and mineral components. The proportions, processing and particle sizes influence how a mix holds water and air. Some products also contain lime, a starter fertiliser or a wetting agent. Two bags with similar ingredient lists can still behave differently, so read the complete label and product sheet rather than treating peat-free as a specification. Look for the stated crop or growing method, particle information, feeding directions and any notes about preparation. Record the exact product name if you want to compare trials later.
Do not assume that natural, organic or all-purpose means suitable for every greenhouse crop, or that peat-free means sterile, fully fertilised or ready for sowing. A seed-raising mix, a potting mix for established plants and a specialist crop medium do different jobs. Nor does a peat-free description by itself establish the origin or environmental impact of each ingredient. If sourcing matters, ask what materials are included and what evidence supports the claim; do not fill gaps with front-of-bag wording. Keep the label or product sheet with your records, because a generic note such as peat-free mix is not enough to repeat a successful purchase. If the supplier changes a formulation, check that the information still describes the bag you receive.
Match the medium to the crop and growing system
List your crops and growing method before comparing blends. Young seedlings generally suit a fine, even texture; established plants in larger containers need a structure suited to their root volume and the way water moves through that container. Fruit-bearing crops grown in pots or grow bags may need a different balance of water storage and air space from shallow-rooted leafy crops in a bed. These are starting comparisons, not fixed recipes: crop, container, greenhouse conditions and the manufacturer's stated use all matter. Check that a product is intended for the job, then use its directions and crop-specific guidance to refine the choice. If you grow several crop types, consider whether one blend is suitable for all of them or whether separate mixes would be more practical.
Sketch the greenhouse floor plan with paths, doors, beds, pots and a propagation area marked before calculating how much medium you need. As a footprint reference, the T-Model Orangery Greenhouse is listed with area options from 16.52 m² to 30 m². Use the applicable size to plan the growing areas and access for routine work, then measure the actual beds and containers. Keep propagation and established crops identifiable on the plan if they will use different blends. This gives you a basis for ordering each medium without counting walkways or other non-growing areas.
Particle size, air space and drainage
Particle size and its distribution affect air spaces as well as water storage. A fine blend can settle and leave less air space in some containers; a coarser fraction may drain more freely but give young roots less close contact or dry sooner, depending on the recipe. Neither fine nor coarse is automatically better. Ask the supplier for a particle-size description and measurements such as air-filled porosity or water-holding capacity. Check how each figure was measured: results from different methods are not directly comparable, so do not select a product by the largest number alone. If the supplier cannot describe the grading, an ingredient list by itself will not predict how a filled bed behaves.
Test the mix in the container you plan to use: fill it to the normal depth, wet it as directed, and observe how it settles and drains. Note whether the surface crusts, the mix settles markedly or water passes around rather than through the sample; these observations raise questions for the supplier but do not replace laboratory testing. Follow any instructions for pre-wetting or filling. When planning containers for a model such as the Pyramid Greenhouse, listed in area options from 5.53 m² to 18.9 m², choose the intended pots or trays before running this test. Their shape and drainage outlets influence the result.
Check how the mix holds and takes up water
Water retention is more complicated than how long the surface looks dark. A peat-free mix may retain useful moisture yet wet unevenly, drain very quickly or be difficult to re-wet once thoroughly dry, depending on its ingredients and preparation. Ask whether supplier data give a water-holding figure, the test method and instructions for initial wetting or re-wetting. Before filling beds, test a sample in a pot or tray: wet it gradually, then check the centre and lower layers as well as the surface. If water runs down the sides while the centre remains dry, seek the product's pre-wetting advice rather than assuming more frequent watering will solve it. Check whether a dry sample re-wets evenly, not only how it behaves immediately after a pour.
Plan watering zones by crop and container, because different root volumes, plant sizes and positions in a greenhouse can dry at different rates. Check representative pots or beds rather than using one plant as a guide for the entire growing area; containers near vents, glazing or doors may not match a sheltered central bed. If comparing layouts for the Limited Edition Aluminium Greenhouses with Storage, listed in options from 5.52 m² to 28.08 m², mark the planted zones on your space sketch. Label each zone by crop and mix so you can relate moisture observations to the right growing conditions.

Reset watering after a change of medium
Do not copy an old watering schedule unchanged when moving to a new medium. A mix that drains rapidly may need more frequent checks than one with greater water storage, but greenhouse conditions and plant demand also matter. In pots, lift or weigh selected containers before and after watering to build a practical feel for moisture changes; in beds, inspect the root zone near representative plants. Check below the top layer, as a dry surface can sit above moist medium and a damp surface can hide a dry centre. If using a moisture instrument, confirm it is intended for this type of medium and follow its directions. Keep brief notes across several waterings before changing the routine.
Change one watering variable at a time—interval or volume per watering—so you can see what made a difference. Water should reach the active root zone, and excess water should be able to drain; repeated saturation can reduce oxygen around roots, while tiny surface-only doses may leave deeper roots dry. Avoid making a large change because of one hot day: inspect again under similar conditions and consider recent plant growth. There is no fixed peat-free watering interval. For a layout based on the Bloomcabin Prestige Greenhouse, listed in sizes from 3.77 m² to 28.08 m², leave access to representative containers so routine root-zone checks remain practical as plants grow.
Check pH, soluble salts and added fertiliser
Check whether the blend includes a starter fertiliser, lime or nutrient-bearing composted ingredients, and how the supplier intends it to be fed. Do not add your usual fertiliser automatically: a mix that already contains feed may not need the same programme as an uncharged blend. Conversely, a low-nutrient medium may need feeding suited to the crop after establishment. Follow the product directions and crop-specific guidance, taking account of plant stage and watering. If the label gives a period for incorporated fertiliser, treat it as an estimate for the stated conditions, not a promise that every crop will need no further feed throughout that period. The same bag can behave differently in a small propagation tray and a larger crop container, so note the context for its directions.
pH affects nutrient availability; electrical conductivity (EC) indicates the overall level of soluble salts but does not reveal which individual nutrients are present. If testing the mix or root zone, use the kit or laboratory's sampling instructions and compare results only when the methods are alike. Interpret readings against guidance for the crop and growing system, rather than applying one target to every plant. For a multi-bed layout in the Spacious Greenhouse, listed from 47 m² to 70 m², give each crop or medium zone a clear identifier. Keep its readings and feeding records together rather than averaging results across separate plantings.
Ask suppliers for measurable product details
Ask for a full ingredient declaration and confirmation that the medium is intended for your crop and growing method, such as propagation trays, pots, grow bags or beds. Useful details include particle grade, pH, EC, incorporated fertiliser and water-retention or air-space data, together with the test method. For composted or other variable plant inputs, ask how batches are assessed and whether a current analysis is available. A clear product sheet lets you compare claimed properties on consistent terms. If an answer is limited to broad phrases such as good drainage or feeds for weeks, request a description of the test or labelled use rather than assuming those phrases suit every crop.
Confirm the bag volume, whether the material is compressed, and how it should be handled before use and after opening. Ask whether it needs pre-wetting and whether its included feed affects your usual fertiliser programme. Alongside a greenhouse choice such as the Aluminium Classic Greenhouse, listed in footprint options from 3.77 m² to 28.08 m², plan where you will prepare the medium without obstructing growing areas or access. Follow the medium supplier's handling directions rather than assuming all bags are ready to use in the same way. Keep the supplier's response and batch details with the label for future orders.
Trial an unfamiliar mix before scaling up
Try an unfamiliar medium with a small group of the crop you intend to grow, using the same cultivar, container, planting date and care as a familiar mix. Keep watering and feeding as comparable as practical; otherwise, differences may reflect treatment rather than the medium. Label each pot or bed and record the exact product, batch, initial condition, watering and any feed. Compare how easily it wets, how it drains, whether it settles and how often the root zone needs checking. A modest trial cannot prove performance for every crop or season, but it can identify handling or moisture differences before you order enough for the whole greenhouse. Use similar starting plants so obvious differences are easier to interpret.
Choose a trial location with conditions similar to the main crop area; avoid comparing a new mix in one environment with an established mix elsewhere in the greenhouse. If growing zones differ, repeat the comparison in a representative zone rather than treating one edge or shelf as typical. When planning a trial in the Aluminium Lean-to Greenhouse, listed as a wall greenhouse with footprint options from 3.69 m² to 14.34 m², mark the test containers on the actual growing layout. Keep them comparable in size and position, and note any differences in exposure when interpreting the results.

Calculate the amount from beds and containers
Calculate the amount from the bed or container, not from the greenhouse's total floor area. For a rectangular bed, measure its internal length and width and the intended fill depth, multiply the three measurements in metres to get cubic metres, then multiply by 1,000 for litres. For example, a bed 2 m long, 0.6 m wide and filled to 0.3 m holds 0.36 m³, or 360 litres. Repeat for every bed, then add pot capacities separately. For irregular shapes, split the space into manageable sections or use a measured fill volume. Count only the depth you plan to fill with growing medium, excluding any material already occupying that space.
Check what the bag's stated volume represents and follow its instructions on expansion, pre-wetting and settling; do not apply a blanket allowance because products differ. Keep separate totals for each blend if crop zones need different formulations. The Limited Edition Aluminium Greenhouses are listed in sizes from 3.77 m² to 28.08 m², but calculate your order from the beds, pots and grow bags shown on your chosen layout. Label each quantity against its intended zone before the bags arrive. This keeps the volume calculation separate from the overall greenhouse footprint and makes orders containing several mixes easier to organise.
Keep records so results are repeatable
Record the exact medium name and batch alongside the crop, container, planting date and initial watering. Note how evenly the mix wets, how quickly it dries below the surface, whether it settles and what fertiliser you add. Use consistent units and inspect similar locations each time; otherwise, comparisons from one week or batch to the next can be misleading. Include changes in greenhouse conditions and plant size when interpreting results. A concise log need not be complicated: its purpose is to show whether a change in watering or feeding followed a change in the medium, rather than leaving you to rely on memory. Photographing the label is a simple way to retain formulation information.
If plants respond poorly, check moisture through the root zone, drainage and product directions first, then consider pH or soluble salts if appropriate. Wilting or leaf colour alone does not identify a single cause: water supply, root conditions, nutrients and other growing factors can overlap. Change one part of the programme at a time, record what you did and observe new growth. If a bag or batch behaves unexpectedly, keep its label and batch code and give the supplier your observations. That makes it easier to decide whether to repeat, modify or stop using the blend for that crop without making several untested corrections at once.
Frequently asked questions
Does peat-free mean the mix is organic?
No. Peat-free describes the absence of peat; it does not automatically mean a mix is organic, sterile or environmentally verified. Check the ingredient declaration and any evidence for claims that matter to you, then confirm that the product suits your crop and growing method.
Can I use the same peat-free mix for seedlings and fruiting crops?
Not automatically. Seed-raising and established-plant mixes can differ in particle size, nutrients and water behaviour. Check the stated use, or trial the product with a small group before using it across the greenhouse. An all-purpose label alone does not establish suitability for every crop.
Should I water peat-free mixes more often?
Not by default. Watering depends on the ingredients, container, crop and greenhouse conditions. Check moisture at root depth and note how the mix drains before adjusting your routine. Product directions are a starting point, not a universal watering schedule.
How can I compare two peat-free mixes?
Compare stated crop use, particle information, water-retention or air-space data, pH, EC and incorporated fertiliser. Check how any measurements were made, then trial both mixes in the same containers with the same crop and care. This reveals practical differences that ingredient lists may not show.
How much growing medium do I need for a greenhouse bed?
Measure the bed's internal length, width and intended fill depth. Multiply them to get cubic metres, then multiply by 1,000 to convert to litres. Calculate each bed separately and add container volumes; the greenhouse's total floor area is not the bed volume.
Good peat-free greenhouse growing starts with a crop-specific choice and continues with observation. Read the full formulation, check the supplier's data, and try the medium in the containers and conditions you will actually use. Then adjust water and fertiliser from root-zone checks and measured information, not from habit or a generic timetable. A modest trial and a clear record make it easier to buy the right quantity and repeat results without assuming every peat-free mix behaves alike.
