
Why Plants Scorch on Just One Side of a Greenhouse
Greenhouse troubleshooting
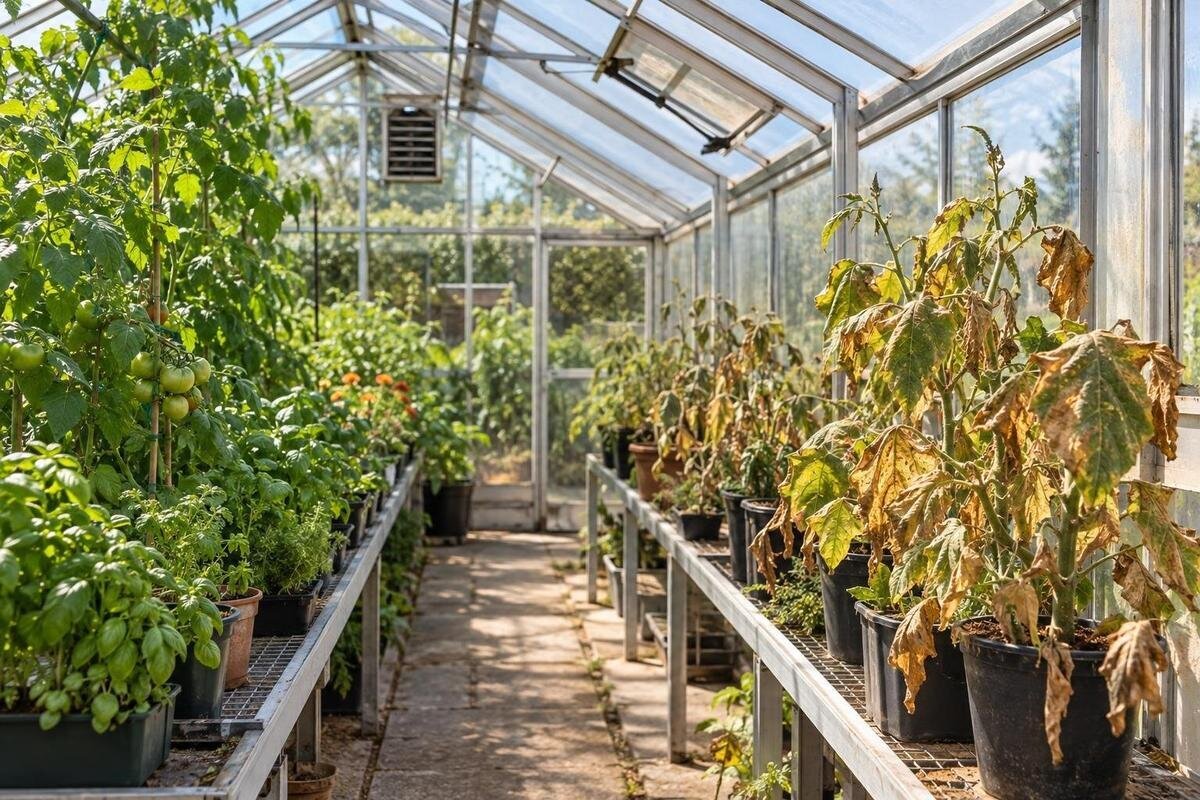
Plants scorched on only one side of a greenhouse are often responding to a local difference, not a condition shared by the whole structure. A moving sun patch, reflected heat, still air, uneven watering or a plant’s position can leave one group more stressed than another. The leaf pattern is a clue, not a diagnosis. Map where damage appears, compare affected and healthy areas at the same time, then test one change at a time. This helps avoid shading every crop or changing ventilation when the cause is limited to one zone.

What a one-sided scorch pattern can tell you
Scorch is a description of damaged tissue, not a diagnosis. Affected areas may look pale, tan or brown and become dry, but appearance varies with plant species, leaf age and cause. Direct sun or excess heat can injure exposed tissue; a dry root ball, excess salts, pests or disease can create damage that looks similar. Note whether marks begin at an edge, form a sharply exposed patch or appear as separate spots, but do not use one visual pattern alone to name the cause. Older lower leaves may also yellow naturally, so distinguish that from fresh injury.
Where damage sits is often more informative than colour. If several plants of the same kind develop symptoms on the same greenhouse side, at a similar height and after the same weather, a local exposure is plausible. If only one plant is affected, or its new leaves continue to develop marks after it is moved, check its watering and health as well. A sunny side is not automatically the cause: heat from a nearby surface, still air or an uneven irrigation line can make a similar cluster. Old scorched tissue usually stays marked, so assess a test by whether fresh damage appears, not by expecting brown patches to turn green.
Map damage by plant, leaf and position
Draw a rough plan of the greenhouse and mark the affected plants, not just the side where you first noticed them. Add benches, beds, doors, vents, fans, fixed shelves and nearby walls, then note each plant’s species, pot or bed, height and which leaf surface faces glazing or a wall. Use a simple code for new and old damage. This separates a row-wide pattern from one pot, one shelf or a single level. It also clarifies whether side means the side of the greenhouse or the sun-facing surface of each leaf. Give the ends fixed labels so left and right do not change when you enter from another door.
Take photos from the same position and include a healthy comparison plant. Note when you first see new injury, the weather, watering, vent settings and any temporary shade; symptoms may become obvious after the exposure. Look for alignments: a narrow strip below a shelf, a cluster beside a door or plants sharing one watering line can point to different causes. Include storage areas on the plan rather than treating them as separate from the growing space. When considering Limited Edition Aluminium Greenhouses with Storage, check where the storage sits relative to your proposed crop rows and openings. Record any items projecting into the growing area, then compare conditions on either side rather than assuming they obstruct airflow.
Follow direct sun as it moves
Check the affected plants in the morning, around midday and later in the afternoon rather than relying on a single glance. A bright strip can move across a bench as the sun changes angle, while a tree, fence or building may cast a sharp, shifting shadow. Record when direct sun reaches the damaged crop and how long the patch remains there. Repeat on a clear day and a partly cloudy one, because clouds can hide the beam during an observation. If the damage appears later, note the conditions beforehand as well as when you first spot it.
Mark the sun patch on your plan or take timed photos from the same place; do not mark the glazing itself. If direct exposure repeatedly coincides with the affected zone, test a small, reversible shade change or move one comparable potted plant before shading the whole structure. Repeat the check as seasons change or nearby trees are pruned, since both can alter shadows. When planning a new greenhouse, mark its proposed footprint on the actual site. If comparing Aluminium Greenhouses, use those site observations to plan crop positions rather than relying on a catalogue image. Note which proposed rows receive morning or afternoon sun and where a nearby building’s shadow crosses them.
Check for reflected heat and warm surfaces
Sunlight can also reach plants after reflecting from a nearby window, pale metal or another reflective surface. Dark paving, masonry or a sunlit wall can absorb heat and release it later, so a warm area may persist after the bright patch has moved. Check outside and inside the greenhouse at the times symptoms develop. Compare a suspected surface with a similar area that is not in the sun, and note whether the damaged plants face it. This helps distinguish a direct beam from heat coming from a nearby object.
Try a temporary, freestanding screen between the suspected source and the affected plants, changing no other factor. Observe it in comparable weather and keep vents clear. A screen can also change shade or airflow, so treat the result as a clue rather than proof. For a Wall Greenhouse, include the adjoining wall in your observations: record its exposure, colour and surrounding surfaces as well as conditions beside the glazed face. Compare plants close to the wall with those further away before deciding where screening might help. Check the greenhouse manual before adding a permanent screen, and do not attach trial materials to glazing or block an opening.

Measure conditions at plant height
To compare local air temperatures, measure at canopy height on both the damaged and healthy sides. With two loggers, place them in comparable open-air positions; with one device, take readings in both places close together and repeat in reverse order. Keep sensors out of direct sun and away from glass, metal frames, wet soil and direct vent streams. A sensor warmed by a sunbeam can report more than the surrounding air. Record the time, cloud, shade and vent or fan state beside each reading, so differences in weather or equipment settings do not undermine the comparison.
Look for a repeatable local difference when damage tends to occur, not for a universal threshold. Air temperature and relative humidity describe the sensor’s position; they do not tell you the temperature of a leaf or the moisture at its roots. A daily maximum alone does not show when a peak occurred or how long it lasted, so compare time-stamped readings around the period of exposure. If readings seem inconsistent, swap the loggers to see whether the difference follows the position or the instrument. When planning benches in a Spacious Greenhouse, allow for comparisons between individual crop zones. The listed floor-area range is 47 to 70 m², but measurements at the affected plants are more useful than assuming conditions are uniform throughout.
Compare airflow around affected plants
Air can move unevenly even when the greenhouse as a whole feels warm or well ventilated. Check whether vents open as expected, whether a fan is obstructed or directed away from the crop, and whether dense foliage, hanging items or stored equipment interrupt the route between openings. Compare the affected and healthy zones with doors, vents and fans in the same state. A plant behind a bench or packed against neighbouring foliage may experience stiller air than one only a short distance away. Record outside wind conditions too, since they can change the direction of air through openings.
A light strip of tissue held at canopy height can show the direction of air movement, but it is not an airflow measurement. Repeat at several points under the same vent settings, keeping it clear of leaves and moving parts; do not use smoke or a flame as a tracer. For a layout such as the T-Model Orangery Greenhouse, locate the openings on the actual plan and compare them with your intended bench and crop positions. Include each growing area in your observations rather than judging circulation from the doorway alone. If powered ventilation appears faulty, follow the maker’s instructions and have a suitably qualified person assess any electrical work.
Rule out watering and plant-health problems
A hot, dry corner can expose a watering difference rather than a ventilation fault. Check whether containers on the affected side receive the same irrigation, whether emitters are blocked or displaced, and whether pots drain freely. Compare growing medium at a consistent depth using the same method, and note pot size, root fill and plant size; a small pot beside a large one is not a fair comparison. Heat can increase water demand, but timing alone does not establish that scorch came from dry roots. Avoid flooding a plant as a test, which can create another problem.
Inspect leaf undersides and stems for insects, webbing, residue or new lesions, particularly if damage is limited to one species or keeps appearing after you move it. Look at the pattern over time and avoid applying a treatment on appearance alone. Keep plant-health observations separate from assumptions about the structure: damage beside the glazing does not by itself show that the greenhouse shape caused it. If considering a Pyramid Greenhouse, compare the actual plan with your intended planting positions and access for watering and inspection. Then check how sun and airflow fall at your site, without assuming that plants near the centre or around the edges will automatically be cooler.
Test one local change at a time
Once a likely cause emerges, run a small comparison. Keep one similar plant in its current place and move another potted plant of the same kind to a less exposed position, or screen only the suspected reflecting surface. Do not move every pot, alter watering, open every vent and add shade at once: the result would not tell you which change mattered. If plants are in beds, use a small, local shade trial rather than uprooting them. A move can change more than light, including airflow, so record the new position and keep a healthy comparison nearby.
Where direct exposure is the likely trigger, choose a reversible shade trial suited to greenhouse use and keep openings unobstructed. Shade changes the light available to plants beneath it, so test only the affected area and compare with similar plants receiving ordinary light. Before buying a permanent shade accessory for Limited Edition Aluminium Greenhouses, check compatibility with the exact version you are considering, including the proposed fixings and the area the shade would cover. Keep the trial focused on that area so the result helps you decide whether broader coverage is warranted. Compare plants through similar sunny conditions, not just one cloudy day, and record any changes to vent settings during the trial.

Match the response to the likely cause
Choose a response that fits the pattern. If damage follows a moving sun patch, adjust the exposed crop or provide targeted shade; if a neighbouring surface stays warm after direct sun, deal with that source rather than darkening the whole greenhouse. If a repeatable difference coincides with still air, clear an obstruction or use existing ventilation as the manufacturer intends. If moisture differs, correct the watering issue. Shade and ventilation are not interchangeable: shade reduces incoming light, while airflow addresses air movement. Neither will repair damaged roots or resolve a pest problem.
Before buying ventilation or shade equipment, compare the proposed change with the cause you recorded. For the Bloomcabin Prestige Greenhouse, check the opening locations, included equipment, accessory compatibility and operating instructions for the exact configuration. This lets you distinguish a need to adjust the existing setup from a reason to purchase something additional. Consider which crop zone the change would affect and whether it would also alter conditions for healthy plants nearby. If a proposed change involves powered equipment or structural alterations, ask a suitably qualified professional to assess it and follow the manufacturer’s instructions. Avoid adding equipment simply because one part of the greenhouse is scorched.
Reassess new growth after a change
After making a change, take new photos from the same angle and keep the original map. Damaged patches will not disappear, so look for fresh injury on new leaves, the timing of new marks and whether the same local zone remains affected. Compare similar plants under similar weather; a cloudy stretch after installing shade is not a fair test of the shade alone. If possible, change only one position or setting at a time and keep notes across more than one sunny period. The right observation period depends on the plant and conditions, so avoid treating one day without new marks as proof.
If new damage continues despite a clear change in exposure, or the pattern spreads to unrelated plants, revisit plant health, root-zone conditions and irrigation rather than escalating shade. Take dated photos and notes on location, temperature, watering and vent settings to a local horticulturist or plant diagnostic service if you cannot distinguish environmental injury from pests or disease. A clear record of what changed and what stayed constant is more useful than a label such as heat stress on its own.
Frequently asked questions
Does one-sided scorch always mean the sun is too strong?
No. Direct sun is one possibility, but reflected heat, still air, uneven watering, pests or disease can create similar damage. Compare affected plants with healthy ones and note whether the pattern follows a spot, a row or an individual plant before changing shade.
Why can a thermometer miss a hot spot?
A reading only describes the sensor’s position and the time it was taken. A thermometer in a different part of the greenhouse may miss a brief, local peak, while one sitting in direct sun can be warmed by the beam. Compare shaded sensors at plant height.
Can I shade just the affected area?
A small, reversible shade trial can help test whether direct exposure is involved. Keep vents clear, use a shade option intended for greenhouse use, and compare similar plants nearby. Because shade also reduces available light, avoid covering the whole structure before you know the cause.
Will opening more vents fix the scorch?
It may help if observations point to still air or a local build-up of warm air. It will not necessarily resolve heat reflected from outside, uneven watering or a plant-health problem. Check the equipment instructions and compare conditions at the affected canopy before changing the ventilation setup.
What if new damage keeps appearing after I move a plant?
If fresh marks continue to develop on the same plant in a different position, check its watering, roots and leaves for other signs of stress or pests. Keep dated photos and your notes. If the pattern spreads or remains unclear, ask a local horticulturist or plant diagnostic service for advice.
Treat the affected side as a place to investigate, not proof that the whole greenhouse is too hot. A mapped pattern, readings taken at plant height and a local trial can distinguish a moving sunbeam from reflected heat, still air or uneven watering. Keep the response proportionate to the evidence, then judge it by fresh growth and repeat observations. If the pattern does not fit the environment or continues to spread, return to plant health rather than adding more shade.
