
Finding the Cause of Condensation Dripping onto Greenhouse Plants
Greenhouse troubleshooting
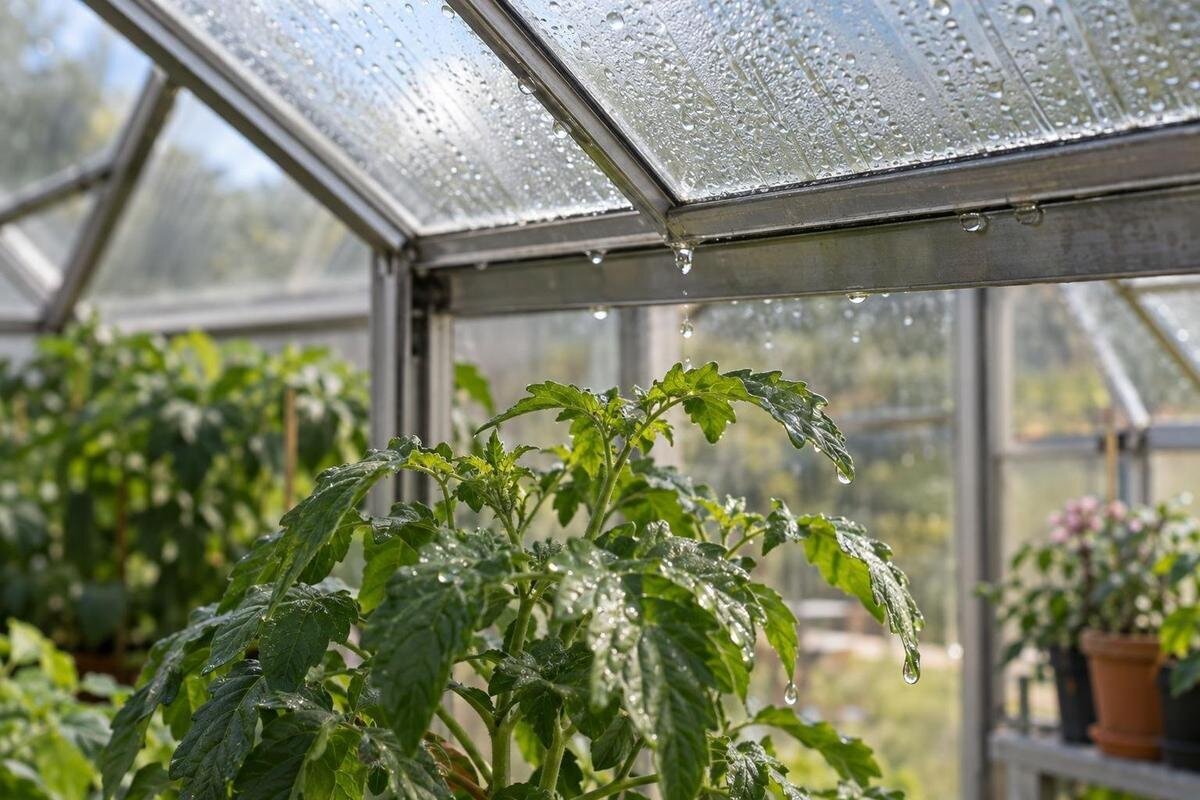
Water on greenhouse leaves at dawn may be condensation, but the drip landing point is not always directly below where the moisture formed. Water can collect on a cold roof panel or frame, follow a slope or joint and fall onto a bench or plant. A simple map, repeat photographs and overnight temperature and humidity records help distinguish that pattern from rain entry, irrigation or another local source before you change the setup.

Map the wet leaves before changing anything
Sketch the greenhouse as seen from above and mark benches, plant rows, doors, vents, roof sections, gutters, downpipes, water lines and any adjoining wall or storage area. On your first inspection, mark every wet leaf, pot, bench and floor patch, not just the most affected plant. Use separate notes for droplets on leaf tips, damp leaf surfaces and wet soil. Add the time you first noticed each area, and note whether it was already wet or became wet while you watched. This turns a vague morning observation into a pattern you can compare later.
Look for clusters and edges: a narrow strip of wet plants may follow a repeated drip route, while scattered moisture across the canopy may have another explanation. Mark nearby dry plants too; the contrast can help. Record whether water is on the upper or lower leaf surface, but do not treat that detail alone as a diagnosis. A leaf can be wetted by splash, a drip or moisture condensing on the leaf itself. Repeat the same map on more than one morning, and note weather differences. Avoid moving pots until you have recorded their original positions.
Trace each drip point to the roof or frame
From a safe position inside, inspect the accessible underside of the roof, glazing bars, frame joints, gutters and roof edges above the mapped area. Note where beads first appear and whether they run down a panel or along a bar. Water can travel sideways before it drops, so the plant directly underneath may only mark the endpoint. For a lean-to such as the Wall Greenhouse, mark the roof-to-wall junction separately from the rest of the roof. Give each suspected starting point and landing point a matching label on your sketch. If you can see only part of the route, mark the visible stretch rather than drawing an assumed connection. This keeps a drip from the middle of a panel distinct from water arriving along a frame or adjoining wall, even when both land near the same plant.
Photograph the surface before wiping it, and note whether the moisture appears to be on the inside or outside face. Reflections can make this difficult to judge, so compare a wide view with a close view from another angle. Do not climb onto the structure or lean on glazing to reach a suspected point. If a panel is inaccessible, record that uncertainty rather than probing it. A wet track that begins at a joint deserves attention, but condensation can also gather along framing. The route and timing together matter more than a single damp mark.
Photograph the overnight sequence
Use your phone’s timestamp and take repeat photographs from the same safe position. A useful sequence includes a wide view of the roof and affected row, a close-up of droplets or a wet joint, and a side view showing where the water lands. If you can do so safely, photograph the surface before it becomes wet as well as when you first notice moisture. Avoid relying on flash alone: reflections can hide droplets. Keep the original images and write observations separately, so you can compare each morning without altering the record.
Include the date, time, weather, irrigation and vent position in your notes. If you photograph outside, do so from the ground. Keep each set of photographs together and label the roof section shown, using the same labels as your sketch. Record the exact model wording in the file notes, for example Limited Edition Aluminium Greenhouse, while keeping that identity separate from your observations of the water. A useful caption describes what is visible: droplets beneath a panel, a wet joint or a dry neighbouring section. Avoid captions that announce a cause before you have compared the sequence. When reviewing the images, distinguish the first photograph showing moisture from the time moisture actually began forming; unless you watched it happen, those times may not be the same. Labelling that uncertainty makes the sequence easier to interpret.
Compare overnight air readings with cold surfaces
Condensation forms when moist air meets a surface that is cool enough for water vapour to condense. As greenhouse air cools overnight, relative humidity can rise even if no new moisture has entered the air, so a rising reading is a clue rather than proof. If you have a logger, record temperature and relative humidity at plant-canopy height. If a suitable instrument also measures surface temperature, note the temperature of the affected area, following the instrument instructions. A logger that displays dew point can provide another useful comparison; there is no need to estimate it from rough readings.
Keep the air sensor out of direct sun, away from splashes and clear of the glazing, so it records the surrounding air rather than a wet surface. Leave it in the same position for each comparison and check that its clock is correct. Record a time series or overnight minimum and maximum rather than relying on a single dawn reading. On the plan for your T-Model Orangery Greenhouse or other structure, label the sensor position separately from the affected roof section. Write down whether a reading describes the air near the plants or the surface above them; do not combine the two under a single temperature label. When matching readings to photographs, use the closest recorded time and note any gap. If only minimum and maximum values are available, retain them as an overnight summary rather than assigning them to a particular drip photograph.

Separate condensation from watering and plant moisture
Note when watering, misting or cleaning takes place, and whether pots, trays or the floor remain wet afterwards. Water from soil and other damp surfaces adds moisture to the air; plants also release water vapour. That moisture may later condense on a cooler surface. Record what happened without withholding water a crop needs. If the wet area appears soon after irrigation, or follows a hose or emitter, inspect the accessible line and its route rather than assuming the roof is responsible.
Compare mornings after different watering conditions, keeping other observations in the log. Wet leaf surfaces throughout a canopy may have a different cause from a narrow drip line, but neither pattern proves it by itself. Check soil, trays and surfaces near the affected plants as well as the glazing. On your plan of a Pyramid Greenhouse or another greenhouse layout, mark the watered areas separately from the plants receiving roof drips. Note whether a hose, emitter or watering can could have wetted the same spot during the previous watering. Record the event you observed rather than simply writing that irrigation was used. If a tray or floor patch remains wet, mark its location too. These details help you distinguish water applied directly to the affected area from moisture that may later have collected overhead, without changing several parts of the watering routine at once.
Check whether rain or a leak explains the water
Record whether rain fell before or during the wetting, and note the time you first saw water. A drip that begins during or after rain, especially near a roof edge, gutter, joint or wall junction, makes rain entry worth investigating. Wind can affect where water reaches the structure, so note the weather rather than relying on the fact that it rained at some point that day. Do not hose the greenhouse to try to reproduce a suspected leak; that can create a new wetting pattern and may not match real conditions.
Compare the same area on dry nights. Condensation can occur without rain, while a leak may leave a repeated route around a joint; neither observation is conclusive alone. If your structure includes a storage area, mark its boundary and record wetness on each side. A model such as the Limited Edition Aluminium Greenhouse with Built-In Storage needs that storage area included in the inspection sketch, rather than leaving it outside the recorded growing space. Note whether the first visible water is at the boundary, on an adjoining roof section or farther inside. Keep observations from rainy and dry nights clearly labelled, even if the final wet patch looks similar. If you did not inspect until morning, write that down: a wet joint seen after rain does not establish when the water first appeared or the route it took.
Review vents and shade using the equipment manual
Write down which vents are open, partly open or closed when you see the drips, and note whether anything appears to obstruct their movement. Observe the setup without forcing a vent or altering a mechanism. Check the instructions for the exact structure and any fitted equipment before making changes. An opening position that seems helpful on one night may not suit another night’s weather or your crop, so record what was actually happening rather than assuming the vents were operating as intended.
Treat shade as another condition to record, not an automatic cure. It changes daytime solar exposure, which can affect the overnight pattern, but does not by itself identify where the water is coming from. Use only shading options confirmed as compatible with your structure. When considering equipment for a Prestige Greenhouse with Metal Base, keep the exact model details alongside a record of the vents and shade actually fitted. Separate the existing setup from any proposed purchase so you do not confuse an available option with equipment already in use. Record whether the shade was in place during the day before the drips appeared, not just its position during the morning inspection. Before buying an accessory to address the problem, identify which observation it is intended to change and how you will compare the result with the existing record.
Test one possible cause over comparable nights
Once you have a repeatable pattern, choose one likely factor to investigate. If the timing points to irrigation, record the watering event and its route; if it points to rain, compare wet and dry conditions; if it points to a vent, note its position and consult the manual before making an adjustment. Change only one thing at a time, and do not disrupt watering or ventilation in a way that risks the crop. Several simultaneous changes can make it impossible to tell which one affected the drip pattern.
Keep the sensor in the same place and take photographs from the same viewpoints as before. Record weather, rain, watering, vent position and any shade change alongside each result. In a larger space, take location-specific readings instead of treating one point as representative of the whole greenhouse. The Spacious Greenhouse listing gives an area range of 47 to 70 m²; use the actual selected size and installed layout when marking observation points. Label each reading with its location, especially if more than one instrument is used. If you move a single logger to investigate another area, record the move and do not present the resulting readings as simultaneous measurements. Compare the affected row with a nearby dry area where possible, while keeping the timing clear. A useful comparison explains what stayed the same as well as what changed.

Read the combined evidence, not one clue
Condensation becomes more likely when moisture repeatedly appears on the inside roof or frame after a cool night, the air readings show overnight cooling, and there has been no rain or recent splash to explain the pattern. A wet area that follows watering, or a drip that appears during rain at the same joint, points towards other causes. Wet foliage on its own is not enough to distinguish them. Look for several observations that agree: location, route, timing, surface condition and the log.
Write down the best-supported explanation as likely, possible or still unknown. This is more useful than treating one photograph or humidity reading as a final answer. Keep the greenhouse identity, such as Classic Aluminium Greenhouse, at the top of the record, then summarise the observed route beneath it. Catalogue and material names do not establish why water appeared. For each proposed cause, list the observations that support it and any that do not fit. For example, distinguish a photographed trail from a route you inferred because the plants below were wet. Leave a gap in the explanation where the route could not be seen, rather than filling it with an assumption. This gives you a focused question for the next inspection: where the water first appears, when dripping starts or whether the same patch becomes wet without rain.
Choose a response that matches the source
If the evidence favours condensation, review avoidable moisture sources and the recorded ventilation conditions before changing the setup. Check that watering is not leaving unnecessary standing water, and consider ventilation only in line with the equipment manual, weather and crop needs. Avoid making a broad change simply because leaves are wet. If the pattern points to rain entry, focus on the suspected joint, edge or gutter instead; a general change to watering or shade will not establish whether that area is leaking.
For persistent water entry, an inaccessible roof area or a junction that needs repair, ask a qualified greenhouse professional to inspect it. Provide the marked plan and the photographs showing the suspected route, along with the relevant overnight records. Explain which observations support your suspicion and which remain uncertain, rather than presenting a working explanation as a confirmed fault. Note any changes already made, including their dates, so the inspection can take those into account. If no clear source emerges, leave the explanation open and continue observing the same marked area rather than replacing parts on the strength of a single wet morning.
Frequently asked questions
Does wet foliage at dawn prove that condensation is the cause?
No. Irrigation, rain entering the structure or water running along a frame can also wet plants. Look at where the moisture first appears, what happened during the night and whether the same pattern returns.
Why are only some plants getting dripped on?
Water may collect at one cold spot or run along a panel or frame before falling, so the wettest plants might not be directly below where it formed. Local watering or a leak can also affect just one area.
Is a high relative-humidity reading enough to confirm condensation?
No. Humidity readings describe the air, not whether a particular surface is cold enough for condensation. Compare overnight air readings with observations of the inside roof and frame, and note whether they become wet on dry nights.
Should I leave the greenhouse vents open overnight?
There is no setting that suits every structure, crop and night. Record the vent position and consult the instructions for your model. Consider weather and crop needs before changing ventilation, then observe the result.
How long should I keep temperature and humidity records?
There is no universal number of nights. Record several comparable nights, keeping sensor positions consistent and noting rain, watering, vent settings and other changes. Include different conditions where possible so you can compare patterns.
Diagnose greenhouse drips by matching where the water lands with a route and an overnight pattern, rather than assuming all morning moisture is condensation. A marked plan, dated photographs and readings taken consistently can narrow the cause while preserving useful evidence. When the observations point to a leak or an area you cannot inspect safely, have a qualified professional assess it. Otherwise, make one suitable change at a time and check whether the same drip point returns.
