
Your First Greenhouse: What to Buy Now and What Can Wait
First greenhouse planning
Buying a first greenhouse can turn into a long accessories list before a seed is sown: trays, shelves, hoses, shade, timers and more. There is no universal starter kit for growing, because a propagation setup for a few pots differs from one built around full beds or heat-sensitive crops. Use a sequence instead: choose the crops, check the exact greenhouse package, buy the supplies those crops need, and wait for experience to justify optional upgrades.

Before you buy 1
Plan your first crop list around usable space
Write a short list of what you actually want to grow before comparing trays or shelving. For each crop, note whether you will sow seed under cover, raise seedlings there for later planting, or keep mature plants inside. Add a realistic plant count, the containers or bed area it needs, and its expected height or spread. A tray of seedlings and an established plant use space differently; recording both stages helps prevent you from filling the greenhouse with equipment before plants arrive. Note which crops may share space at different times and which will occupy a container for longer. Keep the first list narrow enough that you can care for it and see how the greenhouse behaves.
Sketch the proposed layout, including plants, a workable access path and room to reach each growing area. Treat the listed area as a starting figure, not as all usable growing surface: paths and working space take their share. The Classic aluminium greenhouse options are listed from 3.77 m² to 28.08 m², but the selected variant and internal arrangement matter more than the range label when you plan containers. A simple scale drawing, even on paper, exposes crowding early. Leave practical space to move a watering can or carry a tray, and check how equipment affects access. If the plan does not fit, reduce the initial crop count before shopping for extra shelves.
Check what the selected greenhouse package includes
Before ordering growing accessories, read the itemised specification for the exact configuration and separate what is supplied from optional extras. A product title, sales image or generic setup checklist cannot confirm everything included in your selected package or which accessories fit it. Note any item you expected but cannot find, then ask the seller to clarify quantities and compatibility. Keep that reply with the order details. This check prevents duplicate purchases and helps you identify missing items before other plans depend on them. Use the confirmed package contents as the starting point for your shopping list, rather than assuming every greenhouse comes with the same equipment.
One example of why wording matters: the Prestige Greenhouse with Metal Base listing identifies a metal base and lists area options from 3.77 m² to 28.08 m², but the model name alone is not a complete inventory of a chosen package. Check the selected configuration and order documents for the items relevant to your build, including any separately selected options. Once that is clear, make a second list for growing supplies—seed, mix, containers, labels, a watering method and monitoring—instead of mixing them with structural components. This separation makes it easier to compare what you already have with what you still need.
Before you buy 2
Buy growing media and containers for your chosen crops
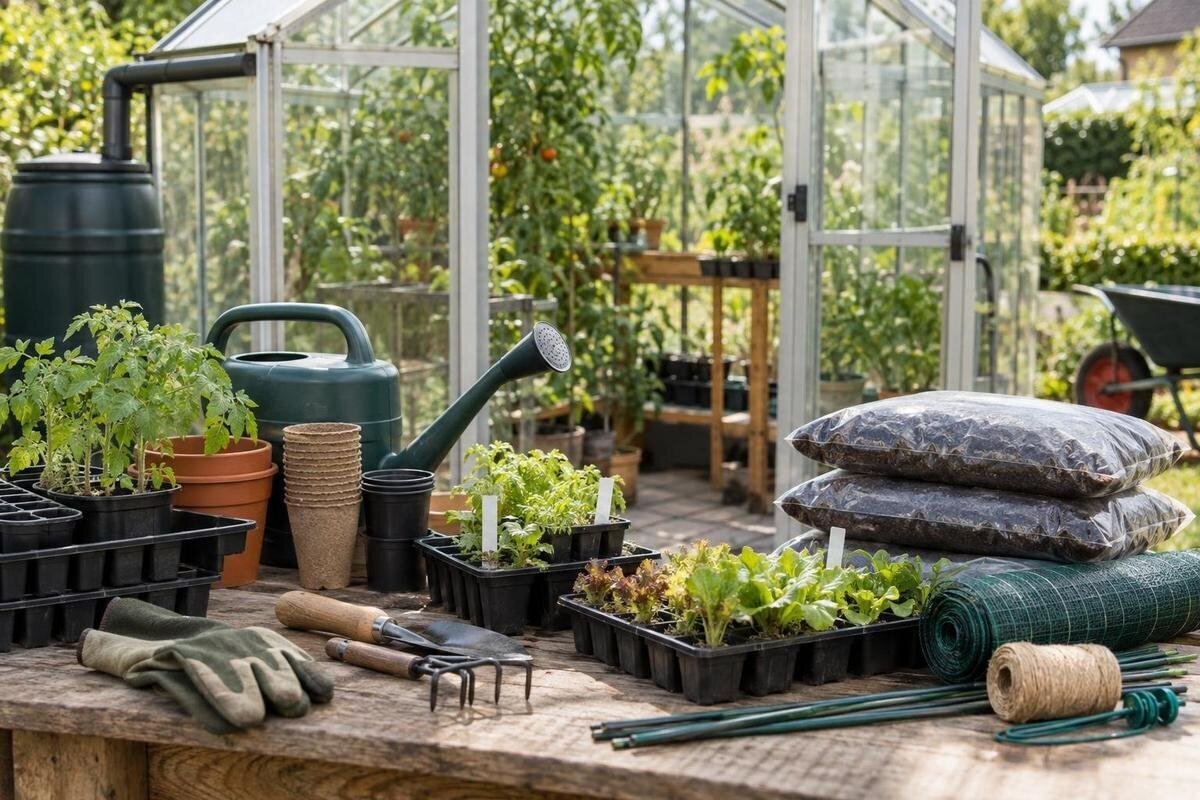
Choose growing media and containers to match the way you intend to start each crop. Seed-raising mix, potting mix, seed trays, small pots and a direct-sowing bed serve different purposes, so avoid ordering every format by default. Follow the label for each medium and the seed supplier's directions, and keep both with your growing notes. Labels and a waterproof pencil make it easier to identify varieties and sowing dates, particularly when several batches look alike. A hand trowel or small potting scoop may help with the work you plan, but select tools to fit actual tasks rather than buying a pre-packed collection. Store materials as their packaging directs.
Estimate quantities from the number of seedlings and containers, not just greenhouse area. If you start seeds in trays, work out how many cells you will use and what will happen when seedlings need more room; avoid sowing more than you can pot on or plant out. The Limited Edition Aluminium Greenhouses listing gives area options from 3.77 m² to 28.08 m², but that range does not tell you how many trays, pots or beds fit your chosen layout. Choose a configuration and draw the planting arrangement before buying in bulk. Purchase media in quantities that match your containers, check storage guidance, and avoid accumulating opened supplies you cannot use promptly.
Keep watering simple at first
Have a basic watering method ready before planting: a watering can, hose or another arrangement you can use comfortably in the selected layout. Think through how water reaches each pot or bed and whether carrying it would obstruct the path. Requirements change with plant number, container size, medium, growth stage and weather, so copying a fixed amount from someone else's greenhouse is not a sound shopping basis. Keep the first method simple enough to observe. Note which areas dry sooner and whether different crops need separate attention; those observations can distinguish a genuine need for another tool from a guess. Check that the method fits the work you can actually do.
The Wall Greenhouse range lists area options from 3.69 m² to 14.34 m². That figure cannot tell you how much water your crops will use, and the product name alone does not establish a water connection or irrigation compatibility. Check access to the intended water source and the route you would use before buying a timer or tubing. If water must be carried, decide whether a can remains manageable for the planned number of plants. Confirm any connection or supply requirements with the equipment maker rather than assuming that a fitting or hose will suit every setup. Buy an automated system only after you know what it must serve.

Before you buy 3
Use a thermometer and keep a basic growing log
Start with a thermometer that is easy to read rather than buying several sensors at once. Position it to measure the air around the plants, following its instructions and avoiding locations where direct sun or a nearby surface could distort the reading. A minimum–maximum model can make changes between visits easier to spot, but a reading is information, not a control system. In your growing log, record the date, temperature, watering, sowing or planting changes, and any adjustments to ventilation or shade. Consistent records make comparisons more useful. These notes are a better basis for an upgrade than memory or one unusually warm afternoon.
The Pyramid Greenhouse listings cover 5.53 m² to 18.9 m², but a stated area does not describe temperature differences in any selected layout. One sensor may be enough to establish a pattern in a compact growing arrangement; if your notes later show noticeably different conditions in separate areas, consider whether another reading would help. Keep sensors in positions recommended by their makers and compare similar locations rather than moving one around at random. The aim is not to chase each fluctuation; it is to learn whether a recurring condition affects the crops you chose. Use the record to decide whether a change is necessary before buying controls.
Plan shade and ventilation for your crops and site
Shade and ventilation can be a priority before planting if the site, season and chosen crops are likely to create conditions the plants cannot tolerate. Do not buy generic shade cloth or a fan simply because it appears on a starter checklist. First establish which openings and shade options are part of the selected greenhouse, what the crops require, and how sun reaches the site at different times. Shade reduces incoming light as well as heat, so stronger shading is not automatically better for every crop. Observe areas with different sun exposure and choose crops whose needs you can manage. If a crop needs tightly controlled conditions, a less demanding first crop may be a better choice than buying several controls at once.
The T-Model Orangery Greenhouse listing spans 16.52 m² to 30 m², but its name and area range do not tell you which ventilation or shade provisions come with a chosen configuration. Check those details in the exact specification, and ask the supplier whether a proposed accessory is compatible. For shade products, confirm their intended use and fit rather than guessing from a photograph. For powered fans or controls, do not improvise an electrical arrangement; have a qualified professional assess equipment and installation where needed. Keep the purchase tied to a specific observed condition, and check that the selected system addresses it rather than assuming one accessory can manage every climate issue.
Before you buy 4
Choose benches and storage to suit your tasks
Extra benches, shelves and storage can make handling easier, but each uses room that might otherwise be available for plants or access. Before ordering, list the jobs you perform—potting, setting out seedlings, keeping frequently used hand tools close—and decide which needs a dedicated surface. A movable table or a small shelf can be a modest first solution; if it does not suit your routine, you can reposition it. Think about where messy jobs happen and whether a surface needs to stay clear for trays. Measure any item before bringing it inside, allowing for its intended position, door access and nearby plants. Buy only enough to support the work you actually do.
If keeping supplies inside is important, the Limited Edition Aluminium Greenhouses with Storage range is presented as a storage option, with listed area choices from 5.52 m² to 28.08 m². The product name does not state storage capacity or how much growing area a particular layout leaves, so check the selected configuration before relying on it. For separate storage, measure the items you intend to keep and leave room to reach plants without shifting every tray. A tidy system matters if it saves steps or keeps supplies you use accessible; unused shelves can become clutter. If you can store tools elsewhere, postpone built-in or freestanding storage until you know what needs to stay close.
When to consider automated irrigation
An irrigation timer or drip arrangement is worth considering when manual watering has become repetitive, awkward or unreliable for your crop plan—not simply because automation is available. First note how often each group of plants needs attention, how watering differs between containers, and whether one line or schedule could serve them sensibly. The equipment must suit the available water source and its specified operating requirements. A timer cannot assess a change in weather, pests or blocked outlets, so it should support routine care rather than replace inspection. If the first planting is small and varied, keeping watering manual while you learn can make differences between crops easier to notice. Let the records show whether a system would solve a repeated task.
If you are comparing larger growing spaces, the Spacious Greenhouse listing covers 47 m² to 70 m². That area alone does not determine an irrigation system: plant count, containers or beds, water supply and the arrangement of growing zones all matter. Map those needs before buying tubing or a controller, and verify each component against the maker's instructions. After setup, check that water reaches the intended plants and keep observing them; an automated schedule is not proof that delivery is even or that every crop has the same needs. Buying after a real pattern emerges is more likely to solve a named problem than purchasing for a hypothetical future garden.

Before you buy 5
When powered climate equipment is worth considering
Grow lights, heaters, fans and other powered equipment are conditional purchases, not universal greenhouse essentials. They may be relevant when a chosen crop or observed seasonal conditions create a clear need, but each brings requirements for operating conditions, power and safe use. Do not assume a device suits the greenhouse because its product description uses a familiar term. Compare the maker's stated limits and instructions with your crop plan and selected configuration. If electrical equipment or installation is involved, ask a qualified professional to assess suitability instead of attempting a technical solution from a shopping checklist. Consider ongoing attention as well as the initial setup; a control still needs to be checked.
Before paying for a powered upgrade, write down the problem it is meant to solve and when it occurs: a repeated temperature issue, insufficient light for a planned crop or a specific ventilation challenge. Use those observations to compare options against the same requirement, rather than comparing long lists of features. If you cannot identify a clear need, defer the purchase and keep observing. Controls do not make decisions about crop health, and extra equipment can add tasks as well as functions. Include those tasks in your decision: consider what you will need to check and whether you can give the equipment that attention.
Review the first season before buying upgrades
At the end of the first growing cycle, review what you bought and what you actually used. Note which supplies ran out, which stayed untouched, where work became awkward and whether the crop plan changed. Record practical details too: how often you watered, whether the work surface was in the right place, whether the thermometer helped you decide, and when shade or ventilation became necessary. Include the dates and conditions around problems rather than writing only that a plant struggled. Keep the review factual, not a verdict on the season; crops, timing and conditions can vary. These notes reveal which supplies need replacing and which possible upgrades address a real gap.
Rank possible additions by the problem they address, their compatibility with the selected greenhouse, how often you expect to use them and whether a simpler change might do the job. Buy one useful upgrade, then observe its effect before adding another. A second shelf, automatic irrigation or a powered control might be useful in some setups and unnecessary in others; your records can help you choose. Keep a running wish list so optional purchases do not take priority over seeds and growing media for current crops. You can equip a greenhouse gradually; it need not have every accessory before the first planting. This makes the next purchase a response to experience rather than a guess.
Frequently asked questions
What do I need before planting in my first greenhouse?
Start with the supplies your crop plan calls for: suitable growing media and containers or bed preparation, labels, any hand tools you need, a practical way to water and a thermometer. Check what is included in the selected greenhouse package, then add crop-specific supplies rather than buying a universal kit.
Should I buy accessories at the same time as the greenhouse?
Only coordinate items that need to fit the selected configuration or that you will need before planting. Check the exact package details and ask about compatibility where it is unclear. You can usually decide on general growing accessories once you know what crops you will raise and how you will use the space.
Do I need an automatic watering system from day one?
Not necessarily. A manual method may be enough for a small or varied first crop plan. Keep notes on watering needs and check that any proposed system suits the water source, layout and equipment requirements. Consider automation when you can identify a repeated task it would solve.
When should I add shade or ventilation equipment?
Plan for it before planting if your site and chosen crops are likely to need it. Check which options are part of the selected greenhouse, observe how sun reaches the space, and confirm that any accessory is compatible. Shade also reduces incoming light, so match it to the crops rather than choosing by habit.
Which upgrade should come first after my first season?
There is no single best upgrade. Review what you used, what caused difficulty and what conditions you recorded. Choose the addition that addresses a specific, recurring need, then assess its effect before buying more equipment.
Your first greenhouse setup only needs to be complete enough to support the crops you have chosen and the work you can realistically do. Confirm the selected package, arrange suitable growing media, containers, watering and basic monitoring, then let real observations—not a long accessories checklist—set the next purchases. A season of clear notes will make later choices more precise and keep optional equipment tied to a genuine need.
