
How Much Clear Space Do You Need Around a Greenhouse?
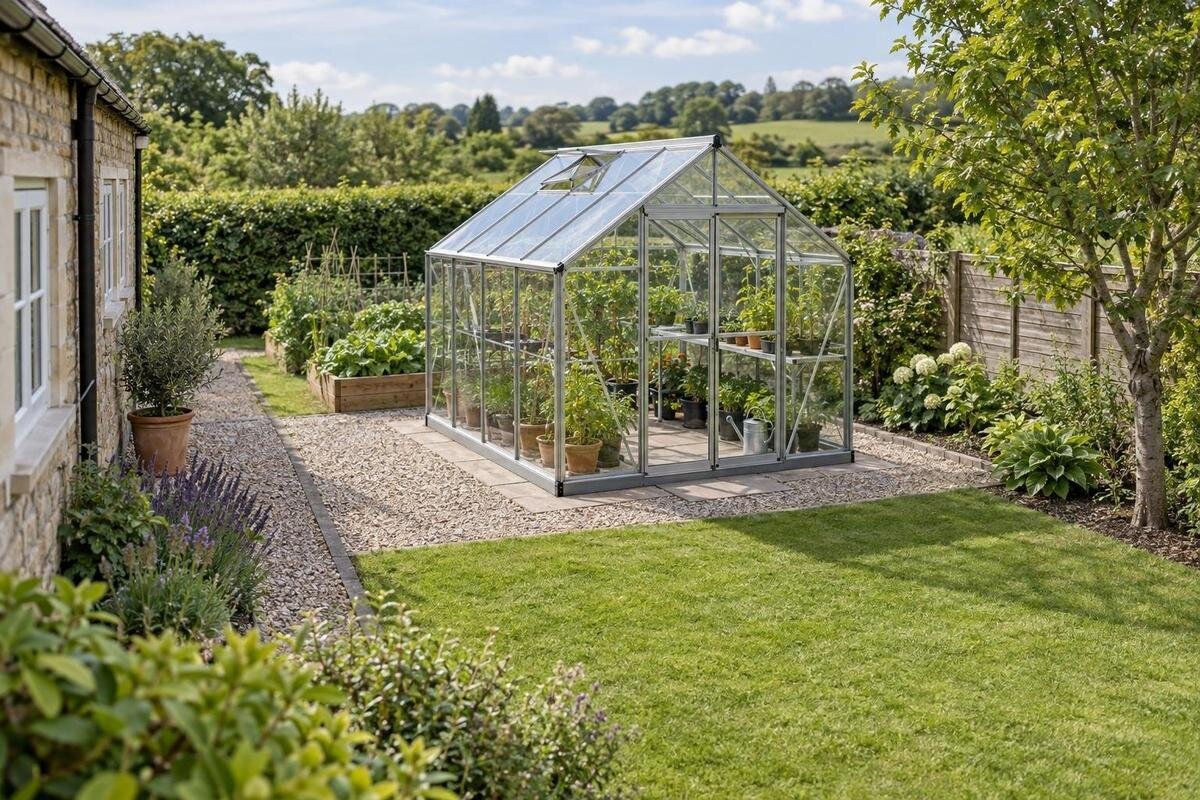
Greenhouse location and access
Working out how much room to leave around a greenhouse means planning for what has to happen outside it: assembly, cleaning, repairs and ordinary garden work. There is no universally correct strip to add to the footprint. The space needed depends on the selected model's external dimensions, its access requirements, the tools you use and the obstacles around it. A scaled perimeter sketch can reveal those needs before the greenhouse, paths or planting are fixed in place.

Perimeter planning checks 1
Planning clearance for installation and maintenance
Treat the greenhouse footprint and its working zone as separate outlines. The footprint locates the base and any fixed projection shown in the exact model plan; the working zone records where a person, tool or access equipment must go. These tasks do not use the same route. Assembly can need temporary room on several sides, while routine cleaning may be possible from a planned path along one side. Moving a mower, wheelbarrow or replacement panel may need a turning area elsewhere. A single all-purpose margin can waste space at an easy side and leave the difficult job without practical access.
There is no universal clearance distance to add to every greenhouse. Identify which tasks need access at each face, who will carry them out and whether a route from another side can genuinely reach the area. A gap that cannot be entered, or that will be blocked by a fence or planting, is not useful just because it appears on a sketch. Check assembly and service requirements against the selected model's instructions. If a boundary, overhead or buried service, drainage or neighbouring structure affects the position, verify that site constraint with the relevant authority, service provider or qualified professional.
Drawing the footprint and access zones to scale
Measure the garden and draw it to a consistent scale on grid paper or in a simple digital plan. Mark the property edges, house and shed walls, fences, paths, gates, steps, trees, established hedges and fixed items such as drain covers or taps. Use the exact dimensions for the greenhouse you are considering, rather than estimating from a photograph. Trace its outermost fixed edges, including the base, frame and any projections shown in the model information. Draw door movement and any opening vents separately so their operating space is visible without confusing it with the permanent footprint.
Add distinct lines or shading for the temporary assembly zone, the access needed for ongoing tasks and the route from the gate or delivery point. Avoid adding the same margin around all four sides by default; show where you need to stand, turn or move equipment. Label each zone with its purpose so that someone reading the sketch can distinguish a cleaning path from a temporary place to set down components. Write the measured gaps beside the relevant edges. A listed area is not enough to establish the outline: the Spacious Greenhouse is listed from 47 to 70 m², but an area range does not give the external side dimensions or maintenance space for the particular option. Choose the exact variant before you refine the sketch.
Perimeter planning checks 2
Assembly and delivery need their own temporary space
Trace how components and tools will get from the delivery point or garden gate to the proposed position. Note turns, steps, narrow paths, soft ground, low branches and other obstructions along the route. Long or awkward pieces may need more room to turn than a person walking through with empty hands. Also mark a place for tools and components to be set down without blocking the route or occupying the only space needed for assembly. These areas may be needed only during the build, so distinguish them from permanent access for cleaning and garden maintenance.
The installation sequence determines which sides need to be reached and when; do not assume a greenhouse can be assembled entirely from its doorway or from one open side. If an Aluminium Classic Greenhouse is on your shortlist, match the precise size you are considering to its installation information, then confirm the access and staging needs with the installer. On the sketch, distinguish the route for carrying components from the place where they will be unpacked. Show any point where materials would otherwise block the approach to the assembly area. A category name or a drawing of the finished structure cannot tell you how components will be handled on your particular site. Resolve that question before paths, paving or garden beds make the route harder to change.
Cleaning access depends on the outside surfaces
Think through the exterior surfaces that need cleaning on the selected model: side panels, corners, frame edges, roof edges and any gutters or downpipes fitted to it. The person doing the work needs somewhere to stand, turn and move tools along the structure. A narrow strip can look adequate on a plan but become awkward if a fence, shrub or pipe restricts movement at one end. If you plan to use a long-handled cleaning tool, check that its reach and working angle make sense from the ground; do not assume that a gap wide enough for a person will also provide useful reach.
Where a task needs elevated access, include the footprint of suitable equipment and a stable place to position it. Do not treat the greenhouse frame or glazing as a platform or support. If there is no appropriate position for the equipment, seek competent help for that work rather than relying on a difficult reach. For a Pyramid Greenhouse, use the exact model's plan to trace its outside faces and corners; a clearance pattern borrowed from a different outline may leave an awkward spot to reach, even if the two options appear similar in area. Mark the surfaces you expect to reach from each working position. This makes it easier to spot a corner or roof edge that has been overlooked between two otherwise usable access areas.

Perimeter planning checks 3
Repairs need a route for tools and replacement parts
Plan for occasional repairs as well as routine cleaning. If the selected greenhouse has replaceable panels or external components, consider where a person can work with the relevant tools and how a removed part can be carried away. A repair may need more than hand access: the person doing it may have to turn a component, set it down temporarily or bring a replacement through the garden. Keep that route clear of permanent planting, stored items and fence panels that cannot be moved when needed. Check the model's maintenance information for tasks that require access to a particular side.
A narrow gap between a greenhouse and a boundary can become a dead end if nobody can enter it or handle a component there. Decide before installation whether that side will remain reachable, whether maintenance can be completed from another position, or whether the layout needs to change. Do not treat a neighbour's side as available workspace unless access has been explicitly arranged. When comparing a Limited Edition Aluminium Greenhouse, check the service guidance for the exact option rather than assuming its category name tells you how a repair must be carried out. Trace the whole route for a replacement part, including its exit from the working area. A clear position beside the greenhouse is of little help if the only way out is obstructed.
A wall greenhouse changes which sides are accessible
A wall-mounted or lean-to arrangement can leave less room on the wall side, but that does not automatically mean the side needs no attention. Check whether the model's instructions call for access there during assembly, cleaning or later repairs. If the wall face is to remain inaccessible, make that a deliberate choice based on the actual requirements, not an assumption made from the product category. Also consider whether nearby eaves, windows or other building features leave enough room for the intended installation and ongoing access.
Measure the wall and mark existing downpipes, taps, service covers, outdoor fixtures and door swings on the same plan as the greenhouse. These features may need to remain reachable, and a proposed position can interfere with access even when the greenhouse itself fits. Show the approach to each feature as well as its location: a tap marked on the drawing is not necessarily usable if reaching it means squeezing behind the proposed structure. If a Wall Greenhouse is on your shortlist, confirm that the exact model is intended for the proposed wall arrangement and check its installation information before deciding which side can be left clear or closed off. Ask a qualified installer about site conditions that cannot be resolved from the drawing alone.
Perimeter planning checks 4
Garden paths must still work around the greenhouse
Include the work you already do in the garden, not just the greenhouse-related tasks. A route may need to accommodate a mower, wheelbarrow, hose or pruning tools, and the person using them may need room to turn rather than simply pass through. Check how the greenhouse affects the connection between the gate, paths, beds and other areas you maintain. A clear strip that ends at a fence or planting bed is not much use if equipment has to be carried around it. Think about how shrubs and other plants will occupy the space as they grow.
Try drawing the actual outside outline before deciding where the path goes. With a T-Model Orangery Greenhouse, use the selected model's plan to mark each outer corner and return rather than substituting a simple rectangle; those changes in outline can affect a route that passes beside it. Then compare the marked route with the equipment you use and the turns it needs to make. Test the approach from both directions, including the return trip with a loaded wheelbarrow or garden waste. Pay particular attention to corners where you would need to change direction beside the glazing. A shared path can serve more than one purpose when the activities do not conflict, but do not count a space twice if a mower, stored tools or planting will block it.
Opening parts, drainage and services also need room
Show moving parts separately from the fixed footprint. Mark the space taken by an open door and any roof vent or other opening feature included with the selected model. Check that movement does not conflict with a path, fence, tap or another structure, and that the person using it can reach the relevant handle or operating point. Use the model information for the direction and extent of movement rather than guessing from a photograph. An opening that clears the frame may still occupy space needed for someone to pass or work beside it.
If the greenhouse has gutters or downpipes, include their position and leave access for inspection or cleaning. Mark existing drains, service covers and water points, and consider where collected or discharged water is intended to go; ask an installer or relevant professional if the site layout makes drainage uncertain. A greenhouse option described as having built-in storage also needs its storage access included in the perimeter plan. For the Limited Edition greenhouse with built-in storage, check the exact arrangement and draw the storage section and its access route rather than assuming where they sit from the name alone. Include room to take stored items out, not just to reach the opening. Keep this handling area distinct from any adjacent through-route so you can see where the two uses might conflict.

Perimeter planning checks 5
Photos and seasonal records reveal site constraints
Use site photographs to supplement, not replace, the measured sketch. Take views from the proposed access directions and include fences, building edges, overhanging branches, pipes and changes in ground level. Add notes about what each image shows and where it was taken from; perspective can make a gap look wider or narrower than it is. Record features that may change, such as hedge growth or seasonal foliage, as well as fixed obstacles. A seasonal shadow diagram can help compare possible positions, but it is a siting record, not a measurement of the clearance needed for work.
Keep the photographs and the model drawing together so you can compare the actual garden with the proposed outside outline. Number the photo viewpoints on the sketch and use the same numbers in your notes. This helps you identify which fence corner, path edge or obstruction each photograph records when reviewing the layout later. When reviewing a Prestige Greenhouse with a Metal Base, use the exact model information to mark the base edge and any separately shown projections; do not assume a photograph reveals the full footprint or the room needed to reach it. Note any space that depends on pruning, moving a hose or keeping a path open, so it does not quietly disappear when the garden is finished. If a site feature is hard to measure or assess, have it checked before committing to the position.
A ground-level mock-up tests whether the plan works
Once the sketch looks workable, mark the proposed footprint and access routes on the ground with removable markers or string. This makes tight turns, pinch points and awkward approaches easier to spot than they are on paper. Walk the delivery route and the paths you expect to use; where practical, carry the tools or equipment that will use them. Check whether you can reach the sides you have labelled for cleaning and repairs without stepping into a bed or moving a permanent obstacle. Adjust the outline if the test exposes a task that cannot be done comfortably.
Keep temporary assembly space and permanent access labelled separately, then review the plan before paving, planting or adding a fence. That is also the point to confirm any model-specific requirements with the installer and resolve boundary, service or drainage questions with the appropriate professional. The final drawing does not need identical clearance on every side; it needs to show why each route is there, what it serves and whether it will remain available after the rest of the garden is in place.
Frequently asked questions
Is there a standard distance to leave around a greenhouse?
No single distance suits every model and site. The space needed depends on installation instructions, the work you expect to do outside, equipment access and nearby obstacles. Check any site-specific boundary or service constraints separately rather than relying on a general clearance figure.
Do I need the same clear space on every side?
Not necessarily. A side used for regular cleaning or repairs may need a clear route, while another side may not need routine access. Confirm what the selected model requires during installation and maintenance before deciding that any face can be left inaccessible.
How is assembly space different from ongoing clearance?
Assembly may need temporary room to carry and position components, use tools and stage materials. Once the greenhouse is installed, those areas may not need to stay open, but routes for cleaning, repairs and garden work still matter. Ask the installer what the build requires.
Should the plan include open doors and gutters?
Draw the greenhouse's outer footprint, then mark moving parts separately, such as a door's operating space or any opening vent. Include gutters and downpipes if the model has them, and leave room to reach them if they need inspection or cleaning.
Can I position a greenhouse close to a fence or wall?
Only after checking the selected model's installation and maintenance requirements against the actual site. A narrow gap may not be usable for cleaning or repairs. Do not count a neighbour's land as workspace unless access has been arranged, and verify relevant local constraints.
A greenhouse can fit on paper yet be difficult to install or maintain if the open space is unreachable or too restricted for the task. Keep the routes that support regular work visible on the plan, and make any inaccessible side an intentional choice based on the model's requirements. Revisiting the perimeter before paving, planting or fixing fences helps preserve the access your garden and greenhouse actually need.
