
Coordinating a Greenhouse in a New Home Landscape
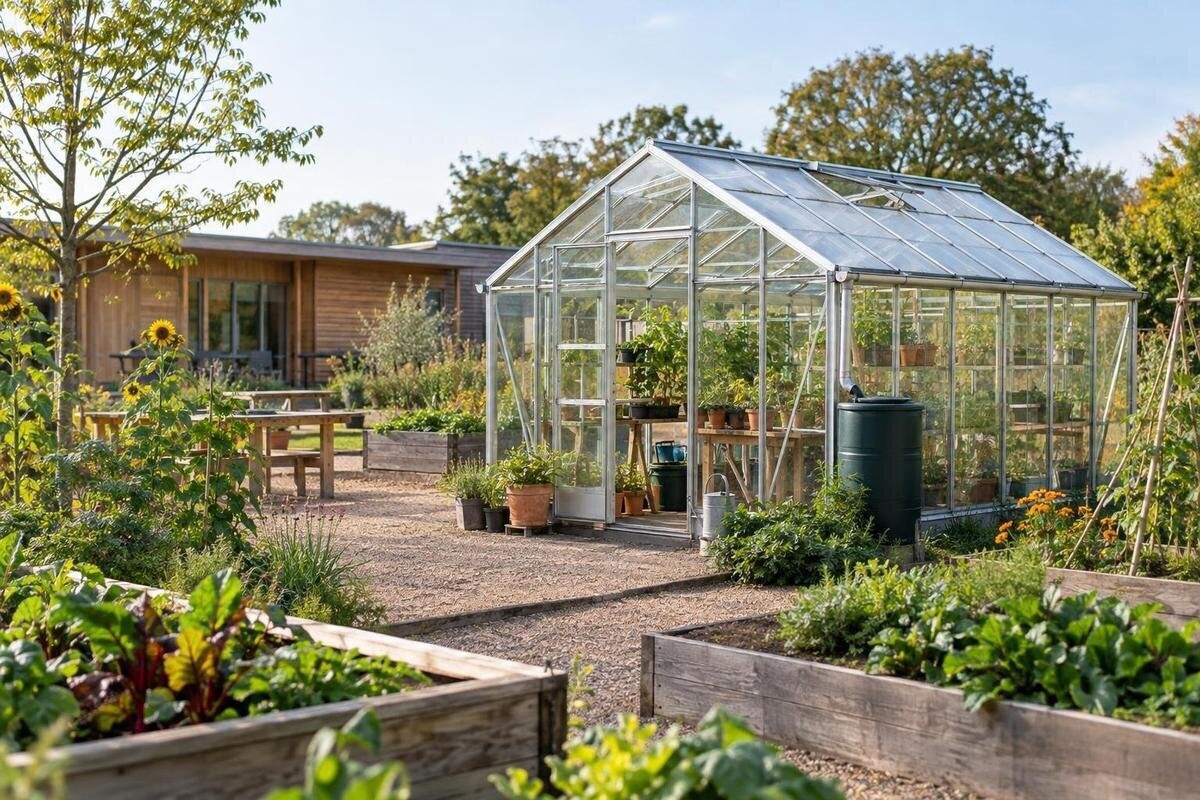
Greenhouse project planning
When a greenhouse is part of a new-home landscape, its location affects more than the planting plan. Ground levels, water runoff, service routes, vehicle access and the order of work need to be coordinated before the final surfaces go in. Choose the site while the builder and landscaper can still accommodate changes, then confirm the exact model and base requirements before work is locked in.

Choose the greenhouse site before the landscape plan is fixed
Treat the greenhouse as a fixed structure in the concept landscape plan, not as an item to position after lawn and paving are designed. Mark its likely outside footprint, entrance and a working zone around it. That zone should account for opening the door, carrying pots or tools, cleaning the exterior and reaching the structure for maintenance; required clearance depends on the selected configuration and installation method. Map house eaves, fences, retaining walls, established trees, future planting and views from neighbouring properties on the same drawing. Check where sun and shade fall through the day and season, including shade from the new house and mature trees. A location that looks clear on an early site plan can be difficult to reach or too shaded once the finished garden is in place.
Do not set out the base from a brochure’s floor-area figure. Ask for the selected greenhouse’s overall plan and elevation dimensions, including the base outline, door position and space needed for assembly and access; clarify whether a stated area is internal or overall if the documentation does not say. The Aluminium Greenhouses range is listed from 3.77 to 28.08 m², but that range does not define the external setting-out line or clearance. Have the builder, landscaper and supplier use the same drawing, with the site boundary, finished levels and path edges shown. Revisit the setting-out if the model, orientation or entrance changes, because each may affect a path junction or planting bed.
Set finished levels and manage water around the site
Have the proposed location checked against a survey or the builder’s level plan before earthworks are signed off. Consider the base, adjacent path, lawn, garden beds and house threshold together: changing one finished level can alter the doorway transition and the way water moves across the site. Ask the project designer to state the proposed finished level at the greenhouse and adjoining surfaces, and identify any transition or retaining work. A single spot height may not explain a block that falls across the site. The landscape contractor can set out the work, while a surveyor or suitably qualified civil or structural professional can advise on site-specific ground and retaining questions.
Resolve drainage before the final pad position is chosen. Identify existing low points, overland flow paths, roof-water discharge routes and places where garden edging or paving could trap water; the completed design should not send runoff towards the home or a neighbour. Ask the designer to show where water goes after paving, garden beds and the greenhouse are in place, rather than relying on the appearance of a bare block. A model title such as the Prestige Greenhouse with Metal Base does not specify site preparation or drainage design. Confirm the selected model’s installation requirements with the supplier and builder. If you want to collect or connect greenhouse roof water, verify the product details and have a drainage professional design the connection.
Plan water and electrical services before paths are built
List the services the greenhouse is intended to use: perhaps a water point for hand watering, an irrigation connection, or electrical supply for equipment you have selected. Decide where each service should enter or serve the working area and how it can remain accessible without crossing a doorway or future planting bed. Have the relevant trades coordinate routes with the house, outdoor lighting, irrigation and existing underground services shown on the site plan. If you are considering the Wall Greenhouse beside the house, show the relationship between the two structures on the drawing used to plan services. Confirm connection positions against the selected configuration rather than relying on the model name or product photographs. Keep provisions tied to actual use, rather than installing every possible service just in case.
Electrical and plumbing requirements should be specified by qualified trades for the actual equipment and site; they can advise on supply, protection, pipework and connections. The landscape plan should show intended locations without attempting to prescribe technical details. Give the trades the greenhouse drawing, the proposed position of any benches or fixtures and the finished levels before paths are laid. Ask the builder to identify who arranges each service, who supplies components and who confirms the route before it is covered. Record installed routes on the final site plan so future planting, fence work or repairs do not depend on memory. If equipment may be added later, describe its intended function now and ask the electrician whether making provision is worthwhile.
Confirm intended use and approval requirements
Clarify how the greenhouse will be used before you finalise its location and internal arrangement. A space used mainly for raising plants may need convenient access to water and a practical route for carrying supplies. If you also plan to sit in it, check that the selected structure and planned conditions suit that use; do not infer suitability from a product image. Sketch the working area, shelves or benches you plan to add, the door approach and the route back to the house. Leave room for the way you expect to move through it, then check the arrangement against the selected model’s drawings, not only its floor-area figure.
Check permissions and site constraints while the location is still flexible. Ask the local council or an appropriately qualified building professional what approvals or other restrictions may apply to your block and proposed structure; check any relevant build-contract or estate requirements with the responsible party as well. The answer may depend on location, size, siting and intended use, so do not infer it from another property or a product listing. This is especially important when a proposed footprint is substantial: the Spacious Greenhouse listing gives an area range of 47 to 70 m², but area alone says nothing about whether a particular site or use is acceptable. Record the advice sought and the plan it relates to.

Make responsibilities clear across the building team
A new build may involve a builder, landscaper, supplier and several trades, so name the person responsible for each greenhouse-related task rather than relying on a broad scope such as ‘complete landscaping’. A simple responsibility schedule can list the final model and location; site set-out; earthworks and drainage; base design and preparation; service provision; delivery and unloading; assembly; paths and planting; and handover. For each item, state who supplies the information, who carries out the work and who accepts the result. The owner or project manager should distribute one current drawing, even when separate contractors control different parts of the job.
Define the interfaces in writing. The supplier may provide product information, while the builder or a specialist contractor may prepare the site; do not assume either scope includes the other’s work. Confirm who checks the prepared base against the selected model requirements, who protects finished surfaces during installation and who resolves a clash if a service route or path is misplaced. When comparing the Limited Edition Aluminium Greenhouses with Storage, or another option, put the selected model, configuration and drawing revision into the project schedule; a collection name alone is not enough for a contractor to set out the site. Add decision dates and sign-off points so a late substitution is visible before work is covered.
Sequence earthworks, services, the base and assembly
Agree the work sequence before the landscape contractor commits to finished surfaces. A coordination plan might begin with confirming the model and approvals, followed by site set-out, earthworks and any required drainage or retaining work. Preparation of the base or supporting surface and service routes can then be coordinated with delivery and assembly, followed by the surrounding paths, edging, irrigation and planting. The exact order must follow the manufacturer’s instructions and the contractors’ agreed method, so this is a planning sequence, not an installation recipe. Ask whether assembly needs access to an unfinished area and whether paving should wait until the structure is in place.
Choose hold points where work pauses until someone confirms the information: location and orientation agreed; levels and services coordinated; base requirements confirmed; delivery access secured; and the final surface layout approved. Make the chosen configuration’s installation information available before the base contractor starts, and agree who verifies it. For example, request current assembly and base details for the option being considered in the Limited Edition Aluminium Greenhouses range instead of assuming a generic greenhouse detail applies. After each hold point, circulate the approved drawing revision and note changes. This helps prevent a trade from finishing work to a superseded plan while another arrives expecting a different level, connection or access route.
Protect delivery and installation access
Check delivery access from the street all the way to the proposed installation point. Ask the supplier or installer for the chosen order’s packaging, unloading method, vehicle requirements and handling route; do not infer these from the greenhouse’s floor area or appearance. Walk the route with the builder and note gates, turns, slopes, overhead obstructions, temporary fencing, scaffolding, stored materials and surfaces that may be damaged. Confirm whether components can be moved through the house or must travel around it, and reserve that route on the site plan. Access available during early construction may disappear when fences, paving, garden beds or a shed are added.
Coordinate the delivery window with site supervision and other trades, including where a vehicle can stop and where components can be set down. Keep the approach clear of trenches, newly laid irrigation and protected planting, and agree who will manage temporary access and surface protection. The T-Model Orangery Greenhouse listing shows floor-area options from 16.52 to 30 m²; that figure is not a package size or handling instruction. Get precise delivery and assembly requirements for the chosen configuration, then check that the approach is workable on the scheduled day. If access is tight, resolve it before ordering or finishing the driveway, rather than after a delivery vehicle arrives.
Fit paths, planting and maintenance into the layout
Lay out paths and planting around the entrance and the tasks you will actually do. A route from the house should remain practical with a watering can, tray or wheelbarrow if those are part of your routine; the space at the door should not be consumed by a path junction, raised bed or garden edging. Use the selected product drawing to place the outside walls and opening, then ask the landscape designer to check turning and passing space. Consider how water will move across paths and how beds can be maintained without trampling service routes. If step-free access or another particular access need matters to your household, raise it while levels and path surfaces can still be changed.
Plan planting for its mature form, not only the size of a nursery pot. Trees and tall shrubs can cast shade or restrict access as they grow; root zones, pruning space and irrigation lines also need to be considered alongside the greenhouse position. Check sun and shade at the proposed site and ask the landscape designer to balance growing conditions, screening and views from the house while keeping maintenance access clear. When comparing options in the Pyramid Greenhouse range, listed from 5.53 to 18.9 m², plot the chosen configuration on the planting plan. Show its exact perimeter and entrance alongside proposed borders and paving so planting offsets allow for both mature growth and access.

Keep site plans and handover records up to date
Keep a coordinated plan set rather than a folder of conflicting sketches. It should identify the selected model and configuration, survey reference points, proposed finished levels, base footprint, paths, planting zones, drainage intentions and service routes approved by each relevant trade. Add the drawing date and revision, and send updates to the builder, landscaper, supplier and trades affected by a change. If the greenhouse moves, note what else needs review: a new position may alter the level relationship, service route, drainage, delivery path or approval advice. A short change note that refers to the current drawing is more useful than an informal message nobody can match to the plan.
At handover, keep the final supplier documents and installed-site information together. Ask the relevant contractor to mark service routes and any departures from the design on an as-built plan; retain photographs taken before work is covered if the project team records them. Note the final greenhouse position, the base and surface interfaces, maintenance access that must remain clear, and who is responsible for each part of the installation. This record is useful after the original trades have left: it gives future garden work a reliable reference and can help avoid digging into a service line. Treat it as part of the home’s landscape information, not as paperwork that ends when the lawn is laid.
Check the plan before final paving and planting
Before final paving and planting begin, walk the site against the current greenhouse plan. Check that the proposed footprint still matches the selected configuration; finished levels and drainage have been reviewed; service routes are agreed; delivery and assembly access remains available; and paths, planting and irrigation do not conflict. Confirm that advice about approvals relates to the final location and intended use, not an earlier sketch. If something is unresolved, identify the responsible person and decision date instead of letting the next contractor assume it has been settled. This review is most useful while the surrounding ground is still accessible and changes can be made without disturbing completed surfaces.
If purchase or installation will happen after the home is finished, protect the option in the plan. Ask relevant professionals whether base preparation or a service route should be included now, what must remain accessible, and how any unfinished provision should be capped, protected and documented; do not improvise electrical or plumbing work. Mark a reserved footprint and access corridor on the landscape drawings, and tell future contractors to check before building over them. Make clear that the future configuration still needs confirming, since today’s reserved area may not match the chosen model. A deliberately deferred installation is easier to coordinate than discovering that a finished path, tree or retaining feature blocks the intended site.
Frequently asked questions
When should we decide where the greenhouse will go?
Choose a provisional site during the house and landscape concept stage, then confirm it before earthworks, service routes and the base are locked in. This leaves room to coordinate levels, drainage, approvals and access while changes are still practical. Recheck the position against the final model drawing before paths and planting are finished.
Can the greenhouse sit on finished paving?
That depends on the selected greenhouse’s installation requirements and the site. Neither a product name nor the fact that paving is level confirms what base or anchoring is needed. Obtain the current details for the exact configuration and have the builder or a relevant qualified professional confirm the preparation before paving is ordered.
Should we install water and power before landscaping?
Only if they serve a planned use and the relevant trade has specified them. Decide their intended locations early so routes can be coordinated before surfaces go down, then ask qualified plumbing and electrical trades to confirm the provision for the actual equipment and site. Record the installed routes and positions for handover.
How much clearance should we leave around the greenhouse?
Use the selected model’s outside dimensions, door position, installation information and maintenance needs—not floor area alone. Add the working space needed for assembly, access and the path connection, then have the supplier or installer and landscape designer review the drawing together. Required clearance can vary with the configuration and site.
Does every greenhouse need council approval?
There is no single answer for every site; requirements can depend on the location, structure, siting and intended use. Ask the local council or a suitable building professional what applies to your block, and check any relevant build or estate conditions. An answer for another property is not a substitute for site-specific advice.
Coordinating a greenhouse with a new home means planning its place in the landscape before the surrounding work is finished. Confirm the location and selected model early enough for the builder and landscaper to coordinate levels, drainage, base requirements and access. Keep responsibilities and drawings current, and settle the installation details before completing adjoining surfaces and planting. If installation is deferred, preserve the planned footprint and access route so the greenhouse can be added without undoing the finished garden.
