
Large or Small Glass Panes for a Greenhouse?
Greenhouse glazing guide
Choosing between one broad greenhouse pane and several smaller panes changes more than the pattern of frame divisions. It affects how the glazing looks from inside and out, the size of each piece that has to be moved, and what finding a matching replacement might involve if damage occurs. Pane size alone does not establish light transmission, strength or repairability. Those depend on the specified glazing and the frame system as well as dimensions. Compare drawings for the exact model, size and configuration you intend to buy: a product photograph or a floor-area figure cannot confirm the dimensions and arrangement of individual panes.

What counts as a large or small greenhouse pane?
Pane size is relative to the frame bays of a particular greenhouse, not a universal standard. A wide sheet may fill one side bay, while the roof, gable, door or vent areas on the same structure use differently shaped pieces. One large pane therefore does not usually mean that a whole wall or roof is made from a single sheet. Compare the number and dimensions of panes on each face—roof, sides and ends—rather than relying on a general description such as full glazing. The phrase large glazing can mean one wide pane or a large total glazed area, so clarify which is meant.
An overall floor-area figure describes the greenhouse footprint, not its glazing schedule—the list of individual panes and their dimensions. When comparing sizes of the Pyramid Greenhouse, keep the footprint and pane measurements in separate columns. For each size under consideration, record how many panes form each roof slope, side and end, then note any different shapes around doors or vents. Check whether the count includes glass within opening sections or only the fixed glazing. This gives the words large and small a useful reference: the actual pieces in the configuration you intend to buy. It also prevents a comparison between a single large pane in one model and an entire glazed face in another, which would tell you little about either layout.
How pane size changes the greenhouse’s appearance
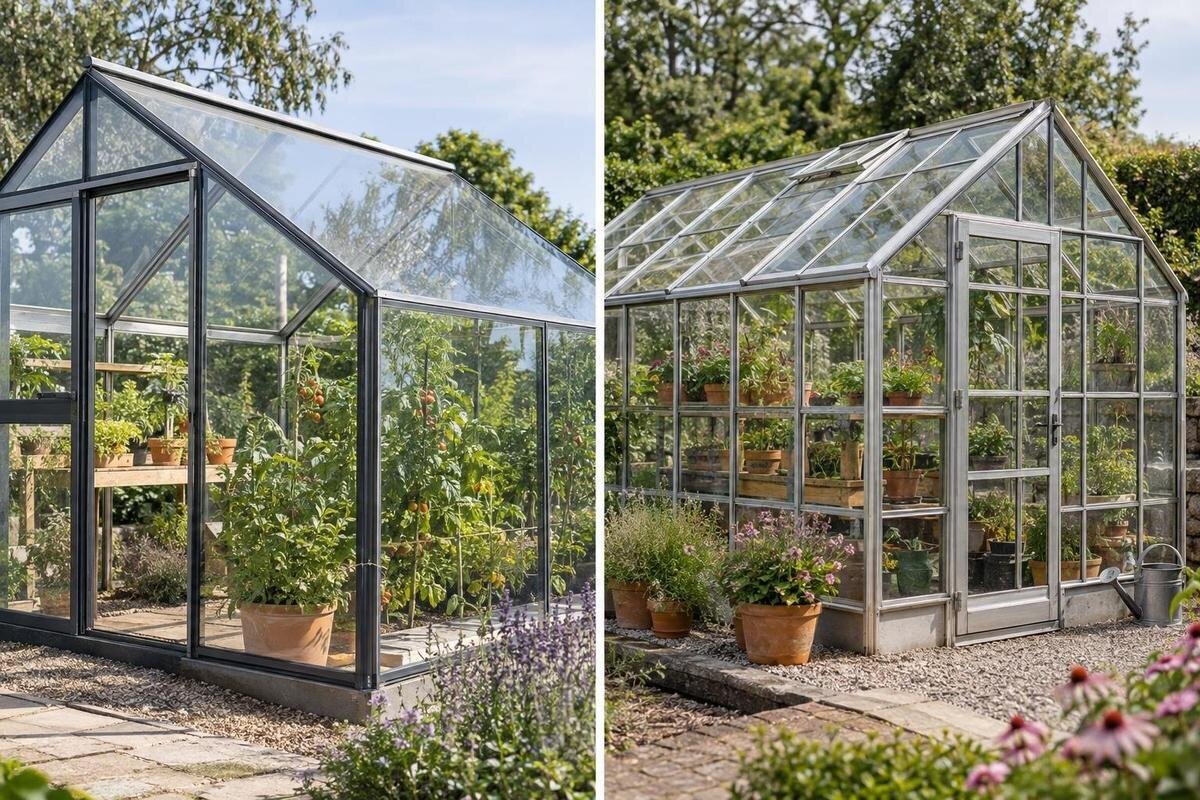
Pane layout gives a glazed face its visual rhythm. Fewer, wider panes generally leave fewer visible pane joints across a comparable area, so the view may feel less divided. Smaller panes create a finer grid and make the lines between them more prominent. That is an appearance effect, not proof that the greenhouse has fewer structural members: supports may still cross the view. Consider which side is most visible from the house or garden, and compare its elevation with the view from inside rather than judging only from a close-up of one pane.
Product photography can give a useful impression of overall form, but it cannot establish the pane layout for every size and configuration. If the Limited Edition greenhouse with built-in storage is on your shortlist, compare the relevant drawing with the photograph and identify which divisions belong to panes, doors or vents. Look at the greenhouse as a whole before focusing on individual sheets: a grid you like in a close-up may look different across a complete side or roof. Consider the view from the house, the main garden path and the entrance, rather than choosing solely from the most flattering photograph. The aim is to judge the arrangement you will actually see, including how the divisions line up across adjoining faces, not simply to count the fewest possible panes.
Light transmission and views through the glazing
Pane dimensions alone do not tell you how much light the glazing transmits. That depends on the specified glazing and other features of the site, such as orientation and shade. A larger sheet may mean fewer pane joints in a particular view, but that is not the same as a guarantee of higher light transmission. If light for plants is the priority, compare the glazing specification and the maker’s information for the chosen material, while treating the frame layout as a separate part of the comparison.
Think about sightlines as well as light. From outside, consider the side that faces the garden; from inside, consider the view along the greenhouse and towards the ends. Compare these views from the positions where you expect to stand or work, rather than only looking square-on at one wall. A pane grid that seems discreet from one angle may be more noticeable from another, and roof divisions can look different from wall divisions. If clear views matter to you, use drawings or images showing more than one angle and identify which lines are pane joints and which are supporting frame members. This keeps the visual comparison separate from the question of light for plants: a less divided view is an appearance preference, not a measure of the glazing’s horticultural performance.
Handling panes during delivery and installation
A larger pane can be harder to turn, carry and position, especially where the route to the site includes narrow gates or limited space to manoeuvre. For glass of the same type and thickness, a larger pane is also heavier. Smaller pieces may be easier to handle individually, but there are more of them to move and place. The actual effort depends on the dimensions and glazing specification, so pane count is not enough to judge handling.
Check the dimensions and weight of the largest individual pane, then compare them with the access route and available working space. For the Bloomcabin Prestige Greenhouse, for example, use the selected glazing configuration rather than the greenhouse’s overall width to frame that discussion. Consider the whole route from unloading to the site, including gates, corners and the space available beside the structure; checking only the final entrance leaves part of the handling question unanswered. Give those details to the installer so they can assess the practicalities under the manufacturer’s guidance. Compare the largest roof pane with the largest wall pane as well, since the most awkward piece may not be on the face that first catches your eye. This is planning information, not an assembly or glass-handling method.

Replacing a damaged greenhouse pane
If a pane is damaged, a larger sheet can mean a larger, more awkward piece to source and handle. With smaller panes, the affected area may be more limited if the frame is designed for each pane to be replaced separately. Neither layout guarantees a simple one-for-one repair: the glazing may be retained in a particular way, and access to the damaged area matters. Confirm how the system is designed to be repaired before treating smaller panes as automatically easier to replace.
A replacement needs to match the relevant opening and the specified glazing; a similar-looking pane or an approximate size is not enough to confirm compatibility. If you are considering the Bloomcabin Orangerie, ask how a damaged roof pane and a damaged wall pane would each be identified and replaced. Keep the comparison focused on the work involved: which piece needs replacing, how it is retained, and how it can be reached. Separate the replacement glass itself from the handling and fitting involved when discussing a repair, rather than assuming the smaller piece necessarily means the simpler job. A useful answer explains whether that pane can be replaced independently and what access is needed. It does not rely on the greenhouse’s footprint or a general promise that replacement is easy.
Cleaning and routine access
Across a comparable glazed face, smaller panes usually create more edges and frame intersections to clean around. Larger panes have fewer separate edges in the area they cover, but still present broad glass surfaces to maintain. The difference depends on the frame detail and, particularly, how easily you can reach each part of the greenhouse. Roof access, nearby planting and the position of the structure may matter more to the routine than the pane count alone.
Treat cleaning as a face-by-face question. For a model in the Aluminium Greenhouses range, mark the roof panes, wall panes, openings and frame divisions on the relevant drawing, then consider access to each area. Separate the broad surfaces from the edges and intersections: fewer joints may reduce one part of the task without changing how you reach the upper glazing. Also distinguish the inside from the outside, since a clear approach on one side does not describe access on the other. This is more useful than assuming that either a fine grid or a broad sheet is always easier to maintain. Follow the manufacturer’s care guidance and plan suitable access; neither layout makes the roof a work surface, and fewer joints do not eliminate routine maintenance.
Why pane dimensions must match the frame
Pane size is part of the designed frame layout. The edges of each piece, its supports and the sections that hold it in place need to align with the particular system. Substituting one large pane for several smaller ones is not simply a change in appearance: the larger piece may not suit the existing frame, and removing a divider may leave the glazing without its intended support. Do not assume that similar-looking greenhouses share pane dimensions or that a different format can be fitted without approval.
Doors, vents, gable ends, corners and sloping roof edges can interrupt a simple rectangle and use differently shaped panes. With a model such as the Wall Greenhouse, distinguish fixed glazing from opening sections before comparing the divisions. A line on an elevation may mark the edge of a door or vent rather than a choice between one large fixed pane and several smaller ones. Ask which divisions belong to the frame system and which pane layouts are available within it. This separates a genuine glazing option from a change that would alter the structure or its openings. It also helps you assess the entire design: choosing fewer divisions on a main wall does not establish what is possible around the doors, roof edges or other shaped areas.
Information to keep for future replacement
Keep the original product information somewhere you can find it later. Useful records include the model name, selected size, glazing description, drawings and any product or pane identification supplied. A simple sketch showing where each pane sits can also help: label roof slopes, side walls, ends and opening sections using the terms on the manufacturer’s drawing. If the greenhouse has more than one pane format, note which location each format belongs to rather than keeping a single overall measurement.
For a Limited Edition Aluminium Greenhouse, as for any model, keep the details of the purchased configuration together rather than relying on the family name. Label your sketch consistently with the original drawing, so a reference to a left-hand wall or roof slope has a clear meaning. Where several pieces look alike, record their locations against the supplied pane references instead of assuming they are interchangeable. Keep any later replacement information with the same records so you do not have to reconstruct the history from separate messages. If damage occurs, use this file to explain which piece is affected, then ask the supplier or glazier which dimensions and fitting details they need. The record helps identify the part; it is not a substitute for confirming compatibility before ordering.

How to compare pane layouts like for like
Compare drawings for the same greenhouse size and glazing option. On each drawing, count the panes on the roof, sides and ends, and note their dimensions and any shaped or opening sections. This makes it easier to separate the glass joints from frame members and to see where a layout will look different. A comparison between different model sizes, glazing types or configurations may be misleading: a pane count on its own does not show the size of each piece or the arrangement on every face.
When reviewing the T-Model Orangery Greenhouse, put the pane information beside the configuration being quoted rather than comparing an unlabelled photograph with another model’s drawing. Use the same headings for each option: pane count by face, largest pane dimensions, shaped pieces and opening sections. Mark anything not specified as an unanswered question rather than treating it as an advantage or disadvantage. Then compare one issue at a time. For appearance, look at where the divisions fall; for handling, look at individual dimensions; for replacement, look at how the relevant piece is identified and retained. Keeping those questions separate prevents a low pane count from becoming a shorthand for quality. It also makes clear when two options differ in more than pane size and are not a direct comparison.
Choosing a layout for your priorities
If you value a less divided view, a layout with fewer pane joints may suit your preference, provided the frame is designed for it and the largest piece can be handled through your access route. If manageable individual pieces are more important, smaller panes may be worth considering, while allowing for more joints to clean and more pieces to position. Think about replacement as well: a smaller pane may limit the affected area only if the system allows it to be replaced separately.
Rank your priorities before choosing between the available layouts. If appearance comes first, identify the particular view you want to keep less divided. If access is the constraint, focus on the largest individual pieces rather than the average pane size. If maintenance matters most, consider reachable surfaces and frame intersections together. You may find that one layout suits the view you prefer while another is more practical to handle; there is no need to describe either as universally better. Record the compromise you are comfortable making and compare only configurations available for the chosen model. This turns a vague preference for large or small glass into a decision tied to how you will see, maintain and manage your greenhouse.
Frequently asked questions
Do larger panes make a greenhouse brighter?
Not necessarily. Pane size alone does not determine how much light the glazing transmits. The specified glazing, frame area, orientation and shade around the greenhouse also affect the light reaching plants. Compare the glazing specification and the frame layout rather than treating fewer panes as a guarantee of more light.
Are smaller panes easier to carry and install?
They can be easier to manoeuvre individually, particularly where access is restricted, but there are more pieces to move and position. Weight and handling depend on the actual pane dimensions and glazing specification. Check the manufacturer’s instructions and ask an experienced installer about the selected configuration.
If a small pane breaks, can I replace just that pane?
Only if the frame system is designed to let that pane be replaced separately. The replacement must also match the opening and the specified glazing. A smaller pane may limit the area involved, but it does not guarantee that a matching replacement is available or straightforward to fit.
Can I change the pane layout on an existing greenhouse?
Do not assume that larger or smaller panes can be substituted in the existing frame. Pane dimensions, supports and retaining sections are designed as a system. Ask the manufacturer or supplier whether a different layout is an approved configuration; do not remove frame members or adapt the glazing without confirmation.
What information should I keep for replacement glass?
Keep the model and selected size, the glazing specification, the original drawings and any product or pane identification supplied. Note where each pane sits, such as a roof slope or end wall. Before ordering, ask what dimensions and fitting details are needed to identify a compatible replacement.
There is no universal winner between a few broad panes and a finer grid. Larger panes can offer a less divided view, while smaller pieces may suit restricted handling routes or limit the area involved in a replacement when the frame permits it. The most useful choice balances those practical concerns with the appearance you want. Judge the layout from drawings for the exact greenhouse and glazing configuration, so you know what each pane means for handling, maintenance and any future replacement.
