
Can a Greenhouse Be Installed Near a Pond?
Greenhouse site planning
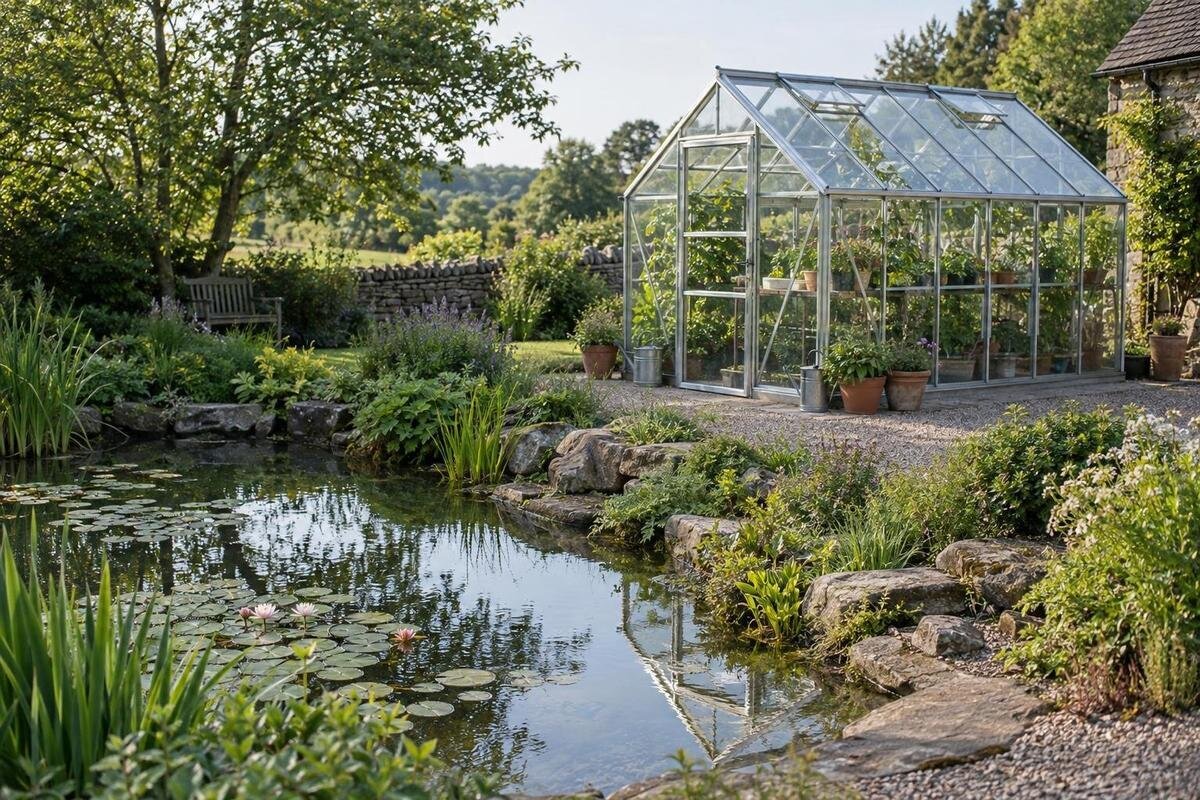
A pond does not automatically rule out a greenhouse, but it makes ground condition, water movement and working routes central to the siting decision. The key question is not simply how many metres separate the two. It is whether the proposed footprint sits on stable, prepared ground, outside plausible overflow or erosion paths, and leaves workable access for delivery, installation, greenhouse care and pond maintenance. Record the site in wet and dry conditions, check how sunlight and shade change, and test the idea on a scaled plan before choosing a model. If the bank, drainage or ground preparation is uncertain, get site-specific advice from a suitably qualified professional; a visual inspection cannot establish what the ground will support.

01
A pond does not guarantee better growing conditions
A pond can be an attractive garden feature, but being nearby does not guarantee that a greenhouse will be warmer, more humid or more productive. Conditions inside depend on the greenhouse itself, sunlight, ventilation, watering and the plants being grown; any influence from nearby water varies with the pond, garden layout and weather. Treat the pond as a neighbouring feature, not as a growing benefit you can count on. Assess the proposed position against the light and airflow needs of the crops you plan to grow, and note shade from buildings, trees and the bank. Decide what the greenhouse will be used for before giving the pond’s position any weight.
Nor does proximity automatically provide a suitable irrigation supply. If you intend to use pond water, establish whether it is appropriate for the intended crops and how it can be collected before planning plumbing or equipment; a clear-looking surface does not reveal water quality. Record filtration or treatment routines, as well as seasonal level changes, because these may affect collection and service access. Keep watering arrangements separate from assumptions about proximity, and have any electrical or water services near the pond assessed and installed by an appropriately qualified professional. This avoids designing around an untested source.
Check the bank and ground behind it
Look at the ground between the pond and the proposed greenhouse, not only at the visible waterline. Note the top and foot of the bank, the steepness of any slope, exposed roots, cracks, fresh sediment, eroded patches, standing water and places where soil appears to have slumped. Photograph the same views from stable ground and compare them after rain or over time. These are observations, not a diagnosis: a bank can look sound at one visit yet have a history of movement, and plant cover can hide changes. Do not treat a dry, tidy surface as proof that it will support a structure.
Check whether the proposed footprint would sit on natural ground, recently placed fill or a levelled area, and whether a retaining wall, pond liner or previous repair is nearby. If available, ask whoever built or maintains the pond about known changes or bank work. Where the spot is on a slope, near signs of movement, over fill or close to pond-related excavation, ask a geotechnical professional to assess the site and advise what further investigation is needed. If a liner or retaining feature is present, ask the pond contractor whether planned ground disturbance could affect it. No generic distance from the edge can confirm bank stability.
02
Trace pond levels and overflow routes
Record the pond’s normal waterline and, if known, its higher seasonal levels. Mark an outlet, spillway, overflow pipe or low point where water leaves the pond; not every pond has the same arrangement, so note only what is present. Also trace runoff arriving from roofs, paving, garden slopes and higher ground. After rain, look from a safe, stable position for shallow channels, sediment lines, debris or damp patches that show where water travels. A single dry-weather visit cannot show the full range of conditions, and a pond that appears calm may still have a defined overflow route. Ask the person who maintains it about any known changes in water level or discharge.
Put those routes on the plan before testing greenhouse positions. The Bloomcabin Orangerie is listed with floor-area options from 47 to 70 m²; if comparing a larger footprint, use the exact model outline to check its relationship to low ground and any overflow path. Include the surrounding working space in that comparison, rather than considering only the area beneath the structure. Do not cover an outlet, block an existing flow route or add a bank, trench or pipe to divert water on guesswork. Changing a route can concentrate flow at the greenhouse, erode the bank or send water elsewhere. If the path or outlet is unclear, seek advice from a drainage professional before fixing the layout.
Draw the levels and greenhouse footprint to scale
Make a scaled sketch with the pond edge, the bank’s top and foot, any retaining features, trees, walls, fences, existing paths and visible drainage points. Mark north and note where the ground rises or falls; measured spot levels or contours are more useful than a visual guess if the site is sloping. Add the greenhouse’s full outside outline, not just its internal growing area, and show the proposed entrance, door opening and the space needed to move around it. Keep the measured bank edge distinct from the waterline, because they are not necessarily in the same place or equally stable. If reliable level information is unavailable, arrange to have it recorded before treating the plan as final.
For an early size comparison, the Classic aluminium greenhouse range is listed from 3.77 m² to 28.08 m². Those figures are floor-area options, not the width and length of a particular model or the preparation required beneath it. Once you have a candidate configuration, use its drawing and installation information to plot the outside dimensions and base arrangement. Mark that envelope on the site plan, then transfer the corners to the ground with temporary markers on stable soil. This can expose tight turns, slope changes and overlaps with the bank before a purchase is made.

03
Check sunlight and shade through the seasons
Draw a seasonal shadow diagram rather than judging light from one visit. Mark north, then note where shadows fall in the morning, around midday and later in the day at different times of year. Include mature tree canopies, deciduous trees whose cover changes, rooflines, fences and nearby buildings; a small tree now can become a more significant obstruction as it grows. Record shade at the proposed greenhouse position, not just along the pond edge. Water reflections are not a dependable substitute for direct sunlight, and the pond does not remove the need to match the growing space to the crops you intend to raise.
If a wall-based style is being considered, the aluminium lean-to greenhouse is an option to assess alongside the wall’s shade and the available access. Do not choose it merely because a wall happens to be near the pond. Check the wall’s orientation, eaves, doors, windows and downpipes on site, then use the exact greenhouse drawing to see how the position affects the entrance and paths. A wall can cast shade or restrict movement, and the usable conditions may change through the year. Include access for maintaining both the greenhouse and the wall when you compare locations.
Plan the delivery route before choosing a model
Trace the route from the likely delivery point to the proposed footprint. Measure gates and narrow sections, and note corners, steps, changes in level, overhanging branches, soft ground and any point where the route runs beside the pond. Include a place where materials could be set down without blocking an overflow route or narrowing access to the water. A garden path that is comfortable to walk along may still be difficult for a delivery crew or installer to use. Check the route in wet conditions too: a dry lawn may not remain firm enough for the handling method required.
For a chosen model such as the Limited Edition aluminium greenhouse, ask the supplier or installer for handling and access requirements for the exact size and configuration. A greenhouse’s floor area does not tell you whether its components can pass through a narrow gate or be assembled beside the pond. Take photos and simple measurements of the full route, including the tightest turn and the surface after rain. Confirm whether materials will be carried or brought in by vehicle, as these approaches need different space. If access depends on moving a fence or crossing soft ground, have that detail assessed in advance.
04
Keep pond and greenhouse maintenance accessible
Leave a practical way to reach both the greenhouse and the parts of the pond that need routine attention. Consider the greenhouse door, exterior cleaning, garden beds and, where present, pond pumps, filters, valves or an outlet that must remain accessible. Avoid a layout that makes normal maintenance depend on stepping across a soft bank or carrying equipment through a narrow gap. Paths can become wet or muddy after rain, so assess their surface and level changes in the conditions when you expect to use them. The space needed depends on people, equipment and the work involved; measure those needs instead of applying a universal clearance.
If built-in storage is useful in your garden plan, the Limited Edition greenhouse with built-in storage is one option to compare. Mark the selected greenhouse’s exact outline and the route to pond equipment separately, rather than assuming storage can take the place of pond access. Check the product information for the specific configuration and consider what tools you actually need to store and carry. Built-in storage does not guarantee room for pond equipment or a clear path outside the greenhouse, so keep those requirements visible on the site plan.
Fit paths and garden services into the plan
Plot the greenhouse within the garden as a whole. Draw routes from the house to the greenhouse, the path to the pond, garden beds, gates, taps and existing drains. Check where the greenhouse door opens and whether you can reach the growing area with a wheelbarrow, hose or watering can without crossing an overflow route. Mark any planned service lines or water points so they can be reviewed alongside drainage and access, rather than added after the footprint is fixed. If a path is used for both garden work and pond maintenance, make sure the proposed greenhouse position does not turn it into a narrow or awkward pinch point.
The T-Model orangery greenhouse range is listed from 16.52 m² to 30 m². Compare a specific size with the space available for paths, beds and pond care, not only with the open patch where the structure might fit. Use the selected model’s drawing in the same scaled plan, with the entrance shown in its proposed orientation. Walk the routes or mark them on the ground with temporary guides, including the approach from the house and the turn into the greenhouse. If the layout only works by sending a path towards a low spot or across an outlet route, adjust the position before settling on a model.

05
Choose the greenhouse type from the site conditions
Compare freestanding and wall-based styles after the ground and access plan is clear. A freestanding model still needs a suitable position and a base arrangement confirmed for its particular design; a nearby wall is not automatically an advantage if it shades the site or blocks a pond-care route. A lean-to is relevant only where a suitable wall is available and the greenhouse can be reached and maintained as planned. Neither format removes the need to check overflow, bank condition or light. Let the measured usable area and the site’s constraints, rather than the pond itself, guide the comparison.
The Oasis Pyramid greenhouse is a named option with listed floor-area choices from 5.53 m² to 18.9 m². Do not use the model name or area alone to infer its exact outline, door position or suitability for a particular bank. Compare the selected configuration’s dimensions and installation requirements with the site drawing, then check whether pond-side routes remain accessible. A model that fits the empty patch on paper may still conflict with a path, a spillway, a tree’s changing shade or the space needed for maintenance.
Verify the exact model and site requirements
Review the drawing as a working site plan, not just as a greenhouse outline. Confirm the specific model’s external dimensions, base and ground-preparation requirements, door position and any installation clearances in the relevant product information. Check that no outlet or natural flow route is obstructed, delivery access is workable, and pond maintenance remains possible. Where there is a slope, fill, erosion, unusual wetness or uncertain drainage, pause and arrange an assessment by an appropriately qualified ground or drainage professional. Keep photos and notes with the plan so that the installer and any professional are considering the same proposed location.
The Prestige greenhouse with metal base is one catalogue model, listed with floor-area options from 3.77 m² to 28.08 m². The words metal base in a model name do not establish whether that base or installation approach is suitable for the ground beside your pond. Verify the instructions for the exact configuration and resolve any site-specific ground question separately. Apply the same care to other models you compare: size is one part of the decision, and neither a product range nor a garden sketch replaces an assessment where the bank or water route is uncertain.
Frequently asked questions
How close to a pond can a greenhouse be installed?
There is no universal distance that suits every pond and garden. The relevant space depends on the bank, ground condition, overflow routes, access and the chosen greenhouse’s installation requirements. Mark these features on a plan, and seek site-specific advice if the proposed footprint is near a slope, fill or drainage route. A generic setback cannot confirm that the ground is stable or outside the path of water.
Will a pond make the greenhouse warmer or more humid?
Not reliably. Any influence depends on the pond, garden layout and weather, so do not count on nearby water to provide warmth, humidity or better growing conditions. Assess sunlight and airflow at the greenhouse position, and plan watering and ventilation for the intended crops.
Can I build the greenhouse on the pond bank?
Do not assume the bank can support a greenhouse because it looks firm or has plants growing on it. Slopes, fill, erosion and previous pond work can affect the ground. If the proposed position is on or close to the bank, have the actual site assessed by a suitably qualified geotechnical professional before settling on a footprint.
What should I look for after rain?
From stable ground, note where water flows, whether it pools, and whether there are new sediment lines, debris, damp patches or signs of erosion. Compare these observations with the pond’s outlet and overflow routes. A dry-weather visit cannot show the full picture, and there is no need to approach an unstable bank to inspect it.
What information should I give the supplier or installer?
Provide a scaled site plan, photographs, the proposed greenhouse position and measurements of the route from the delivery point, including gates and tight turns. Identify the exact model and size you are considering, then ask about its installation information, handling requirements and the ground preparation it needs. Share any uncertainty about the bank or drainage with a suitably qualified geotechnical or drainage professional.
A greenhouse can be near a pond when the ground, water routes and access all support the proposed position. If any of those conditions is uncertain, resolve it before choosing a footprint rather than relying on the pond’s usual waterline or a quick visual check. A scaled plan, observations after rain and the exact model information can show whether the greenhouse and pond can share the garden without one obstructing the other.
