
Working Out Greenhouse Clearance from Trees and Hedges
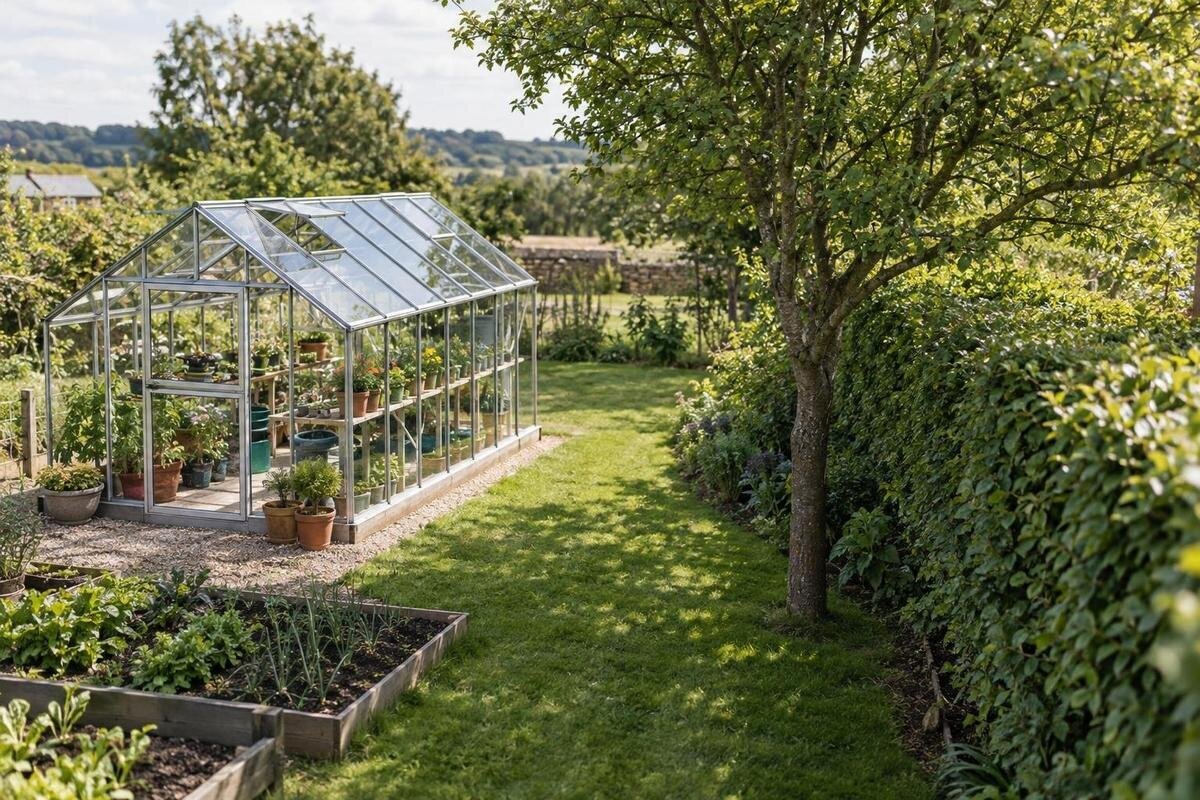
Greenhouse location guide
Trees and hedges can make a garden feel sheltered, but their future canopy, shade, roots and falling material can all affect where a greenhouse works. There is no dependable standard gap for every species or site. Measure the greenhouse’s full outside footprint, map how the planting may change and reserve room to care for both. A scaled sketch, seasonal shadow notes and a maintenance check turn those factors into a practical planting-distance worksheet.

01
Why one distance cannot work for every planting
An appropriate gap depends on the plant species, its age and expected mature spread, how it is managed, the greenhouse’s outside dimensions and what you plan to grow. A young tree can look comfortably distant while its crown is still developing; an established one may already cast shade or shed material well beyond its trunk. Hedges also change width between trims. Measuring from a trunk to a greenhouse wall therefore tells only part of the story. It does not show whether there will be room for the mature canopy and maintenance access, suitable growing conditions, or potential conflicts between roots and planned groundworks.
Use a worksheet rather than starting with a standard number of metres. Record canopy, shade, roots, falling material and access as separate checks, because each can set a different practical limit. Draw the greenhouse and planting on one scaled plan, then note what you know, what you have estimated and what still needs advice. A location works only if the relevant constraints can be managed together; extra room for one issue does not automatically solve another. The goal is to explain why the gap suits this planting and greenhouse, not to find a universal setback. Use the same units throughout so your comparisons stay clear.
Measure the greenhouse’s full outside footprint
Start with the actual greenhouse version you are considering and obtain its dimensioned plan. Mark the outer edges of the frame and any projections, gutters, doors or attached sections that affect where someone can pass or work. Do not use growing area or a product photograph as the footprint: two layouts with the same area may have different lengths, widths and perimeters. On the site sketch, position the greenhouse by its outermost relevant edge, not its centre. Show the proposed orientation and entrance, then mark any path or working strip separately so it is not silently counted as spare clearance.
Measure from the nearest trunk or hedge face to that outer line, not from the greenhouse’s centre. The T-Model Orangery Greenhouse listing gives an area range of 16.52 to 30 m²; this does not tell you the outside length and width of a selected option. Match the version you want to its dimensioned plan and check the remaining strip on the ground. If outside dimensions are not available, record the clearance as unconfirmed rather than estimating from an image. This prevents a brochure area figure being mistaken for a measure of the space left to walk, clean or trim.
02
Allow for a tree’s mature canopy
On the plan, draw today’s crown and its expected mature outline as two different shapes. Measure the current reach from the trunk in more than one direction; a single measurement can hide an uneven canopy. Use the outermost branches in the directions that matter, especially towards the greenhouse, and record trees as a group where crowns overlap. The mature outline is more useful for long-term siting than the tree’s current appearance. It also lets you check whether branches could overhang the roof or access space. Keep this canopy drawing separate from any root estimate: branches are visible, but they do not map the full area that may be affected by groundworks.
Identify the species and, where relevant, cultivar before estimating future size. Use information for that plant and local advice from a knowledgeable nursery or arborist; do not borrow a generic mature-width figure from another species or assume routine pruning will keep a large crown small. When comparing a Pyramid Greenhouse with the planting, place its selected footprint beside both canopy outlines on your sketch. Note which branches already reach towards the proposed roof and where future growth could reduce the gap. If the tree cannot be identified or its growth form is uncertain, keep the canopy estimate provisional. This matters particularly when the tree is young.
Map shade across the seasons
Shade needs its own record because a tree can be a manageable distance away yet cast a long shadow across the greenhouse at important times. On a scaled plan, note the greenhouse’s orientation and trace where shade falls in the morning, around midday and in the afternoon. Repeat observations in different seasons, or draw a seasonal shadow diagram using the tree’s leaf habit and a reliable sun-path reference. Take photographs from the same viewpoint with dates and times noted; a set of repeat images is more useful than a single impression. Record whether the roof, one side or the planned growing area is shaded.
Deciduous planting changes the picture when leaves are present and when they have fallen; evergreen foliage remains, but the canopy still grows. A new tree may therefore cast a modest shadow now and a broader one later. Assess light for the crops and growing pattern you have in mind rather than labelling a position simply sunny or shady. Note any shade from nearby buildings or fences as well, so you do not attribute it all to a tree. If you can observe the site for only part of a year, mark the missing season as an estimate rather than treating a snapshot as a full-year assessment.

03
Plan for leaves, fruit and falling branches
Trees and hedges can shed leaves, blossom, fruit, nuts, seeds, small twigs or pruning cuttings; what matters depends on the planting. Wind can carry debris past a canopy edge, so the nearest branch or hedge face is not a guaranteed boundary for leaf fall. Mark the seasons when each plant is likely to drop material, then consider where it may land on the roof, around doors and on any guttering. Accumulation can add routine clearing to greenhouse care, and a narrow gap may make that job awkward. This is a maintenance question as well as a spacing measurement.
Branches are a separate concern from leaf litter. If a tree has dead, hanging or damaged limbs above the proposed site, ask a qualified arborist to assess it; increasing the greenhouse gap alone does not assess a tree hazard. If you are considering the Limited Edition greenhouse with storage, include the exact selected configuration in your cleaning sketch, including any storage section shown on its dimensioned plan. A model name does not show the roof’s full outline or how much room a person needs to reach it. Use the plan to identify surfaces that may collect debris and the access needed to clear them.
Leave room for a hedge to grow and be trimmed
Measure a hedge as a planting strip, not as a row of trunks. Record its current width at the broadest points and its height, then estimate its mature width using the species and local growing advice. A freshly trimmed face may sit well inside the growth that returns between trims. On your sketch, distinguish the current face from the likely untrimmed or routinely maintained envelope. For a mixed or long hedge, note sections separately where species, vigour or management differ. This makes it clearer whether the greenhouse would sit beside a stable boundary or beside planting expected to keep spreading.
Reserve a usable access strip for trimming, collecting clippings and inspecting the greenhouse side, rather than simply drawing a gap on the plan. Check that the hedge can still be maintained without standing on the greenhouse, blocking an entrance or pushing growth against the structure. If regular pruning is the only reason a gap appears workable, be realistic about whether that work will continue. When positioning the Bloomcabin Prestige Greenhouse, show where the trimming route begins and how you will carry clippings out. A long hedge may need access along its full length, not just enough space beside the greenhouse entrance.
04
Keep a usable route for greenhouse care
Plan for the jobs you will actually do around the greenhouse: walking past it with a watering can or wheelbarrow, clearing fallen leaves, washing accessible surfaces and carrying in plants or materials. Mark the main entrance, door opening and the side you need to reach, then draw the route from a normal garden path. A gap that can be measured but cannot be used comfortably is not useful working clearance. Do not assume you can always reach a side from inside or from above; follow the manufacturer’s care instructions and keep routine tasks on a route you can use safely.
Access may need to continue around an end as well as along a side, especially if that is how you reach the far side for cleaning or inspection. Compare the full outline of the Spacious Greenhouse, listed from 47 to 70 m², with the path you intend to keep; the area range does not show its exact length, width or openings. Do the same for any smaller candidate, because a compact plan can still leave a blocked pinch point if placed too close to a hedge. Keep access requirements beside, not inside, the greenhouse footprint on the worksheet.
Assess roots separately from canopy spread
Roots need assessing separately from the visible crown. The dripline—the ground beneath the canopy’s outer edge—is a useful landmark on a sketch, but it is not a reliable boundary for the root system. Roots vary with species, age, soil, water and competition, and may extend beyond the branches. The practical question is whether roots could affect groundworks or a maintenance route at the proposed position, not whether the greenhouse is a set number of metres from a trunk. Avoid drawing an exact root radius unless a qualified professional has assessed the tree and site.
Before digging, levelling or preparing a base near established planting, ask an arborist or a suitably qualified site professional whether the work could affect roots and what method is appropriate. Do not assume that a shallow-looking plant has no significant root zone or that cutting a root is a simple fix; the answer is specific to the tree, soil and proposed work. If you choose the Aluminium Classic Greenhouse, share its selected footprint and proposed groundworks with the relevant professional. Keep their advice alongside the root-related questions on your worksheet, separate from your observations of canopy spread and shade.

05
Compare freestanding and lean-to positions
A freestanding greenhouse gives you more freedom to choose its orientation and move the footprint around a planting group, but it still needs a workable route to its sides and ends. A lean-to can be considered where a suitable wall is part of the site; it does not remove questions about canopy, roots or falling material. The wall may contribute its own shade, and the greenhouse’s reachable sides may differ from those of a freestanding layout. Compare these as different site plans, not as a shortcut to reducing the planting gap. For either type, mark the footprint, entrance and faces you need to reach.
The Aluminium Lean-to Greenhouse listing gives an area range of 3.69 to 14.34 m². Use the selected version’s external plan to mark how it sits against the wall, where you approach it and which faces remain accessible; do not convert the stated area into a required gap. For a freestanding option, draw the complete outside perimeter in the same way. The better choice is the one whose clearances remain workable after the planting’s mature width, seasonal shade and maintenance needs are added to the sketch.
Complete the planting-distance worksheet
Bring the measurements together on one sheet. List each tree and hedge separately, its identified species if known, current size, expected mature outline and the source for that estimate. Add a seasonal shade diagram, likely debris periods, root or groundworks questions, and the route needed for pruning and greenhouse care. Draw one or more candidate greenhouse footprints to scale, including exact external measurements and any attached section. For each position, mark which constraints are confirmed, which estimates need checking and which routes would be blocked. This gives you a clear comparison instead of relying on memory or a single tape measurement.
Keep a position only if its weaknesses have a credible solution, such as a realistic hedge-trimming route or an assessment before groundworks. If shade or future canopy remains uncertain, test an alternative location or wait for better information rather than treating a guessed distance as settled. For a shortlisted Limited Edition Aluminium Greenhouse, use the worksheet to record why the chosen position works and which estimates remain unresolved. Keep that record with the selected model’s plan so later changes can be compared with the original assumptions. Revisit the drawing if a hedge is allowed to widen or a young tree approaches its expected mature size.
Frequently asked questions
How many metres should a greenhouse be from a tree?
There is no single distance that suits every tree and site. Measure the greenhouse’s outside footprint, then allow for the tree’s expected mature canopy, seasonal shade, falling material and the space needed for upkeep. If you do not know the tree’s likely mature spread, keep the estimate provisional until you have reliable local advice.
Do tree roots stop at the dripline?
Not necessarily. The dripline—the ground beneath the canopy’s outer edge—is a useful visible reference, but it is not a dependable boundary for roots. Their spread varies with the tree and site. If greenhouse groundworks are planned near established planting, seek advice from an arborist or another suitably qualified professional.
Can a greenhouse sit beside a hedge?
It may work if the hedge’s future width, shade and clippings are manageable and there is a usable route for trimming and greenhouse care. Measure the maintained face and likely growth between trims. Do not count on continuous pruning to keep a gap workable unless that is a realistic long-term maintenance plan.
How can I check tree shade throughout the year?
Record where shade falls at different times of day and in more than one season. Note dates and times on a scaled sketch, and take repeat photographs from the same viewpoint. If you cannot observe the site for a full year, use the tree’s leaf habit and a reliable seasonal sun-path reference, and mark unobserved periods as estimates.
What if I do not know how large a tree or hedge will grow?
Identify the species and, where relevant, cultivar before settling on a distance. Use plant-specific information and local advice from a knowledgeable nursery or arborist rather than a generic figure for another plant. Keep the greenhouse position provisional while the expected mature spread remains uncertain.
A useful greenhouse clearance is not just the distance from a trunk or hedge face. It is the space left after you account for mature growth, seasonal shade, falling debris, root-related groundworks and the tasks you need to do around the structure. Keep those checks visible on the same plan, and leave estimates marked as estimates until they are verified. If a tree grows or a hedge’s management changes, revisit the drawing so the original gap remains practical.
