
Planning a Greenhouse on a Sloping Garden Block
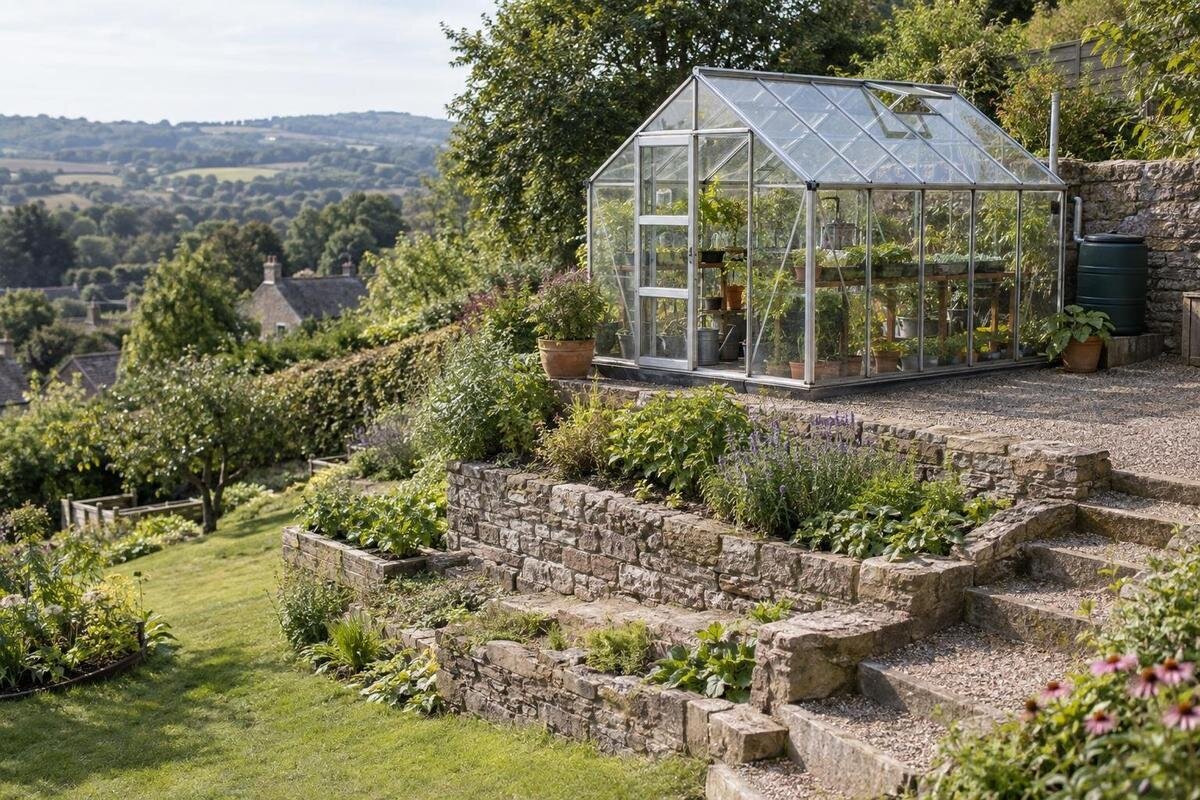
GREENHOUSE SITE PLANNING
A sloping garden can still be a candidate for a greenhouse, but the fall affects more than the height of its base. It can change where water flows, how much ground needs to be altered, which areas receive sun and how easy it is to reach the entrance. Start with a measured site plan, compare platform options and then check the requirements for the specific greenhouse. The final support, retaining and drainage design must suit the ground and layout.

Site survey checklist 1
Measure levels across the proposed footprint
A sloping block may fall along its length and across its width, so looking from one corner can give an incomplete picture of the ground beneath a proposed greenhouse. Draw the garden to scale, including boundaries, buildings, fences, paths and visible changes in ground level. Mark each possible greenhouse outline, then choose a fixed reference point for recording relative heights. Take spot levels at all footprint corners, the centre and obvious breaks in slope; add intermediate points on a grid if the ground undulates. Label the measurement points on the drawing and use the same labels in your notes. Keep existing ground levels separate from any proposed platform level so the sketch clearly distinguishes what is there now from what you are considering. If you compare two locations, use the same reference point for both rather than starting a separate set of readings with no clear relationship to the first. This preliminary drawing helps explain the site; it is not a foundation design.
Label the high and low sides and note the direction of fall along both axes. A single description such as uphill or downhill can miss a hollow, ridge or cross-slope that leaves one corner lower than expected. Keep the individual readings rather than smoothing them into one average, and record where each was taken so someone else can follow the plan. A basic level gives a preliminary picture, but irregular ground, uncertain measurements or substantial earthworks call for a competent surveyor. Tighter measurements around abrupt changes in level can be particularly useful.
Mark the full greenhouse footprint and access
Before deciding that a greenhouse will fit, find the external dimensions for the exact model and size you are considering. A stated floor area can help with an initial shortlist, but it does not tell you the width, length or base outline. For example, the Limited Edition Aluminium Greenhouses listing gives a range from 3.77 to 28.08 m²; that is a range of areas, not one footprint. Use the dimensional information for the selected variant, together with any specified base requirements, to draw its actual outline.
Mark the outline on the ground with string, pegs or another temporary guide and walk around it. Include any clearance specified by the supplier or designer, space to open the entrance, access for assembly and room to clean or maintain the structure. Then add the path, nearby beds and the route you would use to carry pots or compost. Label the uphill and downhill sides on the plan. This makes it easier to see whether the proposed position leaves a practical entrance or puts everyday access across the steepest part of the garden.
Site survey checklist 2
Map where rainwater already flows
A dry-day inspection can hide the main difficulty on a sloping site. After rain, look for water entering from higher ground, puddles, damp patches, small channels, washed soil and sediment lines. Mark these on the same plan as the proposed greenhouse, and note nearby downpipes, paved areas and other places where water is discharged. Take photographs from fixed viewpoints and add arrows to show the direction of flow. Water may reach the proposed footprint from outside it, so include the ground above the greenhouse as well as the area directly beneath it.
A platform can change where water collects or travels: a cut into the uphill side, a filled edge or a retaining structure can all alter the existing route. If you are comparing a wall-side location, the Aluminium Lean-to Greenhouse is a catalogue option to review, not a drainage plan or a confirmation that a particular wall suits the site. Map roof discharge and ground flow independently. Avoid assuming that a wall, gravel strip or pipe will provide a suitable outlet; if works would intercept or redirect water, get the route assessed for your particular block.
Compare sunlight and exposure at each position
Make a simple shadow diagram for every serious location rather than relying on one sunny afternoon. Mark the proposed greenhouse outline on a scaled plan and note the shade cast by buildings, fences and trees at different times of day and in different seasons. Photographs taken from the same points make the comparison easier to revisit. If the Pyramid Greenhouse is on your shortlist, use the footprint for the chosen version when plotting the position; a model name or area figure does not show how much of a particular patch it would occupy.
The slope can change how exposed each possible position feels, but height alone does not tell you whether a spot is sheltered. Note open edges, gaps between buildings and places where nearby structures or vegetation affect the wind. Record what you observe at the proposed base, not just at the house or a convenient path. Pass this information to the greenhouse supplier or site designer when discussing the chosen model and its support requirements. Do not assume that a lower point will always be calmer or that the most sunlit position will be the easiest to build on.

Site survey checklist 3
Compare the main ways to create a level base
The simplest comparison is often between moving the greenhouse to a naturally flatter part of the garden and changing the ground at the preferred location. A cut-and-fill platform, a terrace with a retaining edge or a raised support system may be considered, depending on the site. Cutting into higher ground and building up the lower side changes the ground on both edges; it is not just a matter of making the top look level. Draw the possible platform outline and note how each option would affect the existing water route and the approach to the entrance.
There is no universal platform method for a sloping block. Soil conditions, the shape of the slope, drainage, access and the greenhouse's support requirements all matter. A raised platform also changes the height of the entrance relative to the path and garden. The Prestige Greenhouse with Metal Base product name identifies a catalogue feature, but does not establish that its base can level uneven ground or serve as an engineered platform. Check the actual product requirements, and involve a qualified professional where the option includes retaining or raised structural support.
Retaining edges need site-specific design
If a platform relies on holding back soil, treat the retaining edge as part of the site design rather than a decorative finishing detail. Its design depends on the ground, the slope above and below it, water movement, the proposed platform and nearby structures. These conditions cannot be settled by a generic wall height or a rule of thumb. Ask an appropriately qualified structural or geotechnical professional to assess the site where retaining work is proposed, and make sure the greenhouse position and drainage plan are included in that assessment.
The exact size and location of the greenhouse matter when the platform and retaining edge are being planned. The T-Model Orangery Greenhouse listing, for example, gives an area range of 16.52 to 30 m², but floor area alone does not show the edge length or the support needed on a particular block. Supply the designer with the selected model's dimensions, the level survey and the intended paths. Show where the greenhouse would sit in relation to the proposed retaining edge, rather than drawing the wall and greenhouse on unrelated sketches. Identify which side would hold back soil and where the surrounding ground would remain at its existing level. If those details are still undecided, mark them as questions for the designer instead of treating a rough line as a settled arrangement. Also identify nearby buildings, boundaries and underground services before planning earthworks; do not rely on a universal setback to resolve a site-specific layout.
Site survey checklist 4
Plan a usable entrance and working route
A greenhouse may sit on a level platform and still be awkward to use if the path to it crosses a steep or uneven part of the garden. Draw the route from the house or main garden path to the entrance, then consider the tasks you expect to do: carrying trays, pots or compost, bringing in a watering can, and moving equipment in and out. Mark the space needed to approach and open the door, along with room to turn or pause outside it. The aim is a route that works in everyday use, not just a neat rectangle on the plan.
Allow for the space taken by any features that affect the internal layout as well as the outside route. If storage is part of your brief, the Limited Edition Aluminium Greenhouses with Storage listing is one option to compare. Its area range, from 5.52 to 28.08 m², does not show the layout of a selected version or how storage relates to the entrance and growing space. Check the exact plan before placing benches, beds or paths, and make sure the proposed external access still works from the lower and higher sides of the garden.
Recheck water and ground conditions over time
A single visit may not show how a position behaves when the ground is wet or after garden conditions change. Revisit the area after rain and record standing water, softened ground, small channels or signs of soil movement. Use the same photo viewpoints and date the images so you can compare observations. Keep these notes alongside the original water-flow map rather than replacing earlier observations each time. Record whether a feature is new, persists between visits or has disappeared, and distinguish what you saw from what you think caused it. For example, a photograph of a damp patch records its location, but does not by itself explain where the water came from. If the site changes noticeably between wet and dry periods, include that in the survey rather than treating the dry-day appearance as the permanent condition. Mark areas you have not yet observed in wet weather as unknown. This gives the person assessing the platform a clearer account of the site's observed conditions and the gaps in that information.
Check the whole selected footprint against the level plan, not only the spot where you expect the entrance to sit. A larger structure may cross a break in slope that is easy to miss when looking at one corner. The Spacious Greenhouse listing gives an area range of 47 to 70 m²; use the dimensions for the chosen variant to see how its outline relates to the surveyed ground. The area range itself does not show whether the footprint crosses a change in level. Redraw the plan if the chosen size or platform position changes.

Site survey checklist 5
Confirm the selected greenhouse's base requirements
Before finalising a platform, obtain the installation information for the exact greenhouse and size you plan to buy. Check what support surface is specified, how level it needs to be, what base arrangements are accepted and how the structure is intended to connect to its support. These are questions for the product supplier and, where the platform is site-designed, the responsible professional. Do not assume a greenhouse frame can accommodate a sloping base, or that a base shown in a product title is suitable for any ground condition.
For instance, the Aluminium Classic Greenhouse listing gives an area range from 3.77 to 28.08 m². That information can help with an initial size comparison, but it is not a platform specification. Match the selected variant's dimensions and installation requirements to the proposed support design before work begins. Keep the model and size clearly identified on the plan so information for another variant is not mistaken for the one you intend to order. When comparing the product drawing with the site plan, check which outline each measurement describes: the greenhouse, its base or the surrounding platform. Ask about any unclear measurement before using it to set out the work. If the available instructions do not address your site conditions, describe the specific difference to the supplier and designer and ask them to clarify it. Resolve that question while the platform is still being planned, rather than relying on an improvised adjustment during assembly.
Put the survey into a clear design brief
Bring the information together in a scale drawing that another person can interpret without visiting the garden first. Include boundaries and nearby structures, the greenhouse's exact proposed outline, spot levels, the direction of fall, paths, shade observations and water-flow arrows. Add dated site photographs and mark any readings or ground conditions that remain uncertain. If you are comparing a naturally flatter position with a platform, show both options on separate sketches. This lets a supplier or site professional respond to the actual layout rather than a vague description of a sloping patch.
Before committing to the site, ask who is responsible for assessing the platform, retaining work and drainage, and what information they need from the greenhouse supplier. Check any planning or building approval questions with your local council or an appropriate professional, as they depend on the property and proposal. Compare the complete layout, including access and earthworks, rather than selecting a greenhouse from floor area alone. If a revised position avoids complex ground changes and makes the entrance easier to reach, it may be the more practical choice.
Frequently asked questions
Can a greenhouse sit directly on sloping ground?
Only if the particular greenhouse and its support system are designed for those ground conditions and installed to their requirements. Do not assume a standard frame can follow a slope or make up for uneven support. Check the product instructions and have the proposed base assessed for the site.
How do I measure the slope before planning a greenhouse?
Draw the proposed area to scale and record relative levels at the footprint corners, centre and any changes in slope. Include measurements across both the length and width. This is a useful preliminary survey; arrange a more detailed survey if the ground is irregular or significant earthworks are being considered.
Is a retaining wall the only way to make a level platform?
No. Depending on the site, alternatives may include moving the greenhouse to flatter ground, a cut-and-fill platform, a terrace or a raised support system. Each changes the ground, water flow or access in a different way, so the right approach depends on site-specific assessment.
What should I check about drainage on a sloping block?
Observe the area after rain and mark where water arrives, where it collects and where it flows away. Include runoff from nearby roofs and paving. If a platform would intercept or redirect water, ask a qualified professional to assess the route and outlet rather than assuming a gravel strip or wall will solve it.
Can a greenhouse base make up for an uneven platform?
Do not infer that from a product name or catalogue image. Check the selected greenhouse's installation requirements and ask whether its base is suitable for the proposed platform. The support and any retaining structure must be considered for the actual ground and greenhouse, not chosen from a generic slope rule.
Treat the slope as part of the greenhouse plan, not as a problem the frame should be expected to correct. A levels survey, water-flow notes, seasonal shadow observations and a full-size footprint give you a sound basis for comparing locations and platform concepts. Once the preferred greenhouse is identified, match its requirements to the proposed support and site design. If the sketch reveals difficult runoff, retaining work or an awkward entrance, reconsidering the position may be more practical than forcing the first choice to fit.
