
Planning a Kitchen Garden Around a Greenhouse
Kitchen garden planning
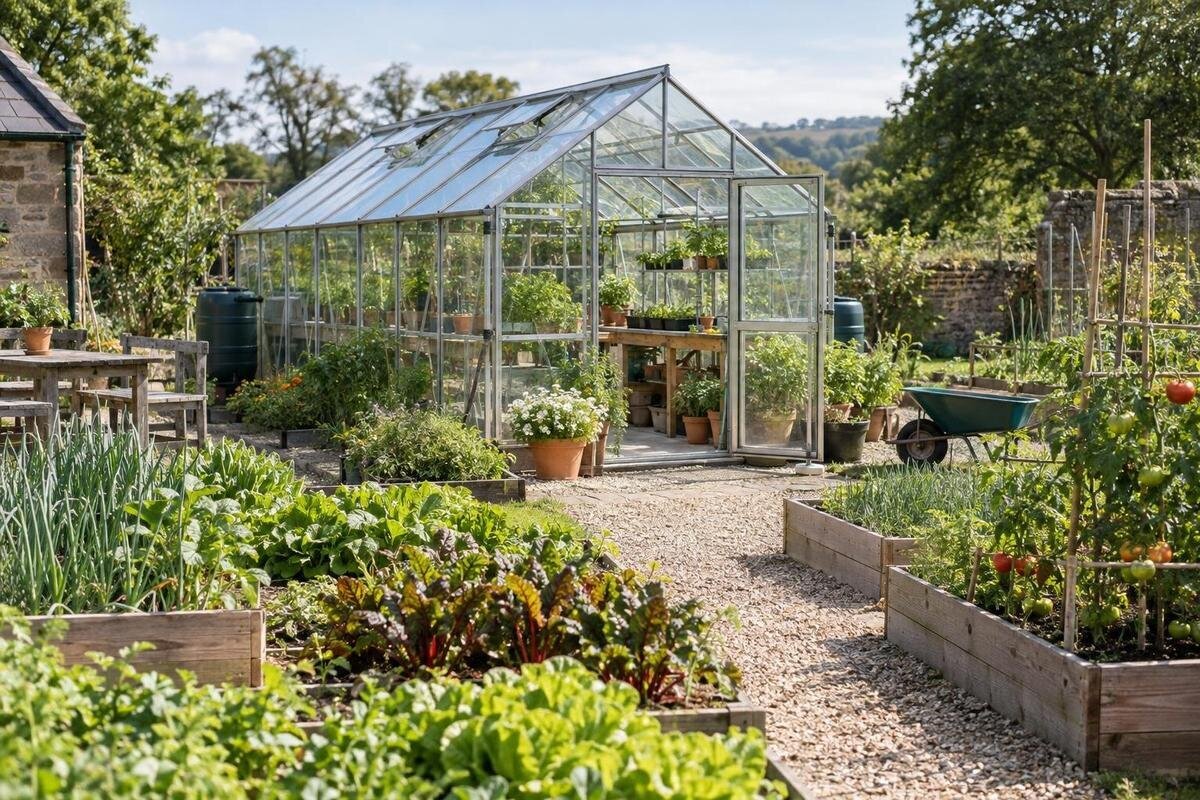
To make a kitchen garden easy to work, plan the greenhouse together with the outdoor beds, water points, compost area and paths that serve them. Treat it as a working hub, not the only growing space. Seedlings move out to beds, produce and tools travel back and forth, and compost has to reach the places where it is used. Drawing those routes before fixing the greenhouse position helps show whether a site supports everyday jobs or simply looks central on a plan.

Plan the garden around everyday jobs
Begin with a list of jobs the garden needs to support: raising seedlings, growing selected crops under cover, producing vegetables in outdoor beds, moving compost, and storing or retrieving tools. Add who will do each job and how often it happens. If most picking is from outdoor rows, a short route back to the kitchen may matter more than placing the greenhouse beside the house; regularly raising seedlings may make the greenhouse-to-bed trip more important. Include less frequent work too, such as bringing in soil improvers or clearing spent plants. Note the loads involved—trays, baskets, bags or a wheelbarrow—so the plan reflects real carrying as well as walking.
Draw the property to a consistent scale, even if the first version is rough. Mark boundaries, existing trees and buildings, current paths, taps, slopes, low or wet areas and features that will stay. Add the greenhouse outline, then sketch outdoor beds, compost, water access and paths around it. Include entrance access and room to turn a barrow, not just the structures’ rectangles. The Aluminium Classic Greenhouse can be one option on a shortlist, but add the exact selected configuration to the plan only after confirming its footprint. Keep the early positions movable until the measured layout works.
Check light, exposure and access on site
Observe the proposed site at different times of day and, where practical, during more than one season. Note when trees, fences, neighbouring buildings or the house cast shade across the greenhouse and outdoor beds; one clear view does not represent every month. Match the planned crops to the light each area receives instead of assuming that the greenhouse should take the brightest patch automatically. Record wind exposure, how water drains after rain and places where it tends to sit. These observations help you compare possible positions for covered growing and outdoor beds before paths or planting areas become fixed.
Walk the routes from the house, gate, shed and water source as well. A site needs to be practical for everyday jobs and for bringing materials into the garden, not merely convenient to look at. If a position against a wall is an option, include a Wall Greenhouse in your comparison while assessing the actual wall, shade, entrance access and outside working space. A sheltered corner is not automatically the best site if it is too shaded or leaves little room to move around the structure. Check the selected model’s site and base requirements before committing beds or paths.
Reserve the greenhouse footprint and working space
Treat the greenhouse outline and the space around it as separate parts of the plan. The structure’s footprint is not the whole area it occupies in practice: its entrance needs a clear approach, people may carry trays through, and planned routine access should remain possible. Connect the entrance to outdoor beds without forcing every task through a narrow gap. Avoid placing bed edges where they would obstruct access or make movement awkward. The clearance needed depends on the selected model and site, so use its relevant plans and installation guidance rather than relying on a universal distance. Confirm the base footprint before fixing nearby beds.
Area figures can help compare scale, but they do not give every side measurement or access clearance. The Pyramid Greenhouse is listed in sizes from 5.53 m² to 18.9 m²; use that range as a broad comparison, not as a substitute for the selected configuration’s plan. Mark the actual outline and entrance on the garden drawing, then see how much usable ground remains for beds, compost, water access and turning space. If those features only fit by reducing paths to impractical strips, revise the layout or reconsider the selected footprint.
Place outdoor beds for light and crop rotation
Arrange vegetable beds according to the light and growing conditions on site rather than making a decorative ring around the greenhouse. Trace how shade moves across the areas you might plant, then match crops to the conditions each bed receives. Beds close to the greenhouse do not necessarily get the same light as those farther away. Leave access to the edges you need for cultivating, weeding and harvesting. If one side of the structure will be a regular route, avoid turning the adjacent bed into a narrow leftover strip that is difficult to reach.
Allow for crop rotation and changes in planting rather than fixing every bed around one season’s plan. Distinguish permanent paths or bed frames from areas where you may want to change the crop layout. Give each bed a simple name or number on the drawing, and keep seasonal planting notes separately from the permanent layout. This lets you record what grew where without redrawing paths and structures each time. Sketch a later planting arrangement as well as the first one: if a bed can only be worked from one side, consider how you would reach the crops when the planting changes. The Bloomcabin Prestige Greenhouse range is listed from 3.77 m² to 28.08 m²; compare the selected footprint with the outdoor growing area you want to retain, rather than treating a model name or range as a bed plan. Draw bed shapes and access gaps to scale, then check that your usual tools and harvest containers can reach them.

Connect the work areas with usable paths
Lay out paths around the jobs they need to connect. A main route may run between the greenhouse entrance, outdoor beds, compost area, water point and garden exit, with shorter branches reaching individual beds. Test each route with the largest item that will use it, such as a wheelbarrow, trolley or harvest crate. Allow room for the person moving it to turn at junctions and stop without blocking the entrance. Measure for your actual equipment and users; one path width will not suit every garden or task. Where two people may work at once, check whether someone can pass a person tending a bed or unloading a barrow. A shared garden may need a passing place rather than wider paths everywhere. Mark these spaces separately on the drawing so they are not later absorbed into beds, and check that any gates along the route can open while equipment is being moved through.
Consider the surface and ground as well as the route on paper. Ask whether paths will remain workable when wet, whether loose material could shift into beds, and whether slopes or thresholds make a loaded barrow difficult to move. Keep path edges clear of planting that could overhang the walking line. The T-Model Orangery Greenhouse range is listed from 16.52 m² to 30 m². Those area figures do not show the entrance position, so confirm the chosen plan before fixing path junctions and turning space.
Plan water access across the garden
Map where water will be used before deciding where taps or stored water should sit. Consider which beds need regular hand watering, where trays will be filled and whether a hose can reach the greenhouse and the furthest outdoor bed. Draw the likely hose route and check it in practice: a connection can be close on the plan yet inconvenient if the hose crosses a doorway or the busiest path. If more than one water point might help, compare that convenience with the available supply and the practicalities of providing it.
Keep a tap or hose connection accessible without placing it where wheelbarrows, compost or harvested produce continually pass. If you are considering a tank or another stored-water source, include its footprint, access and route to the beds on the drawing. The Limited Edition Aluminium Greenhouse range is listed from 3.77 m² to 28.08 m²; place the selected outline and entrance before deciding where water points belong. Have permanent plumbing planned and installed by a qualified professional.
Compost access and handling space
Compost needs an incoming route for material and an outgoing route for finished compost. Place the composting area close enough to the beds for moving loads to be practical, but away from the main route to the greenhouse and any tight turning point. Check that there is room to approach, open and work with the system you intend to use, as well as a place to set down a barrow. Observe the ground after rain and avoid a position where water routinely pools or runs through the working area.
Think through the whole loop: where material is collected, how it reaches the compost area and how finished compost gets to each bed. If those trips cross the route used for watering or harvesting, shifting the compost point may reduce repeated detours. Keep compost handling distinct from storage for hand tools or bagged materials. The Limited Edition Aluminium Greenhouses with Storage listing identifies built-in storage, but verify the selected configuration and usable capacity before relying on it for tools. It does not replace an accessible compost route or outdoor working space.
Set aside space for tools and harvested produce
Plan where a basket, trug or seedling tray can be set down without blocking the greenhouse entrance or a turning space. A small staging area beside a path can make it easier to sort what is going into a bed or coming back from it. When harvesting, consider the route towards the kitchen or any place where produce will be handled. If you plan to rinse produce outdoors, include a suitable water point and think through how the area will be kept clear of standing water.
Place frequently used tools where they can be put away after work without occupying the path between beds and compost. Show the likely parking spot for a wheelbarrow, empty pots and harvest containers too; an object stored in a convenient location can still block an entrance. Keep seed-raising supplies separate from soil and compost handling where that suits your routine. List what will actually be stored before allocating space: a few hand tools need a different arrangement from long-handled tools, stacks of pots and bulky bags. Check how you will retrieve each item when neighbouring spaces are occupied. If storage has an opening door or lid, show its open position on the plan rather than measuring only the closed unit. You do not need to assign a permanent surface to every task, but noting where things will be set down prevents several activities from competing for the same small patch.

Balance greenhouse size with outdoor growing space
Choose a greenhouse footprint in relation to what you genuinely plan to grow under cover and the outdoor space you want to keep. More enclosed area is not automatically more productive if it leaves too little room for beds, paths, water access or compost handling. List the main jobs the covered space must support and compare that list with the time and ground you can give to the rest of the kitchen garden. Leave room for routine access and future changes to planting, rather than filling the plan with structures before you have reserved the working areas.
The Spacious Greenhouse range is listed from 47 to 70 m². An area figure shows the scale of an option, but not whether the remaining beds, routes and service points will suit a particular plot. Draw the selected outline on the full garden plan and check what remains around it, including access to the entrance and the route for moving compost. Larger options are worth considering only where their footprint and intended use fit the overall plan; do not let a catalogue category decide how much outdoor growing space to give up.
Test the layout before fixing permanent features
Mark the proposed greenhouse, beds and compost area on the ground with temporary markers or string. Walk the routes while carrying a tray or basket, push the wheelbarrow through turns and check that the planned entrance remains clear. Test whether the hose can reach the areas you have mapped without running through a doorway or blocking a main path. A rough full-scale test can reveal awkward turns and crowded bed edges that are difficult to judge from a drawing. Try a complete job rather than checking each space in isolation: collect tools, move to a bed, take plant material to the compost area and return the equipment to storage. Note where you have to backtrack or put something down to get past. If several people will use the garden, ask them to try the same marked routes with the equipment they normally use. Adjust the plan while those changes are still simple.
Review the drawing against different seasonal conditions and the jobs you expect to repeat, not only the day you lay it out. Check whether shade changes, bed rotations or a larger harvest would create a new bottleneck, and whether there is room to approach the compost area when it is in use. Before fixing beds, paving or other permanent features, confirm the selected greenhouse’s footprint, entrance and base requirements from its specific documentation. Ask an installer or other qualified professional about site or base questions that depend on the structure and ground.
Frequently asked questions
Does the greenhouse need to sit in the exact centre of the garden?
No. It can be the working hub without occupying the plot’s geometric centre. Choose a position that suits the site’s light and ground conditions and connects conveniently to outdoor beds, water, compost and the routes you use most.
How close should outdoor beds be to the greenhouse?
There is no universal distance. Leave enough room for the greenhouse entrance and any access you need around it, then place beds where their light, growing conditions and connection to paths work for your crops and routine.
Where should the compost area go?
Place it where material can be brought in and finished compost can be carried to the beds without blocking a main path. Check that there is room to approach and work with the composting system you plan to use.
How should I plan water access?
Map where water will be used and test whether a hose can reach each area without repeatedly crossing busy paths. Choose water points to suit the actual garden and supply. Have permanent plumbing planned and installed by a qualified professional.
How do I choose a greenhouse size for a kitchen garden?
Start with the work you expect to do under cover, then compare the selected footprint with the outdoor beds, paths, water access and compost space you want to retain. An area figure alone does not show the full outline or access needed.
A useful kitchen-garden plan gives each part a clear role: the greenhouse supports covered growing, while outdoor beds, water and compost each have accessible places in the wider layout. When you draw those connections to scale and walk them before work begins, it is easier to adjust the position without sacrificing a bed, a path or a regular route. The greenhouse can anchor the garden’s work without taking space from the tasks that make the whole garden productive.
