
Greenhouse Drainage: Stop Puddles After Watering
Greenhouse drainage guide
Puddles after watering are a clue, not a diagnosis. Water may be collecting in a low spot on the floor, escaping from a hose or pot, arriving from outside, or failing to leave through an outlet. Covering the wet patch with gravel or changing the base before you know the route can hide the symptom without correcting the cause. A simple site plan and repeatable watering test are more useful. Record where water is applied, when the first wet mark appears, how it travels and where it remains. That evidence helps separate a watering issue from a floor, outlet or site-drainage problem.

Why puddles appear after watering
An indoor puddle has three parts to investigate: where water enters the floor area, the route it follows and the place it settles. A drip from a hose connection or watering line creates a source near the wet mark. Run-off from pots, trays or a watered bed can travel along joints before pooling. Water may also reach the greenhouse from a doorway or perimeter. On soil, absorption can vary between compacted, dry and already-wet patches; on paving or another hard surface, water is more likely to remain visible and follow small changes in the surface.
Timing narrows the possibilities. A puddle that begins while you water one bench points towards that watering point, a container overflow or the route beside it. A wet patch appearing elsewhere, or growing after watering stops, may mean water has travelled along the floor or entered at an edge. Compare what happens after a dry period with what happens after rain; a patch that appears without watering suggests an external route deserves attention. Treat each pattern as a clue, not a verdict. The source can be some distance from the place where water finally gathers, and a one-off splash is different from pooling that returns with the same routine.
Draw the water route before changing anything
Draw the greenhouse outline on a simple plan and show the floor surfaces inside it. Add the door threshold, beds, pots or benches, taps, hose routes, visible irrigation lines, floor drains and outlets. Mark any gutter or downpipe you can see, plus nearby paving and the ground immediately outside the walls. Use distinct symbols for water sources, openings and puddles; add arrows only for flow you have actually observed. If a feature is hidden or its destination is unknown, label it as unknown instead of guessing. A rough plan is useful if someone else can tell which side and floor area each mark represents.
Identify where the watering test starts, and mark each wet patch with a time or photo reference. If you're planning around a Wall Greenhouse, write its exact model name and selected size beside the sketch and request the matching manufacturer base drawing. Show the wall-side edge and nearby hard surfaces clearly, including any observed flow between them. This helps a reviewer compare the greenhouse boundary with the route you observed, rather than treating every wet mark beside the wall as a separate source.
Run a repeatable watering test
Choose a time when the floor has dried and recent rain is not affecting the area. Begin with the normal watering routine, not an extra pour intended to flood the floor. Test one area or watering zone at a time, using the same method, duration and quantity on each repeat. If an automatic line is involved, observe it during its usual cycle and note any visible leak or overflow. Keep the starting conditions as similar as you can; if rain or a changed watering pattern affects a repeat, label it as a different test rather than treating the result as a repair.
Before starting, record when the surface was last wet, which plant or zone is watered, the approximate amount or duration, and whether water comes from a hand-held hose, a line or container drainage. Photograph the first wet mark, then take another image as the route develops and after watering stops. Note when it clears or whether it remains, using the same viewpoint for each test. For a proposed Limited Edition aluminium greenhouse, label the test area on the site plan so you can relate the wet marks to the intended footprint.
Read the puddle's position and timing
Look first at where the wet mark starts, then at its shape. A puddle directly under a pot or at the end of a hose suggests a local source; a thin trail following a paving joint, threshold or bed edge points to a route worth tracing. Several puddles appearing in a line may share a low route, while one isolated patch may be a floor depression or a single spill. These patterns cannot confirm a defect on their own. Check whether marks line up with a seam, doorway or change in floor material. If a bench or small, movable item hides the floor, photograph the area and note what was in the way before shifting it.
Record the order in which wet areas appear: while a particular zone is watered, after a tray empties, or only once the wider floor is wet. That sequence can distinguish a repeated source from a route that carries water only after more has been applied. For a proposed T-Model Orangery Greenhouse, compare the sequence of wet marks with the perimeter shown on the model-specific drawing. Describe whether water crosses the intended boundary or collects within it, and mark any nearby surface that the visible trail follows.

Check hoses, irrigation and containers
Check the water-delivery points before changing the floor. Look over visible hose joins, tap connections and irrigation lines while they are being used normally; note drips, loose connections, damaged sections or water emerging at a different point. Check pot saucers, propagation trays and bed edges for overflow, as excess may run down supports or under a bench before reaching the floor. If the puddle follows a watering session, switch off one zone at a time on a later, comparable test to see whether the wet patch stops when that source is absent. If the floor is already wet before watering begins, record that as a separate condition.
Where the source is a hose aimed at a walkway or a tray spilling onto the floor, a small reversible change can help confirm it: adjust the hose position or empty the tray, then repeat the same test and compare. Change only one thing at a time; otherwise you will not know which change affected the result. If the puddle moves rather than disappears, update the arrows on your plan. Do not cut watering across all plants just to make the floor look dry, as that can hide the underlying issue. When planning the internal arrangement for a Pyramid Greenhouse, mark intended watering points and containers rather than inferring drainage features from the model name.
Inspect the floor and its edges
Floor material changes what a wet patch can tell you. Bare or compacted soil may absorb water unevenly; gravel can hold water between stones while the layer below remains unclear; paving may shed water towards a joint or edge; a continuous hard floor leaves more of the route visible. These are observations, not a reason to choose a particular surface. Note where materials meet, whether soil has become compacted, and whether the same patch returns after drying. If water disappears below gravel, that does not prove it has reached a suitable outlet; watch whether dampness reappears at an edge.
Pay particular attention to the floor-to-wall and floor-to-base junctions, door threshold, and transitions from a bed or path. Mark dampness that appears at these edges separately from a puddle formed by direct watering. Do not cut, pack or excavate beside a greenhouse base, or cover a joint with new material, simply to redirect water; that may change ground levels or conceal the route. If the model under consideration includes built-in storage, such as the Limited Edition aluminium greenhouse with storage, include the whole proposed structure on the plan, including the storage area, so the floor boundary is clear.
Check outlets and their discharge points
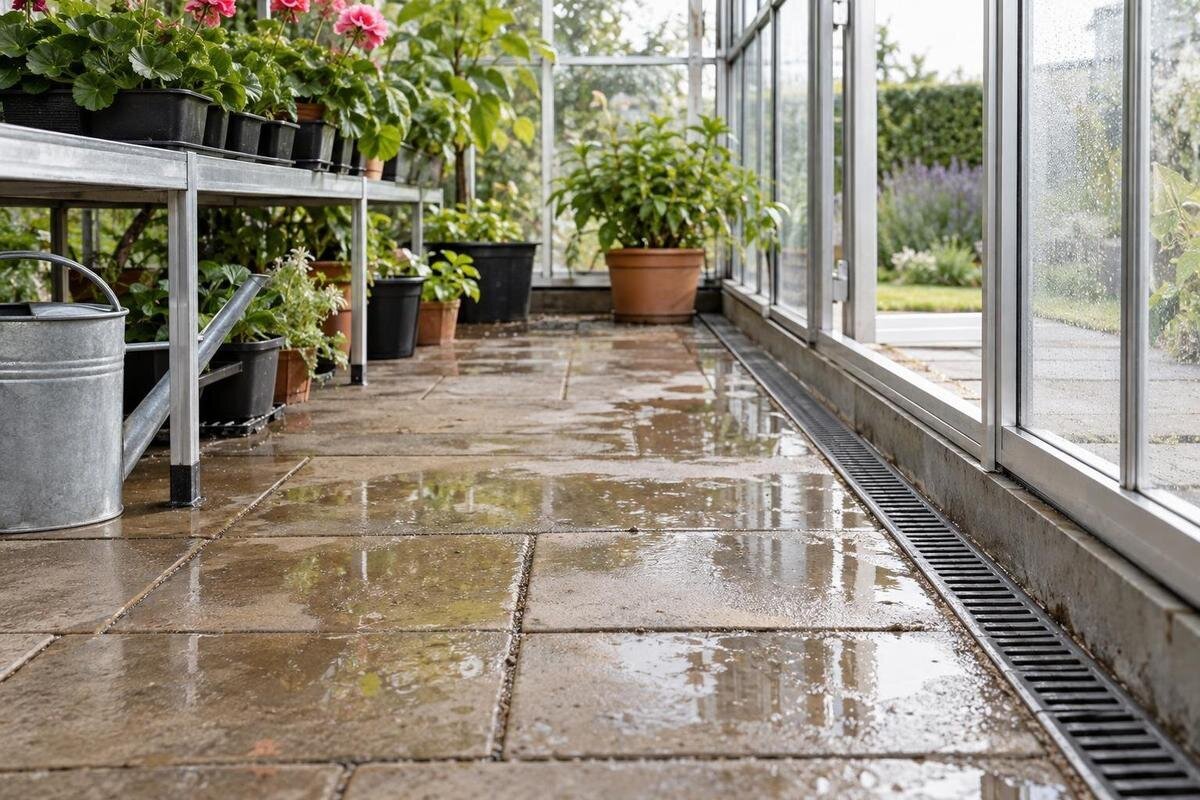
Where there is a visible floor drain, channel or outlet, record when water reaches it and whether it continues to clear. Check the opening for loose, visible debris only if it is safe and accessible to remove without dismantling anything. An open grate does not tell you whether the pipe beyond is clear or where it discharges. If the route disappears below the floor, note the last visible point rather than probing it. Avoid pouring cleaning chemicals or pushing a tool into a hidden drain; either could make the issue harder to assess or damage a line. Describe the result simply as clearing, slow or backing up.
Trace the outlet as far as you can see, including its discharge point, and watch whether water backs up, spills around the grate or returns after rain. A drain may accept water at the floor and still release it into a place where it collects, so the receiving point matters too. If flow is slow, the route is concealed, water backs up, or the outlet sits beside the greenhouse base, ask a qualified drainage professional to investigate. For a Prestige Greenhouse, include the exact model and base description in your notes so the reviewer can identify the structure and compare its base with the outlet's position.
Compare watering with rain and outside run-off
Include outside ground in the investigation. Look for water travelling from adjoining paving, a garden bed, a hose left running, an overflow point or a downpipe if one is present. Note whether the ground outside appears to fall towards the greenhouse, but do not judge a drainage design from appearance alone. Compare the same marked locations during watering-only conditions and after rain. Keep the greenhouse floor and outside garden as separate zones on the diagram so an entry point is not mistaken for an internal outlet problem. Photograph visible routes while they are wet, before they disappear.
Roof water, watering run-off and surface run-on can merge once they reach the same corner, so follow each route back to its first visible source. If water arrives at a doorway or edge only during rain, share that pattern with a drainage or groundwork specialist before adding a channel or changing levels. Do not send water towards another structure or neighbouring land as a quick fix. For a proposed Spacious Greenhouse, show the selected footprint, surrounding hard surfaces and observed water routes on the same plan. Distinguish water coming towards the structure from water leaving it. Mark gutters or downpipes only where they are actually present.

Match any remedy to the source
Match a remedy to the evidence. A leak at a hose or line calls for attention to that water source; a tray overflowing onto the floor can be tested by emptying or repositioning it; surface run-on or an outlet that backs up needs an assessment of the route beyond the greenhouse. A damp seam alone is not enough to justify sealing, digging or adding fill. Repeat your ordinary watering test after any small, reversible change and see whether the same patch returns. Brief dampness after watering and recurring standing water are different observations, but there is no single waiting time that diagnoses every floor.
Bring in a qualified drainage or groundwork professional if the source is hidden, water returns despite the source being removed, an outlet backs up, or the wet area is at the base or foundation. Seek a review before excavation, changing the slope, adding a drain, redirecting discharge or altering any part of the greenhouse base. Give the reviewer the marked plan, test notes, photographs, rainfall comparison and exact model information. Ask them to explain which route they are assessing and what work falls within their scope; a generic base detail or gardening fix is not a substitute for site-specific review.
Use the right foundation drawing for the selected model
Foundation drawings are useful when the greenhouse or its floor is still being planned, but use the one for the exact model and selected size. A drawing may show the frame or base outline; do not assume that it also maps paving joints, irrigation, floor drains or the destination of external water. Mark the base perimeter against your site plan and identify the floor finish, threshold and known services separately. If a dimension or reference is unclear, ask the supplier or installer to identify the correct drawing rather than scaling a picture or guessing from a product photograph. The Aluminium Classic Greenhouse page identifies a product family; use the manufacturer drawing for the proposed installation.
Before hard surfaces are finished or an installation begins, give the installer the marked water-flow plan and show where the watering test was carried out. Ask who is confirming the connection between the greenhouse base, floor level, any drainage outlet and surrounding ground, and whether the plan reflects the route you observed. Photograph existing surfaces and outlets while they remain visible, especially if later work could cover them. Keep unknowns labelled as unknown, and confirm that the drawing and site plan refer to the same model and size. A clear handover does not replace qualified design, but it lets a reviewer see the source, route, collection point and location that need a decision.
Frequently asked questions
Why does water pool in one spot when I have watered elsewhere?
Water may be running from a hose, pot or bed, following a floor joint to a low spot, or entering from outside. Trace back from the pool rather than assuming it is the source. Note when the mark appears and repeat the same watering pattern after the floor has dried.
How can I test drainage without flooding the greenhouse?
Use your normal watering routine on one zone at a time; do not pour extra water to force the floor to flood. Keep the method, amount and starting point consistent, then note where the first wet mark appears and how it moves. Repeat under comparable conditions, after the floor has dried and without recent rain.
Will adding gravel solve the puddle?
Not necessarily. Loose gravel may hide a wet patch or change the surface without resolving an incoming flow, a low spot or an outlet that is not clearing. It can also make the water route harder to see. Record the problem first and get qualified advice before changing levels beside the base.
What if puddles appear after rain as well as after watering?
Compare the marked floor after watering, after rain and when neither has occurred. If the patch follows rain, look for visible outside routes such as a downpipe discharge, paving or water entering at an edge. If the route is hidden or keeps recurring, ask a drainage or groundwork professional to assess it before digging or redirecting water.
Does a greenhouse product page tell me how to drain the site?
Use the page to identify the model, not as a substitute for site-specific drainage information. Request the manufacturer drawing for the exact model and chosen size, then give it to the installer or qualified groundwork reviewer with your plan, photos and watering-test notes. The drawing and observed site conditions answer different questions.
Once the route is visible, the next decision is clearer: correct a local watering source, investigate an outlet, or have incoming surface water and the base reviewed. Keep the diagram, repeatable test notes and model-specific drawing together so an installer or qualified drainage professional can work from what actually happens on site, rather than from the puddle alone. A sound diagnosis is more useful than covering the wet patch before its cause is known.
