
Self-Watering Containers in a Greenhouse: What to Check
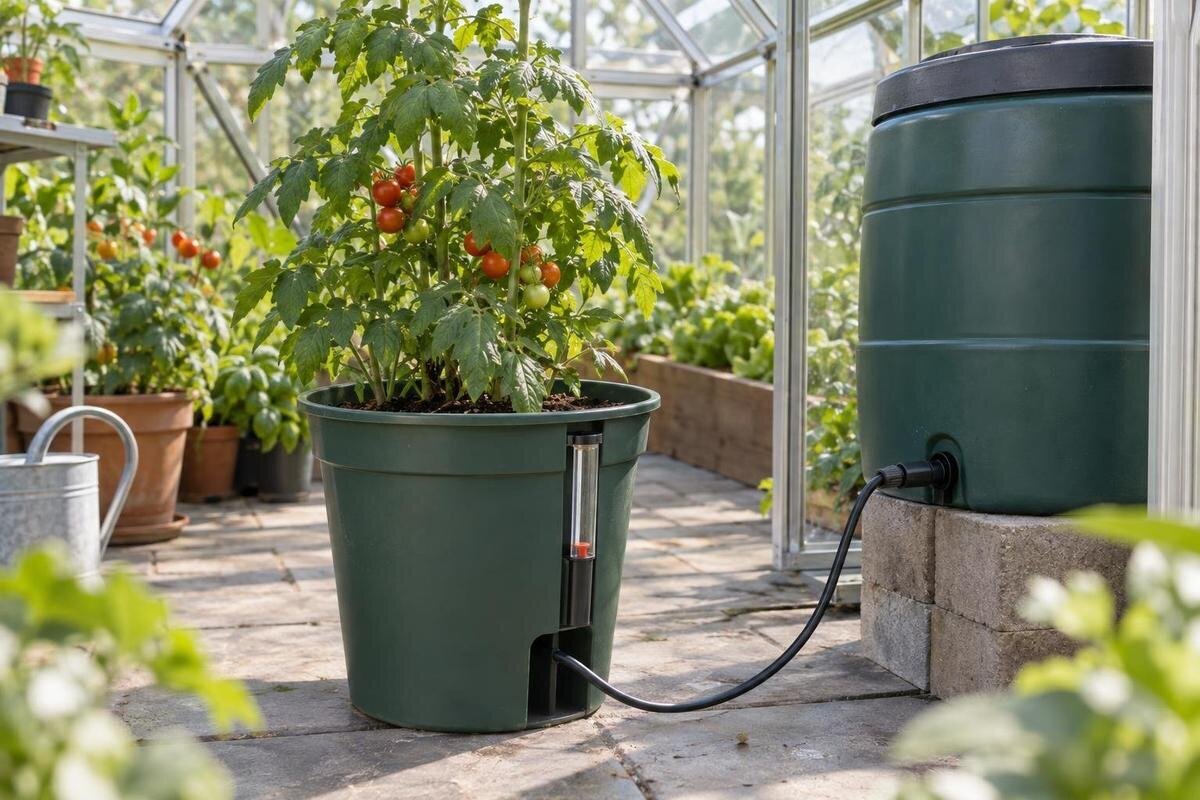
Greenhouse watering
Self-watering containers can make watering less frequent, but the label covers several designs. Some hold water below the potting mix and draw it up through a wick or capillary path; others use a separate reservoir. In a greenhouse, warmth, ventilation and crop growth can change how quickly that supply is used. On paving, the extra issue is where water goes when a reservoir is overfilled or water leaves its overflow outlet. Check the water path, refill access, drainage and root-zone moisture together before committing to a row of pots.

Before you choose a container 1
How self-watering containers deliver water
A self-watering container is not simply a pot with extra water stored underneath. In a common reservoir design, water sits beneath or beside the growing medium and reaches it through a wick, a column of mix or another capillary path. Some models keep the reservoir inside the pot; others use a separate chamber. Read the diagram rather than relying on the product name: identify the reservoir, fill opening, route into the root zone, overflow outlet and any water-level indicator. Check whether the drawing shows a barrier or air gap between water and mix, and which part contacts the water. The instructions should also explain how to assemble the container and how it must sit.
The reservoir is a supply, not a guarantee that the plant will take up only what it needs. The surface can look dry while the lower mix remains wet, or the roots can be poorly supplied if the medium does not make the intended contact with the water. A larger reservoir also does not promise a fixed number of days between refills: plant size, crop stage, pot size and greenhouse conditions all affect use. Some designs call for initial or occasional watering from above; others specify filling through a port, so follow the particular instructions. Treat self-watering as a delivery method that still needs observation. A gauge may show stored water, not root-zone moisture, so check what its markings represent.
Map container positions on the paved floor
Draw the usable floor area before choosing container sizes. Mark the door opening, regular walking route, benches, plant supports, ventilation access and any existing drains; then place containers so you can reach each fill point without stepping over plants. Include room for mature foliage and for a pot to be moved for inspection: a row that fits on paper can become awkward as plants grow. A greenhouse’s total area is not the same as clear floor space. The Classic aluminium greenhouse range is listed from 3.77 m² to 28.08 m², but the exact model and its fittings determine the practical layout. Use the plan for the greenhouse you select, not the category area alone.
Check the paving at the proposed positions. Loose or rocking pavers, uneven spots and a fall towards a doorway can affect stability and where a spill travels. A filled reservoir and wet potting mix add weight, so choose a stable, level support suited to the container and floor; avoid placing pots over a drain or where they obstruct access. Check that feet, a stand or a tray can sit securely without covering drain channels. Do not assume gaps between pavers will carry overflow away. If the floor is part of a suspended or otherwise uncertain structure, ask an appropriate building professional about its capacity rather than estimating from the pot’s empty weight.
Before you choose a container 2
Match reservoir capacity to your routine
Compare reservoir volume with the container’s usable growing volume and the likely demand of the crop. Capacity describes how much water can be held, not how long it will last. A vigorous plant in a warm, well-ventilated greenhouse may use water at a different rate from a young plant in a cooler period; one figure on a box cannot settle that. Ask whether the stated capacity is the usable fill volume or the nominal size of a separate tank, and where the refill limit sits. The Spacious Greenhouse range is listed from 47 to 70 m², useful as broad context when planning how many pots to manage, but greenhouse floor area says nothing about an individual container’s refill interval.
Choose a size you can monitor and refill comfortably. Think through your normal routine: can you top up during a warm spell or while several crops are fruiting? Consider how much water you would need to carry to refill the whole group, rather than judging each pot in isolation. A larger reservoir may reduce how often you carry water, but it can hold more than a small plant is likely to use in one stretch. Match the reservoir to the container and your care routine rather than buying by volume alone. If you plan to fill pots from a tank or hose, verify that the container is designed for that method. Do not treat a reservoir as unattended irrigation unless the complete setup is documented for it.
Keep every refill point accessible
Check the refill opening at the height and position the container will occupy. A fill tube that is easy to reach on an empty display may end up behind foliage or a bench; allow room for a jug, hose end or specified filling tool without leaning across fragile stems. Note whether the container has a gauge, removable cover or removable reservoir, and whether you can inspect it while the pot remains in place. Check that the indicator will still be visible once plants grow. The aluminium lean-to greenhouse range is listed from 3.69 to 14.34 m²; whichever greenhouse footprint you compare, draw the aisle and fill points into its actual layout.
Consider what a full container weighs and whether it can be moved for cleaning. If maintenance requires moving it, find out whether the reservoir can be emptied or removed first; do not plan on shifting a filled pot as part of the routine. If you intend to use a hose, check whether the maker permits that filling method and whether you can stop the flow cleanly without spilling. A plain fill opening does not establish that a container can connect to a pressurised supply. Try the refill motion from a safe standing position and avoid routes that turn a hose into a trip obstacle or leave the opening blocked by stored tools.

Before you choose a container 3
Plan for overflow and spills
Find out how the reservoir handles excess water. Some containers have an overflow outlet; others may not, and the outlet’s position matters as much as its presence. Check the instructions for what level triggers overflow, where it discharges and whether a saucer, stand or shelf would block it. Ask how any plug or removable part should be positioned during normal use. The Prestige Greenhouse with Metal Base range is listed from 3.77 to 28.08 m²; a greenhouse’s named base does not tell you how a separate planter’s overflow will behave, so map that route independently. Follow the maker’s filling instructions rather than pouring water until the pot spills.
On paving, excess water may remain on the surface or run towards a low point instead of soaking into a garden bed. Plan a clear route to a suitable drain, away from door thresholds and places where people stand; confirm that existing floor drainage can accept the discharge rather than assuming it can. A catch tray may help contain drips only if it does not cover the outlet, and it still needs emptying before it fills. Water running under a neighbouring pot can be easy to miss, so inspect the area around the container after supervised fills. If there is no suitable route for excess water, resolve that before regular use. Wipe up spills promptly, as a wet paved floor can be slippery.
Check for excess moisture around roots
Roots need an appropriate balance of moisture and air, so a reservoir that stays full is not automatically better. If the lower mix remains saturated, the container may be unsuitable for the crop, the medium may not match its design, or the refill routine may be too frequent. Ask whether the design keeps a gap between stored water and the root zone or uses a wick or mix column, and whether the mix must make direct contact with a particular part. The Limited Edition aluminium greenhouse range is listed from 3.77 to 28.08 m²; when planning a greenhouse floor, group containers by crop needs rather than assuming one watering setup suits every pot.
Check moisture where roots are growing, not only at the surface. A dry-looking top layer does not by itself show that the whole pot needs water, and wilting can have more than one cause. During a trial, compare the reservoir level with the mix at different depths and with the plant’s appearance. Stop topping up if the root zone is staying too wet and revisit the container instructions. Give plants with different moisture preferences separate containers or groups when that makes monitoring easier. Persistent wetness, an unpleasant smell or declining growth is a reason to inspect the drainage and root conditions before adding more water.
Before you choose a container 4
Choose a compatible potting mix and feeding method
Use a growing medium that the container maker says works with its water path. Mix texture affects how water moves and how much air stays around roots; a blend that wicks poorly or stays dense can undermine the design, even if the reservoir is easy to fill. Do not assume garden soil or a homemade mix will behave like a packaged container mix. Ask whether the instructions specify a type of medium or require particular placement around a wick. The Oasis Pyramid Greenhouse range is listed from 5.53 m² to 18.9 m²; when drawing crop groups into any greenhouse plan, leave a way to manage plants with different moisture needs separately.
Check how the container is intended to be fertilised rather than assuming feed should go into the reservoir. Read both the container instructions and the fertiliser label before adding feed to stored water, and use only a method approved for the system. Refilling can leave mineral or fertiliser residues in some setups; visible deposits are a reason to consult the cleaning guidance, not to improvise a chemical treatment. Keep a note of what you add and where. If you change the medium or feeding routine, reassess moisture rather than assuming the previous refill pattern will continue. If the instructions are unclear about adding nutrients to the reservoir, ask the maker before doing so.
Manage pots with different water needs
Several pots can look like one watering job, but their reservoirs and roots may not behave alike. Group plants with similar water needs and comparable container sizes where practical; keep a label or simple record of which pot was filled and when. Avoid assuming that pots filled from the same source will run out together. The T-Model Orangery Greenhouse range is listed from 16.52 to 30 m²; use the chosen greenhouse plan to map groups and refill access rather than turning an area figure into a pot count. Allow space to reach the plants behind a group as well as the front row.
If containers are advertised as linked to a shared tank or to one another, ask for a diagram showing how each reservoir is supplied and where every overflow goes. Check whether levels are controlled individually and what happens if an outlet is blocked; a common supply does not, by itself, prove even moisture at every root zone. For a line-fed arrangement, ask for actual flow information and verified compatibility for the complete system. Keep a manual check in your routine until you know how the connected pots behave with your crops. If one plant needs a different refill pattern, it may be easier to monitor it separately than to change the routine for every container.

Before you choose a container 5
Trial one container before buying a group
Set up one container in the position it will occupy before buying a matching set. Assemble and fill it exactly as directed, check that the inlet is reachable and the outlet unobstructed, then observe the water level and root-zone moisture as the plant establishes. Record top-ups and changes in greenhouse conditions; a short test cannot predict every season, but it can reveal awkward filling, leaks, floor pooling or a mismatch between the medium and reservoir. Use a representative plant and potting mix rather than testing an empty container only. Check the floor beneath and around it after filling, not just the inside of the pot.
Ask about the assembled footprint, reservoir capacity, overflow location, cleaning access and any parts that may need replacing before ordering several. The Limited Edition greenhouse with built-in storage is listed from 5.52 to 28.08 m²; if storage is part of your greenhouse plan, mark that area separately from the working space and make sure containers remain accessible. An overall area listing cannot show where each planter will fit. Check the actual plan and leave room to refill, clean and move around the containers. Confirm what can be inspected without dismantling the pot, so routine maintenance will not become a reason to neglect it.
Inspect and clean the system over time
Make inspection part of normal greenhouse care. Check reservoir levels at intervals that suit the plants and conditions, look for leaks or blocked outlets, and make sure trays or stands have not shifted over drains. Reassess after changes in temperature, ventilation, plant size or crop load: a schedule that worked for young plants may not suit mature ones. Use your refill notes to compare current water use with the pattern you observed during the trial. If a reservoir starts emptying unexpectedly quickly, inspect the container and surrounding floor rather than automatically increasing refills. Check around neighbouring pots too, where a slow leak or spill may be less visible.
Clean the reservoir and water path in the manner specified by the manufacturer, including when changing crops or potting mix. Check that any cleaning product or method is approved for the container and its materials; do not assume a household chemical is suitable. If algae, deposits or an odour appear, look for the source and consult the maker’s guidance before treating the water or parts. After maintenance, refill according to the instructions and recheck the floor, overflow route and root-zone moisture. A quick check after each refill also helps catch a shifted tray or a newly blocked outlet before it becomes a recurring problem.
Frequently asked questions
Will self-watering containers work on a paved greenhouse floor?
They can, provided each container sits securely and any overflow has a managed route. Paving does not automatically absorb spills, so check the actual fall and drains, keep outlets clear and prevent water pooling where you walk. Follow the container instructions about trays or supports.
Can I leave a reservoir to water plants while I’m away?
Do not rely on the self-watering label alone. Reservoir capacity does not predict how long water will last, and crop demand changes with growth and greenhouse conditions. Trial the container with the intended plant and mix, check the gauge and overflow behaviour, and arrange a reliable check if your planned absence is longer than the period you have tested.
Do I need to water from the top as well?
It depends on the design and the plant’s stage of growth. Some instructions call for initial or occasional top watering; others specify filling through a port. Follow the particular instructions and check moisture in the root zone instead of assuming a dry-looking surface means the reservoir has failed.
Can every crop use a self-watering pot?
No single reservoir design suits every crop. Choose plants whose moisture needs align with the container and growing medium, and keep plants with different watering routines separate where practical. During a trial, watch how the root zone responds, especially if the mix stays wet between refills.
Should a saucer or tray sit underneath the container?
Only if it is compatible with the outlet and does not obstruct an overflow route. A tray can catch drips, but it can also hide a leak or collect water. Check it after filling and empty it before excess reaches the paved walking area.
The right container is one whose fill and overflow points suit your paved layout and whose water path matches the crop’s moisture needs. Read the diagram and medium instructions, then trial a single pot in its final position. Watching both the reservoir level and moisture around the roots will show whether the design and your routine work together before you add more containers.
