
Using a Greenhouse to Start Plants for Outdoor Raised Garden Beds
Greenhouse growing guide
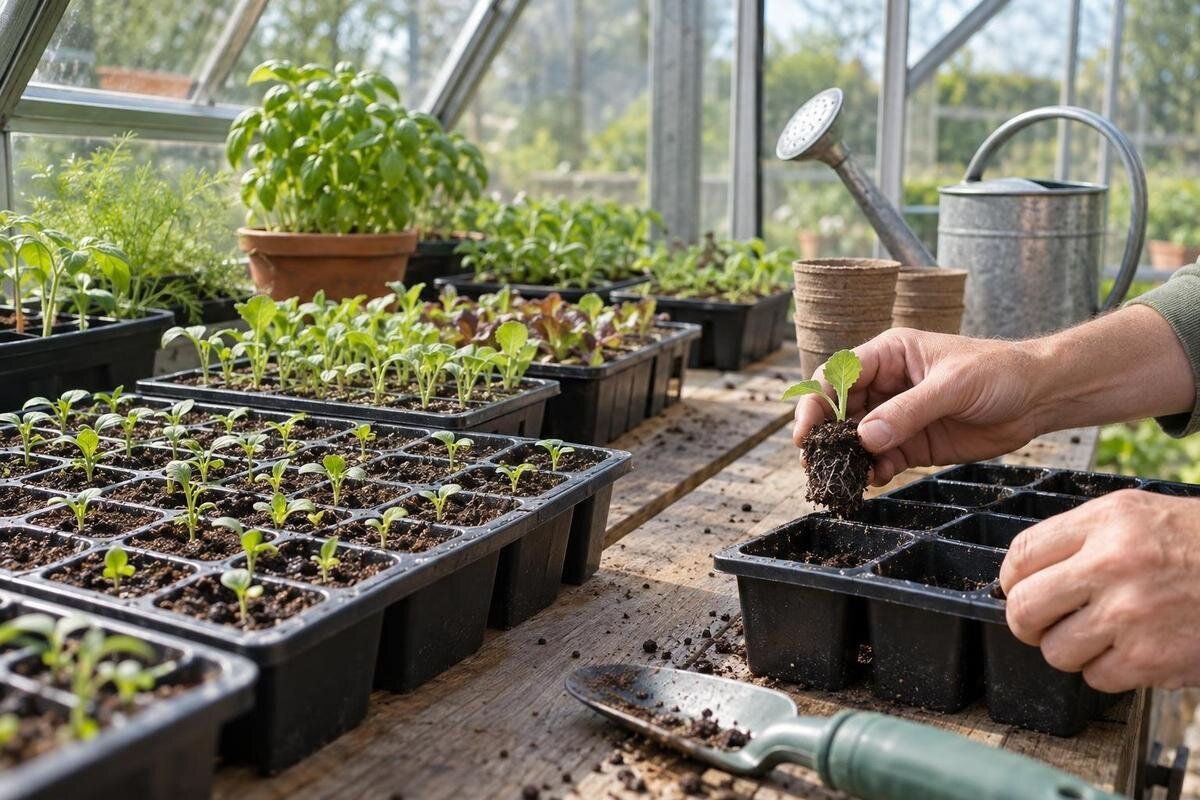
A greenhouse can be a useful nursery for vegetables, herbs and flowers that are suited to transplanting into outdoor raised garden beds. Its role is to give you a manageable place for sowing, germination and early growth, then support a well-timed handover. The plan works best when you decide where each batch will go before sowing: greenhouse space, bed preparation, crop-specific timing and gradual acclimatisation all need to line up.

01
A temporary nursery for outdoor crops
Keep the purpose of the greenhouse clear: it is where you raise young plants, while the raised beds are where they will spend most of their growing time. That distinction affects what belongs under cover. A batch that can move outside soon may need bench space only temporarily; a crop with a longer nursery phase occupies it for longer. Light and shelter may help you manage early growth, but they do not guarantee suitable conditions or remove seasonal limits. A greenhouse is not automatically warm and stable, and it is not a substitute for outdoor planting space. You are planning a transfer, not a permanent indoor crop cycle.
Before sowing, note the intended bed, the approximate position within it and any neighbouring crops or supports that could affect access. Check that the crop is suitable for transplanting; some plants are better sown directly where they are to grow, and moving roots may set them back. Use crop-specific sowing guidance to confirm the recommended method and transplant stage. Treat the greenhouse as one part of the growing plan, not a way to force every crop into an earlier or longer season. Its value lies in coordinating a healthy start with a prepared outdoor destination.
Work backwards from an outdoor planting window
Choose a likely period when the bed will be available, then work backwards using the crop’s sowing and transplant guidance. The intended move depends on more than the calendar: seedling stage, current weather, bed moisture and the condition of its growing medium all matter. A raised bed is not automatically ready earlier simply because it sits above ground; check the actual soil or bed mix and the expected conditions for that crop. Local forecasts and your garden’s exposure help refine the plan, especially if the site is windy, shaded or slow to drain. Keep a margin for a change in weather or a delayed bed clearance rather than relying on one exact date.
Prepare the bed before you fill the greenhouse with seedlings. Clear old growth, complete any needed soil preparation, arrange supports if the crop needs them and leave the access you need for watering and harvest. Follow crop-specific guidance on spacing and soil conditions rather than guessing from the size of a seedling tray. If another crop still occupies the bed, allow time for it to finish and for you to prepare the space; seedlings ready to plant need somewhere to go. Keep dates as workable windows and adjust sowing when weather or bed plans shift. This check prevents the nursery schedule from getting ahead of the garden.
02
Match each sowing batch to the beds you can fill
Sketch the bed positions and count how many plants fit at the recommended spacing before sowing a full tray. Allow for access, crop supports and neighbouring plants that need room. Label each batch with its variety and intended bed, not just the sowing date. A succession of smaller sowings can spread transplant work and avoid a flush of seedlings reaching planting size at once; it also lets you change later batches if a bed is delayed. Avoid sowing extra simply because a packet or tray has spare cells, since surplus plants still use water, attention and bench space and may be kept too long.
That count links greenhouse footprint to bed capacity: you need space for trays and room to reach, label and water them, but little value comes from a large propagation run the outdoor beds cannot absorb. The Pyramid Greenhouse listing spans variants from 5.53 m² to 18.9 m²; use the stated area as a first comparison, then confirm the chosen layout against actual tray sizes, bench positions and a clear working route. Product floor area is not a count of usable seedling positions, so base your plan on surfaces you can actually reach. Allow for the equipment you already own and space to carry a tray out without navigating a crowded aisle.
Calculate nursery capacity from trays and turnaround
Measure the trays, pots and working surfaces you expect to use, then estimate how many batches will overlap at their peak. Include newly sown cells, seedlings that need more room and plants waiting for a suitable outdoor window. A bench that holds one full tray on paper can still be awkward if you cannot reach behind it, read labels or lift the tray out without disturbing others. Keep some surface free for sorting and staging; sketch the proposed layout to scale or mark it out before settling on a capacity. Count only surfaces that will remain accessible during everyday watering.
Separate growing area from storage when comparing layouts. Seed packets, labels and hand tools need an accessible home, but a storage compartment should not be counted as seedling bench space. The Limited Edition Aluminium Greenhouses with Storage listing identifies built-in storage; inspect the plan for your exact variant and check what remains for trays and access rather than assuming storage adds growing capacity. Decide whether you also want temporary staging near the door or a potting surface, as those uses can compete with nursery benches. Keeping this distinction on your sketch makes the required footprint clearer and helps prevent occasional-use items from taking over the growing area.

03
Check the chosen greenhouse model and site plan
Once you know the tray count, compare an exact greenhouse variant rather than relying on a product-family name or the smallest and largest figures in a range. Check the listed external dimensions, floor area, door position, openings, base details and any benching you expect to add; these may differ between sizes or configurations. Draw the structure and the route to the beds to scale, including fences, walls, water points and other fixed obstacles. This prevents a decision based on total area alone, which can conceal an awkward working path or a tray layout that will not fit as pictured. Use the product drawing, not an imagined generic shape.
The Bloomcabin Prestige Greenhouse page lists variants from 3.77 m² to 28.08 m² and identifies a model with a metal base. Use that information as a starting point: confirm the exact variant’s supplied components, site requirements and layout in its current product documentation. If you are unsure about the site, base or structure, ask a suitably qualified installer or other relevant professional rather than guessing. Settle the configuration and its fit on your site before using bench dimensions to finalise seed numbers; a revised layout can change what you can raise.
Decide whether the nursery shares space with other plants
If the greenhouse also contains established plants, potting supplies or equipment, plan how seedling trays fit alongside them. Mature foliage can shade small starts, while carrying cans, pots or harvest containers through a crowded bench area can knock trays. Give nursery batches visible labels and group them by intended outdoor bed. Avoid mixing new sowings with plants you are monitoring for problems; separation makes inspection easier and reduces unnecessary handling. A clean, uncluttered corner can help you notice changes in a batch, but it does not replace routine checks or crop-specific pest guidance.
A dedicated propagation zone can make counting and watering easier, but size it for the batches that will actually overlap, not the biggest batch you can imagine. For a larger-scale comparison, the Spacious Greenhouse product page lists variants from 47 to 70 m². On the selected plan, mark separate places for seedling trays, established plants and supplies, then trace the route between them. Check whether tending established plants would mean reaching across or moving the seedlings. For a seasonal nursery, also decide how you would use and organise that space outside the busiest period. Extra room should serve the work you expect to do throughout the year.
04
Manage light, temperature and airflow around the trays
Conditions inside a greenhouse can change quickly: a sunny spell may raise the temperature, while nights can be cooler. Use a thermometer at seedling height and observe the conditions where trays sit rather than relying on a reading elsewhere in the garden. Place trays so each crop receives suitable light; crowded shelves or taller plants can shade smaller seedlings. Rotate trays if one side repeatedly receives less light, and use species-specific guidance to judge whether shade or supplementary light is appropriate. Clear panels do not deliver uniform light to every corner at every time of day, especially as the sun moves and outdoor conditions change.
Air movement and access matter as much as tray count. Follow the greenhouse maker’s ventilation instructions, avoid packing every bench edge-to-edge and watch for persistent dampness or stretched growth; these can be clues that the arrangement needs adjusting. When comparing the Aluminium Greenhouses range, listed in variants from 3.77 m² to 28.08 m², consider how you would manage the trays in each proposed layout. Check access to openings as well as to the plants themselves. Leave room to inspect leaves and remove one tray without shifting an entire row, so routine checks remain practical when the benches are at their busiest.
Harden seedlings off before planting them outside
A plant raised under greenhouse conditions is not automatically ready for outdoor sun, wind and temperature changes. Harden it off by introducing those conditions progressively, following the crop’s needs and the forecast. Begin in a sheltered spot and build exposure gradually; avoid placing tender plants straight into harsh sun or a windy position after they have been protected. Keep the growing medium from drying out during the transition, but do not leave trays waterlogged. The suitable pace varies with the crop, recent growing conditions and the weather, so watch plant response rather than treating a fixed number of days as a universal rule.
Plan the physical move as well as the acclimatisation. A clear route from the greenhouse to the bed, somewhere to set trays down and a way to shelter them temporarily can reduce handling and delays. If considering the Wall Greenhouse range, its listed variants run from 3.69 m² to 14.34 m²; use the exact variant’s drawings and your site measurements to check access to the outdoor beds and any wall or site constraints. Include the temporary hardening-off area in this plan, rather than measuring only the greenhouse footprint. Plants need somewhere to stand during the transition without blocking the path you will use to carry other trays.

05
Transplant into a prepared bed and monitor the first days
Move plants when they have reached the crop-appropriate stage, the bed is ready and the forecast offers a suitable planting window. Handle seedlings gently, supporting the growing medium around the roots, and follow the crop’s recommended planting depth and spacing rather than applying one rule to every tray. Water as directed for that crop and label the variety, date and bed. Avoid transplanting during harsh conditions where possible; the first adjustment outdoors is easier when young plants are not also facing avoidable stress. If a start is weak or damaged, assess it before mixing it with the rest of the batch. A short note can connect later growth with conditions at planting time.
Once plants leave, clear spilled mix and dead foliage, then check the remaining seedlings and prepare the bench space needed for the next sowing. Plan this turnover alongside the outdoor planting schedule: if spring is the busiest period, estimate which batches will overlap and how long each will occupy the benches. The Limited Edition Aluminium Greenhouses page lists variants from 3.77 m² to 28.08 m². Compare an exact variant with that sequence, marking where incoming sowings and departing trays would sit during the busiest changeover. This gives you a more useful layout to assess than one drawn only for newly sown trays or for benches that are about to empty.
Record each handover to improve next season’s plan
Record the crop and variety, sowing date, tray or pot used, greenhouse position, notable conditions, when seedlings were ready, when they went outside and how they settled in. Note whether the bed was available on time and whether you had surplus or too few starts. These notes need not be elaborate: a short record for each batch makes an early or late handover easier to explain later. Distinguish what you observed from what you think caused it; one season is a clue, not proof that a single factor was responsible. Include any change you made between sowing and transplanting so you can repeat what worked.
Use those records to change one or two parts of the system next cycle: sowing batches, bench allocation, bed preparation or greenhouse footprint. If you are comparing a larger format such as the T-Model Orangery Greenhouse, its listed range is 16.52 m² to 30 m². Compare the selected variant’s plan with the problems your records identify: were trays crowded, was handling awkward, or were plants simply waiting for an occupied bed? Keep the distinction clear when deciding whether more space would help. The most useful setup gives seedlings a manageable start and leaves the outdoor beds ready to receive them. A modest correction to timing or capacity may be more useful than a larger structure.
Frequently asked questions
Do I need a greenhouse to raise seedlings for raised beds?
No. Many gardeners raise suitable transplants in another protected spot, and some crops are better direct-sown. A greenhouse is useful when it gives you conditions and a workspace you can manage, but it does not replace the right timing, crop-specific guidance or a prepared outdoor bed.
When should I move seedlings into a raised bed?
Use both the crop’s recommended transplant stage and the bed’s readiness, then check the current weather. A calendar date alone is not enough. The seedlings should have reached the stage described in the crop guidance, and the bed should have suitable conditions and enough room. Harden them off before the move.
How long does hardening off take?
There is no single duration for every crop and weather pattern. Introduce outdoor sun, wind and temperature changes gradually, often over several days, adjusting the pace to the plants’ response and the forecast. Use species-specific advice if available; do not rush a batch simply because its planned bed is free.
Can I transplant greenhouse seedlings straight outside?
Usually, avoid an abrupt change from sheltered greenhouse conditions to full outdoor exposure. Harden seedlings off progressively, choose a suitable weather window and follow crop-specific planting advice. If plants have already been growing in conditions similar to the outdoors, the transition may differ; use their recent conditions and response to guide you.
How many seeds should I sow for my beds?
Work from the bed layout and recommended spacing, then account for any plants you want as replacements and any planned succession. Sow a manageable buffer, not every spare cell by default. Record how many plants you actually use so the next batch better matches your beds and bench space.
Successful greenhouse raising is measured by the plants that establish in the beds, not by how full the benches look. Decide the outdoor destination first, sow in quantities you can plant, manage each batch for its crop, then harden off and transplant when conditions align. Keep a brief record of the handover. That feedback will make next season’s sowing dates, nursery capacity and bed preparation more realistic.
