
Create Separate Watering Zones for Pots and Beds
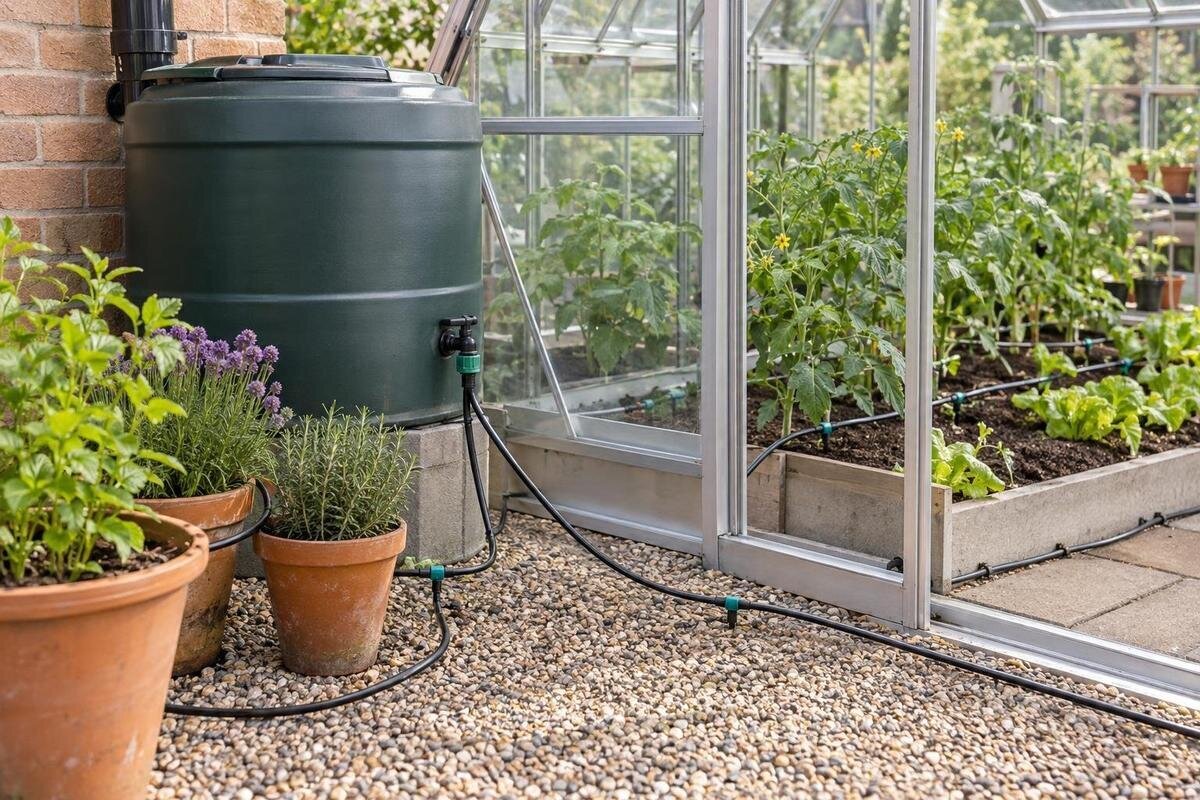
Greenhouse watering
Separate watering zones let pots and greenhouse beds follow different schedules rather than forcing every crop onto one timer setting. A container’s limited root volume may dry at a different rate from a deeper bed, while emitter output, plant size and local conditions add further variation. Group plants by how quickly their root areas dry, give each group independent control, then adjust run times using measured delivery and moisture checks.

Why pots and beds may need different schedules
Containers and greenhouse beds do not hold or release water in the same way. A pot confines roots to a limited volume of potting mix, and that volume can dry quickly when the container is small, the plant is large, the mix is free-draining, or the pot gets stronger sun and airflow. A bed has a larger, continuous soil volume and may stay moist longer, although shallow soil, crowded roots or free-draining ground can change that. The useful distinction is not simply that pots dry fast and beds stay wet; it is whether the groups need meaningfully different watering intervals or amounts.
With one shared timer setting, a short run may suit the bed but leave a small pot dry; a longer run may then keep the pots going while leaving bed soil wet for too long. Neither pattern applies to every greenhouse, because potting mix, bed soil and plant size all vary. Check below the surface where the active roots sit, in several representative locations, rather than judging by a dry-looking crust or leaf appearance alone. A zone split is useful when observations show a consistent difference, not just because plants happen to be in containers.
Group plants by their watering needs
Begin with two broad groups—pots and beds—then check whether either still contains plants with conflicting needs. A large container with an established crop may dry differently from a small pot of seedlings, even though both are containers; a shallow bed can behave differently from a deeper one. Consider root depth, plant size, potting mix or soil, spacing and where each group sits. Compare members after similar watering and note how quickly their root areas dry. Organise by observed moisture change and crop needs, not by plant labels alone.
A useful zone is one where a single setting can meet the needs of its plants without repeated hand-watering or leaving some root areas persistently too wet. Mark the groups on a simple plan and note which plants may move as crops change. Avoid creating a separate line for every pot at the outset; extra zones add controls and maintenance, so split a group only when records show a recurring difference. The Pyramid Greenhouse range is listed from 5.53 m² to 18.9 m²; your selected footprint and actual planting plan, not the model name, determine how those groups fit.
Map the growing areas and irrigation routes
Sketch the greenhouse footprint and mark bed edges, pot clusters, the water source, the timer location and likely main and branch routes. Give each proposed zone a name and trace its route separately, so you can see which outlets belong to which control. Count the plant positions and note the farthest outlet on each branch, rather than recording only a total for the greenhouse. Mark where a line changes direction, crosses a path or reaches a movable pot bench. This makes the plan useful when discussing equipment, as well as when checking the finished layout. Include the space needed to reach pots and tend beds: a route that looks short on paper may obstruct everyday access. Also mark likely planting changes, such as a future bed or a larger pot cluster. You can then distinguish the layout needed now from possible additions, without treating every spare corner as part of the initial watering zone.
Keep connectors and any points that need inspection accessible, and leave room to work around plants. Check the greenhouse instructions before planning how to attach or route equipment; do not assume its structure includes irrigation fittings. The Limited Edition Aluminium Greenhouse with Built-In Storage range covers configurations from 5.52 m² to 28.08 m², so use the chosen footprint when mapping routes. The storage feature itself should not be treated as a water source or an irrigation specification.
Choose controls that run each zone independently
A watering zone is a group the controller can start and stop independently, not just a separate length of pipe. If two branches receive water together from one timed outlet, they share a schedule even if they have different lines. Choose a timer or controller with independently controlled outlets, or a compatible valve arrangement designed to provide separate timing. Check the instructions: a two-way splitter may divide a line, but it does not by itself provide separate start times or run lengths. Write down what each group needs the controller to do before comparing controls. For example, can you change the interval between watering runs for the pots without changing the bed schedule? Can you alter one zone’s run length while leaving the other unchanged? These are more useful questions than simply counting outlets. Two zones might occasionally have matching settings; the important distinction is that you can adjust them separately when their watering needs diverge.
Before choosing equipment, count the independent schedules you need and check the maker’s stated pressure, flow and connection requirements against your water source and emitters. A tank-fed setup may behave differently from a pressurised supply, so do not assume that a timer or dripper suits both. The Prestige Greenhouse range is listed in footprints from 3.77 m² to 28.08 m², but floor area alone does not set the number of schedules. Use the actual bed and pot map, then confirm that the proposed controls can operate the planned zones.

Match emitters and lines to each growing area
Different emitters can deliver different amounts of water over the same run time. For pots, the number and position of outlets need to suit the containers and their plants; for beds, line placement needs to relate to the crop rows and the soil to be wetted. Do not assume that identical tubing, or the same number of outlets, will give every area the same amount. Check the component maker’s specifications and arrange delivery to reach the active root area rather than a path or empty section of a bed.
Consider the line, emitter, filtration and pressure requirements together, particularly if a zone has many outlets or a long route. The Spacious Greenhouse listing includes configurations from 47 m² to 70 m², but those floor-area figures do not show how many emitters a line can serve or what pressure reaches its far end. Confirm the proposed setup’s capacity with the irrigation supplier or a qualified installer, using the actual layout and the system’s stated requirements. Do not infer irrigation performance from greenhouse size.
Measure delivery before setting run times
Calibrate each zone under the conditions in which it will normally run. Collect water from several representative outlets—for example, near the source, midway along a line and at the far end—over the same measured interval. Compare the amounts. A marked difference can point to a blockage, pressure or layout issue; simply extending the run could overwater outlets that are already receiving more. Follow the equipment maker’s method for checking pressure, and ask a qualified irrigation professional to assess the setup if its pressure behaviour is unclear.
Once delivery is reasonably even, choose an initial duration and inspect moisture at the root area after watering and before the next planned run. Aim for water to reach active roots without persistent saturation or runoff; surface appearance alone is a poor guide. Use identifiable checking points, such as a particular pot and a marked position in each bed, so later observations refer to the same places. Record the date, duration, outlet readings and result for each zone. Note whether a moisture observation was made after watering or just before the next run; without that detail, two entries may describe different stages of the watering cycle rather than a change in performance. Keep delivery measurements separate from moisture observations: one records what the outlets supplied, while the other helps you judge the result in the growing area. The Aluminium Classic Greenhouse range spans 3.77 m² to 28.08 m², while the crop area and emitter count depend on the layout you actually choose.
Adjust schedules as growing conditions change
Conditions inside a greenhouse can change with the season, shading, ventilation and plant growth. A warm, bright or breezy spell may dry small pots faster; cooler or cloudier conditions can slow moisture loss, while a larger plant may use more water as it grows. Treat these as reasons to observe, not as fixed seasonal rules. A date on the calendar or an outdoor forecast cannot tell you exactly how moist each root area is, so check representative spots in every zone before changing its schedule.
When one group shows a consistent change, adjust its setting without altering the other zone unnecessarily. Distinguish the length of each watering run from the interval between runs. Your checks should help identify whether water is failing to reach the active root area during a run, or whether that area dries sooner before the following run. These are different observations, so record which one prompted the adjustment rather than simply noting that a zone needed more water. Keep a note of the weather pattern and crop stage to help distinguish a lasting trend from a short-lived change. The Wall Greenhouse listing identifies a lean-to model, not the light or airflow at your site; base your plant groupings on conditions in the actual growing space. Change one setting at a time and compare the next moisture checks with the earlier observations. Do not compensate for a blocked or poorly placed emitter by extending the whole zone’s run.
Differences within a container watering zone
Even within a pot zone, drying rates can differ with container size and shape, potting mix, plant maturity, root density and exposure to sun or moving air. Group pots with similar needs where practical, and note any outliers that regularly dry sooner or stay wet longer. Identify the particular container in your notes rather than describing the whole pot group as too dry or too wet. That distinction matters when deciding whether to change a shared setting: one consistently different pot does not necessarily represent the others. Compare it with neighbouring containers after similar watering, then consider whether its size, mix, plant or position explains the difference. A pot that has become root-bound or a plant that has grown substantially may no longer behave like its neighbours. Recheck the grouping after repotting or moving containers, rather than assuming the original schedule still suits them. If a difference persists, use that evidence to decide whether the pot belongs in another watering group.
After a run, check that water is reaching the mix and spreading through the root area, rather than running down the outside or missing the pot. Look at more than one container, including a pot near and one farther along the line. If results differ, inspect outlet position and delivery before increasing every pot’s run time. The Limited Edition Aluminium Greenhouse range is listed from 3.77 m² to 28.08 m²; decide where fixed and movable pots will sit in your chosen layout before finalising branch lengths.

Check bed depth, rows and wetting patterns
Bed watering depends on more than the bed’s footprint. Soil texture and depth, crop spacing, plant maturity and row positions all affect where water needs to go. A long bed does not automatically have one uniform watering pattern, and separate sections may need separate control if their crops or soil conditions differ. Place lines in relation to the plants’ active root areas, then check how moisture spreads through the soil rather than relying only on a damp-looking surface.
During a test, inspect near and far points and areas between lines. If coverage is uneven, check the layout, outlet placement and blockages before lengthening the run; extra time can leave one section too wet while another remains dry. The T-Model Orangery Greenhouse range is listed from 16.52 m² to 30 m², but floor area does not identify bed dimensions or crop rows. Set the line routes from the actual bed plan and recheck them when crops or line positions change.
Test both zones before relying on the timer
Run each zone separately before relying on its automatic schedule. Check that the timer starts the intended branch, that outlets deliver water where expected, and that there are no visible leaks, kinks or pooling. Compare representative outlets again if you change a line, emitter or filter. Confirm independence by checking that a setting changed for one zone leaves the other zone’s programme unchanged. Matching start times do not necessarily mean the controls are linked; what matters is whether each zone’s timing can be set separately. Label the branches to match the zone names on your plan and controller, so a later adjustment is applied to the intended pots or bed.
Keep a simple record of each zone’s name, plants, timer setting, measured delivery and most recent root-zone check. It will help distinguish a schedule that needs adjusting from a change in the equipment or planting. Revisit the plan after moving pots, replacing crops or altering a bed. A timer setting is an estimate for the current plants and system, not a permanent instruction; regular checks keep the two schedules useful as the greenhouse changes.
Frequently asked questions
Why separate pots and greenhouse beds into different watering zones?
Their root areas can dry at different rates. Pots have a limited volume of mix, while a bed has a larger, continuous soil area; plant size, soil and exposure also affect how quickly each dries. Separate control lets you adjust one group without extending or shortening the watering run for the other.
Do all pots need to be in the same zone?
Not necessarily. A small pot, a large container and a densely rooted plant may not dry at the same rate. Begin with pots that behave similarly, then divide them into another zone if checks show a consistent difference in watering needs. Avoid adding extra zones just for the sake of having one for each pot.
How many watering zones should I plan?
Plan for the number of groups that need genuinely different schedules, not simply the number of crop types. Two zones—one for pots and one for beds—are a useful starting point if their needs differ. Add another only when observations show a recurring mismatch within an existing group and your controller can manage it independently.
Can one tap timer control both pots and beds?
Only if its outlets or connected valves can be controlled independently. A splitter by itself does not create separate schedules: if both branches receive water at the same time, they share a run. Check the timer’s instructions for independent programmes, outlet limits and compatibility with your water supply.
How do I choose a watering run time?
There is no single run time that suits every greenhouse. Check what representative outlets deliver over the same measured interval, then inspect moisture at the root area after watering. Record each zone’s setting and the result, and adjust according to repeated observations rather than relying on a fixed calendar or the timer’s default.
A useful two-zone plan is not simply “pots get more water”. It gives different root areas independent schedules while making sure each line delivers as intended. Start with groups that show a real difference, measure each branch and adjust according to moisture at the roots—not greenhouse floor area or a timer default. Add another zone only if a group repeatedly needs a different pattern. Recheck after repotting, crop changes or irrigation adjustments so the settings continue to reflect the plants and equipment in the greenhouse.
