
How to Set Up a Greenhouse for Practical Garden Workshops
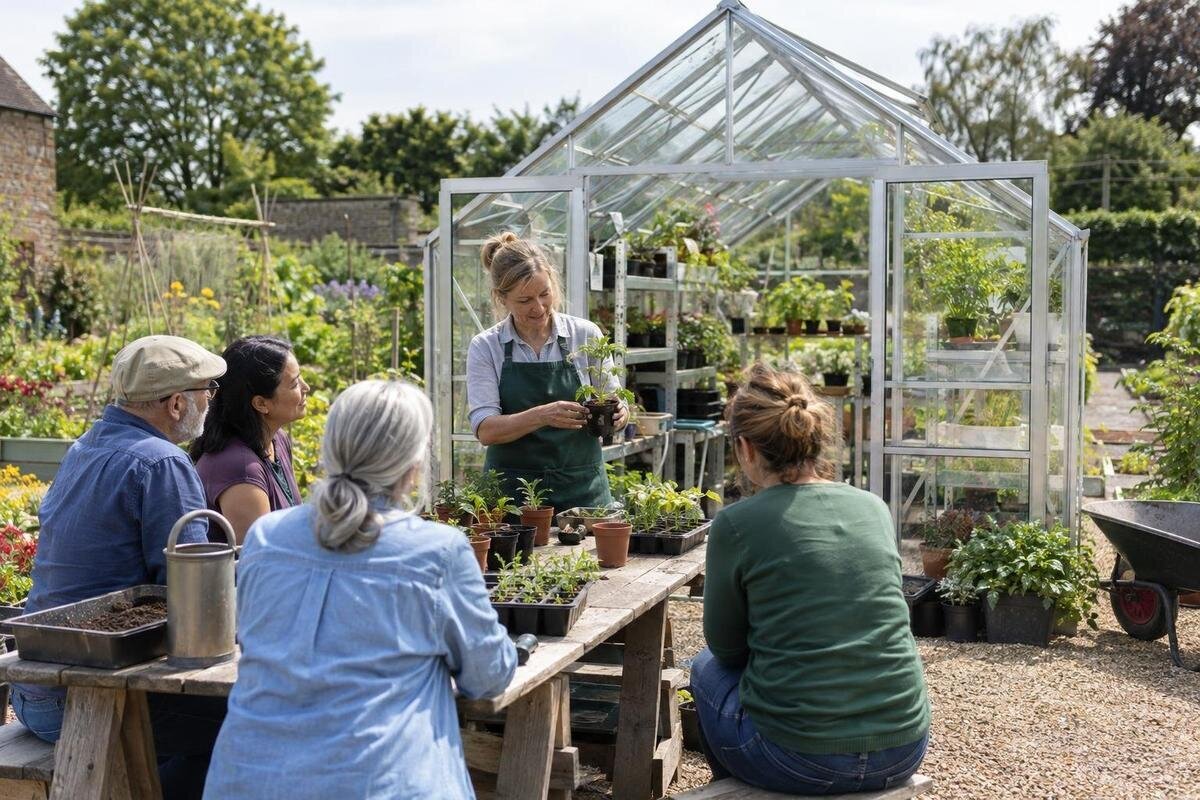
Greenhouse workshop planning
A greenhouse can make a practical setting for garden workshops, but the layout succeeds only if participants can see the demonstration, take part in the work and move between activities without constant rearrangement. Plan around the teaching point, shared work surfaces, participant stations, circulation and any required services. Then test that plan against the selected greenhouse’s actual dimensions, access points and operating arrangements. The aim is not to fit the biggest possible group; it is to make each session clear and workable once people, pots, tools and materials are in place.

01
Define the session before sizing the greenhouse
Begin by writing down the workshop format before comparing greenhouse footprints. A presenter-led demonstration, a potting session where everyone works at once, and rotating stations use space in different ways. Record the intended number of participants, presenter and any assistant, then list what people will do at each stage. Watching a pruning demonstration needs a clear shared view; sowing seed or mixing potting mix needs reachable surfaces, materials and room to stand without crowding the person leading the task. Note whether activities are seated or standing and whether each person needs separate kit. A small group can still need generous work space if everyone handles plants at the same time.
Map the whole session: arrival and introductions, demonstration, practice, questions, clean-up and the time needed to change activities. Note which tasks happen simultaneously and which equipment moves with the group. Allow for supplies before the session and completed work afterwards, including pots, trays, labels, tools and chairs. A plan based only on the demonstration can miss temporary piles that narrow a route at the busiest moment. Sketch the presenter’s path and a participant’s path through each stage. That sequence gives you a practical test for the layout and helps identify where a session format may need to change.
Make the demonstration visible and easy to follow
Choose the teaching position by checking what people can see from the places they will actually occupy. Stand or sit at the furthest planned position and check whether the sample, hand movements and key details are visible, not just the presenter’s face. A small seedling, pest or pruning cut can be difficult to follow from a distance; consider a larger sample, duplicate materials or bringing the example around during a planned pause. Set up the work surface so the presenter can demonstrate without hiding the action behind their body. The best position may not be the centre of the greenhouse.
Check sightlines from both seated and standing positions, and repeat the test after adding the plants, hanging items and equipment that will be there during a session. Reflections or backlighting can make fine details harder to see at some times, so try the space when workshops are likely to run. Keep written instructions where participants can refer to them without turning away from the demonstration. Also consider whether people can hear the presenter from the furthest station: a layout that looks clear on paper may spread the group too widely for easy conversation. Adjust the distance or group arrangement before adding more stations.
02
Reserve a clear surface for demonstrations
Give the presenter a defined work surface with enough clear area for the plant or tool, the materials being used and a place to set items down. Keep frequently handled tools within reach, but separate clean samples from messy supplies if the session includes both. A portable table can suit activities that need different positions; a fixed bench can simplify a repeated demonstration, but should not dominate the plan by default. Mark the surface and the presenter’s working space on a scaled sketch. Check that the presenter can move around it without stepping into the audience’s view or blocking the route. Leave a separate spot for handouts or spare examples.
Compare floor area as a starting point, not as a measure of usable teaching space. The Bloomcabin Oasis Pyramid Greenhouse is listed in sizes from 5.53 m² to 18.9 m². Those figures do not show the exact position of benches, openings or clear working zones in the configuration you are considering. Before treating a size as a possibility, account for the demonstration surface, fixed elements and routes that must remain clear. Check the selected configuration’s actual dimensions and plan where supplies and completed work will sit, rather than assuming the listed area is all available for tables.
Size participant workstations for the task
For a hands-on session, work out the number of stations from the activity rather than the number of chairs available. Participants might share a table in pairs or need separate room for a tray and tools; decide that before setting a group limit. Mark each station at full scale, including the space for someone to stand, move their arms and put completed work down. Allow for a facilitator to help without leaning across someone else’s task. If participants rotate between activities, set out the station order and decide where materials will wait. Otherwise, people may gather around the first table while later stations remain unused.
A product’s listed floor area does not establish how many people can work comfortably inside it. The Bloomcabin Prestige Greenhouse is listed in sizes from 3.77 m² to 28.08 m². Compare the required workstations with the actual dimensions for the specific configuration, allowing for equipment and movement between activities. Rectangles on a paper plan are a useful first check, but test them with the real trays, containers and chairs. If participants have to reach across one another or move kit repeatedly to make room, reduce the number of simultaneous stations or change the activity sequence.

03
Keep routes clear between activities
Plan movement as a series of routes: from the entrance to the teaching point, between work areas, and to hand-washing or waste collection if those tasks are part of the session. Keep the main route separate from places where people stop to watch or work. Avoid making participants cross behind the demonstrator or carry tools through a group gathered around a table. Mark where doors open and where someone waiting to join the group might stand. A narrow approach can create a queue that blocks everyone else, even when the work areas themselves appear spacious. Walk the routes on your plan in the order the session will use them.
Storage can affect circulation even when the floor area looks generous. The Limited Edition Aluminium Greenhouse with Built-In Storage is listed from 5.52 m² to 28.08 m². Its name identifies a storage version, but does not tell you where the storage sits or how much workshop equipment it can hold. Confirm those details for the configuration you are considering, and include access to stored items in the plan. The Limited Edition Aluminium Greenhouses with Storage range can be part of a footprint comparison, but its area figures are not a measure of usable aisle space. Check that retrieving tools will not interrupt the group or narrow the route.
Plan equipment, water and power around the work
List services against the planned activities before deciding where equipment will go. Water may be needed for watering, hand-washing or rinsing tools; power may be needed for lighting or specific teaching equipment. Treat these as requirements to confirm, not features a greenhouse automatically provides. Decide whether tasks can be prepared outside, where supplies can be put down and whether any hose, lead or container would cross a participant route. If the plan includes permanent supply points or drainage, raise that early with the people responsible for the project, before benches and workstations are fixed in place.
Check the selected greenhouse information and ask appropriately qualified professionals to review electrical, plumbing, drainage or other building-service questions. Do not infer connection points from a product image or size. The Aluminium Classic Greenhouse is listed in sizes from 3.77 m² to 28.08 m²; those footprint figures do not specify service points or what is included. Include a laptop, teaching light or powered tool only if the session needs it, then decide how it can be used without placing leads, water or containers across routes used by participants. A portable setup may reduce reliance on permanent services, but test its practical use in the actual space.
04
Consider changing conditions during workshops
Comfort is part of workshop planning because conditions in a greenhouse can change with sunlight and weather. Observe the proposed space at the times you expect to teach, and consider what shade, ventilation or a cooler alternative will be available. Plan breaks and a change-of-plan option appropriate to the conditions you experience; do not assume that a larger footprint alone will make the space comfortable. Keep handouts, samples and equipment where they can be used as intended, and check the instructions for any environmental equipment included in your plan. The session schedule should be flexible enough to respond if conditions differ from those expected.
Check the shade, ventilation and temperature-management arrangements for the specific model and site, and ask a suitable professional about equipment that affects the greenhouse or its services. The Limited Edition Aluminium Greenhouses are listed from 3.77 m² to 28.08 m², but that is a footprint range, not evidence of particular thermal performance or comfort. A crowded layout can also make it harder to adjust the session, so preserve clear routes and space to pause or change activities. If conditions make it difficult for participants to concentrate on the day, move the workshop to a more suitable space.
Check access for the people taking part
Consider the route from the garden approach through the entrance and to each activity. Measure the path, threshold, door opening, internal route and turning space, then compare them with the people and equipment expected. Think about where someone can sit, whether a seated participant can see the demonstration and reach the materials, and whether a helper can work alongside without blocking others. If participants may use mobility aids, include them in the layout test rather than making assumptions from a photograph. Treat access as part of the site plan, not as a feature that can be judged from floor area alone.
The Aluminium Lean-to Greenhouse is listed in sizes from 3.69 m² to 14.34 m². Those figures help with footprint comparisons but do not confirm door width, threshold details or accessible circulation for a particular configuration. Check actual drawings and access details before deciding how the space will be used. For workshops open to a wider community, discuss access needs with an access consultant, qualified building professional or relevant authority for the project. Avoid describing a space as accessible until the features participants need have been checked in practice.

05
Include the surrounding garden in the plan
Map the area around the greenhouse as well as its interior. Participants may need a place to gather before entry, put bags down, wait for a station or continue a discussion after a practical task. Work out how compost, potting mix, tools and discarded materials will arrive and where they will be kept; those movements should not cut through a teaching group. Check the proposed location against existing garden paths and maintenance routes. If outdoor waiting or a seasonal alternative space matters, show it on the same site plan rather than assuming the greenhouse will handle every part of the day.
Use floor area to narrow options, then verify the exact footprint, access arrangement, site conditions and project requirements. The Spacious Greenhouse range is listed from 47 m² to 70 m², but a larger stated area is not a participant-capacity rating or proof that a model suits a particular site. The Spacious Greenhouse can provide a comparison point when sketching a larger layout; check its exact dimensions and configuration against the activities you plan to run. Include access, services and maintenance in the project review, and confirm site-specific requirements with the people responsible for the garden and relevant professionals.
Rehearse the layout before setting a group limit
Before fixing the plan, rehearse a representative workshop with the actual tables, tools, plant material and storage containers. Have one person teach while others follow the planned routes, sit or stand where participants would, change stations and collect materials. Note any blocked sightline, queue, repeated reach across someone else’s work, or spot where wet or dirty equipment builds up. Adjust the seating, station count or activity sequence and run through it again. A mock-up made from tape and temporary furniture can reveal problems that are easy to miss in a neat drawing, especially when all movable items are included.
Write down the practical routine for setting up, cleaning, storing equipment and checking the space, then match it to the actual greenhouse and services rather than assuming a standard arrangement. The T-Model Orangery Greenhouse is listed from 16.52 m² to 30 m²; use that range for an initial comparison, then review the chosen layout and product information against the workshop plan before setting a group limit. Confirm any project-specific permissions, insurance, access or operating requirements with the responsible organisation and relevant professionals.
Frequently asked questions
How many participants can a greenhouse workshop accommodate?
There is no reliable number based on floor area alone. Plan for the presenter, participants, workstations, equipment, clear routes and any seated participation. Test the chosen arrangement with the actual tables and materials, then set a group limit based on the activity that needs the most room.
Can I use a greenhouse for workshops throughout the year?
That depends on the site, seasonal conditions and the arrangements available for managing the space. Check shade, ventilation and any planned environmental equipment for the specific greenhouse. Set a schedule and an alternative-space plan around the conditions you observe rather than assuming the building will be comfortable in every season.
Which utilities should I plan for in a garden workshop greenhouse?
List services against the activities: water for watering or clean-up, power for any necessary teaching equipment, and suitable arrangements for waste or drainage if relevant. Confirm what the selected model and site provide. Have electrical, plumbing and other building-service questions reviewed by appropriately qualified professionals.
Can a greenhouse be used for both growing and workshops?
Yes, if the layout and timetable account for both uses. Decide which surfaces are for teaching, where tools and supplies belong, and when routine growing work will happen. Keep access to plants and equipment clear, and adjust the session if participants or stored materials would disrupt growing tasks or block the demonstration.
Does a larger greenhouse automatically make a better workshop space?
No. More floor area may provide more layout options, but it does not establish a suitable group size, accessible route, comfortable conditions or compliance with project requirements. Compare the actual footprint and configuration with your session plan, site and operating needs.
A practical workshop greenhouse is organised around what people need to see, reach and do. A measured plan should account for the demonstration, participant workstations, movement, supplies and the services each activity genuinely needs. Rehearsing a session with real equipment will expose bottlenecks that a floor-area figure cannot show. Let the tested layout and the project’s operating requirements determine the group size and model, rather than relying on a bare footprint estimate.
