
How to Harden Off Greenhouse Seedlings Before Planting Out
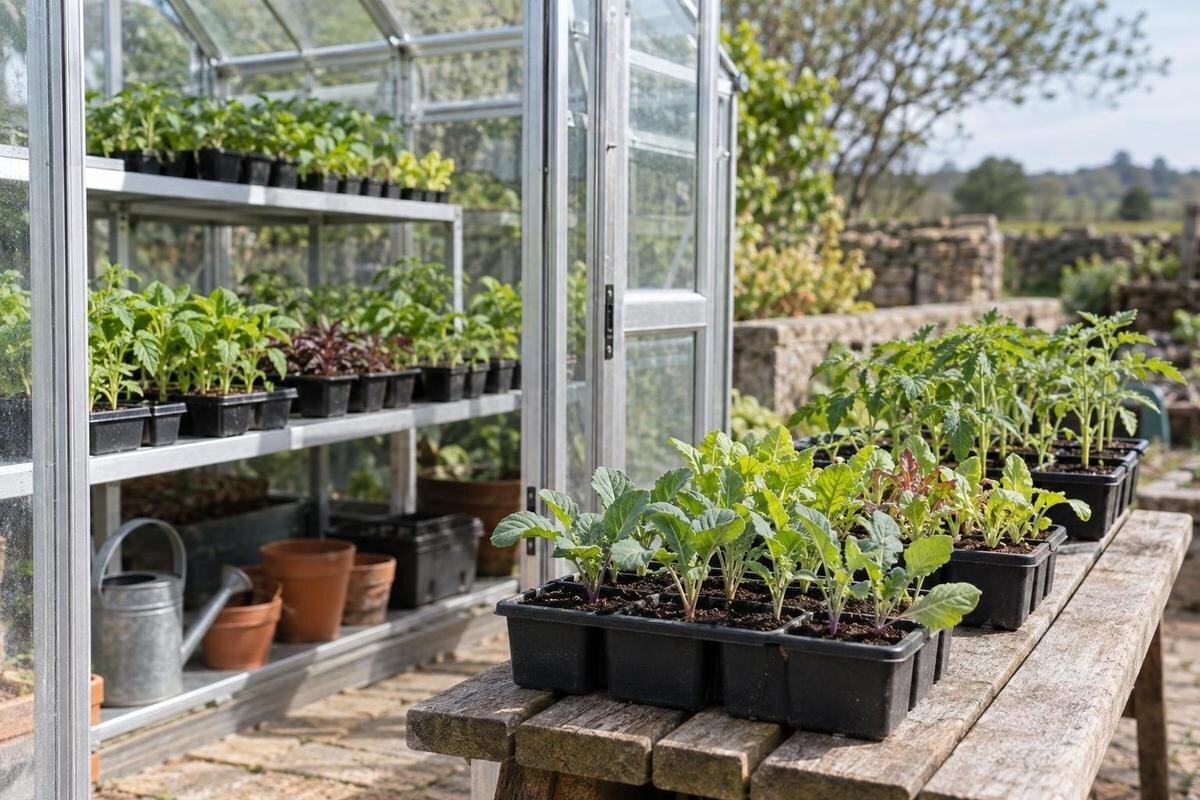
Seedling growing guide
Greenhouse-raised seedlings can look sturdy yet still be unprepared for direct sun, wind and cooler nights outside. Hardening off is the gradual acclimatisation that bridges that gap before planting out. It is not a countdown with one reliable number of days: the right pace depends on the crop, the protection it has had, the forecast and what happens to the leaves each time they go outdoors. Use a suitable weather window, increase exposure in manageable steps and pause whenever conditions or plant response call for it.

What hardening off changes
Hardening off helps a seedling adjust to the conditions at its final growing place. Under cover, glazing, shade, close spacing and still air may reduce the light and movement it receives; outside, sunlight can be stronger, wind can dry leaves and potting mix, rain can soak trays, and day-to-night changes can be sharper. The difference varies between greenhouses and even between positions inside one, so compare the seedlings’ current bench or shelf with the bed or container site. A plant grown near an open vent has experienced more airflow than one kept in a still corner, but that does not automatically prepare it for exposed outdoor conditions.
The purpose is to reduce a sudden change, not to make a tender crop immune to cold, heat or drought. A seedling acclimatised to gentle morning sun may still scorch in intense afternoon sun, and one that tolerates a light breeze can still be damaged by gusts. If you are planning space for future propagation batches, the Oasis Pyramid Greenhouse range is listed from 5.53 to 18.9 m²; use floor area as a comparison point, then check the actual bench, tray and access layout. The growing area under cover never replaces a separate check of the outdoor site.
Check that each seedling is ready
Check the crop’s own transplanting stage before moving it outside. Some seedlings are planted at a stated leaf stage, while others are ready when they reach a particular size or level of root development, so a universal true-leaf count is not reliable. Look for sound stems, active growth and a root ball that holds together when lifted gently. Also check for pests, leaf damage and signs of disease. A weak, waterlogged or severely rootbound plant is not ready simply because the calendar says so.
Group trays by their needs rather than treating a mixed batch as one. Warm-season and cool-season crops can react very differently to night temperatures and direct sun, and varieties within a broad crop group may differ too. Keep labels with each tray and note the sowing date or supplier instructions. Give batches separate spaces if they are at different stages of hardening off, so moving one tray does not mean moving them all. A simple note of which trays are staying under cover, making short outings or spending longer outside helps keep their care consistent. If you are comparing greenhouse layouts for propagation, the Limited Edition Aluminium Greenhouse with Built-In Storage offers listed floor areas from 5.52 to 28.08 m². Work from your tray dimensions and proposed bench arrangement when estimating capacity, and allow space to identify and retrieve each batch without moving neighbouring trays.
Read the forecast at the planting site
Read the forecast for the actual planting location, not just the broad district. Check the expected maximum and minimum temperatures, wind and gusts, rain, cloud cover and any heat or storm warnings across the period you are considering. Conditions can change between morning and afternoon, and one mild day says little about the night that follows. If a sharp hot spell, cold snap, strong wind or heavy rain is expected, keep trays protected and wait for a more manageable window instead of pressing on to meet a calendar date.
Then observe the outdoor spot itself. A wall, fence, paving, tree canopy or slope can change shade and wind; a place that is sheltered early may be exposed later, while paving or a reflective surface can add heat. Check the site at the times you expect seedlings to be outside, and make sure there is a quick route back to cover. Note when direct sun reaches the trays and whether their position stays sheltered throughout the planned outing, rather than judging the spot from a single visit. When planning the relationship between greenhouse and outdoor growing space, the Prestige Greenhouse with Metal Base has listed floor areas from 3.77 to 28.08 m². Consider where trays will go after leaving the greenhouse as well as where they will sit inside it.
Build exposure in stages, not by the calendar
Use stages rather than a fixed schedule. Start with a short outdoor period in bright shade, sheltered from strong wind, then bring the trays back under protection. Repeat when the next outing is suitable and extend the time outdoors as plants remain in good condition. Add more direct light and a little more airflow in separate increments where possible; changing several conditions at once makes it harder to see what caused a setback. Keep a brief record for each batch: where it stood, when it went out and came back, the weather, and how the leaves looked afterwards. Use those observations to decide whether to repeat the same exposure, extend it or step back. This is particularly useful when different people look after the seedlings. Do not keep seedlings out just to complete a planned number of hours when the day turns hotter or windier than expected.
Progress depends on the contrast between the greenhouse and the final site. A plant from an airy, bright greenhouse may need less adjustment than one kept in a sheltered, low-light corner, but still judge the crop and the actual weather. If you have many trays, acclimatise manageable groups and label them so the least tolerant batch is not left out by mistake. For larger propagation plans, the Orangerie greenhouse range has listed floor areas from 47 to 70 m². Map the route between benches and the outdoor hardening area, including somewhere to return the whole batch promptly if conditions deteriorate.

Increase sunlight gradually
Introduce direct sunlight gradually. Leaves grown behind glazing or under shade may not tolerate sudden strong sun, particularly during hot, clear weather; damage can appear as bleached, pale or dry patches. Begin in bright shade or with gentle early sunlight, then increase direct exposure in small steps while initially avoiding the harshest part of a hot day. Keep the crop’s eventual light needs in view: plants suited to partial shade should not be hardened by forcing them into all-day sun.
Watch leaves after the outing and again later, because stress may not be obvious as soon as a tray comes back inside. If a plant wilts or develops sunscald-like patches, move it to a cooler, shaded place, check whether the mix is dry and hold at the last tolerated exposure until it recovers. A few hours without visible damage do not prove a seedling can now take full sun all day. When planning bench positions in the Aluminium Classic Greenhouse, available in listed floor areas from 3.77 to 28.08 m², consider placement and shading separately from size. Record the light conditions where seedlings were raised so you have a useful starting point for judging outdoor exposure.
Introduce wind and rain with shelter available
Introduce moving air separately from sun where possible. Wind increases water loss from leaves and potting mix and can bend or break tender stems; it can also tip a light tray. Begin in a sheltered outdoor position and let seedlings experience gentle airflow before exposing them to a more open spot. Avoid gusty, hot or very dry conditions, and place trays on a stable surface without blocking drainage. If stems lean or become damaged, check the direction and strength of the wind and reduce exposure rather than treating damage as a sign the plant needs more.
Rain needs the same judgement. Light rain may be harmless for many plants, but downpours can flatten small seedlings, splash mix onto leaves or leave pots saturated; hail and severe storms are unsuitable for an outing. Keep a protected option ready and check trays individually after rain rather than assuming they all need more water, or none do. If you are considering the Aluminium Lean-to Greenhouse, its listed floor areas run from 3.69 to 14.34 m². Include the nearby outdoor space in your layout planning: identify a stable tray position, check its exposure to rain and wind, and keep the route back under cover clear.
Use minimum temperatures to judge overnight exposure
Night temperature is a separate decision from daytime sunshine. Check the minimum forecast and crop-specific guidance for the variety and stage you are growing; warmth-loving seedlings may have their growth slowed by cool nights even after they handle a mild day. Hardening does not turn frost-sensitive plants into frost-hardy ones, and a cover or greenhouse should not be assumed to keep every plant above a particular temperature. Local cold pockets can differ from the forecast station, so note what happens at the actual site.
Keep trays under cover overnight until the expected conditions suit that crop, and be ready to bring them back if the forecast changes. A minimum-maximum thermometer near the seedlings can help you compare actual conditions with crop guidance, but do not rely on one reading if the weather is about to change. Note the overnight minimum alongside the batch’s response, keeping those observations separate from the daytime exposure record. For overnight tray storage, compare the proposed bench arrangement rather than floor area alone. The Limited Edition Aluminium Greenhouse has listed floor areas from 3.77 to 28.08 m², but those dimensions do not establish its overnight temperature. Base protection decisions on conditions and plant needs.
Keep watering and handling consistent
Outdoor exposure can make small cells and pots dry faster, especially in sun and moving air. Check the mix around the roots before and after each outing, not just at the surface, and water according to the crop and container rather than a fixed daily routine. Start with evenly moist mix: a tray that is already dry is more likely to wilt outside, while saturated mix may deprive roots of air and stay heavy in rain. Keep drainage open and avoid leaving pots standing in water.
Move trays gently and keep their labels attached; avoid disturbing roots while the plant is adjusting to new conditions. If a seedling has just been pricked out or potted on, let it recover before adding further stress. For a layout that involves carrying trays outside each day, consider access to both plants and water. The T-Model Orangery Greenhouse has listed floor areas from 16.52 to 30 m²; assess your proposed bench layout with the trays in place, including room to lift and carry them without catching neighbouring plants. Keep feeding and other care consistent unless crop guidance indicates otherwise. Record any necessary changes alongside the outdoor exposure notes, so a change in watering, handling or feeding is not overlooked when reviewing a batch’s response.

Pause when seedlings show stress
Pause when seedlings show more than a brief, mild response. Persistent wilting, bleached or brown patches, curled edges, damaged stems or a tray drying unusually fast all mean conditions need reviewing. First move plants out of harsh sun or wind, then check moisture around the roots, the forecast and whether roots or leaves were disturbed. A midday droop that resolves in shade is not the same as a plant that remains limp after cooling, but neither symptom should be ignored during acclimatisation.
Let affected plants recover in a bright, protected position with suitable moisture, then resume at an easier level only when they look stable. Do not try to compensate for sun scorch with extra watering if the mix is already wet. If damage continues indoors, spreads from plant to plant or includes soft, discoloured stems, consider a separate growing problem rather than assuming the hardening routine is to blame. Keep suspect plants apart and seek crop-specific advice if the cause is unclear.
Plant out when seedlings and conditions are ready
Plant out when seedlings are at the crop’s recommended stage, have coped with the relevant outdoor light and airflow, and can tolerate the forecast minimum at their destination. Check that the bed or container is prepared and that the soil is in suitable condition for that crop; an acclimatised seedling can still struggle in unsuitable soil or a heatwave. Choose a manageable period without severe heat, wind or heavy rain, and water the plant according to its needs before handling.
Handle seedlings by the root ball or container rather than pulling on the stem. Set each plant at the crop-appropriate depth and spacing, firm gently, and water in as required by the crop and soil. Provide temporary shade or wind protection only when conditions and species call for it, and monitor moisture closely while roots establish. Remove temporary protection when it is no longer needed: it can create excess heat or reduce light if left in place. Continue watching the plants as outdoor conditions change.
Frequently asked questions
How long does hardening off take?
There is no reliable number of days that suits every crop and weather pattern. The process may move faster in mild, settled conditions and take longer when temperatures, wind or sunshine vary sharply. Repeat and extend outdoor exposure according to the forecast and how each batch responds, rather than working to a deadline.
Is opening the greenhouse vents enough?
Ventilation can introduce more airflow and reduce the difference between a still greenhouse and the outdoors, but it does not reproduce outdoor sunlight, wind or temperature changes. Use ventilation as one part of preparation, then give seedlings gradual exposure outside in a place where you can protect or return them.
Can seedlings stay outside overnight?
Only when the expected minimum suits the particular crop and its stage of growth. A seedling that copes with a mild day may still be affected by a cool night. Keep trays under cover until the forecast and conditions at your site are suitable; hardening off does not make frost-sensitive plants frost-hardy.
What should I do if seedlings wilt or develop pale patches?
Pause the increase in exposure and move the tray out of harsh sun or wind. Check moisture around the roots as well as the forecast, and let plants recover in a bright, protected place. Pale, dry patches can follow excessive sun, but ongoing or spreading damage may have another cause, so avoid assuming every symptom is a hardening problem.
When are seedlings ready to plant out?
Use the crop’s recommended transplanting stage, then check that the seedlings have coped with the outdoor conditions they will meet and that the forecast suits them. The bed or container also needs to be ready for that crop. A fixed date or one successful outing is not enough on its own.
Treat hardening off as a series of decisions about exposure, not a date circled on the calendar. Match each batch to its crop guidance, use the real forecast and planting site, change sun, wind and temperature exposure in steps, and pause when seedlings show strain. That flexible approach lets you move greenhouse-raised plants outdoors when they are ready, rather than because a fixed timetable says they should be.
