
Can an Old Shed Base Work for Your Greenhouse?
Greenhouse foundations
An old shed base might be reusable, but its past use alone does not show that it suits a greenhouse. Check the true supporting footprint, level and squareness, cracks, drainage and fixing positions against the selected model’s manufacturer drawings. A base that fitted the shed—or still looks intact—is only part of the assessment: the new frame must match the surface, and the condition beneath it must be understood.

Identify the old base and its history
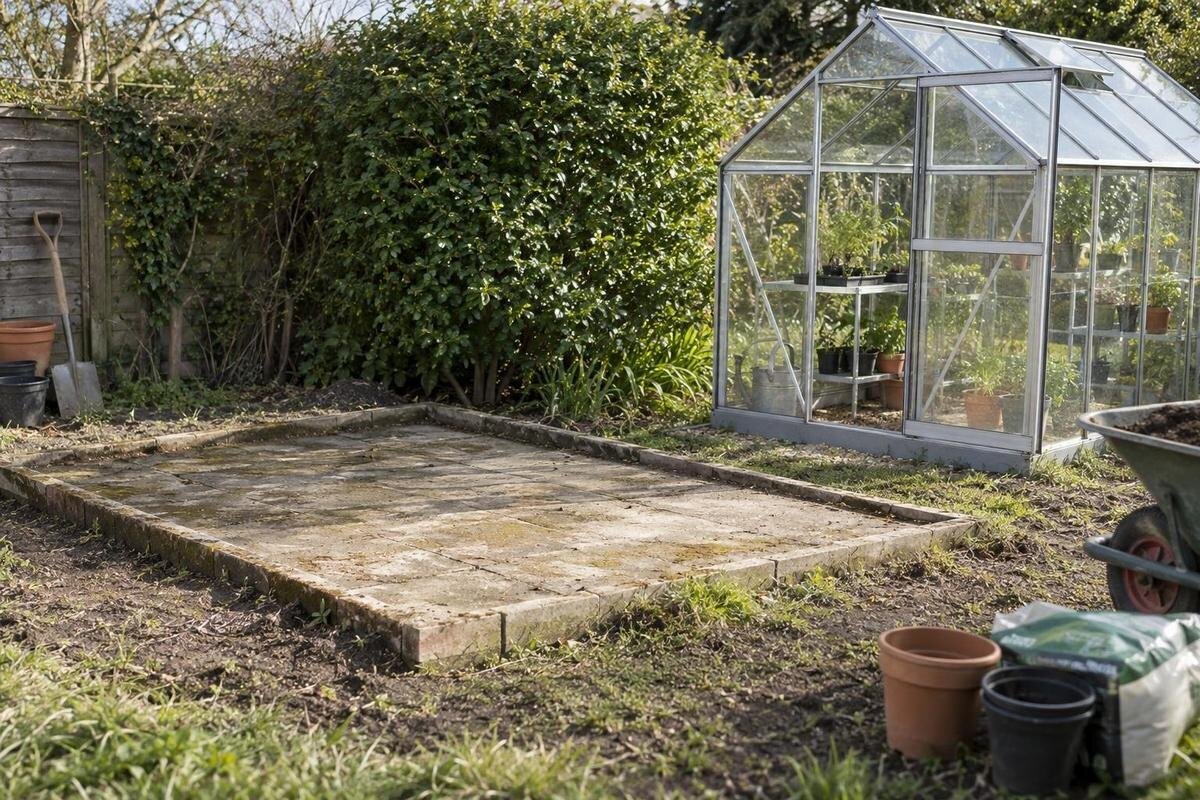
An old shed base can be considered for reuse only after its construction and condition are identified. It may have supported a shed for years, but that shed could have had a different footprint, frame arrangement and fixing method. Establish what is actually there: a concrete slab, separate pavers, a timber platform or another construction. Note whether the shed is still in place, whether the base edges are visible and whether any areas are loose, lifted, patched or crumbling. These observations help determine what needs closer attention. Do not assume that a surface which looks like concrete has the same construction throughout, particularly where coverings or old repairs hide what lies below.
Previous use is useful history, but it does not confirm that a new structure can be set out and secured as intended. You may not know the base’s thickness, reinforcement, support beneath it or condition where the shed frame stood. The absence of an obvious problem under the shed does not establish suitability for a greenhouse with different geometry and anchoring. Compare the selected model’s requirements with measured site conditions, then have uncertain structural details reviewed by a qualified building or groundwork professional. If records are missing, say so; a review can account for uncertainty more responsibly than an assumption.
Compare the base footprint with the greenhouse drawing
Measure the base itself, not just the shed walls that used to stand on it. Record the usable dimensions at the supporting surface and note any notches, projections, raised edges or changes in width. Compare those measurements with the footprint or support line in the drawing for the exact greenhouse model and size. Drawings may show overall frame dimensions, base rails, posts or an entrance opening as separate references, so confirm what each dimension describes. A roof projection or an outside wall measurement is not necessarily the line that needs to sit on the base. If the drawing is unclear, ask the supplier to identify the required support line before comparing it with the slab.
Position matters as much as length and width. Sketch the slab boundary, then mark the proposed greenhouse corners and entrance orientation from its plan. Check whether each required support line lands on sound material, whether corners would extend beyond an edge and whether there is room for the intended door arrangement. Measure both ends and both sides if the edges are uneven; recording each reading is more useful than averaging away a difference. When considering a Pyramid Greenhouse, use the drawing for the selected version rather than relying on the model name or area label. A product listing identifies the model, but cannot show how your old slab lines up.
Check the base’s level and squareness
Check whether the surface is level across its length and width, and whether the corners follow the geometry shown on the greenhouse drawing. Take readings at several points, including the edges and centre; a single reading can miss a fall, high point or twist. Record any abrupt step and measure each side rather than assuming the outline is a perfect rectangle. Comparing the two corner-to-corner diagonals is a useful cross-check, but equal diagonals alone do not confirm every corner or edge. Take each diagonal between the same marked corner points used for the outline. These checks describe the surface; they do not tell you how much variation the selected greenhouse can accommodate.
Do not assume the frame can be pulled into shape with fixings or made level by hiding a discrepancy underneath it. Ask the manufacturer or installer what the selected model’s drawings and instructions require, and have a qualified person assess whether an uneven or out-of-square base needs work. When comparing options in the Limited Edition Aluminium Greenhouses with Storage range, check the required footprint and tolerances for the exact size you are considering. Put readings on a simple sketch and note where each was taken. This lets the person reviewing the site assess the measured differences rather than relying on how level or square the base looks.
Inspect cracks and damaged edges
Look for cracks, broken corners, surface flaking, exposed aggregate, patched areas and any vertical offset from one side of a crack to the other. Mark each finding on a sketch and photograph it from far enough away to show its position as well as close up to show its appearance. Note whether a crack appears to have changed, whether water sits nearby and whether old repairs are documented. A crack by itself does not establish that a slab is unsafe, and a neat surface patch does not prove that movement has stopped. The pattern, displacement, history and proposed use all matter; a photograph cannot diagnose the underlying condition.
Pay particular attention to the perimeter and to the exact places where the greenhouse frame is meant to be secured. A damaged area away from the support line may raise a different question from a crack or broken edge where a fixing is planned, but that distinction should be reviewed rather than guessed. If the Bloomcabin Prestige Greenhouse is under consideration, plot its specified frame and fixing positions before a qualified professional compares them with the slab. Do not treat filler, a surface coating or a conveniently placed old fixing as proof that the base is sound. Where there are signs of movement, crumbling edges or uncertain repairs, seek an on-site assessment.

Assess where water goes
Check how water moves across and around the base, ideally after rain as well as in dry conditions. Note puddles, wet marks against edges, runoff arriving from higher ground, and whether nearby downpipes or garden drainage discharge close to it. The shed may have altered the pattern: its roof could have sheltered one area or directed water elsewhere, so conditions may change once it is removed. Record the ground condition around the perimeter and whether water crosses the proposed doorway. A dry centre alone does not show that the whole footprint and its approach stay clear of runoff. Include photos after wet weather and note where water arrives and leaves, rather than simply labelling the area wet.
Look at both the intended footprint and its outer edge; standing water or soft ground may need an explanation even when the slab surface looks sound. Do not infer a drainage fix or alter the base based on a generic slope suggestion; a qualified site professional can assess the cause and suitable work. If considering the Spacious Greenhouse, mark the footprint of the selected option on your site sketch alongside the observed runoff paths. If the shed is still standing, repeat the check after its removal, as its roof or downpipes may be influencing what you see. Keep dated photos and a brief note of recent weather so the observations have context.
Match fixing positions to the new greenhouse
Use the manufacturer’s base drawing and installation instructions to identify how the greenhouse bears on the base and where any specified fixing points sit. Confirm that the documents match the exact model and selected version; a general assembly illustration may not contain enough detail for set-out. Compare those locations with the old shed’s holes, cracks, joints and edges, but do not assume its fixing pattern can be reused. The shed may have been secured differently, and empty holes or embedded pieces can affect what is possible. If the drawing does not state the information you need, ask for clarification rather than inferring a fixing layout from a photograph.
The base itself also needs professional consideration: its material, thickness, edge condition and any reinforcement or buried services may affect whether a proposed fixing can be used. Do not choose anchor type, spacing, depth or edge clearance from a generic online suggestion; those details belong to the model instructions and assessment of the actual base. If the surface is separate pavers rather than one slab, have the joints and individual units assessed instead of treating them as continuous concrete. For a model in the Aluminium Greenhouses range, obtain the fixing details for that specific version. Have the installer or other relevant professional confirm the connection before assembly is planned.
Check the entrance level and existing floor
Separate the base’s supporting surface from any floor or boards that used to sit on it. A shed may have had a raised timber floor over a smaller footing, a threshold strip or an entrance in a different place; after removal, the visible floor outline may not be the slab outline. Compare the support line and entrance level shown on the greenhouse drawing with the actual surface and the adjacent path. Check for a step, kerb or change in height between the base and the approach. The objective is to confirm that the base and entrance can be assembled as designed, rather than assuming the old shed’s threshold detail will suit the new structure.
Check which way the proposed entrance faces, whether the existing path arrives at it and whether a raised pad changes how items are brought inside. These are questions about how the greenhouse fits the site, separate from choosing an internal floor finish. If a Wall Greenhouse is being considered, confirm how it connects to the wall and base from the model’s own documents; the old shed doorway or slab edge cannot establish these details. If paths or adjacent surfaces may need alteration, consider the levels and runoff paths together. Do not fill a gap or add a step before confirming the greenhouse threshold and base arrangement.
Find out what is beneath the surface
Look for records that explain how the shed base was built and what has happened to it since. Original plans, dated site photographs, invoices for repairs and notes from previous owners may help identify the material, earlier movement or alterations. Treat these as clues rather than proof that the whole base is uniform; a drawing may not show later repairs, and an old photograph cannot confirm the current condition. If the shed is still standing, photograph the visible edges and any accessible fixing points before they are covered or removed. Keep a note of what you know and what remains uncertain, so a site reviewer can focus on the gaps.
The greenhouse drawing and the shed’s history answer different questions: one describes what the new structure needs, while the other may explain the existing base. When considering a Limited Edition Aluminium Greenhouse, pair its exact model documentation with whatever reliable records you have for the old shed. Hidden services, reinforcement, fill or earlier repairs may not be visible from the surface. Do not dig or drill to investigate until underground services have been considered and you have suitable advice. If the base construction cannot be established from records or visible edges, ask a qualified professional what assessment is appropriate for the site rather than guessing from its appearance.

Decide whether to reuse, alter or replace the base
A practical decision comes from the checks taken together. Reuse may be possible when the measured footprint and levels match the selected model, the visible condition is acceptable, water behaviour is understood and the fixing arrangement can be confirmed. If one issue needs attention, ask a qualified professional whether a repair or alteration is suitable and how it affects the greenhouse’s support and drainage. A small-looking change can still alter the frame position or leave a fixing where the base is weak, so do not treat patching, levelling or extending as a minor cosmetic job. If the base cannot meet the model’s requirements, plan for a different base rather than forcing the structure to fit.
Changing the greenhouse choice may be another option, but a different name or outline does not automatically make the old pad suitable. Compare each alternative with the same site measurements and condition assessment. If the T-Model Orangery Greenhouse is an option, use its base plan to check the footprint, support line and fixing requirements against the areas already assessed. Keep a record of what matches, what remains uncertain and what work a qualified person recommends for each option. This makes it easier to compare reuse with alteration or replacement, and to see whether changing models would actually resolve the mismatch.
Prepare information for a site assessment
Put the information in one simple site pack. Include the greenhouse model and selected version, its manufacturer base drawing, a sketch of the old base with measured sides and diagonals, notes on level changes, and marked locations for cracks, repairs and old fixings. Add wide photographs showing the base in relation to the surrounding ground, then close-ups of particular damage or water marks. Note when the photos were taken and, for drainage observations, the recent weather. A clear sketch and labelled images are more useful than a collection of close-ups with no indication of where each feature sits.
Ask the supplier or installer to clarify the greenhouse’s footprint, base interface and any drawing detail that is missing. Ask a qualified building or groundwork professional to assess the existing base and site conditions where its construction, condition, drainage or proposed repairs are uncertain. These are related but different reviews: product information describes the new greenhouse, while a site assessment considers the old base. Record any unresolved points and what would need to change before assembly. If a key measurement, fixing detail or condition remains unclear, pause the decision until it has been addressed.
Frequently asked questions
Can I assume the base is sound because the shed stood on it?
No. That shows only that the shed stood on the base in its own layout. The surface may have cracks, hidden repairs, drainage issues or fixing positions that do not suit the greenhouse. Compare the selected model’s base drawing with measured site conditions, and have uncertain structural details assessed.
How do I check whether the old base is square?
Measure each side and both diagonals between marked corners, and record any irregular edges or steps. Diagonals are a useful cross-check, not complete proof that every corner is square. Compare the measurements with the selected model’s drawing, and ask the supplier or installer what variation the instructions allow.
Can I fill a crack and build over it?
Not automatically. The crack’s location and pattern, any movement, the condition of nearby edges and the proposed fixing positions all matter. A filler or old patch does not show whether an underlying issue has stopped. Have a qualified building professional assess the base before deciding on a repair or fixing location.
Does the greenhouse need to be the same size as the old shed?
No. The new greenhouse’s support footprint and orientation matter, not the shed’s old wall or roof outline. The frame arrangement, entrance and base interface may differ. Compare the measured base edges with the drawing for the exact greenhouse model and size.
Who should check a shed base before it is reused?
The product supplier or installer can clarify the greenhouse footprint, base interface and model-specific instructions. A qualified building or groundwork professional can assess the old base and site where condition, drainage or repairs are uncertain. Give them measurements, photographs and any records you have.
Reuse is a sensible possibility when the exact greenhouse footprint and fixing plan align with a measured base, and the slab, edges and drainage have been reviewed in their site context. A good match on paper cannot establish what is hidden beneath the surface, and a sound-looking slab cannot settle the question either. Put the manufacturer’s drawing, your site measurements and any professional assessment together before committing. If the fit or condition remains uncertain, resolve that gap rather than adapting the greenhouse by guesswork.
