
Greenhouse Water and Power Planning Before Installation
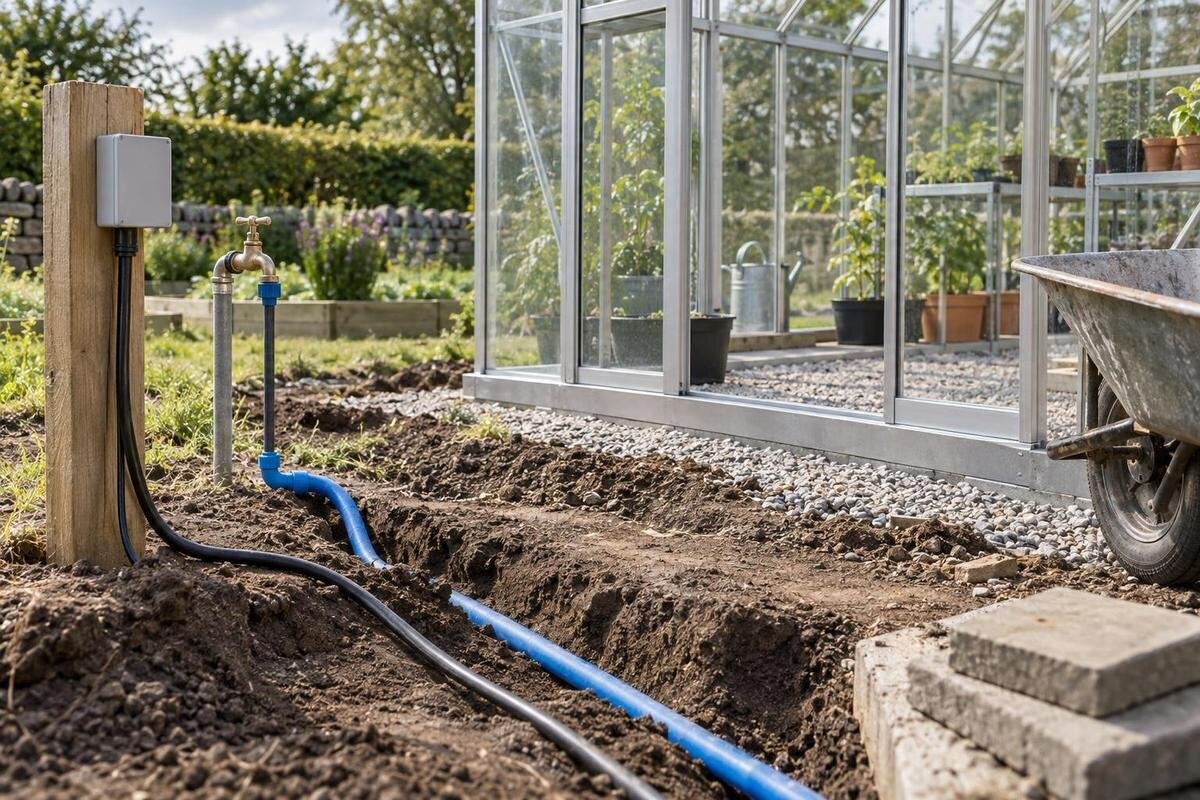
Planning your greenhouse installation
Water and power are easiest to coordinate while the greenhouse position, base and nearby paths are still being planned. Decide where each service starts, where it will be used and how it will reach the structure before concrete, paving or garden edging limits access. Water requirements can be mapped from your routine; electrical requirements need qualified design. A clear plan also gives the installer, groundworker and electrician the same reference, reducing the risk of a connection ending up under a bench, beyond a doorway or on the wrong side of the finished base.

Before the base and paths are finished 1
List the jobs water and power must support
Write down how you expect to use the greenhouse over its first few seasons. Water may mean filling cans, attaching a hose, using a timer or adding a dedicated irrigation arrangement; each affects where and how you need access to water. For power, list equipment already chosen or genuinely under consideration, such as task lighting, a fan or a pump, and keep its product details or manuals. Separate confirmed items from ideas for later. That gives the electrician facts to assess and helps you decide whether future provision is worth discussing, rather than guessing from floor area or assuming every greenhouse needs the same services.
Choose the greenhouse configuration before you draw a final route. The service sketch should refer to the selected structure and how people will enter and move through it, not just a rectangle on a garden plan. The T-Model Orangery Greenhouse is one named option; as with any shortlist, confirm the exact product version and obtain its manufacturer base drawing before setting out the site. The product name is not a substitute for that drawing, and floor area alone does not determine water or power needs. If the model, orientation or layout changes, revise the sketch before anyone opens the ground.
Map each route from its source to its endpoint
Draw a site plan that starts at each existing supply point and ends at every intended use point. Mark the greenhouse outline, the likely water connection and the nearby power supply location for the electrician to assess. Add the paths people will use and fixed features that may affect access, such as walls, gates, garden beds and finished paving. Include any buried services you know about. A rough sketch is a useful start, but check it on site and add measurements and clear labels; a line marked simply service route can hide a difficult turn or an inaccessible connection.
Trace water and electrical routes as separate lines, even where they seem to follow the same corridor. Note where each approaches the greenhouse and where someone may need to reach a valve, connection or control. Label endpoints by their purpose, such as hose connection or planned lighting point. Leave cable sizing, trench details and any required separation to the relevant professionals. For a model such as the Pyramid Greenhouse, use the proposed position and manufacturer drawing to show how these routes relate to the structure, its entrance and the surrounding paths.
Before the base and paths are finished 2
Confirm service entry points against the greenhouse drawing
Use the manufacturer’s base drawing to position the structure and its relationship to the base, then check what it says about services. A drawing may show the base outline without specifying an approved pipe or cable entry. Confirm proposed entry locations with the supplier or installer and the electrician before anything is built. Do not cut a frame, base component or wall because a gap looks convenient; ask the manufacturer or installer to confirm that the opening and route are acceptable for the selected model. Avoid relying on a generic entry dimension when the exact model drawing is the relevant reference.
Mark proposed entries on a copy of the drawing, clearly distinguishing an idea from a confirmed location. Check the plan against the door opening, circulation space and adjacent features, then ask whether the connection will remain reachable once benches and equipment are in place. If a model in the Limited Edition Aluminium Greenhouses with Storage range is on your shortlist, use the documentation for the exact selected variant; the range name does not establish where a service can enter. Keep the final agreed plan with the order and installation documents so each trade works from the same version.
Choose water access for the way you garden
Choose a water arrangement around the way you will actually water. If you will carry cans, a reachable filling tap nearby may be enough; a hose connection or automatic watering setup needs a route and connection point that suit the benches or growing areas. Walk the likely hose path or mark it on your drawing, and check that it will not need to cross a busy doorway or regular walkway. If you plan more than one bed or growing zone, decide how each will be reached before fixing the tap position. The route should make routine watering straightforward without obstructing access.
If water will be piped to the greenhouse, identify its source, proposed point of isolation and the access needed for maintenance. If you are extending an existing irrigation system or using stored water, ask the water-system installer to confirm which connections and equipment are appropriate. Note whether the connection is for a hose, timer or other planned device, and where any controller will be reached. When assessing the Bloomcabin Prestige Greenhouse, as with any model, place the proposed water point on the actual site plan and agree its route before nearby paving is finished.

Before the base and paths are finished 3
Keep valves and equipment accessible
Plan access to the parts that need attention, not just the endpoint. A valve hidden behind a fixed bench, a connector under stored pots or a timer placed where it cannot be reached is inconvenient to operate and maintain. Mark the intended position of shut-off valves, hose connections and any filter, pump or controller you expect to use. The exact equipment may change after the layout is settled, so distinguish confirmed items from possibilities. Include everyday access in the drawing, including the approach from the door and enough room to work at a connection without shifting permanent fixtures.
Powered equipment should be located and connected according to its instructions and the electrician’s design, not simply placed beside the nearest tap. Tell the electrician if a fan, light or pump may be used and where you hope to put it, so they can assess the actual conditions. A storage area should not be treated as a service cabinet without confirmation that it is suitable. When planning the layout for the Spacious Greenhouse, mark both equipment positions and access routes on its plan. Keep connections reachable once benches, pots and other items are in place.
Have a qualified electrician design the power supply
Bring a qualified electrician into the planning before routes are concealed. Provide the exact greenhouse model and base drawing, a site plan showing the proposed supply route, and the list of electrical equipment with its labels or manufacturer instructions. Explain how you expect to use each item and whether anything may be added later. The electrician can assess the supply and design the appropriate connection, switching, protection and route for the actual site and conditions. Those decisions depend on more than the greenhouse’s area, so do not choose a circuit, cable, socket or protective device from a general article or online image.
Discuss where connections and controls will be accessible, how the installation will suit the greenhouse environment, and what checks or records will be provided at handover. Do not assume an indoor fitting or a standard extension lead is a suitable permanent answer simply because it reaches the structure. If you are comparing Aluminium Greenhouses, tell the electrician which configuration you intend to order and identify any equipment choices still undecided. This keeps the brief clear about what is confirmed and what may change. Leave design and electrical work to a qualified professional.
Before the base and paths are finished 4
Coordinate service routes with the base and paving
Put the greenhouse outline, manufacturer base drawing, water route, electrical route and planned paving on one coordinated plan. Give the same current version to the groundworker, water-system installer, electrician and greenhouse installer. Each needs to confirm how their work relates to the base, including whether a route crosses the footprint, a fixing area, an entrance or a planned access path. Do not rely on a standard trench detail or assumed distance between services: have the relevant professionals specify the requirements for the site. Before excavation, ask the appropriate contractor to account for any existing buried services. A route that conflicts with the base can mean rework after concrete or paving is complete.
Pay particular attention where the greenhouse sits beside a wall or existing garden infrastructure. Mark visible taps, outdoor power points, downpipes and other fixed features, then ask the installer whether the proposed route and entry can work with the selected structure. If you are considering the Wall Greenhouse, check any wall-related fixing or service entry against the model documentation; proximity to an existing connection does not establish its suitability. Agree the order of work with the trades. Before a route is covered, confirm that existing buried services have been accounted for and that any required professional checks are complete.
Record concealed routes before they are covered
If pipes, conduits or connection points will be hidden by a base, slab or paving, arrange to record them before the work is covered. Ask the contractor to note the route and endpoints on the site plan, mark changes from the agreed drawing and photograph the work with recognisable fixed features in view. Record where accessible isolation points or inspection locations have been left. The aim is not to create a do-it-yourself installation drawing, but to preserve accurate information for future maintenance and repairs. A photograph without a clear location, or a plan that was never updated, may not tell the next person where to look.
Keep the record with the greenhouse base drawing, final product configuration and equipment manuals. Identify the date and drawing version, who carried out each part of the work and any changes made on site; ask the trade to update the plan if the route differs from the proposal. For a model from the Limited Edition Aluminium Greenhouses range, include the exact configuration in this record so the service plan can be matched to the installed structure. Take a final photograph before paths, edging or planting conceal reference points, preserving a clear view for future maintenance.

Before the base and paths are finished 5
Agree each trade’s scope and handover
Clarify what is included in each quote before the job is booked. Greenhouse supply or assembly, base preparation, plumbing, electrical design and connection may be separate tasks or assigned to different people; do not assume one contractor will cover them all. Ask who supplies any pipe or conduit, who prepares and installs the route, who makes the final connection and who confirms the entry point matches the greenhouse drawing. Establish who coordinates access and who should be contacted if a route cannot be built as planned. A written scope is especially useful when the base installer and service trades are working at different stages.
Agree the handover information in advance. Ask the electrician what design and verification records they will provide, and ask the water-system installer how the route, valves and connections will be identified. Confirm who checks the work before it is covered, who photographs it and who updates the site plan after a change. Share one dated drawing with everyone rather than passing on separate sketches that may disagree. If a trade proposes a change, pause and have the affected installer review the revised route before work continues; even a small move can put a connection behind a base edge or path.
Check the routes before concrete or paving is finished
Set a hold point after the service routes are installed but before concrete, paving or other finishes hide them. Compare the work with the latest agreed drawing: are the source and endpoint as planned, can the water shut-off be reached, and do the proposed entries still match the greenhouse layout? Ask the relevant trade to check its own work and resolve any difference before the next stage. Do not treat an unmarked route or unconfirmed electrical arrangement as ready to cover. If changes are needed, obtain the professional’s advice and update the plan first, while the route is still visible and can be reviewed.
Before the greenhouse arrives or assembly begins, confirm that the model and configuration still match the base drawing and that the agreed service entries are ready for the installer. Check that each trade knows who is making the final connection and when access will be needed. Route records and handover information should be available at this stage, rather than left for someone to compile later. If the model, equipment or site layout has changed since the electrical design or water plan was prepared, send the revision to the relevant professional for review before assembly proceeds.
Frequently asked questions
When should I plan water and power for a greenhouse?
Begin while you are choosing the greenhouse position, and before concrete, paving or paths are finished. Settle the model, likely equipment and water points before trades set out routes. Have the electrical design prepared before any electrical route is concealed, so the electrician can work from the actual site plan and product information.
Can water and electrical services follow the same route?
Do not assume they can share a route or decide their separation from a general diagram. Show both on the site plan, then have the relevant trades specify how each should be routed for your site and installation. Keep their instructions and the final route record with the greenhouse documents.
Is an extension lead a suitable permanent power supply?
Do not assume a standard extension lead is suitable just because it reaches the greenhouse. The equipment, environment and site all affect the design. Ask a qualified electrician to assess the intended use and specify an appropriate supply and connection.
Does a greenhouse always need a plumbed water connection?
No. Carrying watering cans or using a hose from a nearby tap may suit your routine; a dedicated line or irrigation setup is another option. Decide where water is needed and how you will reach it before setting the tap or pipe route.
What should I keep after the service work is finished?
Keep the selected greenhouse’s manufacturer drawing, the final site plan, equipment manuals and an accurate record of concealed routes. Add dated photographs, note changes made on site, and retain the handover information supplied by the electrician and water-system installer.
Good water and power planning is largely a coordination task: know what the greenhouse needs to support, locate each service against the exact base drawing and give the people doing the work a shared plan. Make electrical design a qualified professional’s responsibility, agree the scope before routes are buried and keep an accurate record of what was installed. Planning while the site is open helps the later greenhouse installation proceed without unpicking finished concrete or paving.
