
How to Plan Greenhouse Bench Space for Spring Seed Trays
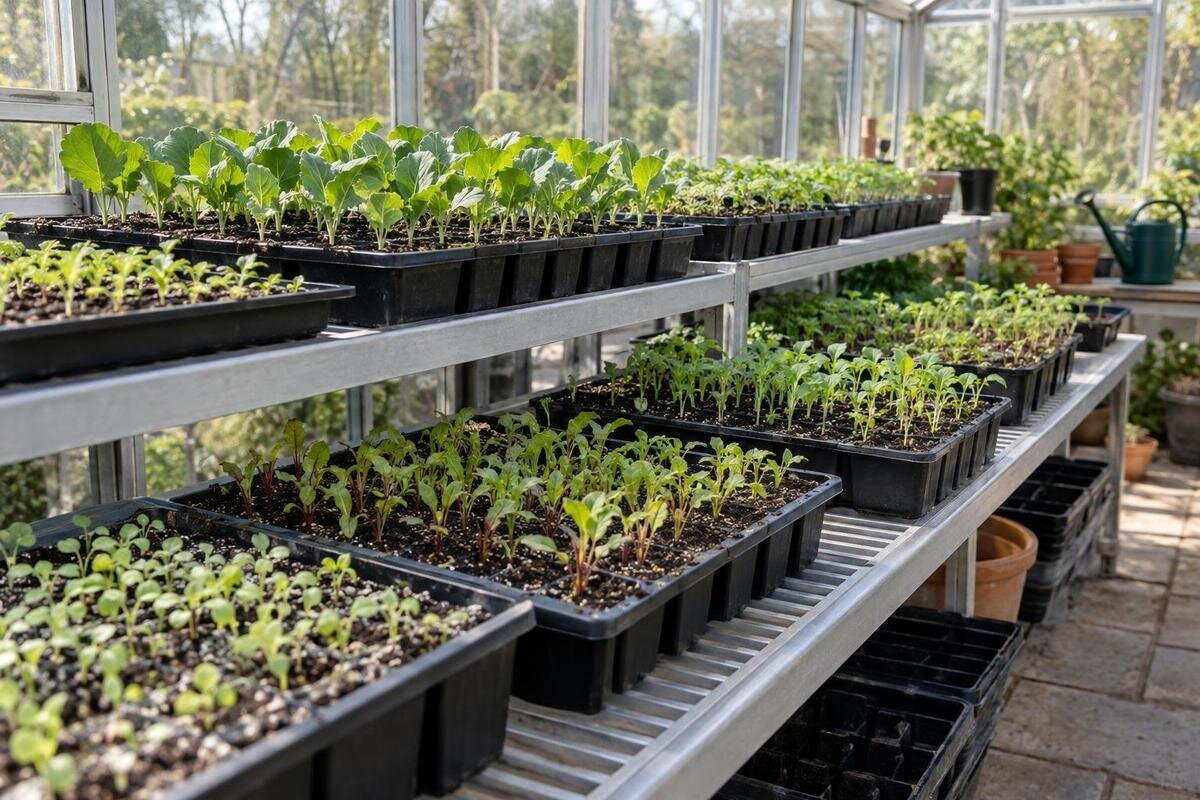
Greenhouse planning
Spring sowing can seem manageable when you look at one batch at a time. The pressure comes when new trays share the bench with seedlings from an earlier sowing. Plan for that overlap rather than dividing greenhouse floor area by a tray footprint. Measure the bench surface you can genuinely use, record the outside footprint of each tray type, and note the dates each batch is expected to occupy a bench. A week-by-week tally reveals the peak demand. This is a space-planning method, not a universal sowing calendar: use crop-specific guidance and your own records to estimate timing and when trays will be cleared.

Measure the bench area you can actually use
Begin with a top-down sketch of every bench you intend to use. Measure its clear length and depth, and break an L-shaped or stepped top into rectangles. Mark posts or fittings that interrupt the surface, permanent pots and edges that cannot support a full tray. A long bench may lose useful area around these interruptions; calculating one rectangle from its overall length and depth can overstate capacity. Keep measurements in millimetres until the layout is finished, or convert each measurement to metres before calculating square metres. Record upper and lower levels as separate surfaces.
Draw aisles and work areas separately from the bench surface; they are not spare tray storage just because they sit inside the greenhouse. Mark sections used by established plants, tools or other tasks as unavailable, including any dates when they cannot be used. If you are sizing a new structure, the Classic aluminium greenhouse is listed across areas from 3.77 to 28.08 m². Treat that range as a comparison of greenhouse areas, not benching: use the exact model dimensions and a proposed bench layout before estimating tray capacity.
Measure each tray’s real footprint
Measure the outside length and width of the complete unit that will sit on the bench. If cell trays sit inside a carrying tray or on a separate bottom tray, measure the combined arrangement rather than an individual cell. Include handles or rims if they affect how closely units can sit, then check that neighbouring trays do not overlap. Record each type under a short label, such as A or B, with its dimensions. For an illustrative example, a tray measuring 300 by 500 mm has a footprint of 0.15 m². Use your own measurements; this is not a universal tray size.
For a first area check, convert both measurements to metres and multiply them. But equal areas do not always make a tidy layout: long, narrow shapes can leave awkward gaps, and some trays fit only in one orientation. Test rows on the sketch before counting positions. Two trays could fit side by side across a 600 mm-deep bench if each occupies 300 mm of its depth, with no gap between them. The Lean-to greenhouse is listed in models from 3.69 to 14.34 m²; use the exact internal dimensions and bench positions to work out tray capacity, rather than converting the area figure directly into a tray count.
Record how long each batch occupies the bench
Give each sowing batch its own row in a log. Record the crop or batch name, number of trays, tray type, sowing date, date it first occupies the bench and planned date it leaves. For this calculation, the important interval is the time on the bench, not necessarily the full period from sowing to transplanting. A batch that begins elsewhere enters the count when it moves to the bench. If it shifts to another surface, note that change; if it changes to a different-sized tray, record the new footprint from that date.
Estimate the planned exit date from the crop guidance you follow and, where possible, compare it with previous records. Do not assign every crop the same occupancy duration: stages and local conditions affect when space is freed. If the date is uncertain, record a realistic range and use the later date for a cautious plan. When comparing layouts for a future structure, such as the Limited Edition aluminium greenhouse range, use the same batch calendar for each option. This keeps the timing assumptions consistent, so you can see whether each proposed bench arrangement accommodates the same peak demand.
Find the busiest week on a calendar
Put the batches across a calendar, with one column for each week and one row per batch. Mark a batch in every week when any part of it is expected to occupy the bench. Add the tray counts for each week, keeping different footprints in separate columns, then calculate the occupied area for each type. The highest weekly total is the demand peak. Use actual dates as well as week numbers, so a changed sowing date does not shift the wrong batch. If trays move between separate benches, tally each surface separately rather than assuming every position can be shared.
Count a whole batch if it uses the bench for any part of a week, unless a more detailed date-based plan tracks the handover precisely. This cautious convention avoids dropping a tray from the tally just because it is due to leave on Friday. Tray count alone can mislead when sizes differ: six small units may occupy less space than four broad ones. Keep both the number of trays and their combined footprint, and use daily dates instead of weekly columns if several batches move in and out close together. The useful figure is the peak on the surface you plan to use, not a spring-wide average.

Check the peak with a worked example
Consider an illustrative bench 600 mm deep and 2,000 mm long. Its surface is 1.2 m². With the example 300 by 500 mm trays, an ideal no-gap arrangement is two across by four along, or eight positions. Suppose Batch A has six trays on the bench in Weeks 1–4, while Batch B has four trays in Weeks 3–5. The peak is in Weeks 3 and 4, when ten trays overlap. Their combined footprint is 1.5 m², so demand exceeds the whole bench by two tray positions, before allowing for access or awkward edges.
That result does not mean the sowing plan must automatically be delayed. Check whether the occupancy dates are realistic, then consider options that suit the crop and your setup: a suitable change in batch timing, fewer trays, another usable bench or a different location. Recalculate after each change; do not simply spread trays into the aisle or assume they will be cleared early. In this example, any useful handling gap makes the theoretical eight-position maximum less practical. The dimensions and dates are illustrative, not prescribed measurements or a recommended sowing schedule.
Allow room to handle trays
An area total cannot show how easy a bench will be to work. Consider how you will lift, turn, label and check a tray, and keep a workable route to the surfaces. Mark the aisle outside the tray-capacity calculation, as well as any bench strip reserved for tools or handling. If the layout needs extra room between some trays, test an actual group rather than assuming every footprint will pack edge to edge. The allowance can be at the end of a row instead of around every tray, provided it remains accessible when the bench is busy.
Mark the access allowance on the sketch and deduct it before counting usable positions. Published greenhouse area gives context but does not show where a bench can sit or how people will reach it. The T-Model Orangery greenhouse is listed in models from 16.52 to 30 m²; compare the exact version with your intended bench layout rather than treating a larger area figure as proof that every tray will be accessible. Include existing plants and any fixed items in the drawing. A plan that fits only when nothing is being handled is not a workable peak-week plan.
Keep batches identifiable in the layout
Arrange trays so batches can be identified and reached without shifting unrelated plants. Give each batch a defined zone, label it on the sketch, and note its tray type and expected clearance date. Grouping by departure date can make it easier to see which section should become free next; grouping by footprint can make a tight layout easier to pack. Choose the approach that suits the bench and record it, rather than changing the arrangement every time a new batch arrives. If one crop has several sowings, give each a distinct code so later trays are not mistaken for an earlier batch.
For mixed tray sizes, draw rows to scale or use paper rectangles at a consistent scale; this shows where leftover strips fall. Do not count a narrow gap unless a tray fits there and can be removed. For a proposed Pyramid Greenhouse layout, draw the bench surfaces within the exact model dimensions before arranging your tray rectangles. Keep batch codes visible on the drawing so you can check both the fit and the order in which space becomes free. A quick photograph of a finished bench arrangement can also help you restore the layout after seasonal changes.
Schedule successive sowings around available bench space
Show both sowing dates and bench-occupancy dates in a succession plan, because space demand does not begin or end simply according to the seed packet. Add batches to the calendar using the crop schedule you have chosen, then compare their occupancy windows. If the peak is too high, test a different sowing interval only if it remains suitable for that crop and your conditions; the aim is to avoid an unnecessary collision, not to impose equal weekly sowings on every plant. Some batches occupy a bench briefly and others for longer, so use those differences instead of assuming all trays free up at the same pace.
After a batch leaves, record its actual clearance date and what happened to the space. Repeated late clearances mean next season’s estimate should allow more time; early moves can help refine it. If comparing a Limited Edition aluminium greenhouse with built-in storage, keep the named storage area separate from propagation capacity until you have verified the usable bench surface. The storage description alone does not tell you whether it can hold trays. A dated log makes both future sowing overlaps and greenhouse comparisons more realistic.

Include a realistic buffer
Leave a deliberate margin for uncertainty instead of filling every theoretical tray position. Base it on your own experience: a batch that often stays longer, a likely change in tray type or a bench section sometimes used for another task. You might reserve one marked position, a small area or a separate surface, but write that allowance into the plan so it is not silently counted twice. There is no universal extra percentage that suits every greenhouse. Compare a cautious peak, using later plausible clearance dates, with the capacity left after access and shared uses are deducted.
Test the buffer against the uncertainty you identified. If a batch leaves later than planned, check whether the reserved positions can accommodate the trays arriving before it clears. If not, the plan still needs a change in timing, tray numbers or available bench space. When comparing a Prestige Greenhouse, listed across areas from 3.77 to 28.08 m², include the buffer in each proposed bench layout rather than adding it afterwards. Keep any area that serves another purpose out of the seedling calculation unless you have decided it is available for propagation during those peak weeks.
Fit the bench plan inside the greenhouse
Before settling on a layout, sketch the greenhouse outline to scale and place the actual bench rectangles inside it. Include access routes, fixed items and areas reserved for other uses. Check that the longest and widest trays can be carried to the benches and taken off again; a bench that fits on paper may still be hard to use if the route is blocked. If you are choosing a greenhouse, compare the exact model dimensions rather than relying only on an area figure. The Spacious Greenhouse is listed from 47 to 70 m², but that figure does not specify how much bench top a particular arrangement will provide.
Finish by noting three figures: usable bench capacity after access allowances, the highest expected tray demand and the spare capacity or shortfall at that peak. Record which weeks create the peak and which batches are responsible. If there is spare room, keep it as a practical margin or identify another use for it; if demand is higher, change the plan before the season begins. At the end of spring, compare actual dates and tray counts with your estimate, including weeks when another crop used the bench. That review makes next year’s plan more accurate.
Frequently asked questions
How do I calculate how many trays fit on a bench?
Measure the clear bench surface and the outside dimensions of each tray. Sketch tray rows in both possible orientations, then count positions that fit without overlapping or sitting over an unusable edge. Multiplying the tray footprint by the count gives a useful area check, but it does not account for access gaps or awkward shapes.
Should I count from the sowing date or the date a tray reaches the bench?
Count from the day the tray first occupies the bench you are planning. If it begins elsewhere, it does not use this bench’s capacity until it is moved there. If a propagator or other piece of equipment sits on the bench, count the surface it occupies; do not count the trays inside it a second time.
How do I plan for different tray sizes?
Keep each tray type separate in the weekly tally. Multiply the number of trays of each type by its footprint, then add the areas that overlap in the busiest week. Use a sketch to check the physical arrangement as well: equal total areas can leave very different gaps and may not pack together neatly.
How much spare bench space should I leave?
There is no single spare-space percentage that suits every layout. First allow for access and any bench area used for other tasks, then add a margin based on your records, such as batches that regularly stay longer or trays whose dimensions may change. Mark the buffer on your plan so it is not also counted as available capacity.
What if the projected peak is greater than my bench capacity?
Check the dates and tray counts first, then decide how to handle the overlap before sowing. Depending on the crop and your setup, options may include changing a batch date where suitable, using fewer trays, allocating another appropriate bench or choosing a different greenhouse layout. Recalculate after each change, and do not rely on the aisle as overflow space.
A useful spring bench plan combines three things: the surface you can genuinely use, the footprint of each tray type and the dates when batches overlap. The busiest week matters more than the total number of trays sown across the season. Check that the peak fits with room to handle the trays, then record what actually happened. Those clearance dates and counts will make your next estimate more closely reflect your greenhouse, your crops and the way you use the space.
