
Planning a Potting Station Around Greenhouse Growing Space
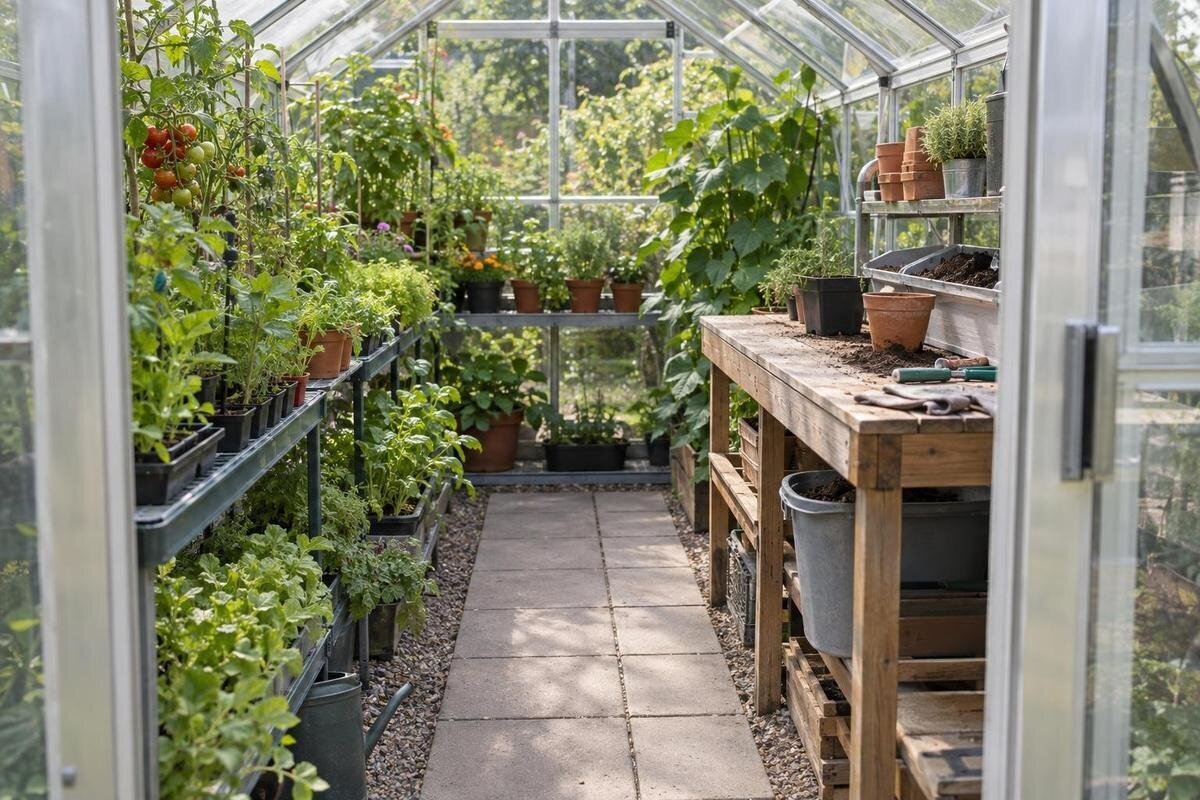
Greenhouse planning
A greenhouse potting station makes sowing, pricking out and repotting easier, but its real footprint is larger than the bench top. You need room to stand and work, a clear route for carrying trays, storage for the items used at the bench, and temporary space when propagation is at its busiest. If those areas are not mapped against the greenhouse’s internal dimensions, a compact bench can displace a bed or turn a useful aisle into overflow storage. Plan around work you actually do, then test the station’s permanent and seasonal footprint before settling on its position or the greenhouse size.

01
List the jobs the potting station must handle
Write down the jobs you expect to do at the station: filling pots, sowing into trays, pricking out, labelling, mixing a small batch of potting mix or repotting established plants. Note the largest pot and tray you handle, plus the tools that need to sit beside them. Filling a few pots and writing labels may need one clear patch; sowing a tray while several pots and a tub of mix are on the bench needs separate landing places. The purpose is not to give every garden job a permanent home. It is to define the work the greenhouse station must support, including which tasks happen at the same time.
Separate daily equipment from occasional supplies. A hand trowel, labels and a small watering can may need to be close by; unopened bags, spare pots and rarely used kit do not have to sit on the worktop. Think about the busiest spell, not a quiet afternoon: propagation can create a queue of trays, while repotting can leave pots and waste on the bench at once. Decide which items must be there together and which can be brought out in turn. If two people use the greenhouse, note whether someone needs to pass while the station is occupied. That affects where the working space belongs, even if the tabletop dimensions stay the same.
Choose bench depth for the actual task
Measure from the front edge to the wall or obstruction behind the bench, then account for items that will stay on it. The nominal top depth is not all free working area if a seed tray, potting tub or rear shelf occupies the back strip. Use real containers as templates: place the largest tray, a pot and the tools you use beside them, then check what remains for filling and labelling. As an illustrative calculation only, a 600 mm-deep bench with a 300 mm-deep tray parked at the back leaves 300 mm in front. These figures are examples, not recommended dimensions or available product sizes. Where a frame, handle or wall fitting projects, measure to that obstruction.
Decide how much of the surface needs to be usable at once. A very deep bench can look generous on paper yet leave its back edge awkward to use; a shallow top may suit individual pots but not a tray plus materials. Mark the proposed front and rear edges on the floor, or mock the top up with a temporary board, and try your tasks with your own pots and trays. Include any rear rail, shelf projection or support that takes away usable depth. Note whether you can reach the far edge without shifting the tray. Count only the clear patch for the current job, not an area occupied by a fixed tub that you also hope to use for seedlings.
02
Measure the station’s full footprint
Use clear internal dimensions to map the station, not just the greenhouse’s advertised floor area. Draw the interior outline to scale, then mark the bench top, legs, shelving, posts and other fixed obstructions. Add the place where you stand to work and the space needed to pick up and carry a tray; the bench uses more than the rectangle of its top if it needs an approach zone in front. Mark storage separately from the route so their footprints cannot overlap on paper. This is a station plan, not a complete planting layout: show the bed edges and growing positions that the bench could displace.
For example, the Limited Edition Aluminium Greenhouses range is listed from 3.77 m² to 28.08 m². That stated area helps compare footprints but does not tell you how much clear wall, worktop run or bed space a particular option leaves. Check the selected configuration’s dimensioned drawing against your station plan; note internal width, clear wall runs and door position. If the bench must fit beside a bed or between fixed framing, use the available span rather than assuming exterior dimensions carry through inside. Keep one plan with the station and another without it. The difference makes the area reserved for work—and unavailable for growing—visible.
Keep the door and route clear
Locate the bench without making the doorway or main route its overflow zone. Check the door’s actual opening path, latch and handle, as well as the route from the entrance to the growing beds. A bench at the end of an aisle may be convenient while you pot, but it can obstruct people carrying trays in or out. On the plan, mark the door both open and closed, along with the full depth of bins, tool handles or a stool used at the station. Do not label a strip as a clear route if pots or stored items regularly occupy it; everyday habits matter more than a tidy first sketch.
Test this junction at full scale before fixing a permanent bench. Outline the top and any shelves with removable tape, set a box at the intended depth, open the door fully, then carry an empty tray along the route and turn towards the growing area. Repeat with bins pulled out and someone standing at the worktop. This is a station-specific access check, not a complete greenhouse-access design; it exposes obvious conflicts between potting and normal movement. The T-Model Orangery Greenhouse range is listed from 16.52 m² to 30 m², but check the exact option’s internal drawing and entry position rather than treating total area as evidence that the route will fit.

03
Allow for the busiest tray period
Measure the trays you actually use, including a lid or cover that stays on them. Count how many may be moving through sowing, pricking out or transplanting at once, then mark that number as separate rectangles on the bench or staging shelf. Allow for the space needed to lift one out without sliding its neighbours; rims and labels can make a tight row difficult to handle. Mark the queue that passes through as well as trays that stay in one place. Without that distinction, seedlings waiting for their next task can become an unplanned second growing bed across the worktop or route.
Give seasonal overflow a defined home. If trays occupy the bench during the busiest spell, the remaining surface still has to work for potting; if they go on a lower shelf, check that they can slide out without blocking plants or the route. Keep stored spare trays separate from those in active use, so a stack of empties does not distort the space you allow for propagation. When considering a Pyramid Greenhouse configuration, plot the measured tray footprints on its internal drawing. Show where each tray will sit during the busy period and which spaces become available again once those trays have been moved.
Store tools without crowding the worktop
Store equipment by frequency and size, rather than piling items at the back of the bench. Keep small daily tools and labels in a shallow container that can be moved aside; group pots by size and keep bulky bags of mix off the working surface. For each item, note its approximate footprint and whether you need to reach it from the front, above or beside the bench. That makes storage visible in the same plan as growing space. A tub that fits underneath can still take away the floor area you meant to use for a low plant or tray.
Built-in storage may reduce loose bins, but its position and access matter. The Limited Edition Aluminium Greenhouses with Storage listing identifies a built-in-storage option, with stated areas from 5.52 m² to 28.08 m². Check the chosen configuration’s dimensions and the storage location before assuming it suits your item list or lets you remove other storage from the plan. The range area does not show storage volume or clearance beside a bench. Count each storage footprint once; do not treat the same area as both a cupboard and an unobstructed growing bed.
04
Check shelving above and below the bench
Shelves can keep tools off the tabletop, but each one has a depth and needs room for you to reach its contents. Mark its front edge and supports on the plan: a shelf projecting above a bench can reduce the usable rear strip, while a tall pot, watering can or tray may not fit beneath it. List what the shelf will hold and compare each item’s height with the proposed shelf spacing. Avoid putting rarely used supplies where you must move seed trays every time you need them. A compact-looking vertical stack can otherwise increase handling and occupy the very surface it was meant to free.
Under-bench storage needs its own check. A low rack, pot stack or tub can interfere with foot space, a stool, cleaning or access to items at the back. If the space is dark or obstructed, do not count it as useful growing area just because it is empty on the plan. When comparing a Bloomcabin Prestige Greenhouse option, draw the proposed shelving within the exact internal outline. Include the containers beneath the bench and the space needed to pull them out. This lets you see whether retrieving supplies would interrupt work at the bench or require you to move nearby plants each time.
Plan for water, spills and clean-up
If you water trays or rinse pots at the station, note where water comes from and where used containers go. Measure the route from an existing tap or filling point, if you have one, and include a place to put down a watering can without occupying the main work patch. A bench near the entrance may shorten a trip but also concentrate traffic, so base its position on the route you will actually use. If there is no water point inside, decide whether carrying water through the greenhouse works for the jobs you plan to do. Keep labels and seed packets in a separate dry spot, away from splashes and spilled potting mix.
Potting mix, fallen leaves and used containers also need a tidy-up plan. Reserve a small movable tray for loose mix, a bin or bucket for spent material, and a place for tools to dry without taking the whole bench. Put the containers’ parked positions on the drawing as well as their working positions. The Wall Greenhouse range is listed from 3.69 m² to 14.34 m². For the option you are considering, trace the route between the water source, bench and clean-up containers on the plan. Check whether those jobs can happen without setting a bucket in the aisle or using growing space as a temporary dumping spot.

05
Rehearse a busy potting session
Before settling on a bench, lay out a typical busy session with the pots, trays, labels and tools you listed earlier. Use empty containers if you do not want to work with mix during the test. Put them in the order you use them: supplies at hand, a clear patch for the current task, then somewhere to set a finished tray. Notice each time you have to move one item to reach another. The test shows whether the proposed surface handles the real sequence, not just whether every object can be fitted onto it at the same time.
If the layout only works when tools or trays are moved repeatedly, change their storage position or reduce what stays on the bench. Keep the measurements from the trial when comparing a Aluminium Greenhouses option, so you can mark the tested arrangement on the selected configuration’s internal drawing. Record which items stayed within reach, where finished trays went and whether the work patch remained clear. Those observations help distinguish a genuine need for more bench space from supplies that could be brought in only for a particular job. Use the revised arrangement, rather than the first crowded attempt, as the basis for your station plan.
Include the station in the greenhouse size decision
Compare greenhouse options only after the bench, working position, storage and trays needed at the busiest time are on the same plan. A larger stated area may give you more options, but internal framing, doors and the chosen position of growing areas still affect where the station can go. The Spacious Greenhouse range is listed from 47 m² to 70 m². For the selected size, compare a plan with the station against one without it, keeping the growing areas you want to retain clearly marked. This shows whether the extra room serves your potting work or simply leaves you with a larger greenhouse and the same cramped bench arrangement.
If a permanent bench cannot fit without displacing a valued growing area, consider whether every task and supply needs to be inside the greenhouse. If suitable storage or a separate work area is available, keeping bulky supplies elsewhere and bringing them in when needed may reduce the station’s permanent footprint. Include the carrying route and seasonal tray overflow in that decision. The useful comparison is not bench size against floor area in isolation; it is the complete working arrangement against the growing space you want to retain.
Frequently asked questions
How deep should a greenhouse potting bench be?
There is no single depth that suits every task. Arrange your largest tray, a pot and the tools you use on a mock-up, then check how much clear surface remains. Treat any example dimensions as planning illustrations, not product specifications.
How much room should I leave in front of the bench?
Allow for the way you stand, the largest tray you carry and anything you need to pull out from storage. Include the open door and the route to growing areas, then test the arrangement at full scale rather than relying on a floor plan alone.
Can I store supplies underneath the potting bench?
Yes, if you count that area as storage rather than available growing space. Check that containers can be reached without moving plants or blocking the working position, and consider whether the space remains practical to clean and use.
Do I need room for all my trays throughout the year?
Allow space for the trays that may be in use at the same time during your busiest period. Give them a defined place without occupying the whole work surface. Store empty spare trays elsewhere or stack them when they are not needed.
Is the greenhouse’s stated floor area enough to plan the station?
No. Floor area is useful for comparing broad size options, but it does not show clear internal wall length, door position or the usable space around a bench. Check the drawing for the exact configuration you are considering.
A space-efficient potting station is not simply the smallest bench you can fit. It is a work surface that handles routine jobs, storage with a defined footprint and a clear home for trays during the busiest period. Test those elements together against the internal dimensions of the greenhouse you are considering. If the plan cannot fit the bench, its working space and the seasonal tray queue without sacrificing growing areas you value, change the storage or move some tasks elsewhere before committing to the layout.
