
Preparing Greenhouse Water Pipes, Pumps and Tanks for Frost
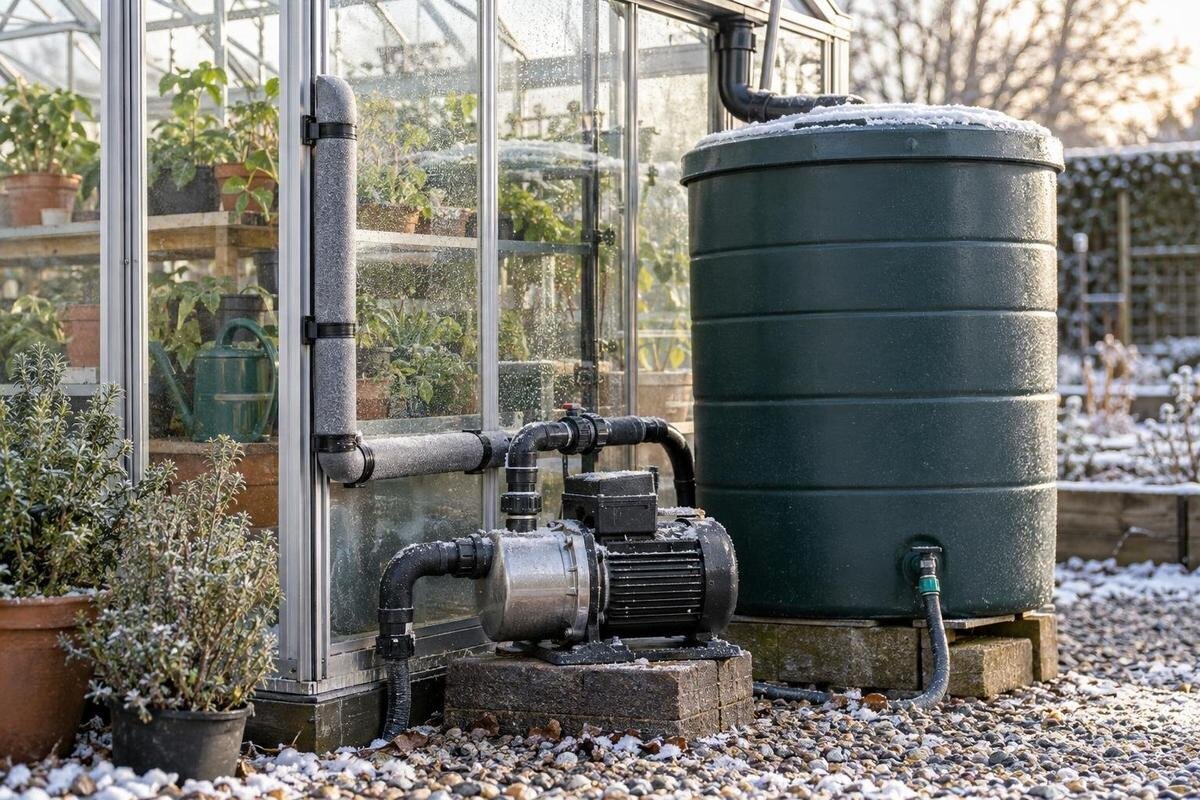
Greenhouse irrigation
Frost preparation for a greenhouse watering system means dealing with each place water can remain, rather than simply turning off the tap or wrapping a visible pipe. A greenhouse enclosure does not guarantee that water in an exposed line, pump casing or valve will stay above freezing, and an apparently empty hose can still hold water in a low loop. The useful questions are where water can be trapped, how each component is designed to drain, and what must be removed or assessed by a professional. This guide focuses on irrigation pipes, pumps, tanks and controls—not general greenhouse winter care. Work from the equipment manuals and prepare before frost is forecast.

Map every part of the water system
Trace the water from its source to its last outlet: tank or mains connection, pump, filter, regulator, shut-off valves, controller, fixed pipe, hose, branches and drippers. Record what is removable, what is fixed and where a line passes through an unheated or exposed area. Mark every drain point, isolation valve, low spot, loop, capped branch and dead end. A tap running dry does not prove that a separate branch or pump housing is empty. A simple sketch, labelled photographs and equipment manuals make it easier to find each part in order. Use labels you can match to the equipment, rather than vague notes such as a pipe near the back bench.
Pay attention to locations, not just the greenhouse interior: lines may cross a doorway, sit near the perimeter or continue outdoors to a tank. Frost can affect a component outside the growing area even when conditions inside are milder. If you’re planning watering alongside a new structure, the Wall Greenhouse listing shows sizes from 3.69 m² to 14.34 m². Use the exact model and selected plan to mark where the supply enters and where it continues outside; the floor area alone cannot show that route. Note model numbers, photograph equipment labels and identify any drain point that will be hard to reach once stored items are in place. Include the outdoor connections on the same sketch so they are not overlooked.
Choose what to drain, remove or keep running
Decide first whether the system can be shut down completely or must still water plants. For a full shutdown, isolate the incoming supply and drain each part by its designed method; for a system that remains in use, check the permitted operating conditions for every component in its actual location. There is no single temperature threshold or shutdown sequence for all pumps, valves, tanks and pipe materials. A greenhouse is not automatically above freezing, and a cover can delay cooling without guaranteeing that water will not freeze. Read the manuals before fittings become cold or difficult to handle.
Make the decision component by component: it may be possible to remove a pump while keeping a separate branch available, but only if the system design and instructions allow that arrangement. List what will remain in use, drain in place, be removed or need professional assessment. Do not add automotive antifreeze or household chemicals to irrigation water; use a treatment only when the equipment instructions and product label explicitly permit that use. If you’re considering the Limited Edition Aluminium Greenhouses, use the selected layout to distinguish the parts of your watering system needed by winter crops from those you intend to shut down. Record those choices on the system sketch rather than relying on memory when frost is forecast.
Drain pipes and hoses by section
Before opening any fitting, shut off the supply and release stored pressure using the procedure specified for the system. Use intended drain cocks or outlets in the order described by the manufacturer, and deal with one isolated branch at a time. Remove detachable garden hoses if permitted, position them so water can leave, then check couplings, spray ends and coils. Water can sit in a low loop, capped branch or pipe section beyond a closed valve; a brief flow from the nearest tap does not prove the whole circuit is empty. Keep track of which parts have been opened or drained.
If a run is buried, concealed or lacks an accessible drain point, do not cut, drill, force a joint or guess that it slopes correctly. Ask an irrigation professional whether an approved drain-down method is available. Do not use an air compressor unless the equipment manufacturer permits it and specifies a safe procedure; pressure can damage emitters and loosen debris. When planning pipework around a T-Model Orangery Greenhouse, mark each branch and its intended drainage route on the exact installation plan. Record which valve isolates each branch and which outlet drains it. This gives you a section-by-section reference for shutdown without treating the greenhouse’s floor plan as a diagram of the watering system.
Empty filters, regulators and valves separately
Filters, strainers, pressure regulators and valve bodies can retain water in bowls, cavities and internal passages. After isolating the supply, remove a filter element or bowl only if its instructions describe user servicing. Empty, clean and dry it as directed; a clean component is easier to inspect for cracks when you put it back. Keep seals, screens and small screws together, note their orientation, and store them where they will not be confused with parts from another fitting. Take a photo of the original assembly first. Do not force a seized cap or prise out a seal with a sharp tool.
A regulator, check valve or backflow-prevention device may need to stay installed or be serviced in a particular orientation. Do not dismantle it, adjust screws or assume that closing the upstream tap has drained its body. Use the manufacturer’s frost instructions; if none are available, ask a qualified irrigation professional rather than improvising. If you’re planning a watering layout for a Pyramid Greenhouse, consider filter servicing as well as access to the shut-off valve. Check where a removable bowl or element will be taken out, and keep that space clear of stored items. The watering equipment’s instructions, rather than the greenhouse listing, determine which parts you can remove and how they should be refitted.

Follow the pump’s own winter procedure
Treat the pump as a separate water-holding component, not as something made safe merely by emptying the delivery hose. Depending on its design, water may remain in the casing, priming chamber, strainer, suction line, pressure vessel or attached fittings. Check the pump manual for the shutdown procedure, including the order for stopping the pump, isolating water and electrical power, releasing pressure and using a drain plug. Use the designated controls and procedures rather than opening an electrical cover or undoing a pressurised connection to work out how to shut it down. If the pump is hardwired or its isolation point is unclear, ask a qualified professional.
Remove the pump only if the manufacturer says it is suitable for removal and you can disconnect and reconnect it safely. Drain it through the intended point and store it within the conditions specified in its instructions, with openings protected from dirt. Keep the drain plug and manual together, and do not assume a pump is self-draining. The Limited Edition Aluminium Greenhouses with Storage listing names built-in storage, but that description alone does not show whether a pump can be stored there. Check the pump’s temperature and moisture instructions before using any greenhouse storage space.
Prepare the tank and its connections
A tank needs its own plan. Check the manufacturer’s guidance on frost and whether the tank should be emptied, left partly full or taken out of service; the answer depends on its construction, placement and fittings. Do not decide by volume alone: an exposed outlet, tap, inlet, float valve, level gauge or filter may face different conditions from the main tank. Isolate connections only in the specified sequence, and identify which branches may continue to supply irrigation. If the water contains fertiliser or another treatment, follow its product label and choose a suitable disposal route rather than draining it indiscriminately.
Emptying a tank may not empty an attached pump, filter bowl, valve or short outlet line, so inspect those individually. Keep lids and ports protected from debris while open, and clean the tank only by the method specified for it; do not enter the tank to reach sediment. Use a competent service provider if internal work is needed. A greenhouse listing that names a metal base, such as the Bloomcabin Prestige Greenhouse, is not a tank-support rating and does not establish water-system compatibility. Assess the tank’s support requirements separately, and do not place a filled tank on or against a greenhouse structure without confirmation from the relevant suppliers or a qualified professional.
Shut down controllers and automatic valves
An automatic controller may still be set to open a valve during cold weather, while a solenoid valve or inline filter can retain water after watering stops. Disable automatic cycles using the controller’s normal winter or standby procedure, and close the supply to unused branches if the system design allows. Save settings before any battery removal that the manual permits. Follow the instructions for batteries, display and storage temperatures; an outdoor-rated controller does not mean that connected hydraulic components are protected. Do not disconnect wires or open enclosures unless the manual identifies the task as user-serviceable.
Keep rain and condensation away from electrical connections as the manufacturer instructs; do not wrap a wet controller in plastic or use improvised heat. If the unit is hardwired, damaged or needs relocation, ask a qualified electrician. The Spacious Greenhouse range is listed from 47 m² to 70 m², but floor area alone says nothing about pump flow, pressure or controller zones. Base control choices on the system diagram and measured requirements, not on a greenhouse category or area figure.
Plan for fixed equipment that will not drain
Some fixed pipes cannot be reached, fully drained or removed. A gravity drain might leave water in a sag, elbow, closed valve or concealed branch, so do not assume the pipe’s appearance or slope shows that it is empty. Note any section without an approved drain point and consult an irrigation specialist about the manufacturer’s accepted method. Do not drill an extra hole or cut pipework; a modification can create a leak and still fail to empty the system. If there is no safe drain procedure, a professional can identify the trapped sections and advise what can remain in service.
Insulation may slow cooling but does not guarantee that water inside will stay unfrozen through a prolonged frost. Use only covers or protective products suitable for the pipe, fittings and location, installed as the manufacturer allows. Do not use open flames, pour hot water over frozen fittings or improvise a heater; fixed electric protection should be assessed and installed by a qualified professional. If you’re planning an Aluminium Classic Greenhouse, identify proposed fixed water routes before they become concealed or difficult to reach. Mark any section whose drainage method is unresolved, along with the fittings it serves. Have those sections assessed before relying on insulation to keep the watering system in service through frost.

Watering crops during a partial shutdown
Winterising does not have to mean removing water needed by every plant, but it should be a deliberate choice rather than leaving the whole system live by default. If crops still need irrigation, identify the branch and supply you expect to use, then confirm that the pump, valves, controller and lines are permitted to operate in the forecast conditions. Isolate and drain unused sections where the system design allows. Keep an alternative watering method ready if frost precautions require the automatic system to be shut down. Do not judge equipment safety from greenhouse air temperature alone.
Before an expected cold spell, check accessible connections and shut-off points while they are not frozen, and make sure they can be reached without moving heavy items or opening electrical housings. A visible drip, wet patch or unexpected pump cycle deserves attention before water freezes. If a fitting is already frozen, do not force it or apply a flame; follow the manufacturer’s instructions and get help if a crack or leak is suspected. Keep a dated note of which branches are open, drained or isolated so a temporary change is not forgotten.
Recommission and test before automatic watering resumes
Restore the system only when frost risk has eased enough for the equipment and its manufacturer’s instructions allow operation. Before putting stored parts back, inspect hoses, filter bowls, valves and tank fittings for splits, distortion or damaged seals. Check the pump for leaks or visible damage, and replace failed parts rather than covering a crack. Refit filter elements, plugs and seals in their recorded orientation, and restore controller settings from saved notes. If a component may have frozen and its condition is uncertain, have it assessed before putting it under pressure.
Follow the manual’s refill and pump-priming sequence; do not run a pump dry unless its instructions expressly allow it. Restore the supply in the specified order, then inspect joints, filter bowls, the pump, the tank outlet and every branch during a controlled test. Check that water reaches the end points, valves respond and there are no leaks; compare pressure and flow with the system’s own requirements, not a general figure. Stop if water appears where it should not, pressure behaves unusually or the pump sounds different, and seek qualified service. Update your sketch if anything has changed.
Frequently asked questions
If I turn off the tap, are the pipes drained?
Not necessarily. Water can remain in a separate branch, a low loop, a filter bowl, a valve or the pump. Use the system’s drain points and check each section according to its instructions; one dry tap does not confirm that the whole system is empty.
Should I empty the whole water tank?
Follow the tank manufacturer’s frost guidance. Whether to drain it depends on the tank, its location and its fittings, so do not decide by volume alone. Even if the main tank stays in use, its outlet, valve, level control and connected pipework need separate attention.
Can I use an air compressor to clear irrigation lines?
Only if the manufacturer permits this method and provides a suitable procedure for the system. There is no universal pressure setting for every pipe and fitting. For fixed, concealed or unfamiliar pipework, ask an irrigation professional rather than improvising.
Is pipe insulation enough to prevent frost damage?
Insulation can slow heat loss, but it does not guarantee that water will stay unfrozen during a cold spell. Check the instructions for the pipe and fittings, and drain or protect the system using an approved method suited to its location.
Can I keep watering crops while frost is forecast?
Possibly, if every component left in service is allowed to operate in the conditions at its actual location. Check the pump, valves, controller and pipe instructions, and isolate or drain unused branches if the system allows. Keep another watering option available if you need to shut the system down.
Winter preparation is complete only when every water-holding component has a clear plan: drain it, remove it, leave it operating within its documented conditions or have it assessed by a professional. A marked system map makes that plan easier to follow and helps prevent a filter bowl, pump chamber or short tank outlet being overlooked. When the cold period passes, check the whole circuit before handing watering back to a timer.
