
Can a Rainwater Tank Run Greenhouse Drip Irrigation?
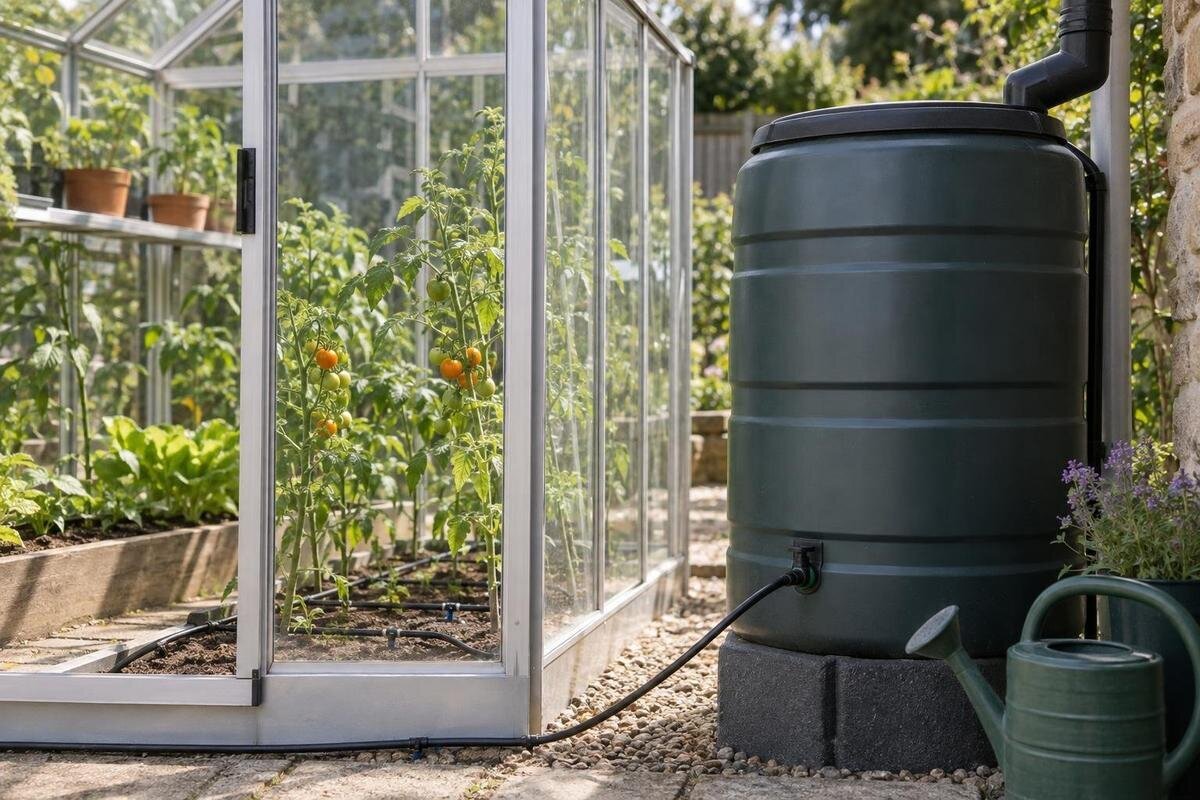
Greenhouse watering
Gravity can supply a greenhouse drip system from a rainwater tank, but only when the water level, pipe route and every component suit low-pressure operation. A tank’s capacity does not tell you whether the drippers will run: the water surface drops as the tank empties, and filters, timers and long lines can reduce delivery. Check the operating specifications, then measure output from the complete layout at both a normal and a low tank level before relying on it.

When gravity feed is a realistic option
Yes, a rainwater tank can run greenhouse drippers by gravity, but the word 'drip' on a kit does not mean it will run at tank pressure. Gravity-fed water has only the pressure created by the height of the water surface above the outlets; it is not equivalent to a pressurised tap. The filter, tubing, valves, connectors and any timer also affect whether water reaches the emitters. A straightforward layout with short runs and parts explicitly specified for gravity or low-pressure operation is a more realistic candidate than a kit chosen by its name alone. Some kits include a controller or regulator intended for a pressurised supply, which may be the limiting part even if the drippers themselves can pass water.
Keep water quantity and delivery pressure separate. A tank can hold enough litres for the planned watering while still failing to push water through an emitter that needs more pressure. It may also work when full but slow as the level drops. A large tank does not automatically provide more pressure if its water surface sits at the same height as a smaller tank's. The relevant conditions are the lowest level at which you intend to operate, the vertical height to each emitter, restrictions along the route and the number of outlets running together. Seeing water leave an open outlet, or a few drips at first, does not establish that the system will deliver its rated flow.
Measure the head at the tank’s lowest working level
Available head is the vertical difference between the water surface inside the tank and the emitter outlet. Measure it with the tank at the low level you expect to use, not from the ground to the tank lid or base: a tall tank can have a low water surface, and a lower tank can sit on a stand. The height of an outlet fitting does not replace this measurement; as the tank empties, the water surface moves down and the head changes. Measure vertically rather than along sloping ground or the hose route, and record the reading. As rain refills the tank and watering draws it down, the available head changes, so note both the full and low water levels.
Check the most demanding outlets in the proposed layout: the highest emitter and those at the end of each long branch. If the greenhouse floor or benches sit at different levels, include those elevations. Compare the available head with each emitter’s stated minimum operating pressure and check what the filter, valve and controller require; every component has to work at the supply provided. There is no single tank height that suits every drip kit. Choose a normal refill point that leaves enough water for operation, and assess the system at or near that low point. A design that only works with a brim-full tank is a poor match if that level is uncommon.
Allow for pressure losses along the line
Head at the tank does not all arrive unchanged at the drippers once water is moving. Resistance builds along the route: long or narrow tubing, kinks, multiple elbows and tees, a restrictive tap connector, filter, valve or timer can all reduce delivery. At low gravity pressure, the difference between a short branch and a convoluted run can be significant. A nearby low emitter may drip steadily while the highest or farthest one delivers very little. Check the tubing maker’s permitted run lengths and the irrigation supplier’s layout guidance, rather than assuming any garden hose will suit. Removing unnecessary bends may help, but it cannot make an emitter work below its minimum pressure.
Sketch the actual route from tank to plants before selecting tubing. For a Wall Greenhouse, available in sizes from 3.69 to 14.34 m², use the footprint you are considering to draw the beds, benches and pipe route. Mark bends, branch points and the highest outlets, then identify the longest run from the proposed tank position. Note where the main line splits into laterals, as restrictions in a shared section can affect every branch. This gives you a specific far-end location to test and a drawing to discuss with the irrigation supplier when checking suitable tubing and run lengths.
Choose emitters rated for low-pressure supply
Look for emitters or dripline expressly specified for gravity-fed or low-pressure use. Read the minimum operating pressure and stated output at that pressure; a flow figure advertised for a pressurised supply is not a promise of the same output from a tank. A pressure-compensating emitter can keep output steadier only within the pressure range its maker gives. If head is below its minimum, it may not regulate or deliver its stated rate. Ordinary non-compensating emitters may change output as pressure varies, so compare both ends of the line against manufacturer guidance. Treat 'dripper', 'micro-irrigation' and 'pressure compensating' as descriptions to investigate, not proof of compatibility.
Check outlet spacing and quantity against where plants will sit. An emitter’s stated flow and spacing do not tell you how many are suitable for a particular pot, bed or crop; follow the maker’s application guidance and judge coverage in the actual growing medium. With sizes from 3.77 to 28.08 m² in the Limited Edition Aluminium Greenhouses range, settle on your greenhouse size and planting arrangement before counting outlets. Mark individual pots or planted rows so you can compare loose emitters with pre-spaced dripline. Allow for adjustments if a trial shows that the chosen spacing leaves some intended growing areas dry.

Check filtration and maintenance requirements
Rainwater can carry particles that block small emitter passages. Use the filtration rating recommended by the emitter or dripline manufacturer; a finer filter is not automatically a better choice if it is not specified for the system. The filter adds resistance as water passes through, so check that its design suits low-pressure gravity operation and that the system can still meet its flow requirements. Install it in the position and direction specified by its maker, and put it somewhere you can inspect without dismantling planted beds. A dirty filter can reduce delivery across the whole system and mimic an insufficient-head problem. Do not remove required filtration just to make flow appear stronger; find the cause instead.
Plan cleaning as routine maintenance, not a one-off setup task. Look for leaves or sediment in the tank, inspect the filter, and flush the main line or laterals only as directed by the component maker; do not poke an emitter with a tool unless its instructions allow it. When planning a T-Model Orangery Greenhouse, available in sizes from 16.52 to 30 m², mark a reachable position for the filter and any flush points alongside the beds and access paths. Check access before planting makes changes awkward. Inspect the filter again after the first run in case debris has collected during setup.
Measure flow across the complete layout
Test the complete assembly rather than the tank outlet alone. Set up the tank, outlet, filter, valve or timer, tubing, connectors and emitters exactly as you intend to use them. Fill the tank to a representative level, open the system and allow it to settle into a steady pattern. Put identical measuring cups under emitters near the tank, at branch ends and at the highest points; include each branch if there is more than one. Use the same timed collection interval for every sample, choosing one long enough to produce a readable amount without overflowing. Record the tank level and interval so you can repeat the test fairly.
Compare each cup’s reading with the emitter maker’s stated output under similar pressure, and compare samples with one another. Keep all intended outlets running during collection: a one-outlet test cannot show how the planned system behaves at full demand. Repeat at the lowest normal tank level, leaving the filter, valve and any controller in place. On the planting plan for your Pyramid Greenhouse, whose listed sizes range from 5.53 to 18.9 m², mark the sampled outlets so you can return to the same points. If readings vary, inspect for a clogged filter or kink, make one change at a time and test again. Consistent sampling makes the results easier to compare.
Set the number of emitters and zones from test results
If a dripper works on its own but weakens when all outlets are open, the issue may be the demand of the whole layout, not a faulty tank. Every operating emitter draws from the same supply; higher combined flow can increase losses through shared tubing. Check the system with all outlets you intend to run together, not just one test dripper. Compare readings at the start and end of each branch and observe whether opening one line changes the others. Adding more emitters or longer laterals without rechecking can leave some plants under-watered even though every dripper releases a drop. If a timer controls the system, test its actual valve arrangement too.
One response is to split beds or containers into separately operated zones so fewer emitters run at once; shorter branches or a low-pressure-rated system may also help. These changes need another test and cannot fix insufficient vertical head on their own. For a Limited Edition Aluminium Greenhouse with Built-In Storage, available in sizes from 5.52 to 28.08 m², draw each proposed zone around the actual pots and rows, then count its outlets. Record which branches will operate together so the test matches that arrangement. If you also plan to store irrigation gear in the built-in compartment, check its details before deciding what will fit.
Position the tank for head, support and access
Tank placement affects both gravity head and practical access. Raising the water surface can increase available head, but any stand or platform must be designed to support the filled tank; do not rest a tank on a greenhouse frame, bench or shelf unless the manufacturer explicitly confirms that use. For a raised installation or uncertain support, ask a suitably qualified professional to assess it rather than working from a rule of thumb. Keep the outlet accessible for isolation and cleaning. If the tank cannot be positioned high enough safely, choose compatible low-pressure parts or assess a suitable pump instead of improvising a support.
Balance a short water route with a clear, usable path. A hose that crosses a doorway, sits where pots are moved or is pinched behind equipment is harder to inspect and can be damaged. Leave room to reach the tap, filter and valve, and plan tank filling, overflow and draining according to the tank’s instructions. The Bloomcabin Prestige Greenhouse comes in listed sizes from 3.77 to 28.08 m²; plot the chosen footprint beside the proposed tank position, access path and farthest outlet. Confirm tank support and any gutter connection separately, rather than assuming the greenhouse size or product name establishes either.

Match emitter positions to the planted layout
Drippers apply water only where outlets are placed, so map the actual plants, not an abstract grid. Pots and beds may have different arrangements; a line positioned for one crop can miss a pot after it is moved, and a drip point that wets the surface does not automatically show how far moisture spreads through the growing medium. Follow emitter guidance for spacing and intended use, then inspect coverage at representative containers and beds. The point of a flow test is not merely to see drops but to confirm that the designed delivery reaches the intended root area. Different planted areas may need separate outlets or branches.
Review the setup as plants grow or the layout changes. Reposition moved lines, check that emitters are not blocked or buried, and repeat a near-and-far comparison after altering a branch or adding outlets. In a Spacious Greenhouse, with listed sizes from 47 to 70 m², keep a record of which planted areas each branch serves rather than relying on the overall floor area to describe watering needs. Note tank level, zones run, cup readings and dry spots together. This helps you compare delivery before and after a change. A set timer does not replace checking that water reaches the intended root areas as plants and conditions change.
Verify specifications before buying a kit or pump
Before buying a kit, ask for data on the emitter’s minimum pressure and output, filtration requirement, tubing size and maximum run, plus pressure requirements for timers, valves and regulators. Confirm that the stated performance applies to gravity-fed supply and to the number of emitters you intend to run together. If those figures are missing, ask the supplier instead of estimating from packaging or photos. If gravity cannot meet the requirements, a low-pressure-compatible emitter or a properly selected pump system may be an option; a pump changes the design and should be installed in line with its instructions and relevant professional advice.
If you are choosing the greenhouse and irrigation together, take the proposed planting plan and pipe route to the irrigation supplier. The Aluminium Classic Greenhouses range spans 3.77–28.08 m², so identify the size you are considering and show where the tank, beds and branches would sit. Ask about the complete combination of emitters, tubing, filtration and controls, including which components must be sourced separately. If the plan also relies on collecting roof runoff, confirm the selected greenhouse’s guttering options and connection details before purchase. Neither the area listing nor a product photo establishes compatibility with a particular kit or rainwater connection.
Frequently asked questions
How high does a rainwater tank need to sit above the drippers?
There is no universal height. The usable head is the vertical gap from the water surface at your normal low tank level to the emitter, and delivery can also be reduced by tubing, filters, valves and fittings. Compare the available head with the emitter’s minimum pressure, then test the highest and farthest outlets.
Can I use pressure-compensating drippers with a rainwater tank?
Only if the manufacturer’s operating range includes the low pressure your tank supplies. Pressure-compensating emitters still have a minimum pressure below which they may not regulate or deliver their rated output. Check the flow data at that pressure and test with the full line, filter and other components in place.
Can a filter reduce gravity-fed flow?
Yes. A filter can restrict flow if it is unsuitable, clogged or not designed for low-pressure use. Match its filtration rating to the emitter manufacturer’s requirements and keep it accessible for cleaning. Include it in every test; removing required filtration may expose the emitters to blockages.
What is a practical way to test drip flow?
Assemble the complete system, then collect water from selected emitters in identical cups for the same timed interval. Sample near and far outlets, high and low points, and each branch. Compare the results with the emitter’s data, repeat with all intended outlets running, then test again at a normal low tank level.
When might I need a pump?
Consider a pump if the gravity system cannot meet the emitter and component requirements at your usual low tank level, even after you have checked for blockages and unnecessary restrictions. Select equipment for the system and have it installed according to its instructions, with qualified help where needed.
A rainwater tank can run greenhouse drippers by gravity when the available head at the lowest working water level suits the emitters and every component in the line. Choose parts with clear low-pressure specifications and test the complete system with the outlets running as planned. If the farthest or highest drippers fall short, adjust the layout or consider a properly selected pump rather than assuming that any drip kit will work from a tank.
