
Growing Ranunculus in a Greenhouse
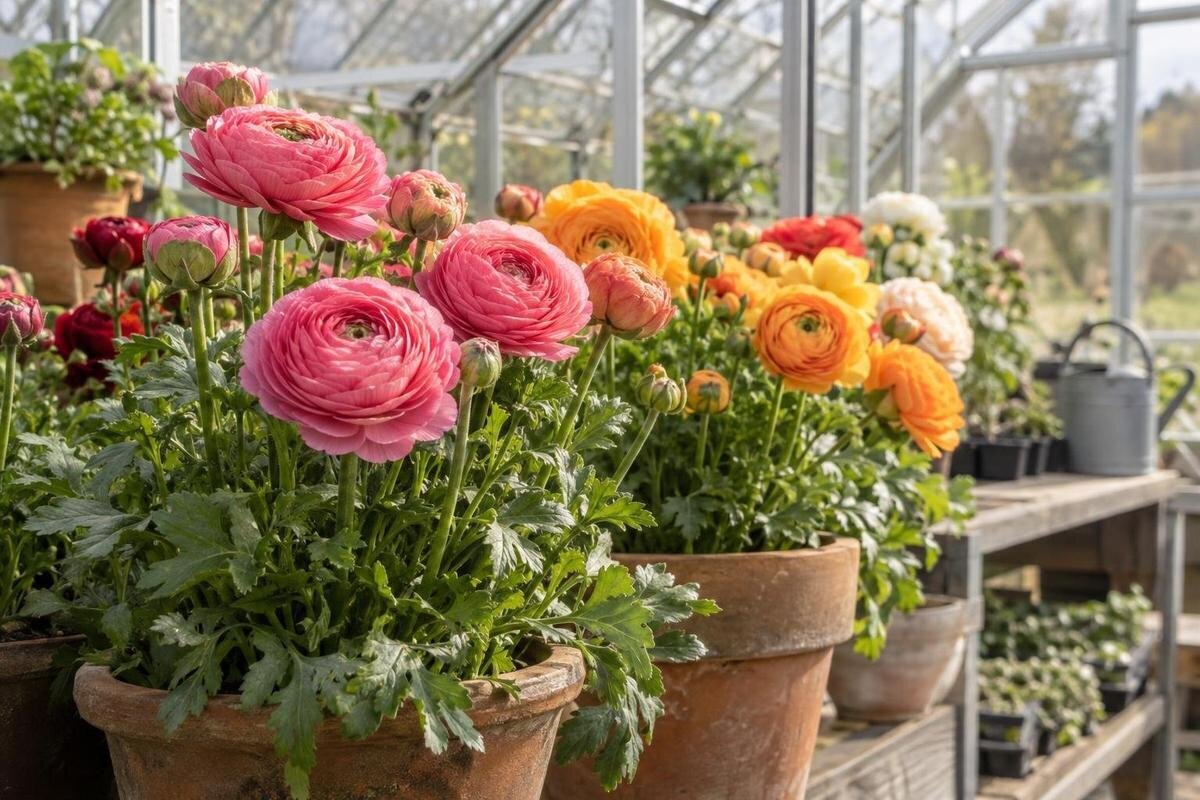
GREENHOUSE GROWING GUIDE
Ranunculus can be a rewarding cool-season cut-flower crop under cover, provided the greenhouse stays airy and the root zone drains well. Across Australia, a fixed planting month is unreliable: corms need to start growing as conditions cool, while a sunny enclosed house can still overheat. This guide covers planting material, timing, temperature and light, watering, disease prevention and the greenhouse layout needed to manage the crop.

Ranunculus is a cool-season greenhouse crop
Ranunculus asiaticus, the familiar florist ranunculus, is commonly grown from dormant, claw-shaped corms. It develops roots and foliage in cool weather, flowers before the season warms, then often slows or dies back as heat arrives. That makes it a cool-season crop, not a plant that benefits from being kept warm all year. A greenhouse can make it easier to organise a protected crop and shelter flowers from heavy rain, but it does not remove the plant’s need for cool growing conditions. The main advantage is a more manageable growing space, not extra warmth. On a sunny day, a closed greenhouse may become much warmer than the outside air, so air exchange matters even in winter.
Australia’s varied climates make one planting month unreliable. Many growers plant in autumn as conditions cool, aiming for winter or spring flowers, but local temperatures and cultivar instructions matter more than a calendar. Plan for a cool establishment period rather than expecting an unheated greenhouse to extend flowering through warm weather. If tool and label storage is part of your layout, Limited Edition Aluminium Greenhouses with Storage is one option to compare. Its listing identifies built-in storage; consider where those supplies will sit in relation to your planting and working areas.
Choose healthy corms and a suitable cultivar
Start with corms sold for planting and a cultivar suited to the job. For cut flowers, check the supplier’s description for stem length, flower form, colour and expected flowering period; for a bed display, plant height and colour mix may matter more. The generic name ‘ranunculus’ does not tell you whether a variety matches your space or planned harvest. Keep varieties in their labelled packs until planting, then label each row or pot. This makes it easier to compare flowering dates and catch a problem confined to one batch rather than guessing which corms were planted where. If you buy a colour mix, keep its batch label as well as the supplier’s name.
Dormant corms are dry and knobbly, so a shrivelled appearance alone is not a reason to discard them. Avoid planting stock that is soft, badly damaged, mouldy or has an unpleasant smell; keep sound corms dry and follow the supplier’s storage instructions until planting. Estimate bed area and spacing before ordering, leaving room for paths and pots as well as rows. The Bloomcabin Prestige Greenhouse is listed in sizes from 3.77 to 28.08 m²; compare the selected plan with usable bed area rather than treating total floor area as planting space. Open packs when you are ready to sort and plant, so corms are not left exposed to damp conditions.
Prepare and plant corms carefully
If the corms arrive dry, read the supplier’s preparation instructions before soaking. Some growers rehydrate them in clean, cool-to-lukewarm water for about three to four hours, allowing the corms to swell before planting. Use a clean container, keep each variety identifiable, and avoid leaving corms submerged overnight unless the supplier specifically advises it. Drain them and plant promptly. Do not let soaked corms sit warm and wet in a bucket, where decay can begin before they have a chance to root. If only part of a pack is ready, prepare that batch separately so the remainder stays dry.
Set each corm with its claw-like points facing down and the central crown uppermost. For many garden plantings, about 5 cm of cover and 10–15 cm between corms is a useful starting point; adjust for corm size, cultivar and packet directions. Plant into loose, well-drained soil, firming it gently without compressing the bed. Water after planting to settle the medium around the corms, then let excess water drain away. Mark rows and varieties immediately, as dormant corms can be difficult to locate once the surface has been watered. A simple sketch of the rows also makes later checks and harvesting easier.
Time planting to local temperatures
Base planting on the period when local conditions begin to cool, rather than assuming that an autumn date applies everywhere. In many Australian gardens this means planting in autumn for winter or spring flowers, but a warm autumn can delay establishment. Check cultivar instructions and watch both daytime highs and overnight lows; the greenhouse may still be hot in sun even when nights have cooled. In colder locations, consider how the chosen cultivar handles cold and protect the crop from damaging frost. An unheated greenhouse follows outside conditions and should not be assumed frost-free. If temperatures are still trending upwards, waiting for a more settled cool spell may be better than planting to meet a calendar date.
Use a min–max thermometer at canopy height and keep a simple record for a week or two before planting a large batch. Those readings show whether the greenhouse is actually cool enough during the day and how low it falls overnight; they are more informative than an outside forecast alone. A small trial batch can reveal how a cultivar responds before you commit all your corms. The Aluminium Greenhouses listing covers 3.77–28.08 m²; when comparing any size, check the selected configuration’s ventilation and usable height as well as floor area. Take readings before and after airing the greenhouse to see how your routine affects conditions around the plants.

Provide free-draining soil and easy access
Drainage matters from the first watering. Ranunculus corms and young roots are vulnerable in persistently wet soil, so loosen the bed and make sure surplus water can drain away rather than collect at planting depth. If the existing ground stays heavy and saturated, use a raised bed or containers with free-draining growing medium rather than planting directly into it. Mature compost can improve structure, but do not make the planting mix dense or water-retentive. Avoid planting into soil that remains cold and sodden after rain. Keep the bed loose after preparation, too: compressed soil is harder to drain and inspect.
Containers need clear drainage holes and enough room for roots to develop; empty any saucer that holds runoff, and check the mix rather than watering by pot size alone. In either beds or pots, keep rows accessible from a path so you can inspect foliage and reach plants without compressing soil. A Wall Greenhouse is listed from 3.69 to 14.34 m²; if considering a wall layout, check the wall’s winter shade and the usable area around the growing surface. A wall does not by itself guarantee enough light or a suitable temperature. Think about where you will stand to water, weed and cut flowers before placing beds or benches.
Balance cool temperatures with strong light
Use cool temperatures as a crop requirement, not just a way to save water. A practical production reference is around 10–15°C by day and roughly 5–10°C at night during active growth; treat these as guideposts, not universal cultivar limits. If daytime readings repeatedly approach or exceed about 20°C, ranunculus may flower and finish sooner, with a shorter useful picking period. The response depends on variety and stage, so compare observations with the supplier’s growing notes. Measure at plant level: a thermometer high under the roof may not represent conditions among the leaves. Record repeated warm spells as well as overnight lows, since both affect the crop’s timing.
Give plants bright, fairly sunny conditions; around six hours of direct light is a useful outdoor reference, though glazing, orientation, cleanliness and nearby shade alter how much reaches the crop. Avoid a permanently dark corner and do not assume a greenhouse roof supplies full-sun exposure. When heat builds, ventilation is usually more important than covering the crop with heavy shade; use temporary shading only where needed, since extended deep shade can reduce flowering and stem strength. The Limited Edition Aluminium Greenhouses range is listed from 3.77 to 28.08 m²; check the chosen configuration’s ventilation details, clear height and site shade rather than choosing on area alone.
Water the root zone without saturating it
After planting, water gently enough to moisten the root zone without leaving it saturated. Once shoots appear, keep soil evenly moist through active growth, allowing the surface to dry slightly while the roots remain supplied. Check a few centimetres below the surface rather than judging by the top alone; in containers, pot weight is another useful clue. Watering frequency changes with sunshine, airflow, medium, container size and plant growth, so a fixed daily schedule can lead to either drought or waterlogging. Reduce watering as growth slows, but do not let actively growing plants wilt. After rain outside, check the greenhouse soil rather than assuming it has received water.
Apply water to the soil in the morning where possible, so foliage and flowers do not stay damp overnight. Avoid repeatedly splashing the crown and leaves, especially in cool, humid weather, and make sure pots drain freely after each watering. Place beds and pots where they can be reached for moisture checks; a narrow, awkward gap makes regular inspection less likely. The T-Model Orangery Greenhouse is listed in sizes from 16.52 to 30 m²; use the actual plan to allow working paths as well as growing area, not just a headline footprint. A gentle rose on a watering can can help avoid washing soil away from newly planted corms.
Use ventilation and hygiene to limit disease
Air exchange helps leaves, stems and the soil surface dry between waterings, reducing the time conditions favour grey mould and other fungal problems. On mild days, open the greenhouse vents or doors as needed, then close or adjust them as temperatures fall; monitor the crop rather than leaving the greenhouse sealed for the sake of shelter. Space plants so leaves are not packed tightly together, and avoid placing trays where they obstruct airflow. Ventilation does not replace drainage, but it works with spacing and careful watering to reduce prolonged dampness. Ventilating after overnight condensation can help foliage dry sooner.
Remove fallen petals, yellowing leaves and dead stems before they collect in the canopy. If you find soft or mouldy corms, or spreading grey growth on leaves and flowers, remove affected material promptly, check neighbouring plants and clean tools between suspect batches. Do not leave decaying matter on a damp bench or in a closed tray. The Pyramid Greenhouse is listed from 5.53 to 18.9 m²; when comparing a greenhouse, check the selected size’s vent positions and access, since stated floor area alone does not show how air will move around a planted bed. Clean spilled growing medium and wash reusable pots before using them for another batch.

Harvest cut flowers and plan successive batches
Inspect plants as stems develop, and harvest regularly once flowers are at the intended stage. For cutting, a coloured bud that is beginning to open is a useful starting point; test a few stems of your cultivar because transport and display plans affect how open you want them. Cut with clean, sharp secateurs in the cooler part of the day, keep the cut stems out of direct sun, and place them promptly in clean water. Remove leaves that would sit below the waterline. If stems lean in a dense bed, install gentle support before they become tangled. Harvesting consistently at a similar stage also makes it easier to compare stem quality between batches.
To spread the picking window, divide corms into small, labelled batches and plant them at intervals only while local conditions remain suitable. Staggering does not override the temperature limit: later plants placed into rising warmth may establish poorly or finish quickly. Keep notes on planting date, corm supplier, temperature readings, watering changes, and first and last flower. Those records show which cultivar and timing worked in your actual greenhouse, and help distinguish a poor corm batch from a season that became too warm or damp. If one batch performs badly, check its drainage and growing conditions before changing the timing for every variety.
Match greenhouse space to the crop layout
Sketch the growing arrangement before filling beds: mark the door, paths, benches, trays, water access and the space needed to turn while cutting flowers. Leave room to reach both sides of a bed and remove spent plants without stepping through the crop. Check usable internal height and the position of vents with benches or tall pots in place; the aim is comfortable access and unobstructed operation, not extra height for a climbing plant. Note winter sun and nearby shade, too. If you are growing several cultivars or successive batches, plan separate labelled zones so watering and harvest records remain clear.
The Spacious Greenhouse is listed in sizes from 47 to 70 m², a scale reference rather than a recommendation for every ranunculus grower. Compare the chosen footprint with the number of corms you intend to raise, paths and any handling space; total area is not the same as planted area. Read the precise model configuration and verify its usable height and ventilation options against your intended layout. A modest bed or a few well-drained containers can be a better-managed crop than filling all available floor space. Keep spare capacity for airflow, inspection and access to tools.
Frequently asked questions
Can I grow ranunculus in an unheated greenhouse?
Yes, if local conditions suit the cultivar. An unheated greenhouse can shelter plants but still experiences outside cold and can warm quickly in sun. Check temperatures where the plants are growing rather than assuming the word ‘greenhouse’ guarantees cool, suitable conditions.
When should I plant ranunculus corms in Australia?
There is no single planting month for every location. Autumn is a common starting point as temperatures fall, but use local day and night readings and the cultivar’s instructions. A small trial batch can help when you are unsure how your greenhouse behaves.
Should I soak ranunculus corms before planting?
Follow the supplier’s directions. If rehydration is recommended, a few hours in clean water is a common approach. Avoid leaving corms submerged overnight unless the instructions say to, and plant them promptly after draining so they are not left warm and wet.
How often should greenhouse ranunculus be watered?
There is no reliable fixed interval. Check the soil below the surface and adjust for the weather, growing medium, container and growth stage. Keep the root zone moist during active growth, but let excess water drain away.
How do I reduce mould on ranunculus?
Use free-draining soil, sensible spacing, regular ventilation and prompt clean-up. Remove fallen petals and dead leaves, avoid leaving foliage damp overnight, and deal with suspect corms or mouldy plants promptly. Airflow helps, but cannot make waterlogged soil suitable.
For ranunculus, a greenhouse is most useful as a sheltered growing space, not a source of extra warmth. Sound corms, cool conditions and well-drained soil give the crop a good start. Record how each batch establishes and flowers, so your next planting reflects the cultivars and seasonal conditions that worked in your greenhouse.
