
Relocating a Greenhouse Elsewhere in the Garden
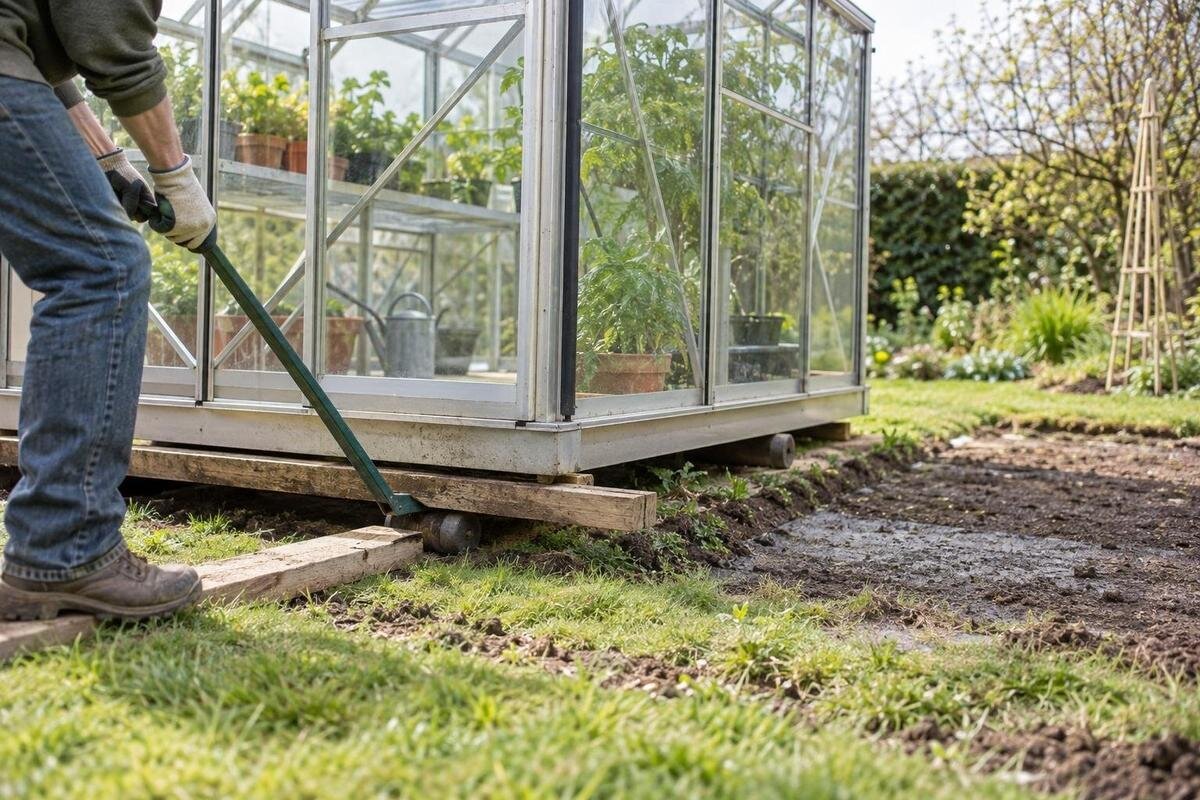
Greenhouse relocation
Moving a greenhouse to another part of the garden is more than shifting it across the lawn. The structure may need careful dismantling, an assessment of which components can be reused, a suitable new base and reassembly in the correct configuration. A sound plan begins with the exact model and its manual, then works backwards from the new site. This guide covers what to document, what to have checked and how to organise the work before glazing or frame sections are disturbed.

Is moving the greenhouse worthwhile?
Begin with the reason for moving it and what the new location must improve. A garden redesign, changing shade, drainage or access, or a different use for the space may justify the work, but first decide whether this greenhouse is a sound candidate. From a safe position, record visible damage, missing parts, glazing that appears broken or displaced, and doors or vents that already fail to operate normally. Don’t take panels apart to inspect them yourself. Ask a qualified installer to assess anything involving uncertain framing or glazing. Also consider whether the move solves a problem or simply transfers it: shade, water run-off or tight working clearance may affect the new site too. This condition record helps establish what may reasonably be reused.
Compare relocation with leaving the structure in place or replacing it. Ask for a quote covering the whole move, not removal alone, and allow for the time the greenhouse will be unavailable. Consider where plants and equipment will go while work is underway and whether the proposed location still provides the growing space you need. If replacement is an option, the Classic aluminium greenhouse range is listed from 3.77 to 28.08 m². Use that range to identify options for a closer comparison, then compare their plans with your existing greenhouse and proposed site. Measure the existing structure or use its manual rather than estimating its size from a catalogue photograph.
Identify the exact model and collect its documents
Before requesting advice, identify the greenhouse as precisely as the records allow. Look for an order confirmation, invoice, model label, assembly booklet, parts list or earlier parts enquiry. Note the manufacturer, model and version, order or serial reference, and purchase date if known. Photograph any label and the structure from all sides, including the roof form, door position, vents, added sections and visible changes from the original build. Record the glazing type only where it is stated in documentation or confirmed by an installer; appearance alone can be misleading. Keep the original configuration distinct from later additions.
Ask for the model-specific assembly instructions, technical drawings, parts list and exact spare-part identifiers so the installer can review the original assembly. If a document is missing, provide clear photographs and measured overall dimensions rather than relying on a broad product description. Keep records for the existing greenhouse separate from information about possible replacements, such as the Limited Edition aluminium greenhouse range. A similar name or appearance doesn’t establish that parts are interchangeable. In each enquiry, make clear whether you need a component for the old structure or information about a new model. Save replies with the relevant drawings so the installer can see which information applies.
Assess the new site before removing anything
Visit the proposed location at different times of day and, if practical, at different times of year. Note when nearby trees, fences and buildings cast shade, and consider how plant growth may change that pattern. Compare the light and shelter with what you need from the greenhouse rather than assuming that the old orientation should be repeated. Look for low points, water run-off, soggy ground after rain and obvious changes in level. These observations help identify questions for the installer, but they don’t replace a site assessment. Consider how people will approach the structure and carry plants, growing media and equipment to it.
Also note exposure to wind and rain, nearby walls, water access, and any existing irrigation or electrical connections that may need separate attention. Have the installer review the proposed position and base requirements against the manual, and arrange appropriately qualified trades for utility work. If the preferred spot is beside a building, treat a wall greenhouse as a distinct product category, not as a way to attach a freestanding frame: the Lean-to wall greenhouse options are listed from 3.69 to 14.34 m². That area range can’t determine fit or fixing requirements; use product-specific instructions and professional advice.
Measure the footprint and access route
Use the greenhouse manual or a measured drawing to establish the footprint the base actually needs; don’t rely on an approximate roof outline or the dimensions of a garden bed. Mark the proposed footprint on the ground and check the space around it for access to the entrance, door movement, opening vents, cleaning and routine maintenance, using the exact model layout. Allow for paths and for anything that could obstruct access later, such as a growing bed, stored tools or a new fence. Record gate widths, turns, steps and the route installers will use to bring in or remove components.
Area alone isn’t a plan: greenhouses with similar floor areas can have different outlines and openings. For example, the T-Model Orangery range is listed from 16.52 to 30 m², but those figures don’t show the exact perimeter or clearances for a selected model. Confirm the specific plan and relevant dimensions with the supplier or installer before marking out the base. Check for overhead obstructions and where vehicles or equipment can stop. If work is proposed where underground services may be present, have their locations checked before excavation. A route that works for a person may not work for long or fragile components.

Have the new base specified before dismantling
Don’t assume the old base can simply be reused, or that matching its footprint is enough. Its condition, the new ground, drainage, level and greenhouse model all matter. The manufacturer’s instructions should set out the base arrangement for that model; if they’re unclear, ask the supplier and a qualified installer to confirm what the new installation requires. The installer should check the site and explain what needs to be prepared, where the structure will be supported and how the approved fixing method relates to the base. Avoid cutting, drilling or adapting frame or base components on the assumption that this will make the old structure fit.
Agree on the base plan before dismantling starts, including the drawing, preparation, access and responsibility for the work. Photograph the existing base and note its visible condition for the installer, without assuming you can see what is below ground. Ask whether the new base must be complete and checked before delivery, and who confirms it matches the greenhouse documentation. If you’re also considering the Bloomcabin Prestige Greenhouse with Metal Base, request the base requirements for that model as part of the comparison. The product name identifies the variant; it doesn’t specify the groundwork for your site or establish whether the base can be used with your existing greenhouse.
Plan dismantling and label each component
Agree the dismantling sequence with a qualified greenhouse installer, using the manufacturer’s manual for the exact model. Don’t assume the assembled greenhouse can be lifted safely or that a generic sequence applies. Glazing can be fragile and structural sections may depend on the assembly order, so arrange professional removal and handling rather than treating this as a routine garden job. If the manual is missing or the structure has been modified, ask the installer to resolve the sequence before work begins. Keep household members and pets away from the work area, and don’t attempt glass removal yourself.
Ask the installer to photograph each stage of dismantling and identify components by position, not just by general type. Mark parts only in a way the manufacturer permits; group fasteners in labelled bags and note missing, damaged or replaced pieces against the parts list. Include doors, vents, added sections and storage features, and keep the original layout visible in the record. Record whether storage was part of the original greenhouse or added later. If you’re considering the Limited Edition greenhouse with built-in storage as a replacement, keep that enquiry separate from the dismantling inventory. Its listing doesn’t establish compatibility with your existing storage section, so any proposed reuse needs to be confirmed before it enters the plan.
Keep parts organised during transport
Before anything leaves the garden, reconcile the components against the inventory and agree who is responsible for packing, loading, transport and unloading. Keep hardware with the section it belongs to, protect each item as the installer directs, and make labels readable after wrapping. Fragile panels need handling and support in the orientation specified for their material and the manufacturer’s guidance; don’t guess how they should be stacked or carried. Separate anything damaged during dismantling and have the installer decide whether it can be reused. Don’t improvise a repair or substitute.
Identify where parts will be stored temporarily, keep them out of busy paths, and avoid mixing items from different projects. Check vehicle and access arrangements with the installer before booking transport, especially if long sections or panels need a clear route. Resolve questions about damaged components before paying to transport them for reuse. If the move quote prompts you to consider a different design, the Oasis Pyramid greenhouse options are listed from 5.53 to 18.9 m². Compare an exact plan with the proposed site before changing the layout or transport arrangements; the listed floor area alone doesn’t show the outline or establish suitability.
Arrange reassembly with the installer
Plan reassembly as a separate stage, rather than assuming it will simply reverse dismantling. Give the installer the manual, drawing, component inventory, photographs, parts history and confirmed base details before booking the work. Ask who will provide any missing model-specific parts, who will check that the base is ready, and how parts damaged in transit will be handled. If a different installer is doing the rebuild, provide the original installer’s notes as well as the manufacturer’s documentation. Agree the sequence and any dependencies so components don’t arrive before the base or access is ready.
Use only the documented assembly arrangement and parts confirmed as compatible with the exact greenhouse. Don’t request new holes, altered structural members, substitute glazing or a changed configuration without manufacturer approval. If the greenhouse has existing power, water or irrigation connections, arrange any disconnection and reconnection through appropriately qualified trades rather than assuming it’s part of the greenhouse work. Confirm who will review door and vent operation and identify any unresolved issue before plants and equipment return. Keep a clear record of what was installed and what remains outstanding.

Review the finished installation and keep the record
At handover, compare the completed structure with the model instructions and agreed layout, then ask the installer to show you any parts that were replaced or left out. Check doors, vents and other movable components against the operation described in the manual. Ask about panels or frame sections that were damaged, repositioned or difficult to fit. Don’t force a stiff component or try to correct a suspected alignment problem yourself; have the installer assess it. If an issue appears after handover, document its location and contact the installer or supplier before trying an improvised fix.
Keep the final photographs, installer notes, updated parts list, base drawings, replacement-part identifiers and relevant correspondence together with the original manual. Record the new location and reassembly date; this information can help with future maintenance and support requests. If a component needs replacement, describe it by exact part number and position, and provide model and order references rather than only a broad description. Don’t assume that a part from a visually similar greenhouse will fit or that every older component remains available. Clear records make later enquiries more precise.
When replacing the greenhouse makes more sense
Relocation may be poor value if the frame or glazing is extensively damaged, essential parts can’t be identified, a safe reassembly method can’t be confirmed, or the new site would require a major change of configuration. Ask for a written scope that separates assessment, approved parts, dismantling, transport, base work and reassembly, then compare it with an installation quote for a suitable new model. Include the effort to empty the greenhouse and restore the growing space. Base the decision on the condition of the actual structure and the whole project cost, not just the price of parts or the fact that it has stood in the garden for years.
For a replacement comparison, use the new site’s measured plan, access route and intended use to narrow the options. The Spacious Greenhouse range, for example, is listed from 47 to 70 m². Compare the exact dimensions of a selected model with the marked-out space, rather than treating the area range as confirmation that it will fit. Include its base requirements, assembly arrangements and component availability in the replacement enquiry so the two quotes cover comparable work. If relocation remains the better choice, retain the agreed scope for the existing greenhouse and resolve any outstanding parts or site questions before booking dismantling.
Frequently asked questions
Can I move a greenhouse without dismantling it?
Only if the manufacturer’s instructions for that exact model and a qualified installer confirm that method. Don’t assume the assembled structure can be lifted or dragged safely. Plan the move around the documented method for dismantling and reassembly, including professional handling of glazing where required.
Can I reuse the greenhouse’s existing base?
Possibly, but don’t assume it will suit the new site or remain suitable after the structure is moved. Ask the installer to assess its condition against the greenhouse manual, the proposed location and the base requirements for the exact model. Agree the new base plan before dismantling begins.
Should I remove the glazing myself?
No. Glazing is fragile, and removal should be planned and carried out by a qualified greenhouse installer using the manufacturer’s instructions. Don’t try to remove a cracked, loose or uncertain panel to inspect it. Record what you can safely see and ask the installer to assess it.
What should I give the installer before requesting a quote?
Provide the model and version if known, the manual, drawings, parts records, photographs and any exact spare-part identifiers. Include the proposed site plan, access route, measurements and information about the existing base. Note any later additions, damage or missing parts so they can be included in the assessment.
How do I decide whether to move or replace the greenhouse?
Compare the complete cost and scope of the move with a replacement installation. Include the greenhouse’s condition, parts availability, dismantling and reassembly, transport, the new base and the time the growing space will be unavailable. There’s no universal cost threshold; use the installer’s assessment and written quotes for your actual structure and site.
A successful relocation depends on the greenhouse, its documentation and the new site being considered together. Identify the exact model first, have the destination and base reviewed, and arrange qualified help for dismantling, glazing and reassembly. A labelled record of every component turns a complicated move into a defined scope and makes it easier to compare with replacement. The right choice is the one that leaves a suitable, documented installation at the new location—not simply the one that gets the frame off the old base.
