
Central Island Beds: Testing the Greenhouse Layout
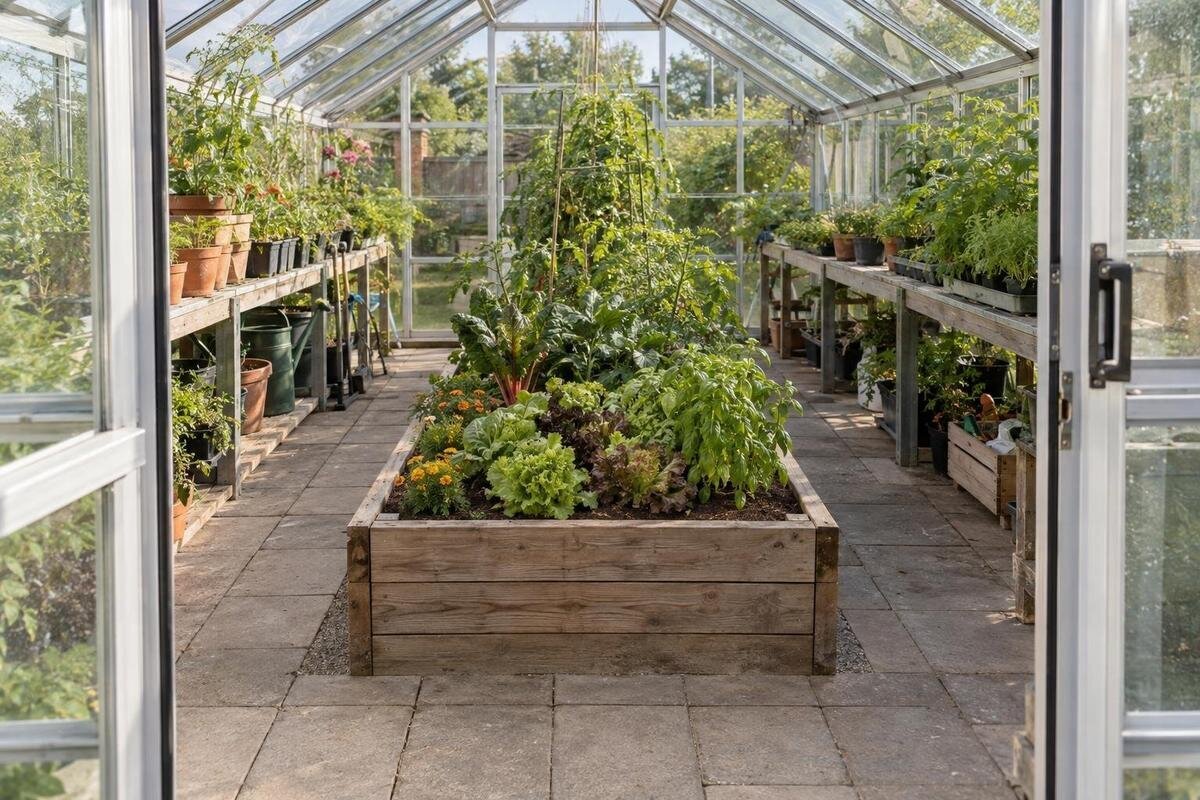
Greenhouse layout
An island bed puts growing space in the middle of a greenhouse, with a path on each side. Perimeter beds keep planting against the outer edges and leave the centre open for a main aisle. The choice is not simply about squeezing in more soil: it changes reach, turning room and access for watering and routine care. A useful comparison holds the planted area constant, then tests the routes with mature-plant space and the things you actually carry. The dimensions below are illustrative planning examples, not available greenhouse sizes.

How a central bed changes access
A central island bed puts soil in the middle of the greenhouse and creates two long working edges. That can make a moderately deep bed easier to tend because you can approach plants from either side. A perimeter layout keeps beds beside the outer walls and leaves a central aisle between them. It may simplify movement through the greenhouse, but every bed still has to be reached from that aisle. Neither pattern automatically provides more growing capacity: usable planted area depends on bed length and depth, the width left for routes, fixed fittings and the mature spread of crops.
The difference shows up most at the ends of an island. If a bed runs nearly from the door to the far wall, the paths on either side can become two dead ends, with little room to cross behind it or turn around. A perimeter plan usually keeps a route running down the middle, although a bench, storage unit or crowded crop can narrow that passage too. Draw a route from the entrance to every plant, not just a shape for the soil. Think about where you will pause, carry a tray, change direction and reach around foliage once it fills out. The test is whether those everyday movements remain possible without stepping into a bed.
Measure the usable interior, not just the floor area
Begin with the internal length and width for the exact greenhouse size under consideration. The advertised floor area is only a total: a long, narrow rectangle and a squarer one can have the same area but very different space for an island and two side paths. Use a dimensioned drawing for the selected model, not just a category name or the outside footprint. Mark the door opening, any fixed posts or fittings shown, and anything you already know will occupy the floor, such as a bench or storage. The Classic aluminium greenhouse range is listed from 3.77 m² to 28.08 m²; that span is useful context, not a measurement for an individual layout.
Measure the clear width across the point where the island will sit, then the usable length after allowing for the entrance and end access. If the walls are not parallel, the door is offset or a fixed item interrupts a side, note the narrowest usable part instead of relying on the widest point. Reserve a route from the entry to the rear and around the bed before assigning the remaining floor to planting. If the entrance position varies between sizes, read the drawing for the exact variant rather than transferring a sketch from a larger option. This first drawing tests geometry, not yield: it reveals what could fit on paper, while your plants, tools and body determine whether the arrangement works in use.
Two illustrative plans with the same planted area
Here is one deliberately simple comparison. Assume an internal rectangle 3.0 m wide by 4.0 m long; these are illustrative figures only, not dimensions of a Bloomcabin product or any available greenhouse. Place a central bed 1.2 m wide by 2.4 m long. On paper, that leaves 0.9 m on each long side and 0.8 m at each end. The bed occupies 2.88 m². These strips are nominal space, not guaranteed clear passage: a door swing, fittings, frame members or a working stance can reduce what is genuinely usable. None of these widths is a recommended standard; they simply make the comparison easy to follow. The example also assumes an otherwise empty rectangle.
For a perimeter comparison on the same rectangle, draw two side beds each 0.6 m deep and 2.4 m long. Their combined planted area is also 2.88 m², while the central aisle is 1.8 m wide and the same 0.8 m is left at each end. The Lean-to wall greenhouse range is listed from 3.69 m² to 14.34 m²; for a wall greenhouse, check the selected model’s dimensioned plan rather than assuming the nominal area leaves two usable routes around an island. The equal-area sketch isolates circulation only: it does not predict crop count or yield, and real door positions or fittings may mean adjusting both beds. If one route is too tight in a full-size test, alter the bed outline and recalculate rather than treating the sketch as a fit recommendation.
Check reach from both sides of the bed
Reach is not measured from the bed edge alone. Stand where you would actually work, with both feet on the path, and see whether you can water, pick, tie in or remove a leaf at the farthest point without stepping into the soil or leaning over a plant. Test the widest part of the bed and its far corners, not just the first row nearest you. For an island, check the reach from each long side; the practical bed width is limited by what you can tend comfortably from those two positions, not by a generic ideal number. Include any support or container that makes access harder. A long-handled tool can help, but it is no substitute for reaching the plant’s base or tie points.
A perimeter bed offers access from its aisle on one side, so its full depth must be manageable from that edge; the opposite boundary may not be a working route. An island offers access from both sides, but only if both paths remain open as the crops grow. Put a box or pot in the intended planting position and repeat the motion, then imagine mature leaves between your hand and the stem. If a particular mobility aid or reach range matters, measure with the actual equipment and get an appropriate accessibility professional to assess the plan. A specific size in the Limited Edition aluminium greenhouse range still needs its own drawing and a hands-on reach test; the range name is not a dimension.

Leave room to turn and carry things past the bed
An island bed changes a straight trip into movement along one side, around an end and back on the other. Walk that route while carrying the largest everyday item you expect to use: a full watering can, harvest tub, seedling tray or small trolley. Check whether you can turn at the entrance and pass the end of the bed without brushing leaves, snagging a hose or having to set everything down. Test the actual door opening as well; a clear aisle on a plan is not useful if the door swings into it or its approach is obstructed.
Make the turn with your feet and shoulders, not only with a ruler. You may need extra room to angle a tray or step backwards while lifting, which can differ from the space needed to walk straight. A perimeter layout usually provides one continuous aisle, whereas an island depends on side passages joining at the ends. Draw both paths and the end crossing, and mark any fixed bench or shelf that projects into them. The T-Model Orangery Greenhouse range is listed from 16.52 m² to 30 m², but a total area does not establish a clear turning point for any selected size.
Make watering and upkeep possible from the aisles
Watering often exposes a weak route quickly. If you use a hose, follow where it will travel from the point where you bring it into the greenhouse to each planting face. Can it reach the far end without dragging across foliage or looping around a bed? If you carry watering cans, act out a return trip with the load you actually use; an island may mean watering both long sides and crossing around an end to reach the opposite aisle. A perimeter arrangement can keep that work along a central path, but plants close to the wall still need room for you to direct water without crushing them.
Include the smaller jobs that happen repeatedly: checking leaves, tying stems, collecting fallen material, removing spent plants and cleaning the floor. Those tasks need access alongside a watering route, not just a one-off pass through the greenhouse. Note where wet hoses or tools can be set down without blocking the way, and whether every bed has a route to the exit when you are carrying a pot or tray. The Pyramid Greenhouse range is listed from 5.53 m² to 18.9 m²; whichever size you assess, use its internal plan to trace the route rather than treating total floor area as proof that a watering path fits.
Plan for mature plants and their supports
Draw plants at their mature spread, not as neat dots on planting day. Use the spacing and support guidance for the crops you intend to grow, then show the likely canopy, stakes, strings or cages on the plan. Foliage extending beyond an island bed can narrow both side paths at once. With perimeter beds, growth can intrude into the central aisle. In either layout, the soil outline may look generous while the usable walking space disappears as the crop develops.
Think through the growing sequence as well as the final planting. Seed trays, young plants and established crops take different amounts of room, and the greenhouse may be busiest just as foliage reaches its full spread. Place one representative mature plant outline on the drawing before repeating it down a row; include access to the base, not just space above the canopy. If comparing the Limited Edition aluminium greenhouse with built-in storage, allow for its storage area in your crop plan. Do not count the same space once for storage and again for planting.
Count benches, storage and other fixed features
Count every feature that occupies floor or narrows a route: shelves, staging, pots that stay in place, water containers, fixed supports and the door’s swing. A bed plan drawn before these items can make an island look possible, then leave too little room to work when everything is in place. If a storage area is built into a selected model, plot it in the exact location shown on that model’s drawing; do not subtract a guessed amount or infer its position from a product name. Check the inside dimensions of the specific variant, including any point where the walkway has to pass a fitting.
Be clear about what needs permanent access and what can move. A staging surface may need a person to stand in front of it; a container may need to be lifted out; a hose connection or drain point, if present, should remain reachable. These working spaces compete with the beds for the same clear floor and can favour an uninterrupted aisle. The Prestige Greenhouse range is listed from 3.77 m² to 28.08 m². When comparing its sizes, include the space needed to use each fixed feature, not just the footprint of the feature itself.

When perimeter beds are the more practical choice
Perimeter beds tend to make more sense when a continuous route through the middle matters more than access to the middle of a single broad bed. They can also suit a plan where you want to carry pots along one aisle or keep the centre free for a trolley, temporary trays or a work surface. Check the depth of each side bed from the aisle: if you cannot reach the wall-side edge without leaning across fragile crops, the open walkway does not solve the access problem. A central island is a better candidate when the two long edges are genuinely useful work faces and the end passages are clear enough for the way you move.
A larger listed floor area can give you more layouts to compare, but it never confirms that one will work. The Bloomcabin Orangerie range is listed from 47 m² to 70 m²; check the selected model’s internal drawing and account for the entry, fixed features, mature plants and service routes before treating an island as feasible. Do the same for a smaller footprint. If each layout offers the same planted area, choose by the route you can maintain rather than assuming the centre bed is more productive. If the island only works with unrealistic reach or tight end crossings, perimeter planting is the layout that better fits the job.
Compare both layouts at full size
Before settling on either arrangement, recreate it full size on the ground or another clear floor. Use the selected greenhouse’s internal length and width from the dimensioned plan, then mark the door opening, beds, fixed storage and main paths with tape or string. If there is no room to mark out the whole greenhouse, make a scale drawing first, then test critical areas such as bed depth and end clearances at full size with boxes or furniture. Place containers or plant markers where mature plants will sit, then walk from the entry to the rear, reach into each bed, carry a tray around the island and turn at each end.
Repeat the same exercise for an equal-area perimeter plan, so you are comparing circulation rather than giving one option a larger planting footprint. Note where you have to lean awkwardly, squeeze through a gap, brush a crop or put down a load; those are signs to alter the outline. You might shorten or narrow the island, enlarge an end gap or move the beds back to the perimeter, then retest with the same objects. Keep the plan that remains workable for the ordinary jobs you do most often as plants fill the space. A successful layout is one you can tend from its paths without treating the bed itself as a walkway.
Frequently asked questions
How wide should a central greenhouse bed be?
There is no universal width. Decide how far you can work from a normal standing position on each side, then allow for the crops and supports you intend to use. Keep both paths open and check that you can reach the middle and corners without stepping into the soil. A tape outline is more useful than copying a generic bed measurement.
Does an island bed provide more growing space?
Not automatically. Compare the planted area of the beds, then account for the paths, end clearances and any fixed items that take up floor space. An island gives access from two long sides, while perimeter beds can leave a wider central route. Neither layout predicts crop numbers or yield on its own.
Can I put an island bed in a narrow greenhouse?
Possibly, but the internal width matters more than the total floor area. Check whether two side paths remain usable after you draw the bed, door opening and any fittings. If the paths disappear or the ends become difficult to turn around, perimeter planting may be more practical.
How much room should I leave around an island bed?
There is no single clearance that suits everyone or every greenhouse. Test the paths with the equipment you carry and consider the space you need to reach plants, turn at the ends and move past mature foliage. If you need a particular clear width for mobility equipment, assess the plan with the actual equipment and an appropriate accessibility professional.
How can I test a layout before choosing a greenhouse?
Use the internal dimensions for the exact model you are considering. Mark the door, bed and routes on the ground with tape or string, then walk through with a tray, watering can or other everyday item. Repeat the test for an equal-area perimeter layout so you can compare movement fairly.
Treat a central bed as a practical option only if both sides stay reachable and the end passages remain clear when plants, tools and equipment are in place. Compare it with perimeter beds using the same planted area and the exact internal plan for the greenhouse size you are considering. If the everyday route works in a full-size test, the island may suit your growing style; if not, a perimeter layout can make better use of the same floor.
